Before Spring ’26 (260.10+), in Segment Triggered Flows, a given Unified Individual hitting the Send Email Message element would receive the email on every email address tied to the Unified Individual (provided they were opted in for the current subscription). With Activation Templates and their Contact Point Selection rules, you can now ensure that only one email address receives the email. Note: In this article, we focus on email sending, but the same concepts also apply to the SMS channel.
Activation Templates are a new type of Data 360 Activation. In a Segment Triggered Flow, defining an Activation Template is optional when using a Segment of Unified Individuals (if none is specified, all email addresses will receive the email, as before), but mandatory when using a Segment of Individuals (the support for Segments of non-unified Individuals was introduced in Spring ’26, along with Segment of Engagement data).
When an Activation Template is created, it can then be re-used multiple times, in different Segment Triggered Flows.
Creating an Activation Template
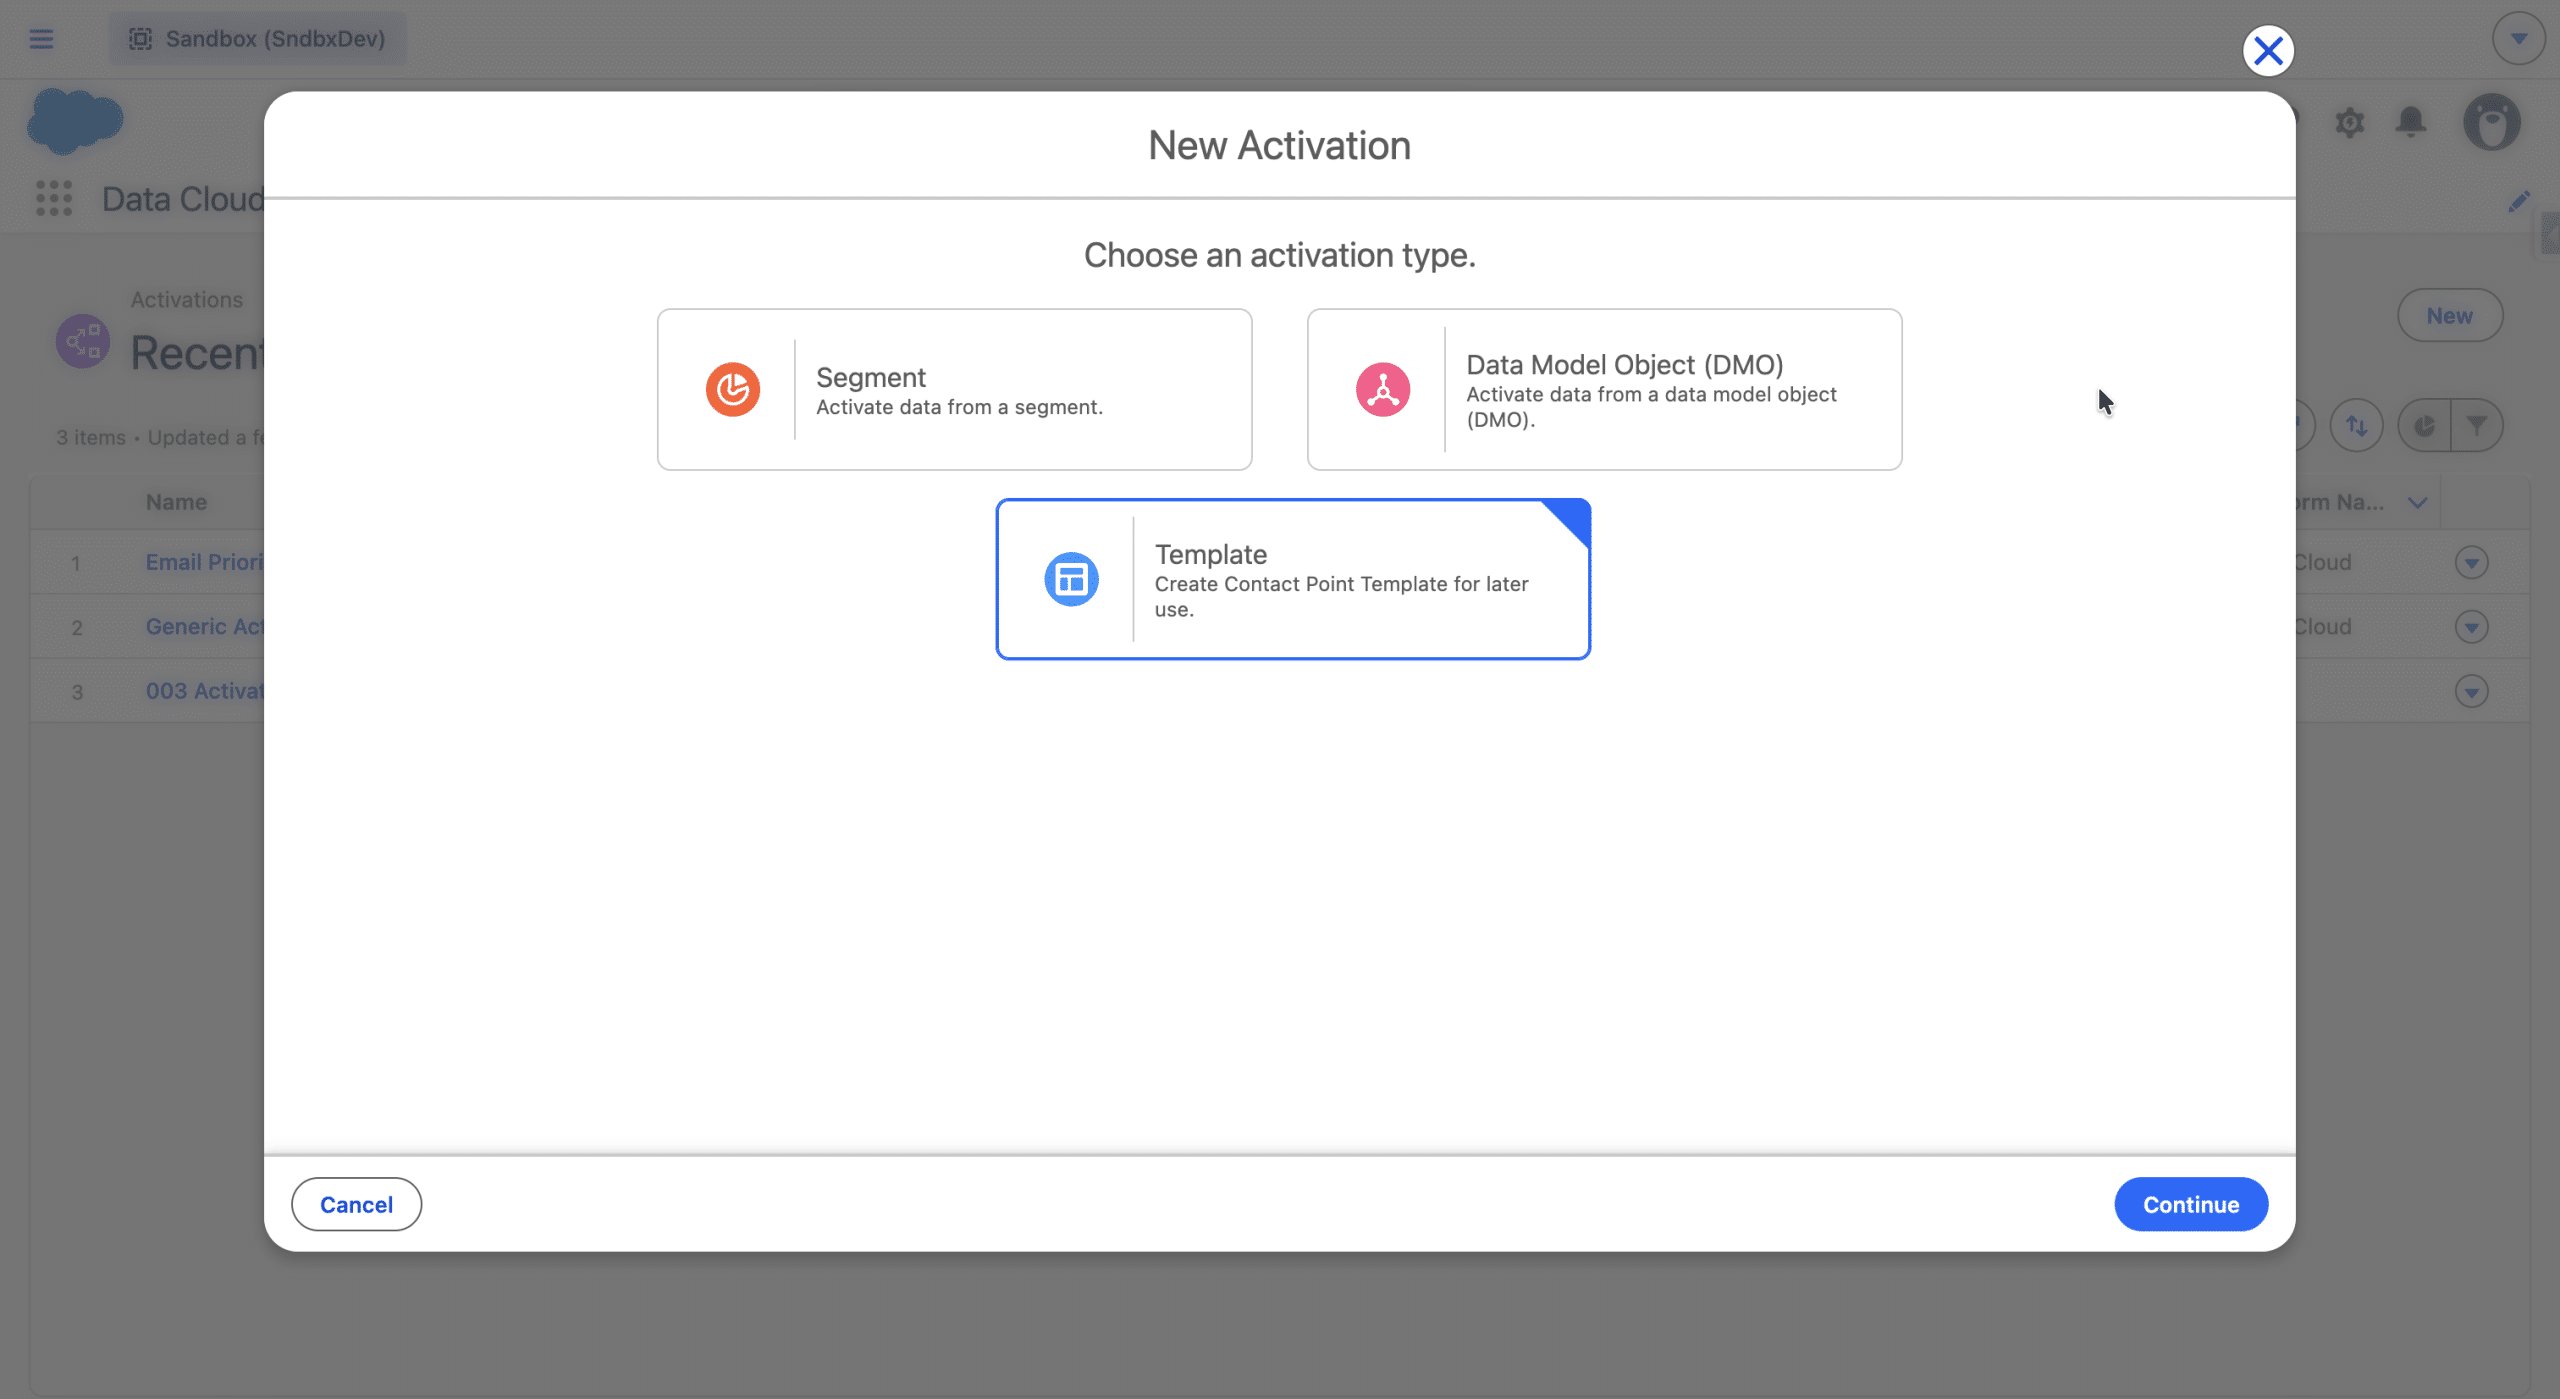
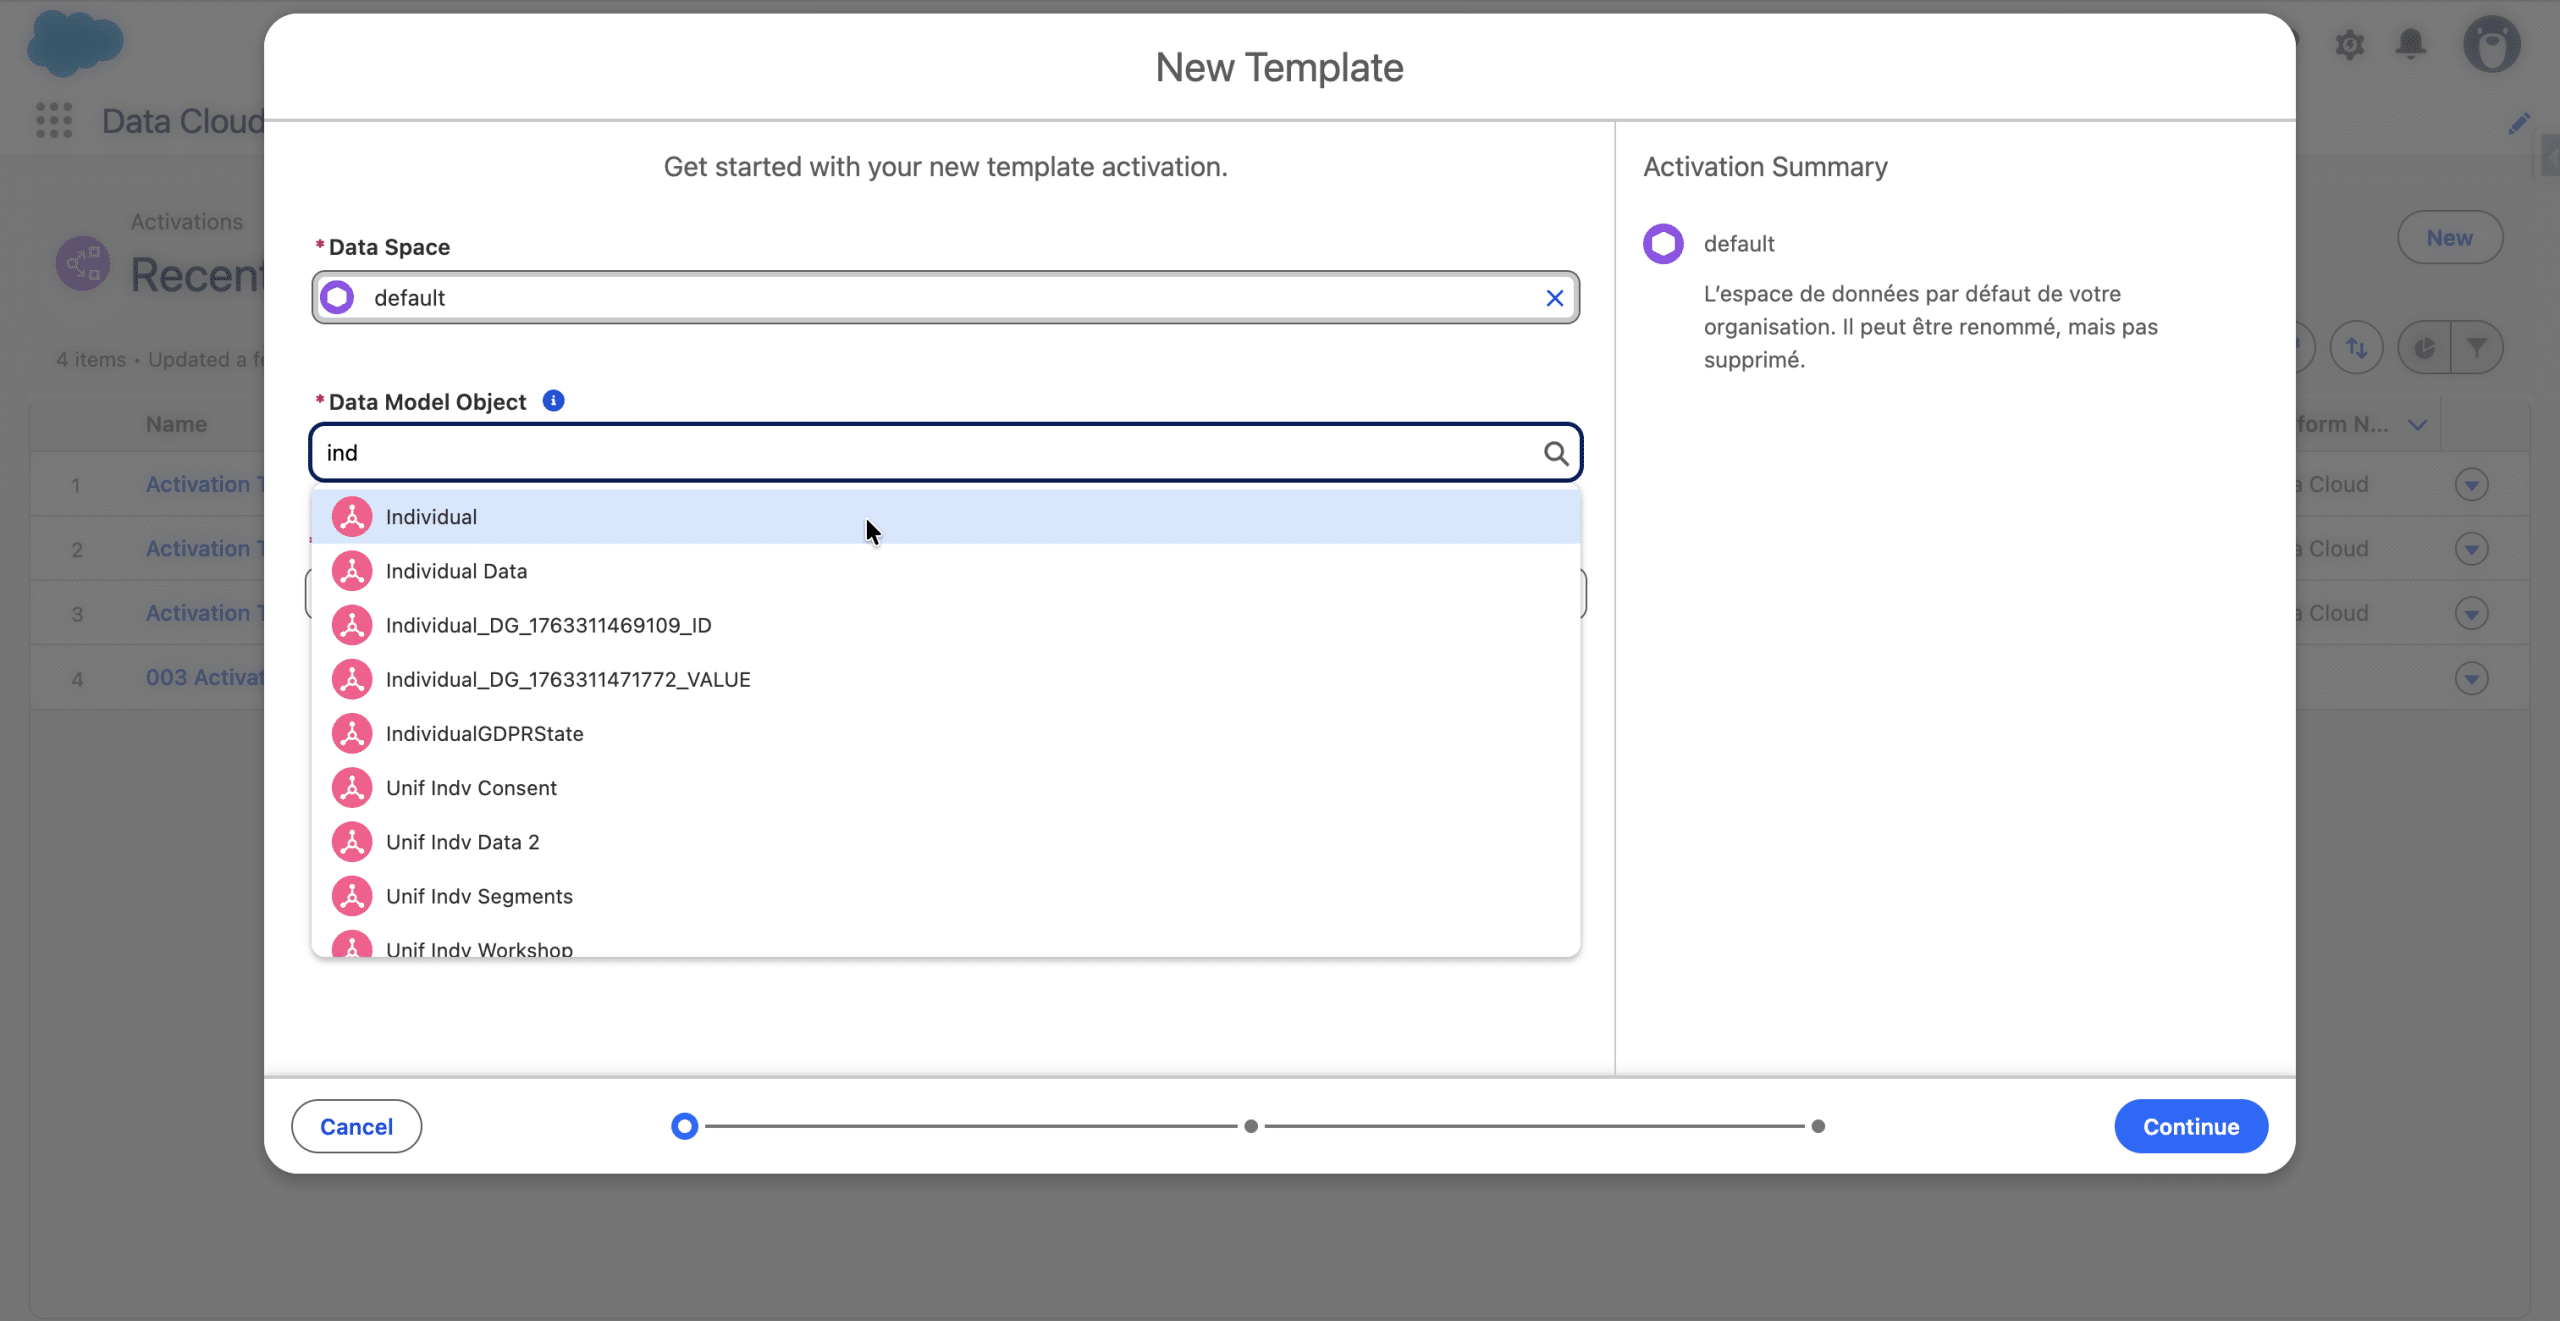
You create an Activation Template in Data Cloud > Activations > +New, and then select the new “Template” type.
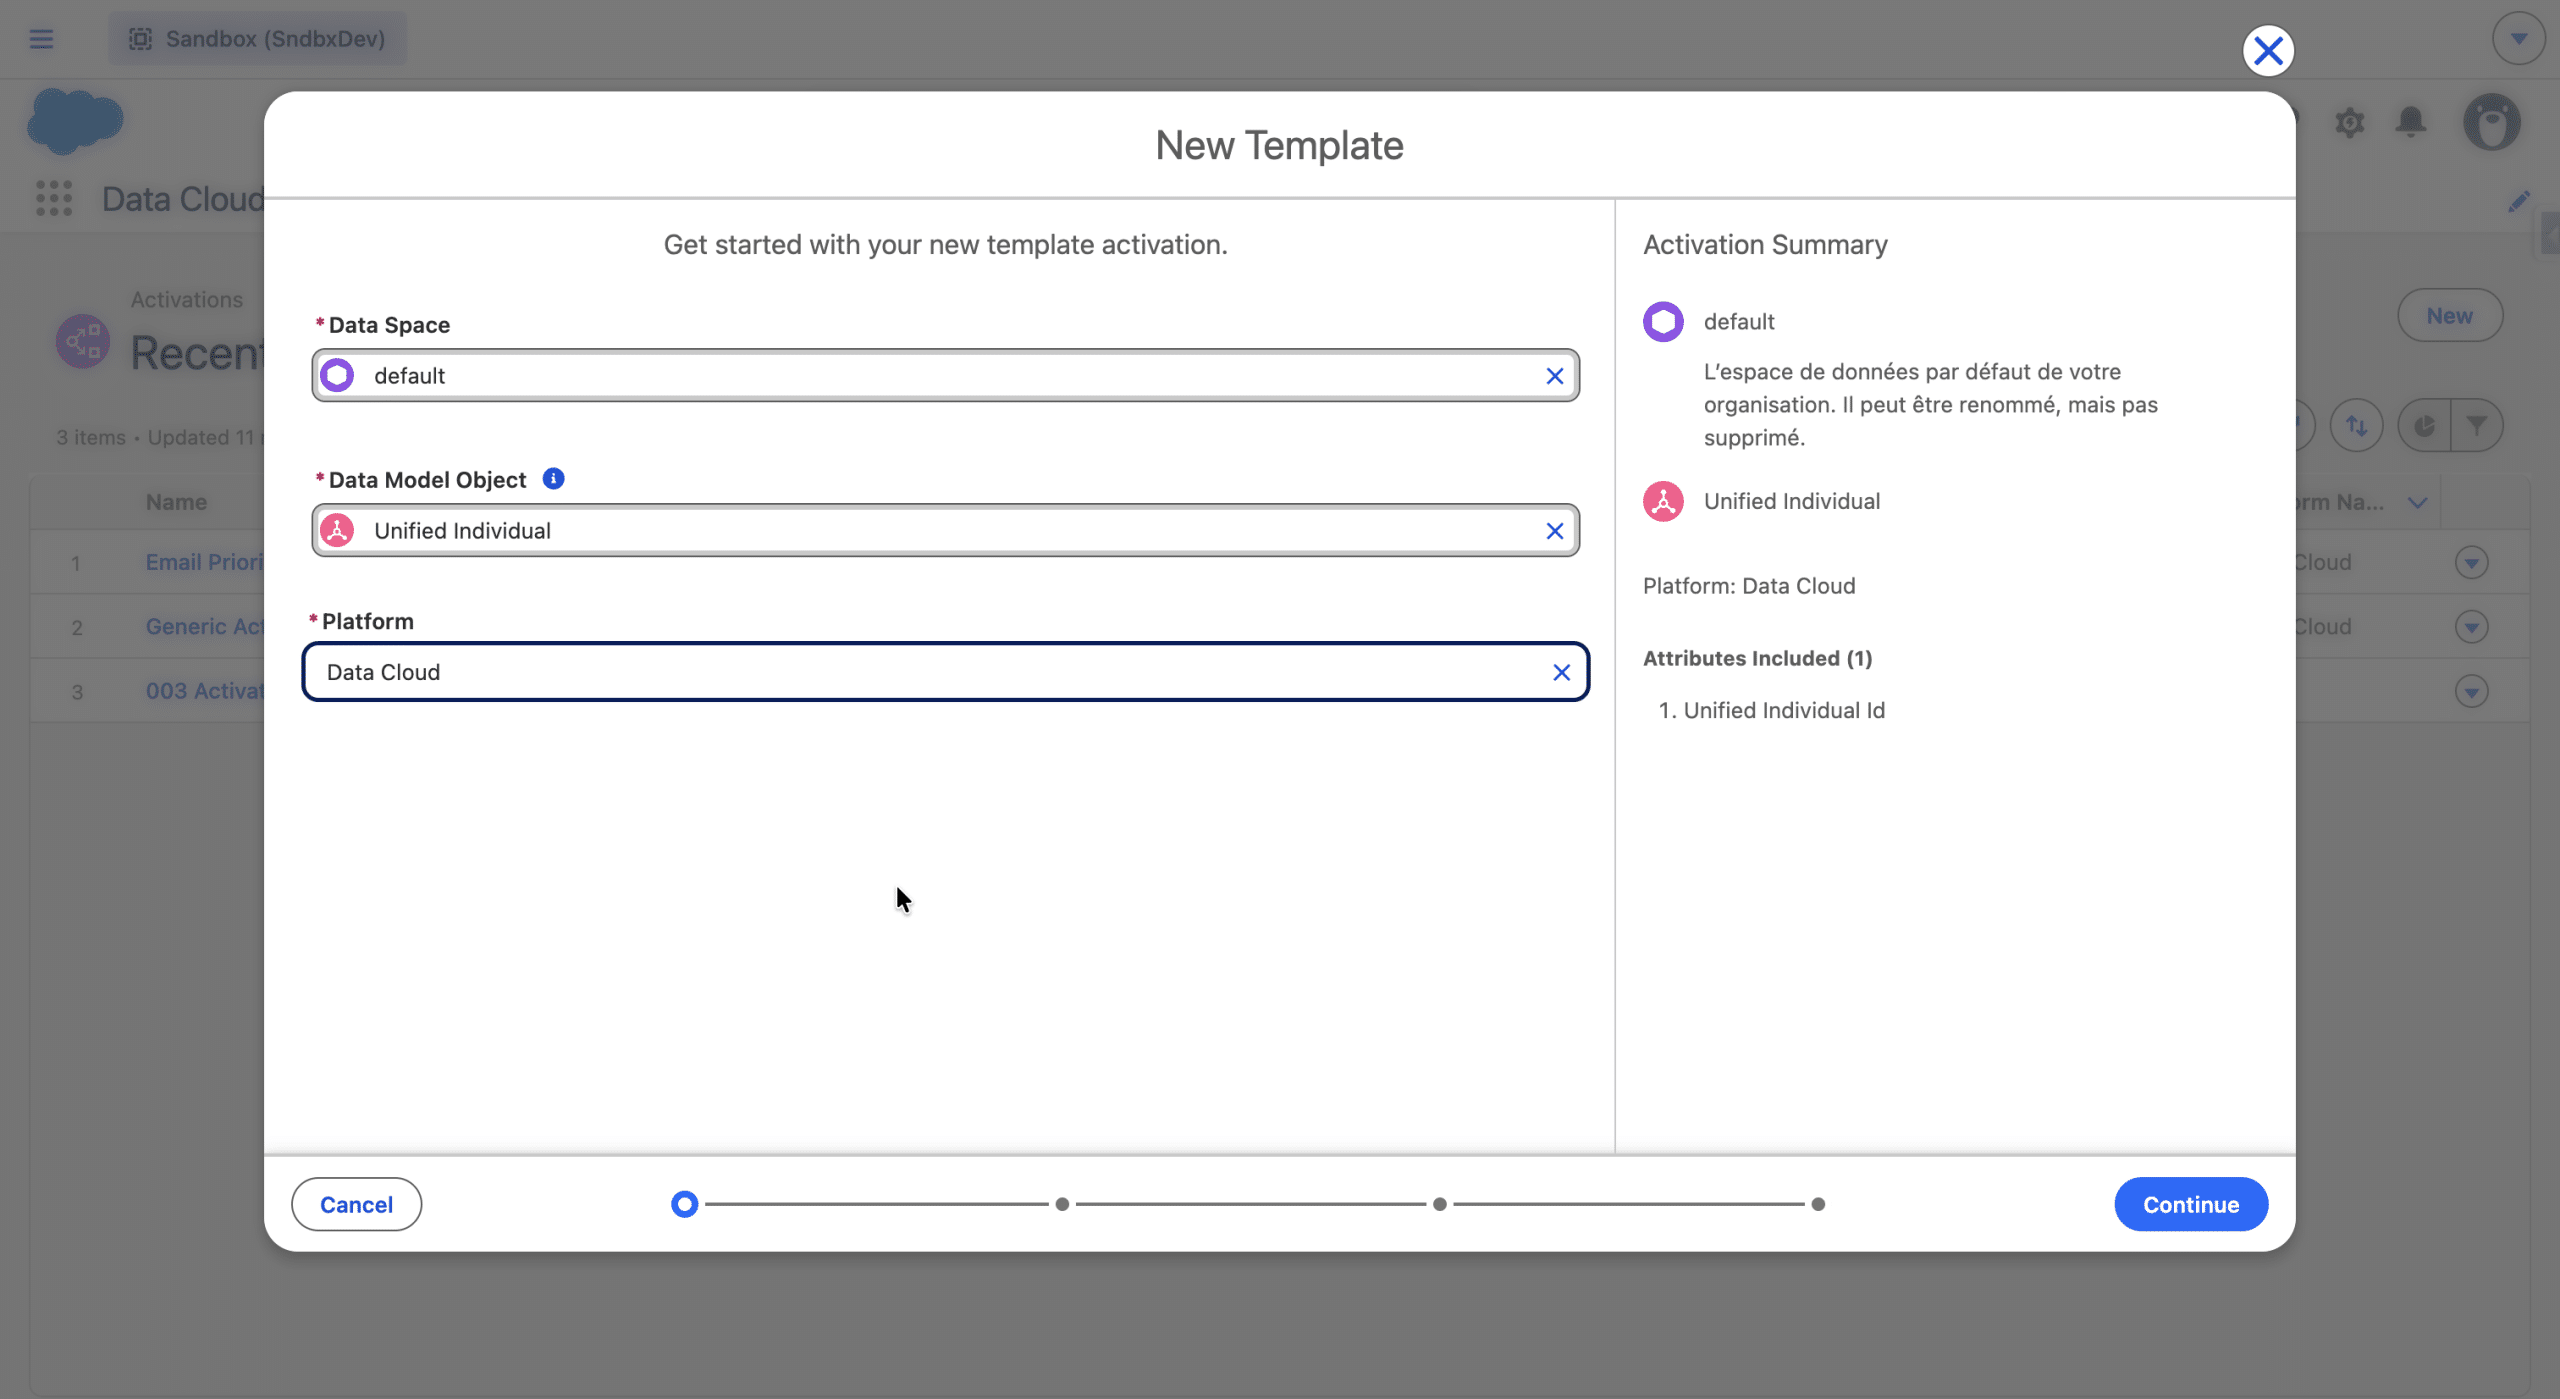
Then we select the Data Space in which this Activation Template will be available, the Data Model Object (Unified Individual, Individual or an Engagement DMO) and the Data Cloud for the Platform.
We’ll then prioritize which Email Addresses (and/or Phone number if using the SMS channel) should be used in case multiple are possible.
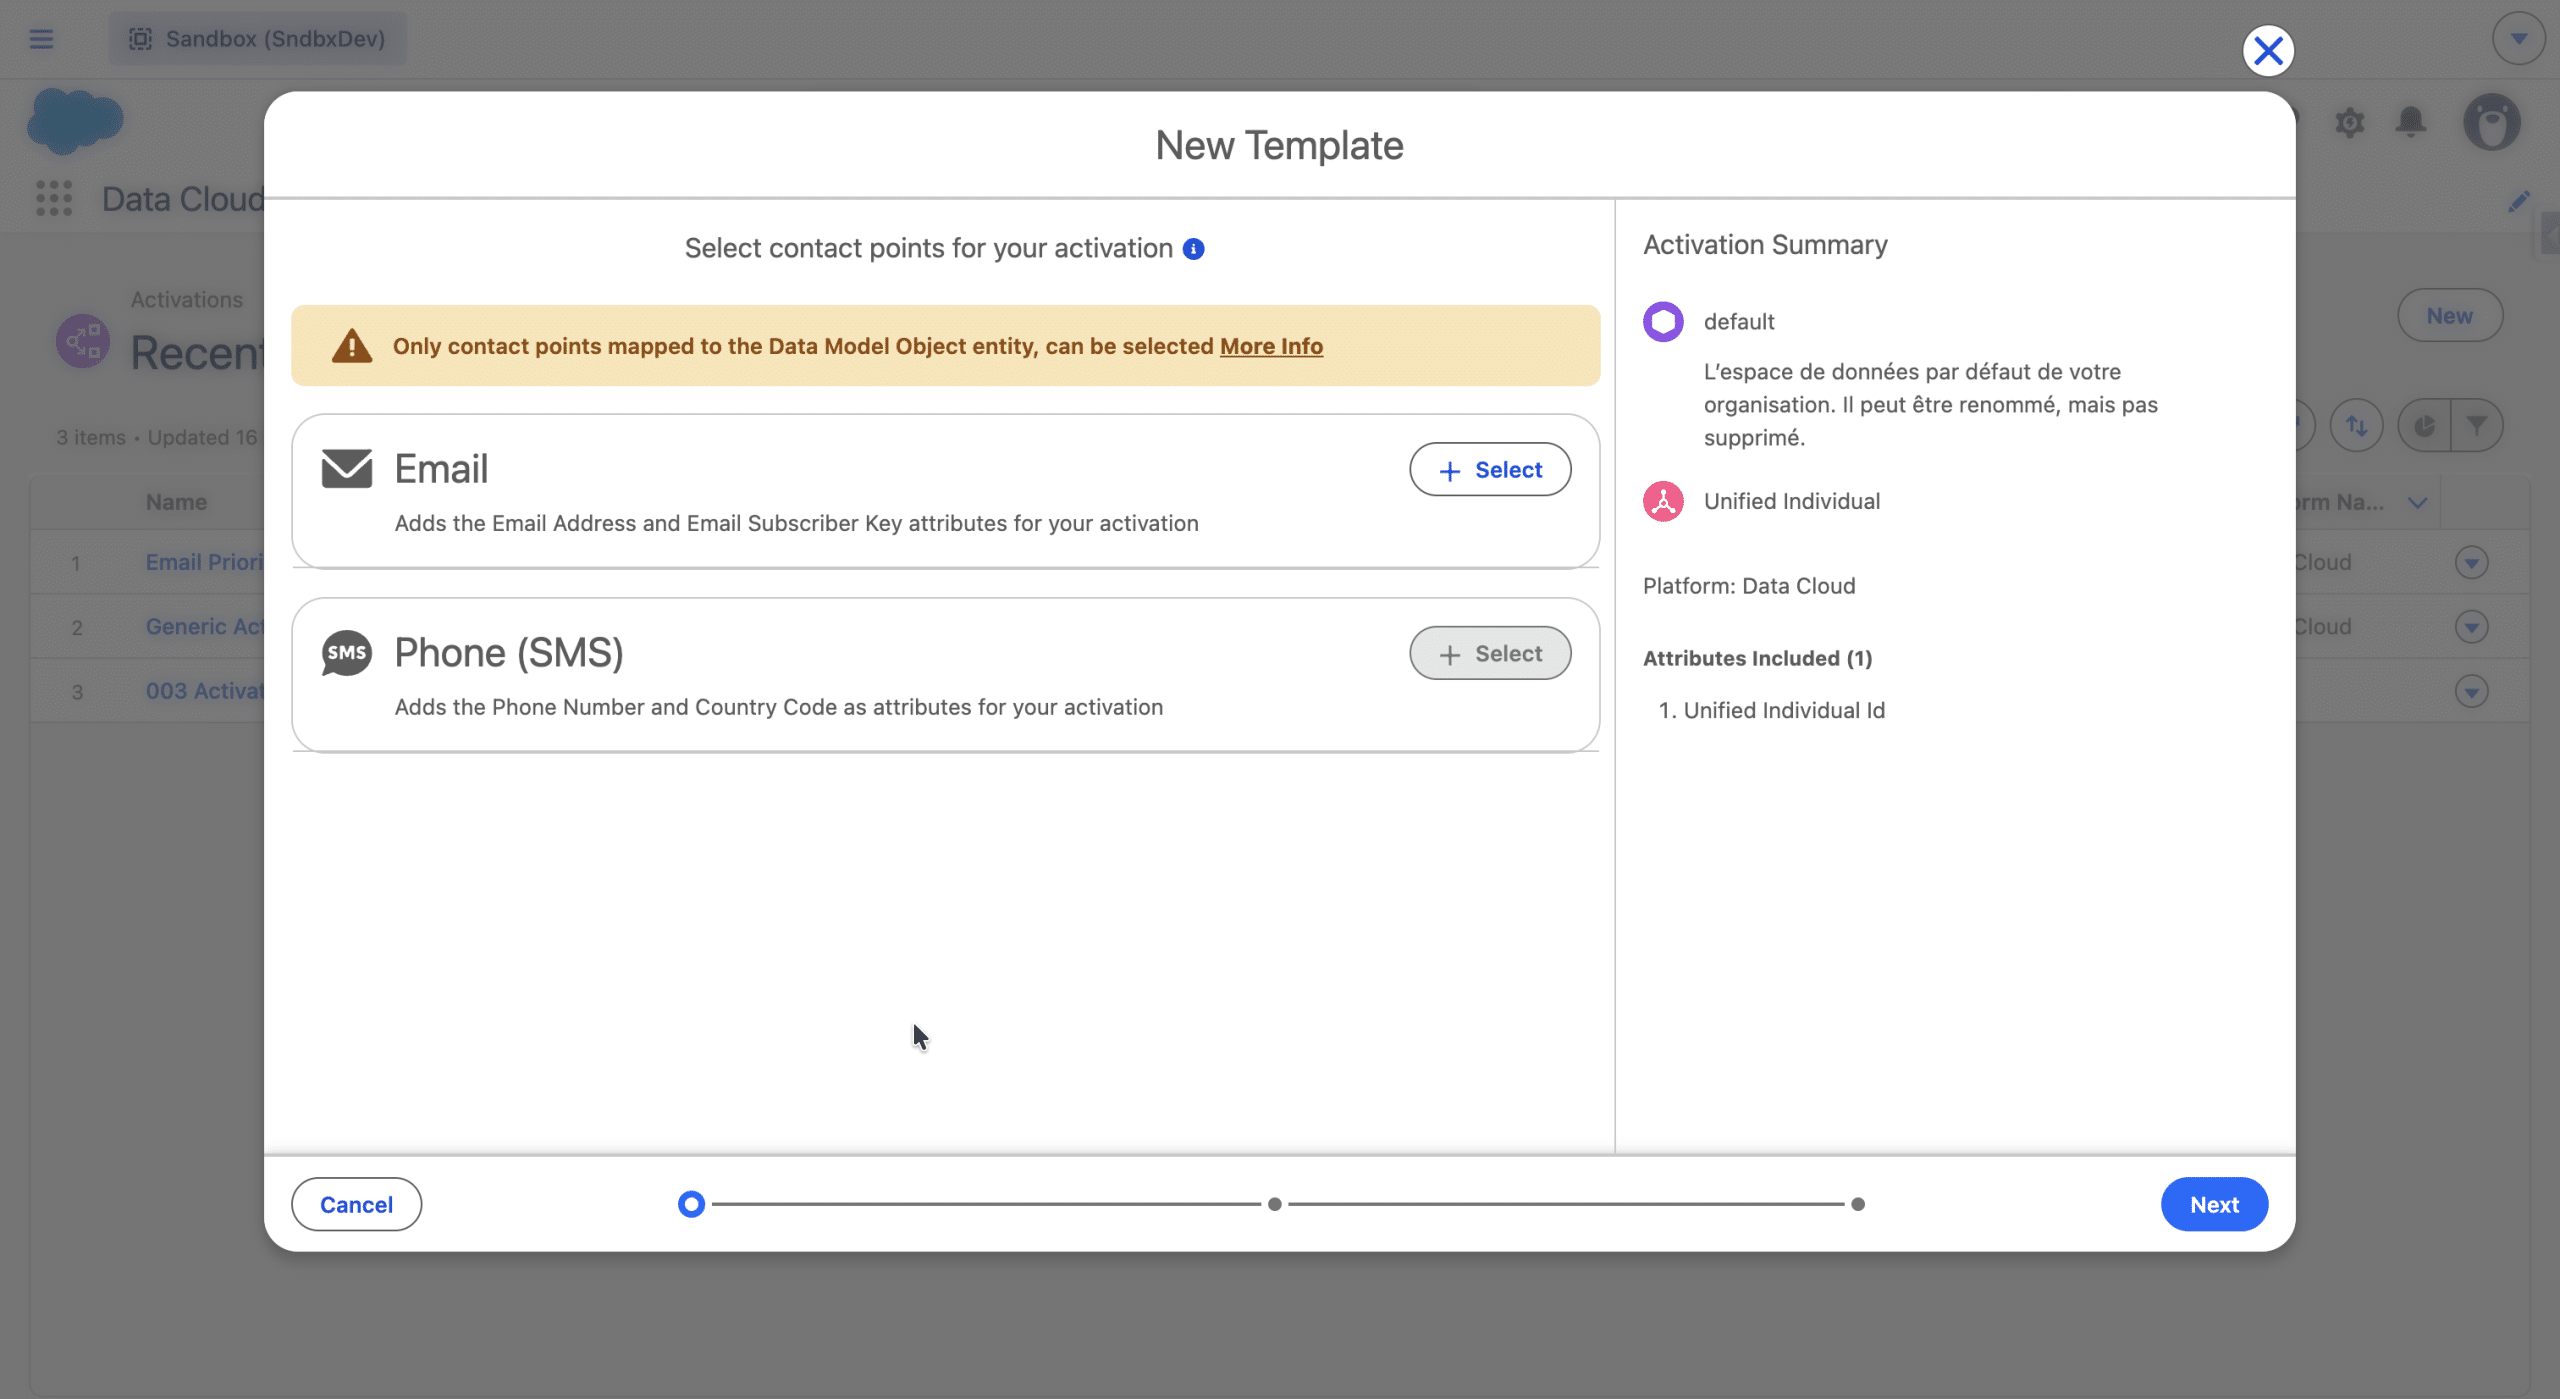
+Select adds the current Contact Point for the Activation.
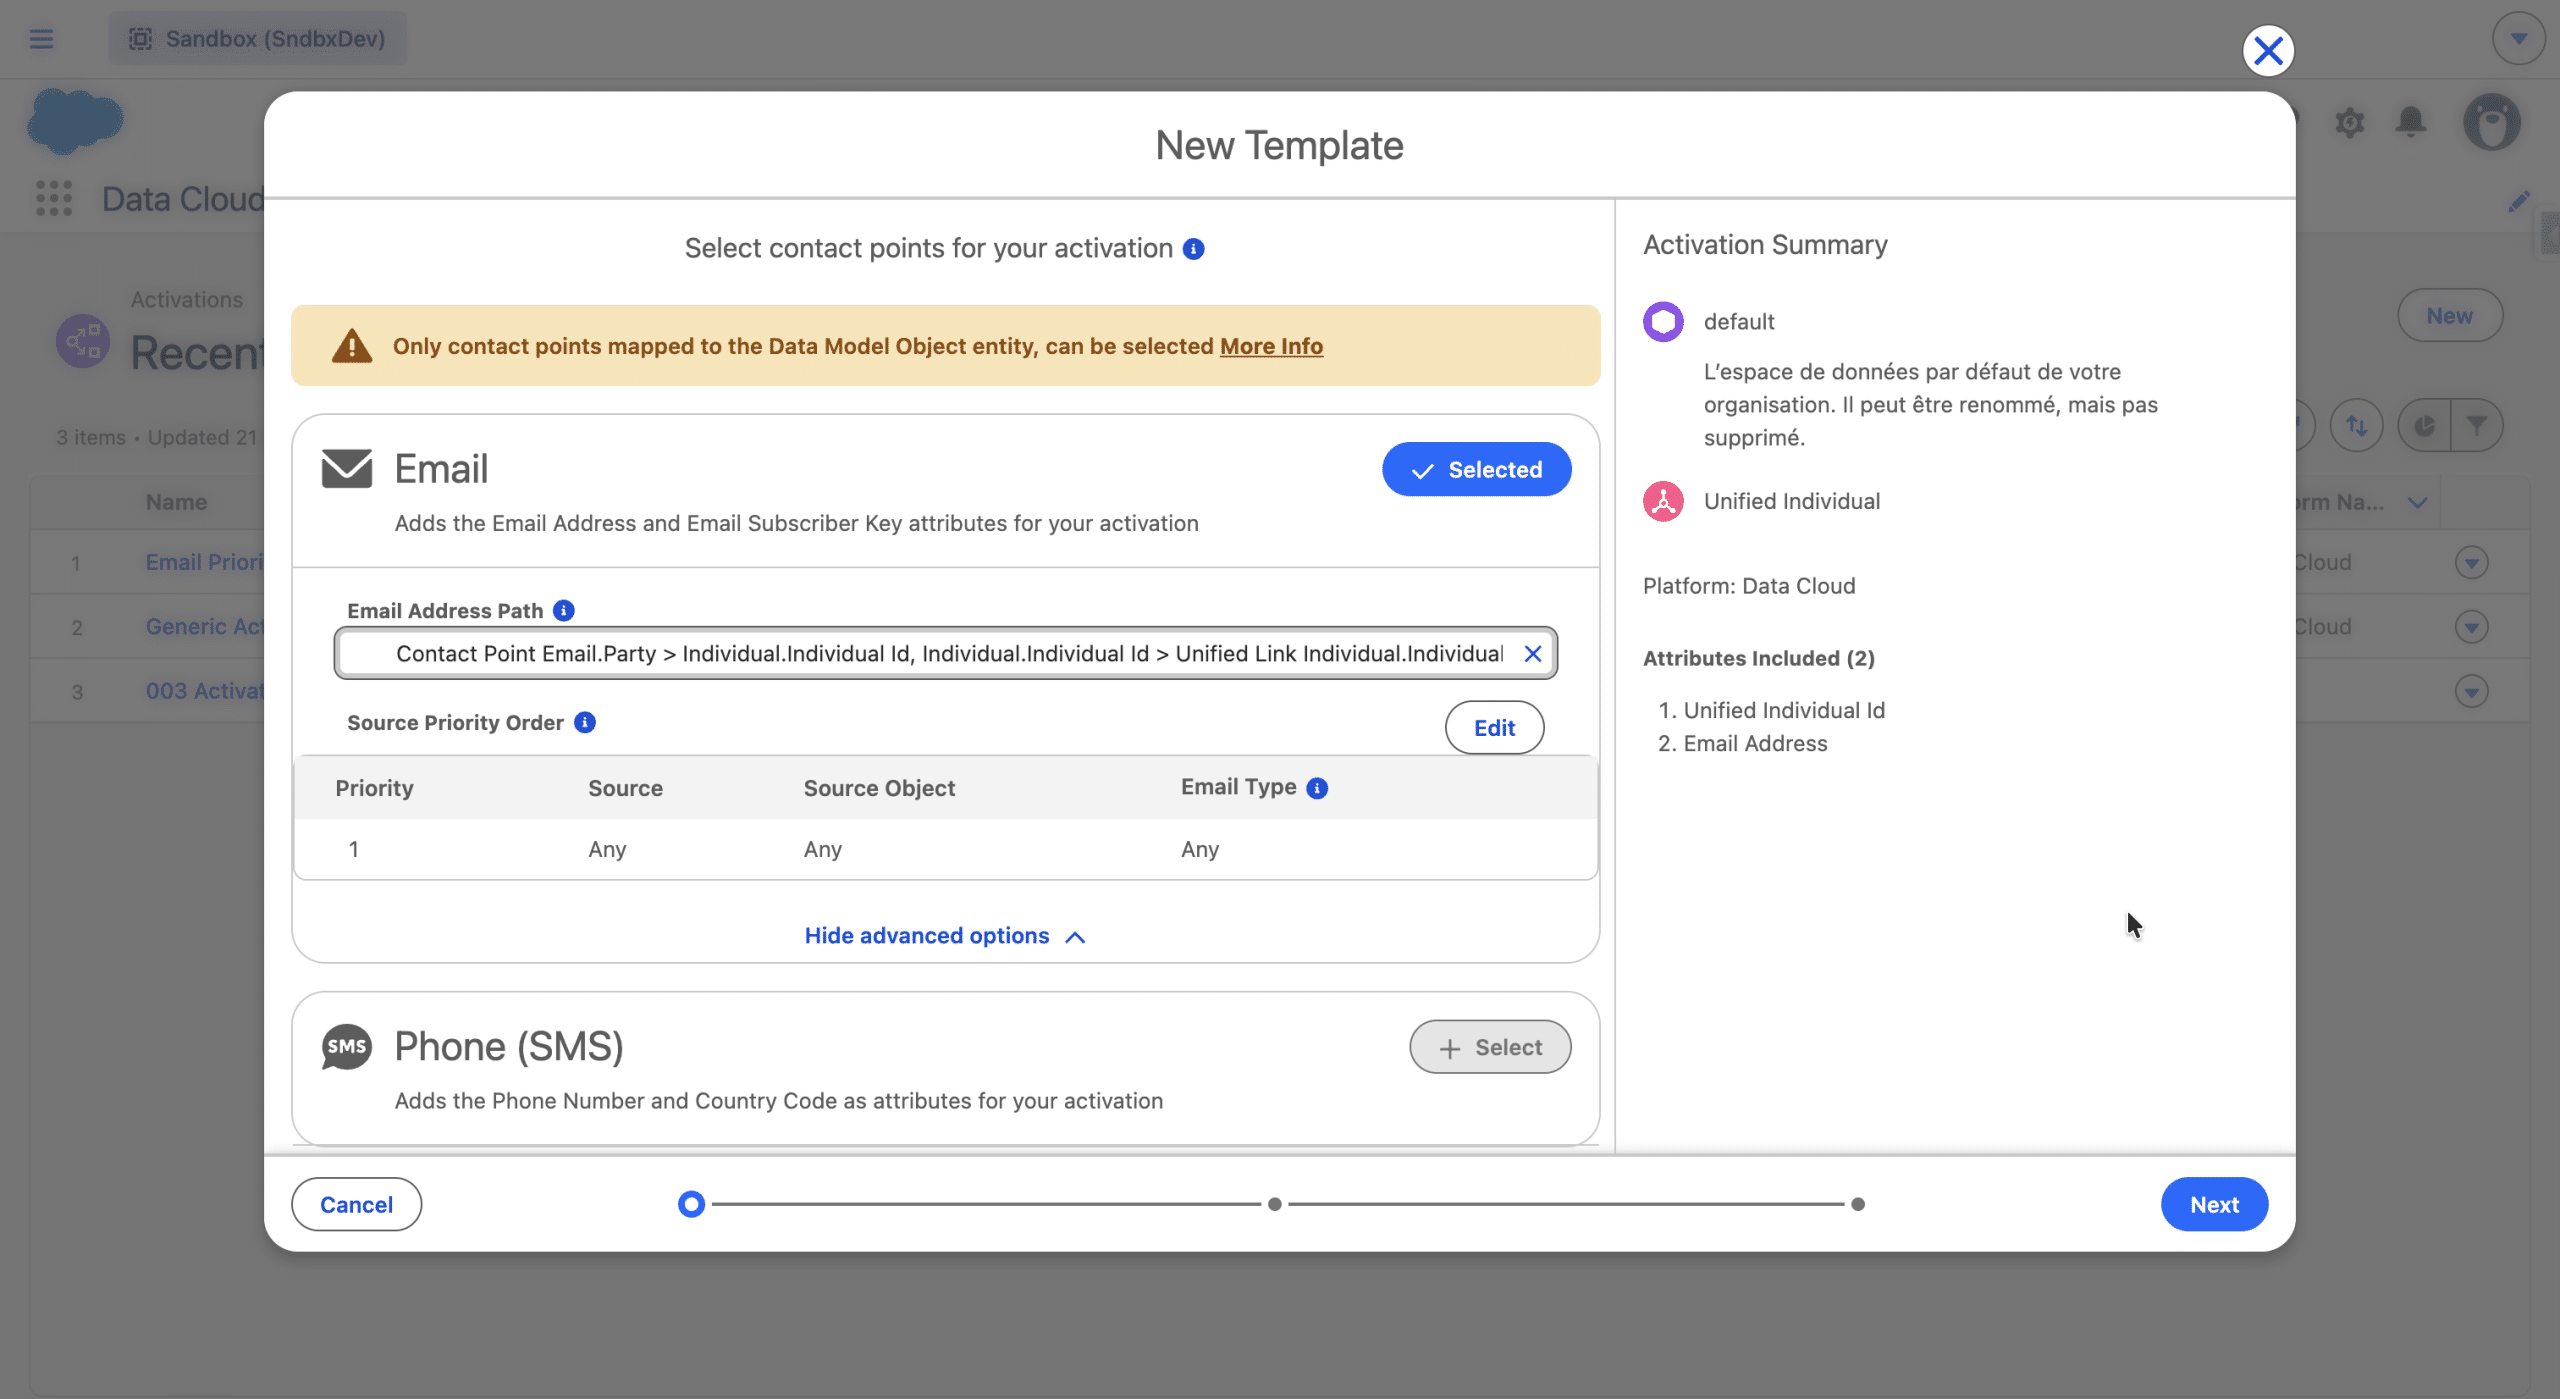
The Path from the Unified Individual to the Contact Point Email records is specified, and we will now define the source Priority Order by clicking +Edit.
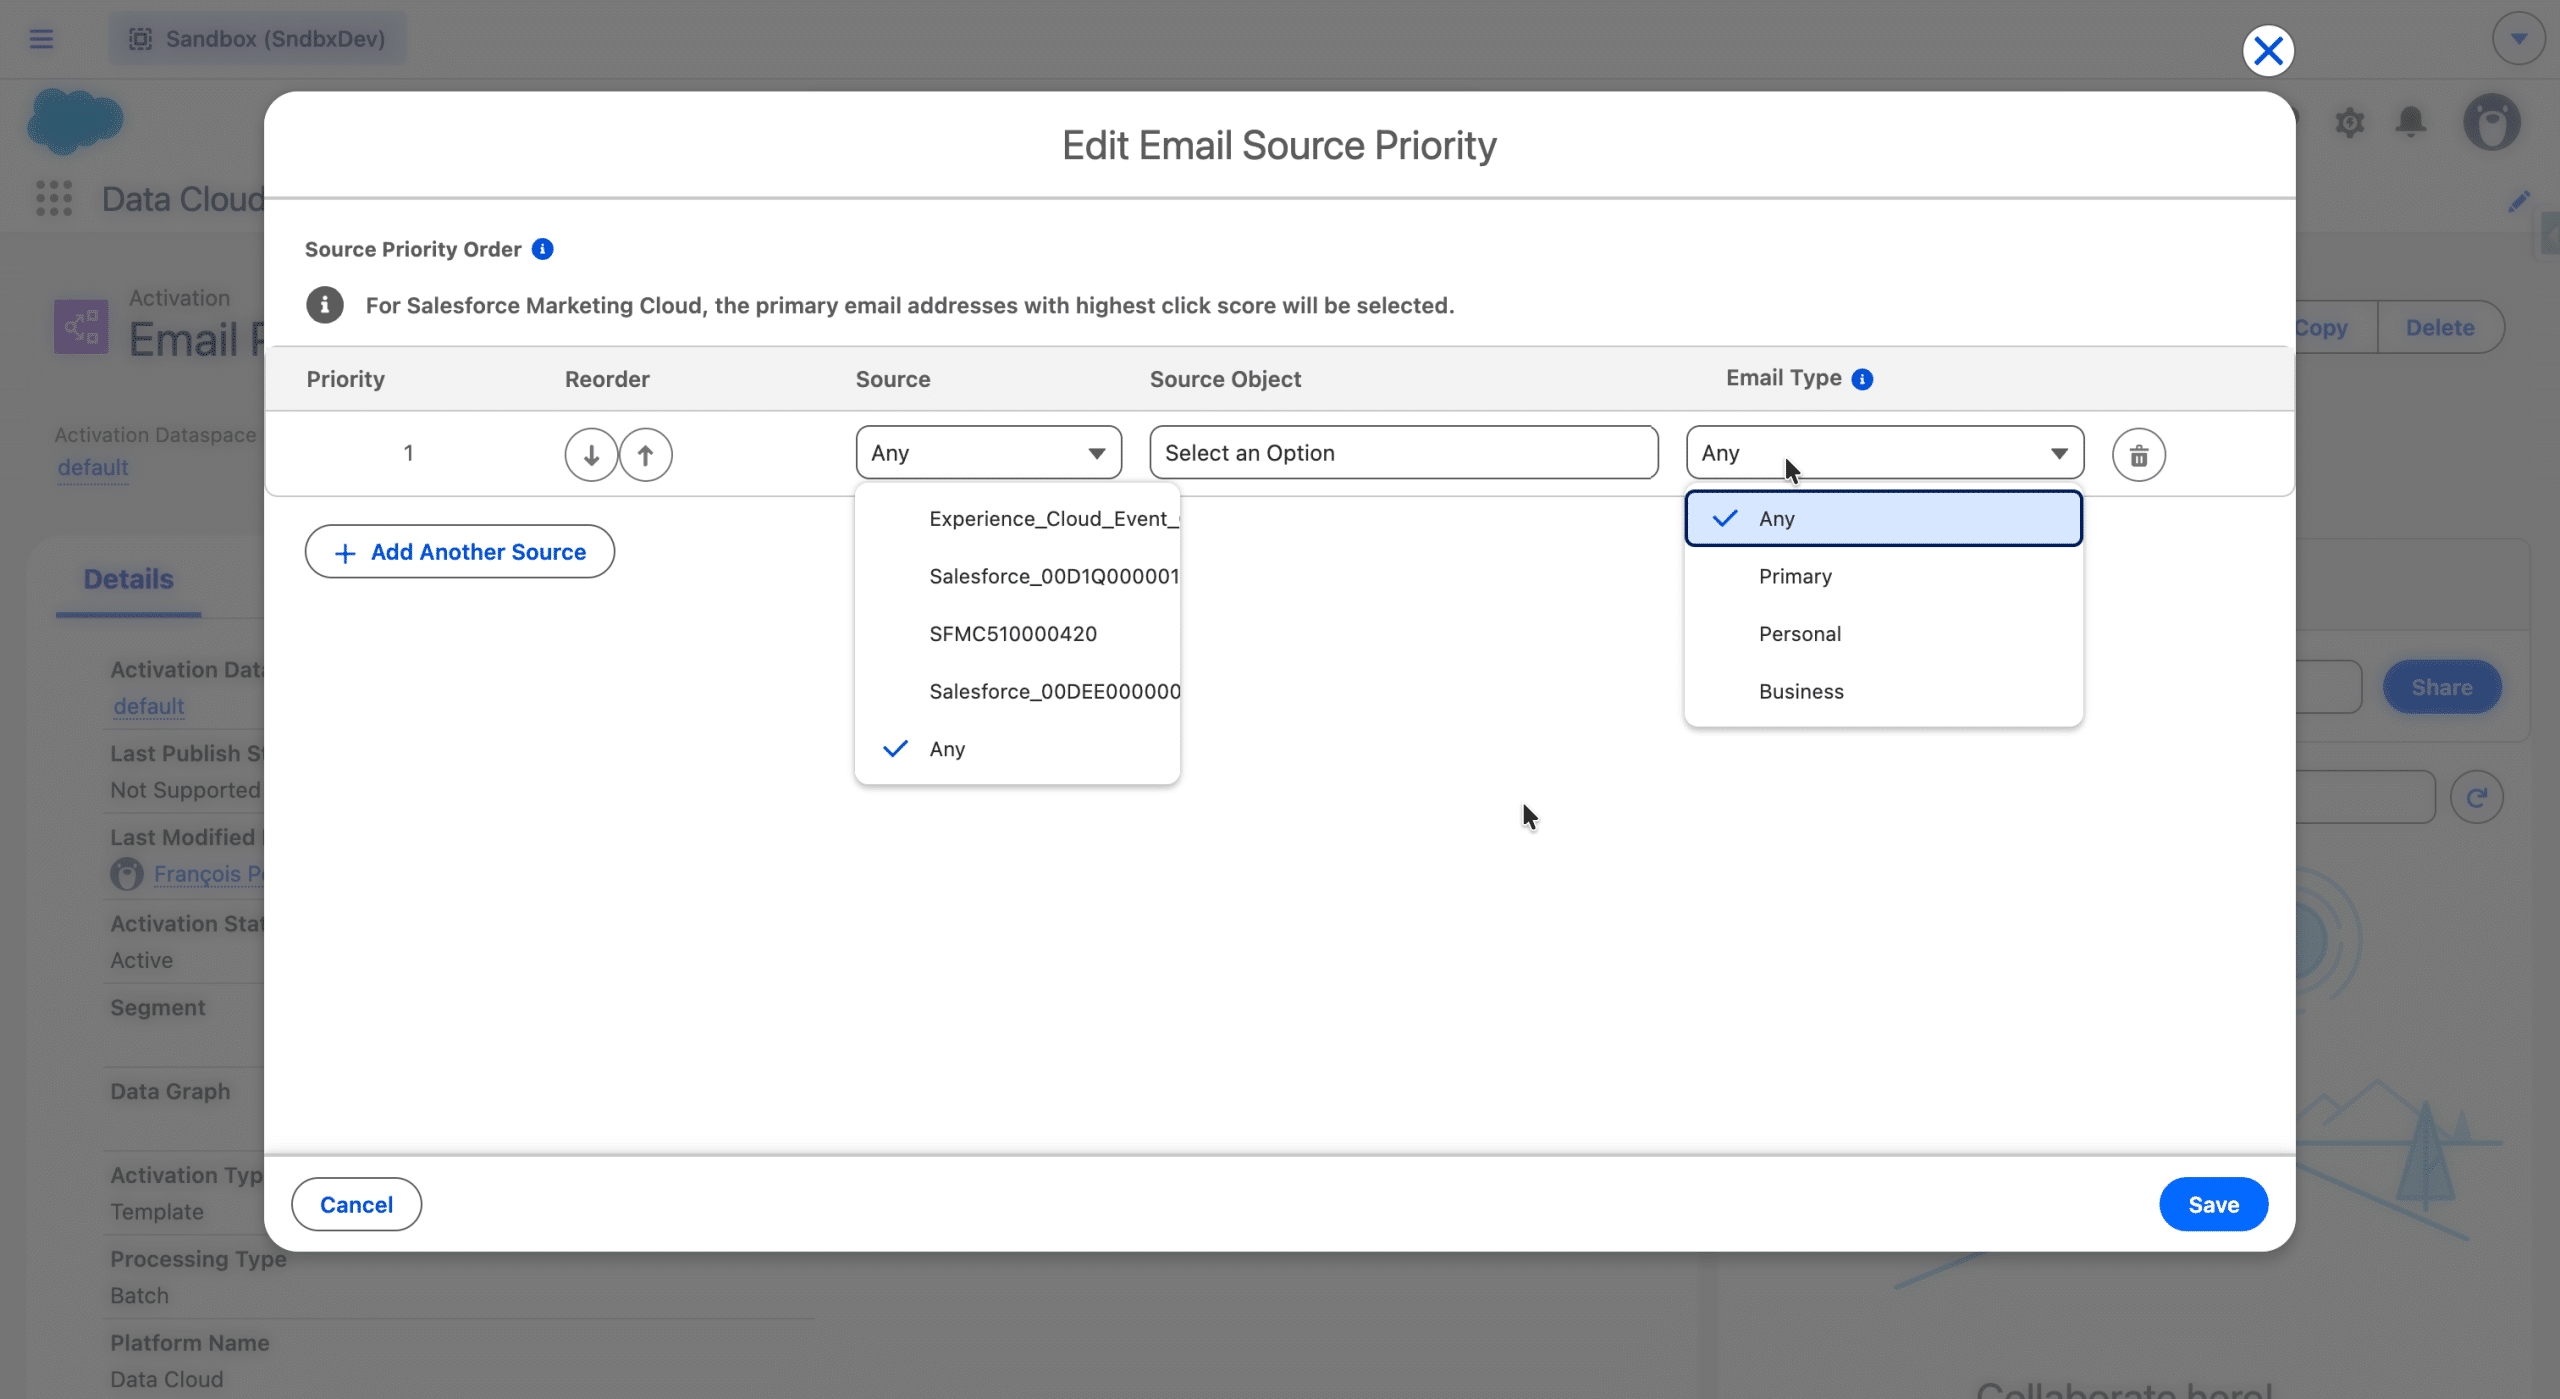
We are presented with different options.
- Source: the list of every source (DSO/DLO) the current Contact Point is mapped to
- Source Object: in case the Source we selected is a Salesforce profile ingestion, we are presented with the following options:
- Prospect
- Lead
- Contact
- Email Type: is referring to specific fields value on the Contact Point DMO (see here for details):
- Primary: used in Contact Point records ingested from MCE / MCP (the Primary Flag field must be mapped in Data Streams)
- Business: the “For Business Use” field must be mapped and the value must be 1.
- Personal: the “For Personal Use” field must be mapped and the value must be 1.
- Any: a contact point value is retrieved from any available source.
We can then create one or more sources and define them as we wish and we can also reorder them using the arrows.

Source priority rules can be seen as a waterfall. In the example, if an email address matches the first line (Business Email Address), that’s the one the Activation Template will use. If not, a Contact Personal one will be used, if none exist, we’ll use the one related to the Lead object. We may use a fallback, catch-all rule as a final rule as in our example (if not, the activation population may be smaller, and no email address might be selected, because the email addresses are selected from fewer data sources).
Once the rules are ok, we click +Save and +Next, where we can add additional filters.
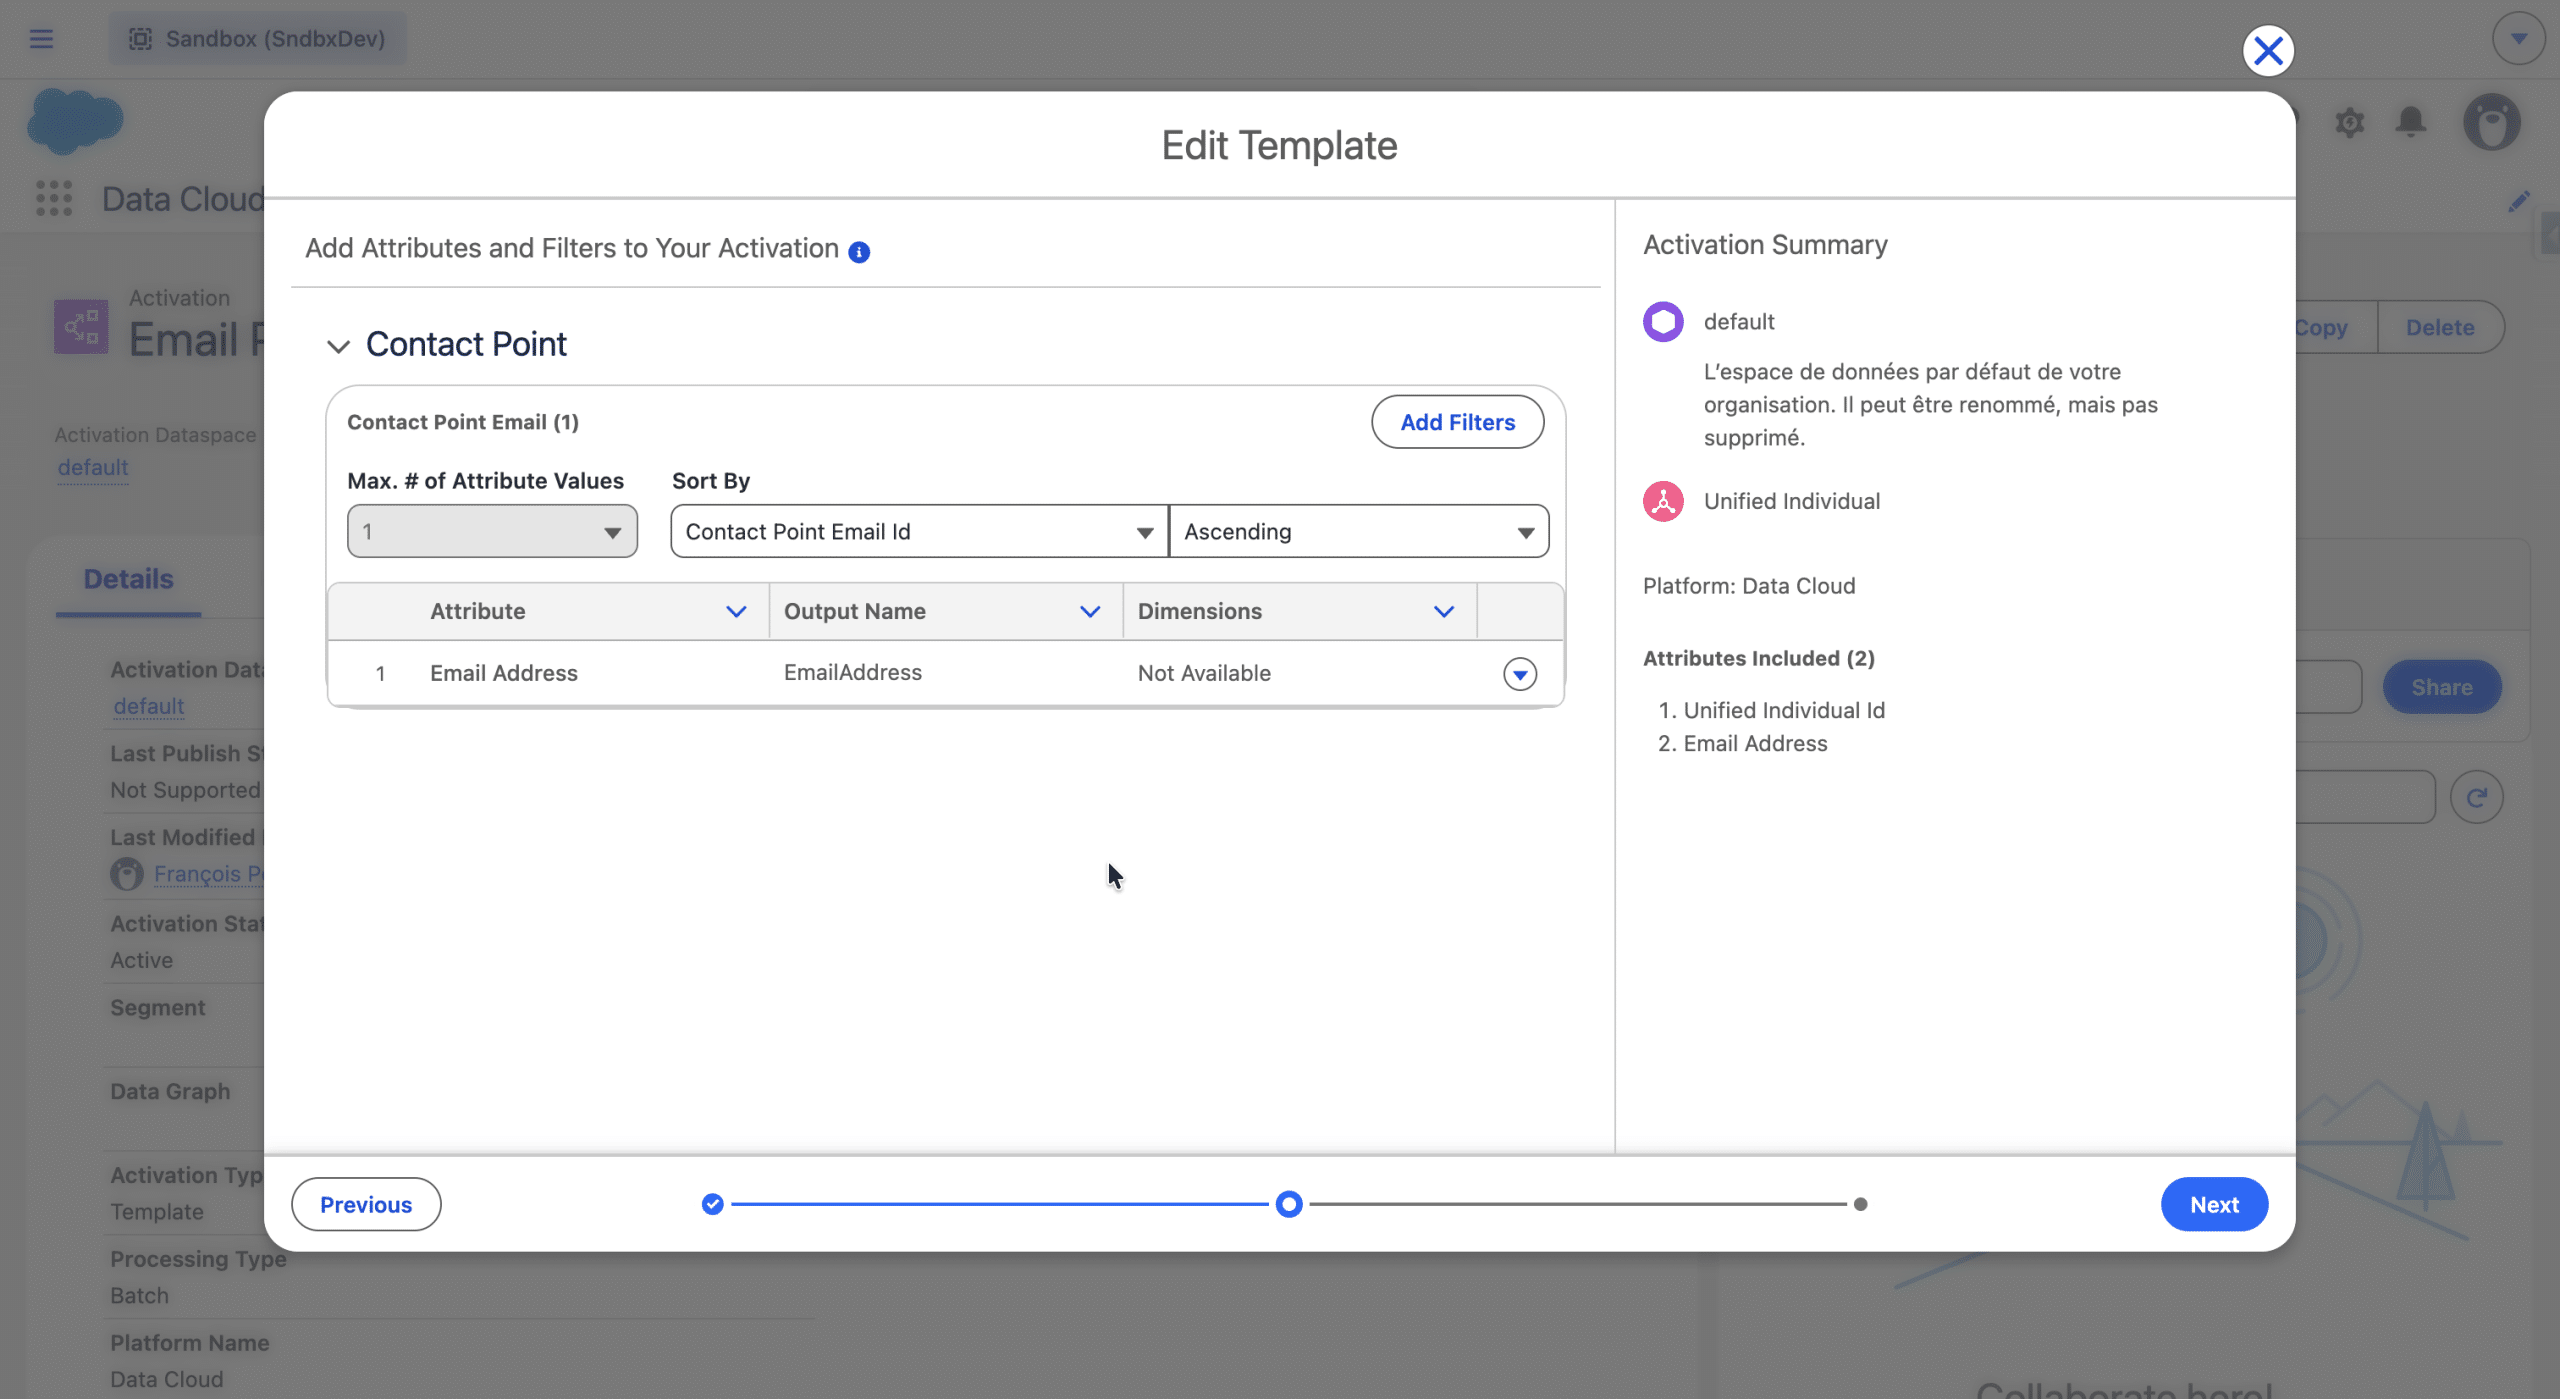
By clicking the +Add Filter option, we access the Contact Point Email DMO, where we can add additional filters using fields. We can drill down the Data Model, and access for example the Communication Subscription Consent to keep only Opted In email addresses.
Note, as opposed to regular Activations, you cannot add extra Fields to an Activation Template, only the Email Address field is included. Then click +Next, give a name to your Activation Template, and it is ready to be used!
Using an Activation Template
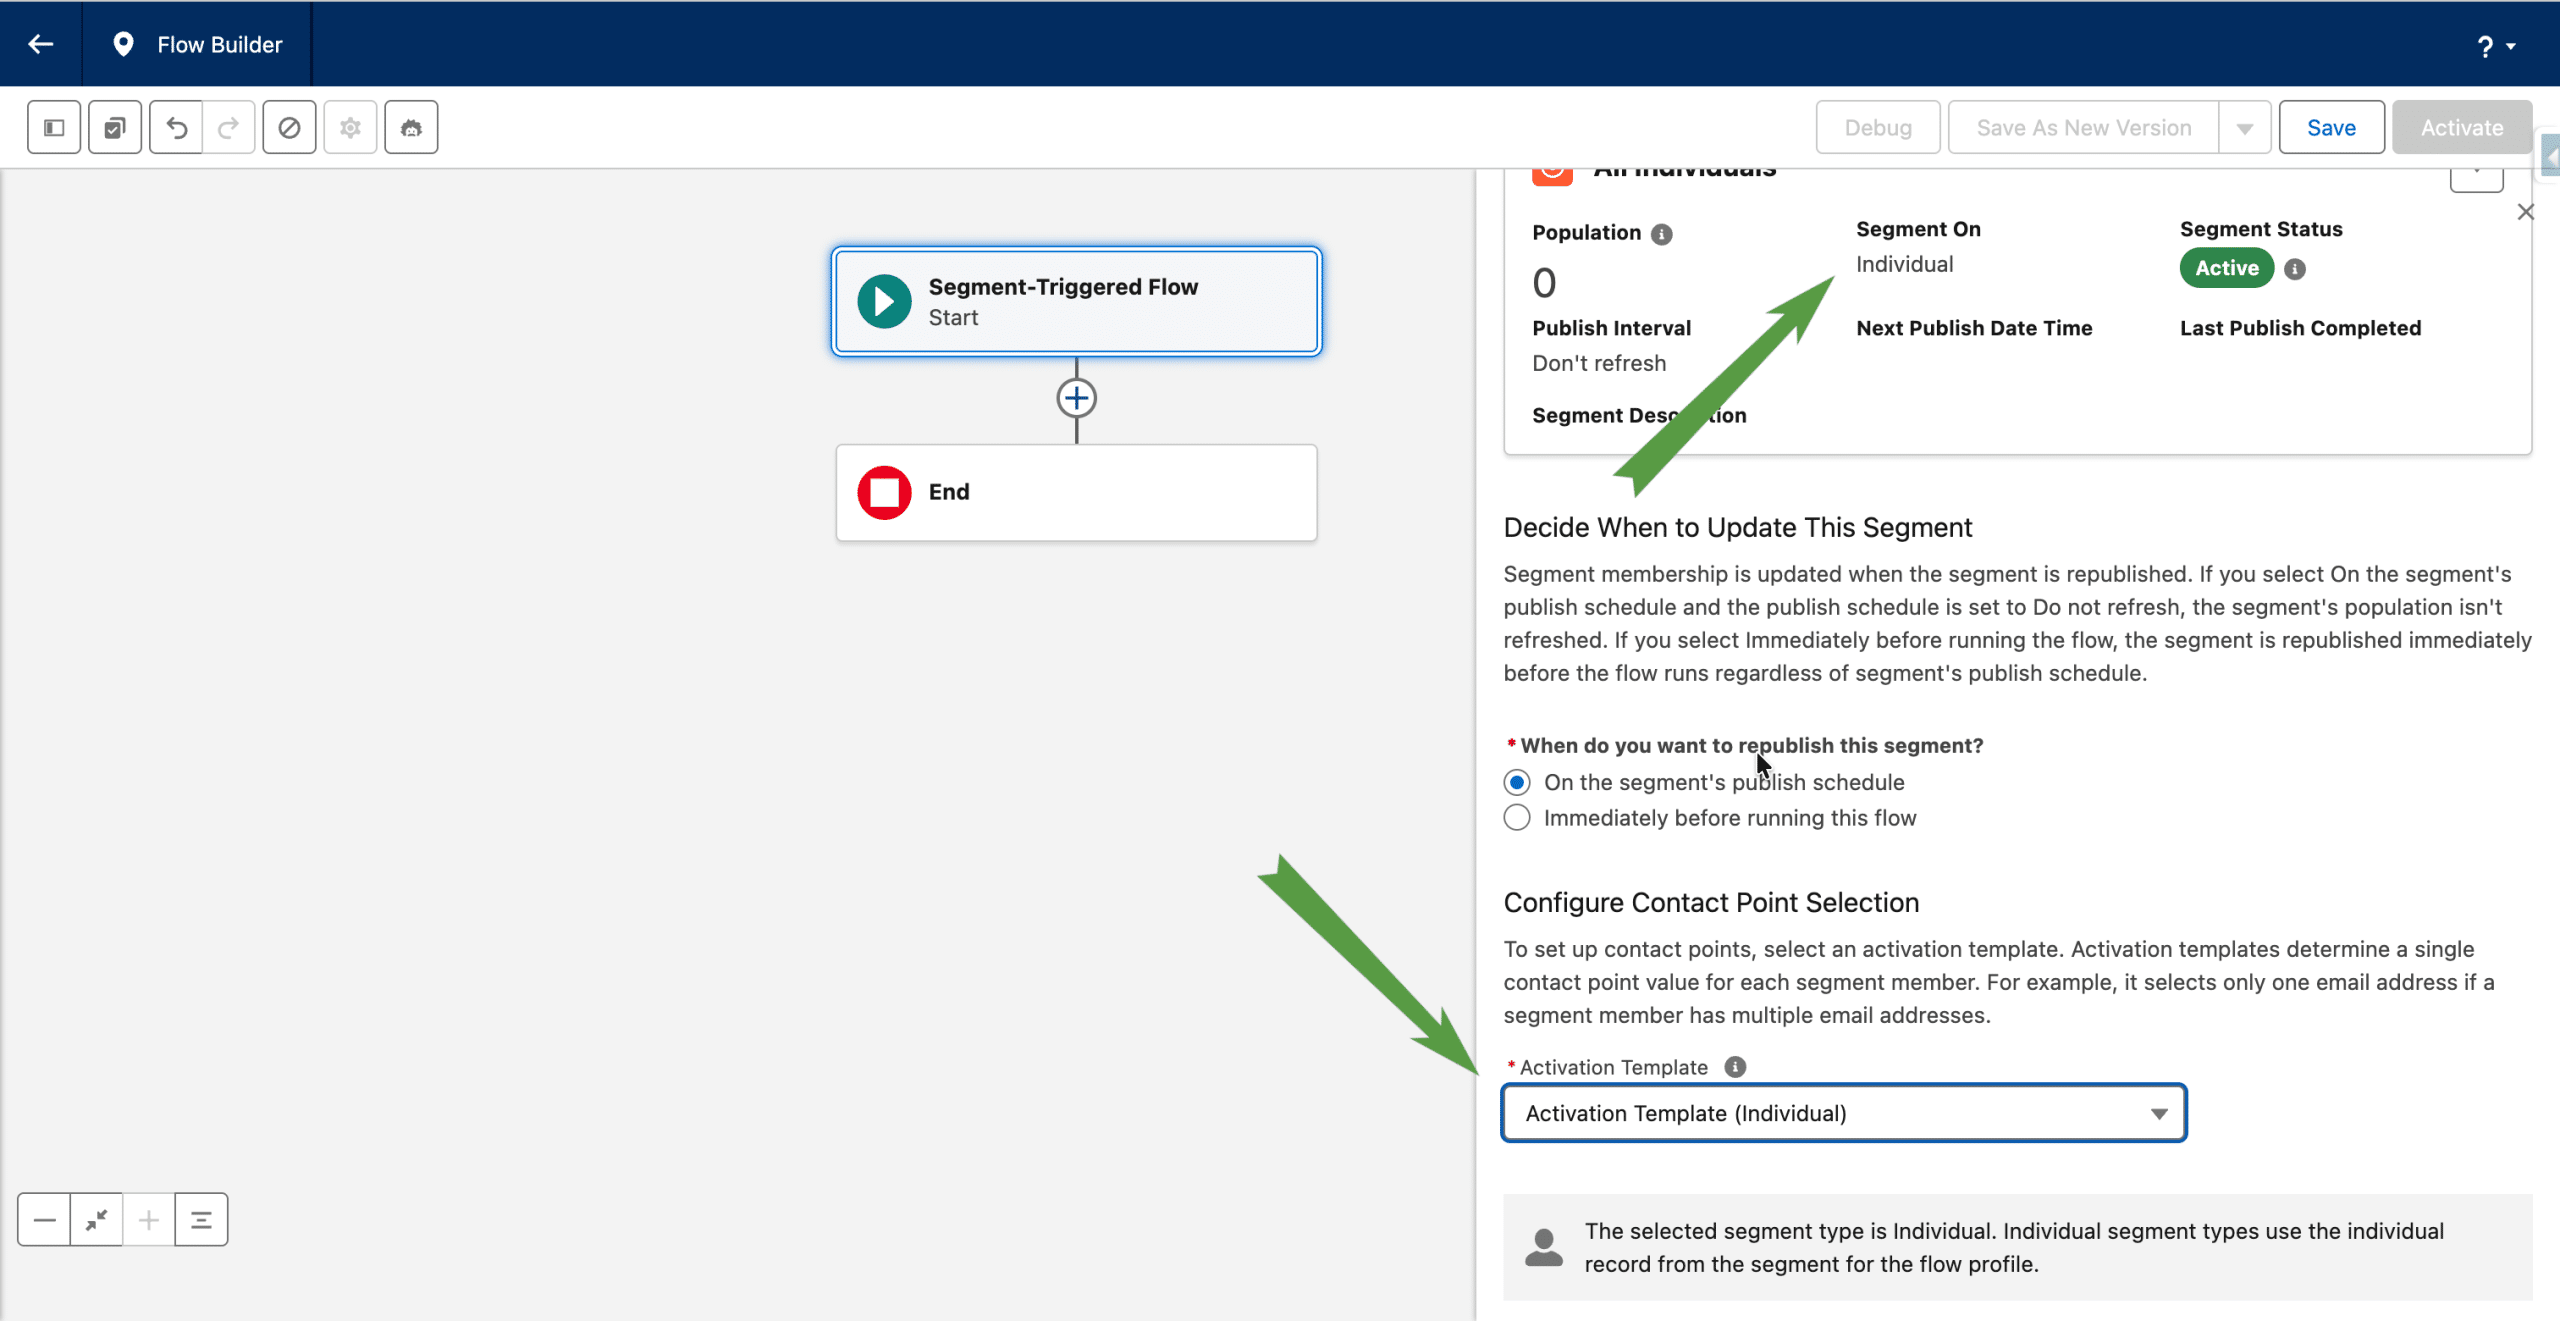
An Activation Template can be selected in a Segment Triggered Flow, when configuring the triggering Segment. If the Segment contains Unified Individuals, this is optional, but useful to ensure only one email per Unified Individual will be sent by the Flow. If using other types of Segments (based on Individuals or Engagement DMOs), an Activation Template is required.
When using an Activation Template in a Segment Triggered Flow, a specific mode is set (the sendMsgToOneContactPtPerIndv field is set to true), which means only one email address will receive a given email, the one with the higher priority, as defined in the Source Priority of the Activation Template.
With a Segment of Unified Individuals
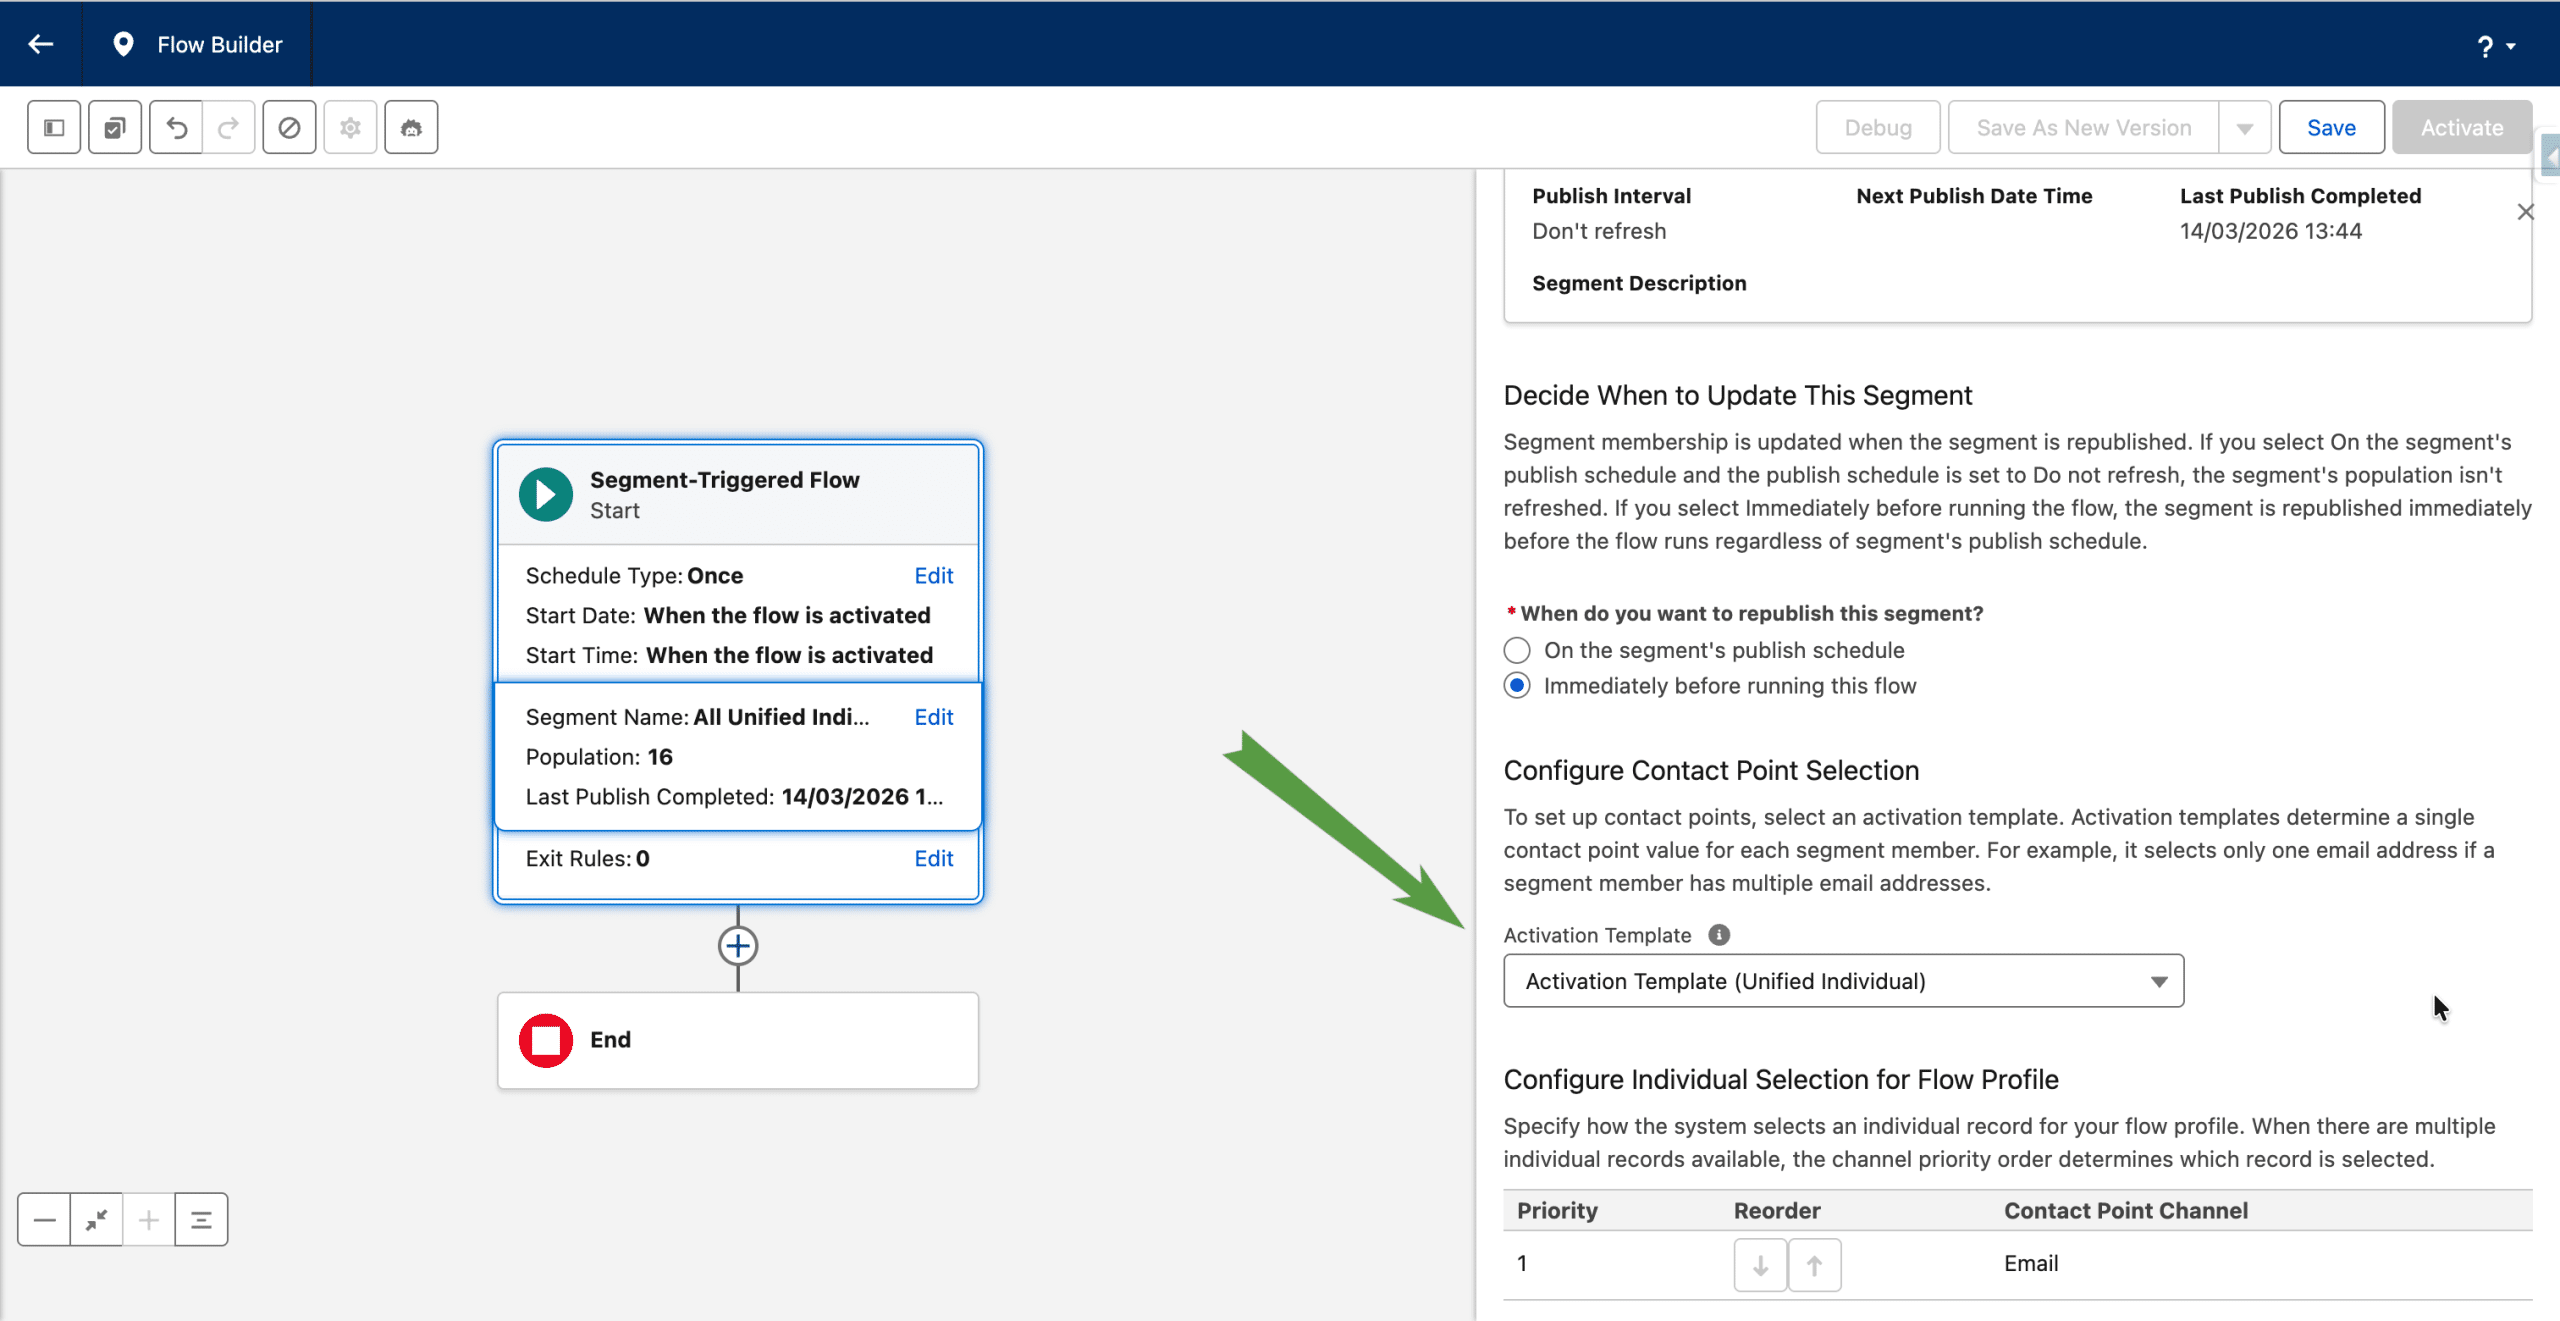
If the triggering Segment of a Segment Triggered Flow is made of Unified Individuals, by default, every Contact Point Email associated with each Individual will receive an Email sent from the Flow. However, if you select an Activation Template in the “Configure Contact Point selection”, only the email address with the highest priority will.
This is an handy way to ensure that a given Unified Individual receives an email only once, even if multiple email addresses are tied to it, to deduplicate and reduce fatigue. Note, if you are using the email address as a matching rule in the Identity Resolution, all your Unified Individual will be tied to only one email address. You may generate Unified Individuals with multiple email addresses by using a Party Identification based matching rule instead (see handling sub-addressing for an example).
In the specific case of an Activation Template used in a Segment Triggered Flow triggered by a Segment of Unified Individuals, the Flow Profile Attributes are no longer determined with the same priority as in the Determine CRM Record for Individual activity, rather, the Individual used will be the one associated with the chosen email address (and that email address is also available in the Flow).
Segments of non-unified Individuals
So far, only Segments of Unified Individuals could be used to trigger Segment Triggered Flows. Since Spring ’26, Segment Triggered Flows can also be triggered by a:
- Segments of Individuals
- Segments of Engagement data
In such cases, an Activation Template is required to activate the Flow. The Activation Template will tie the Individual to its Contact Point, and also prioritize which Contact Point to use, in case the Individual has multiple Contact Points (if ingesting Prospects, Leads or Contact, this is not the case with defaults mappings, but you can handle multiple addresses for a unique Individual)
The steps to create an Activation Template for a non-unified Individual are the exact same ones we used for Unified Individuals. Just select the Individual DMO or the Engagement DMO (like Email Engagement).
In the Flow, you define the Activation Template related to type of Segment triggering the Flow.
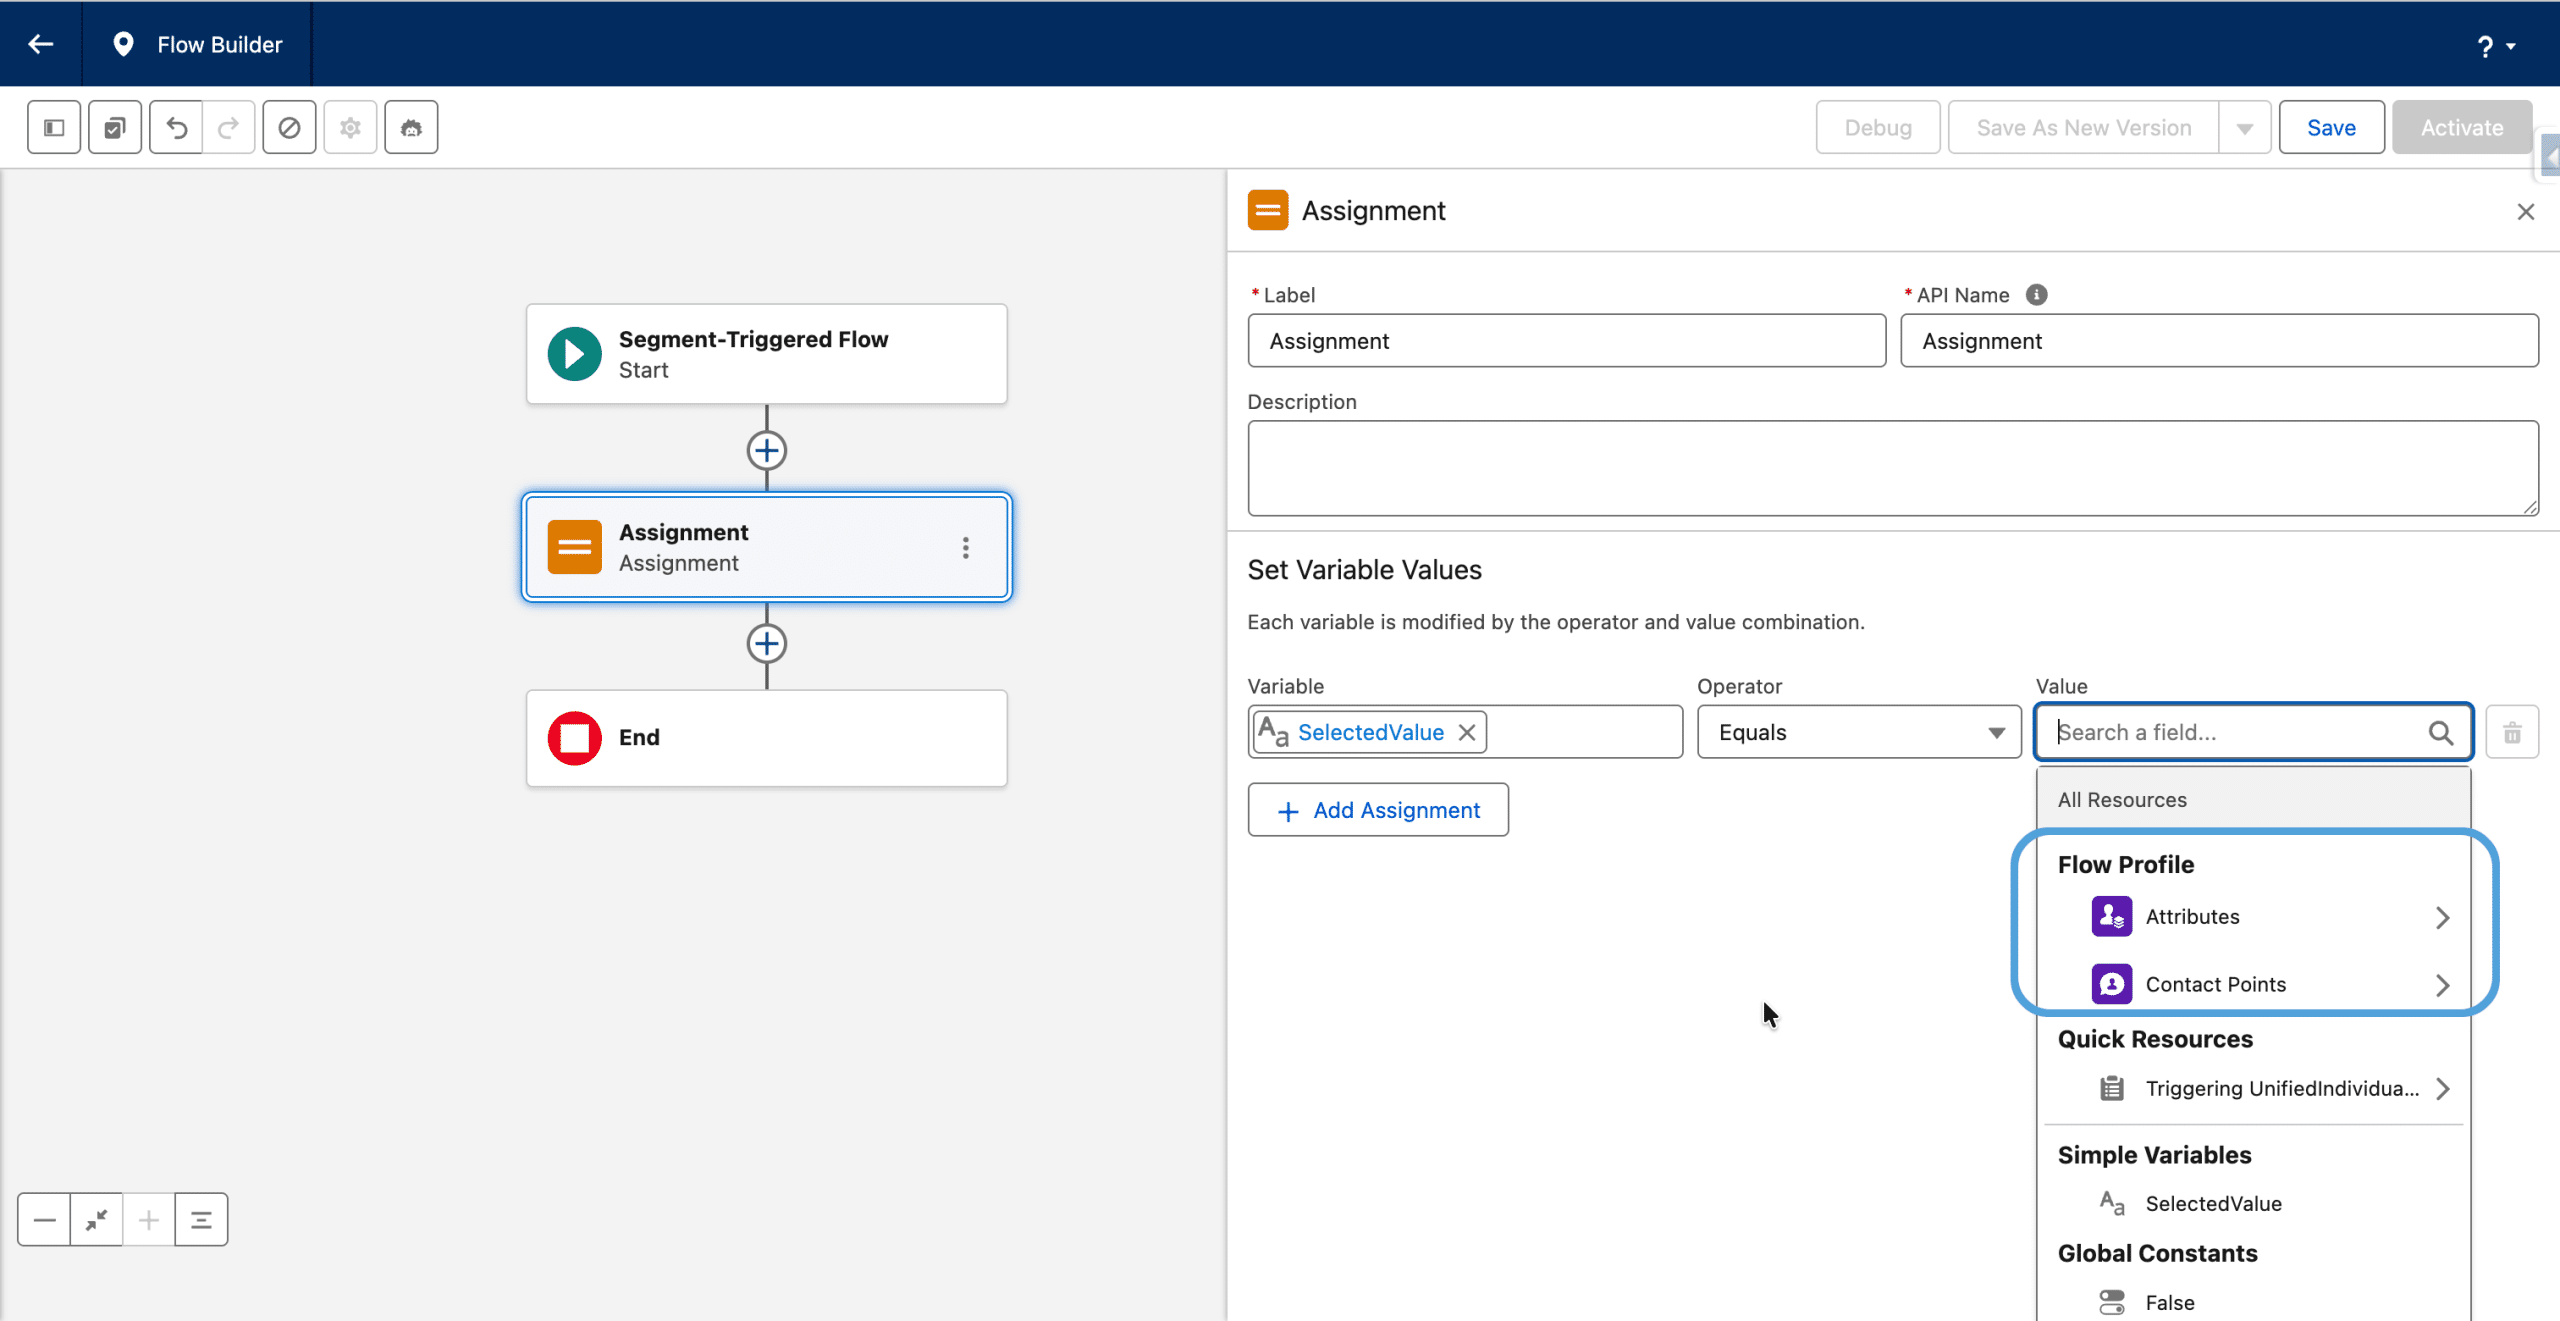
You can access the current Individual in the Flow, for example for an assignment in the Segment DMO Section.
Final thoughts
An Activation Template can be used in multiple Segment Triggered Flows. And so our recommendation is to create one for the Unified Individuals (that you can use or not depending on your use-case), one for the Individuals (that you need to use in a Segment Triggered Flow) and one for each Engagement DMO you use. They represent the Contact Points deduplication and priority strategy of your brand.
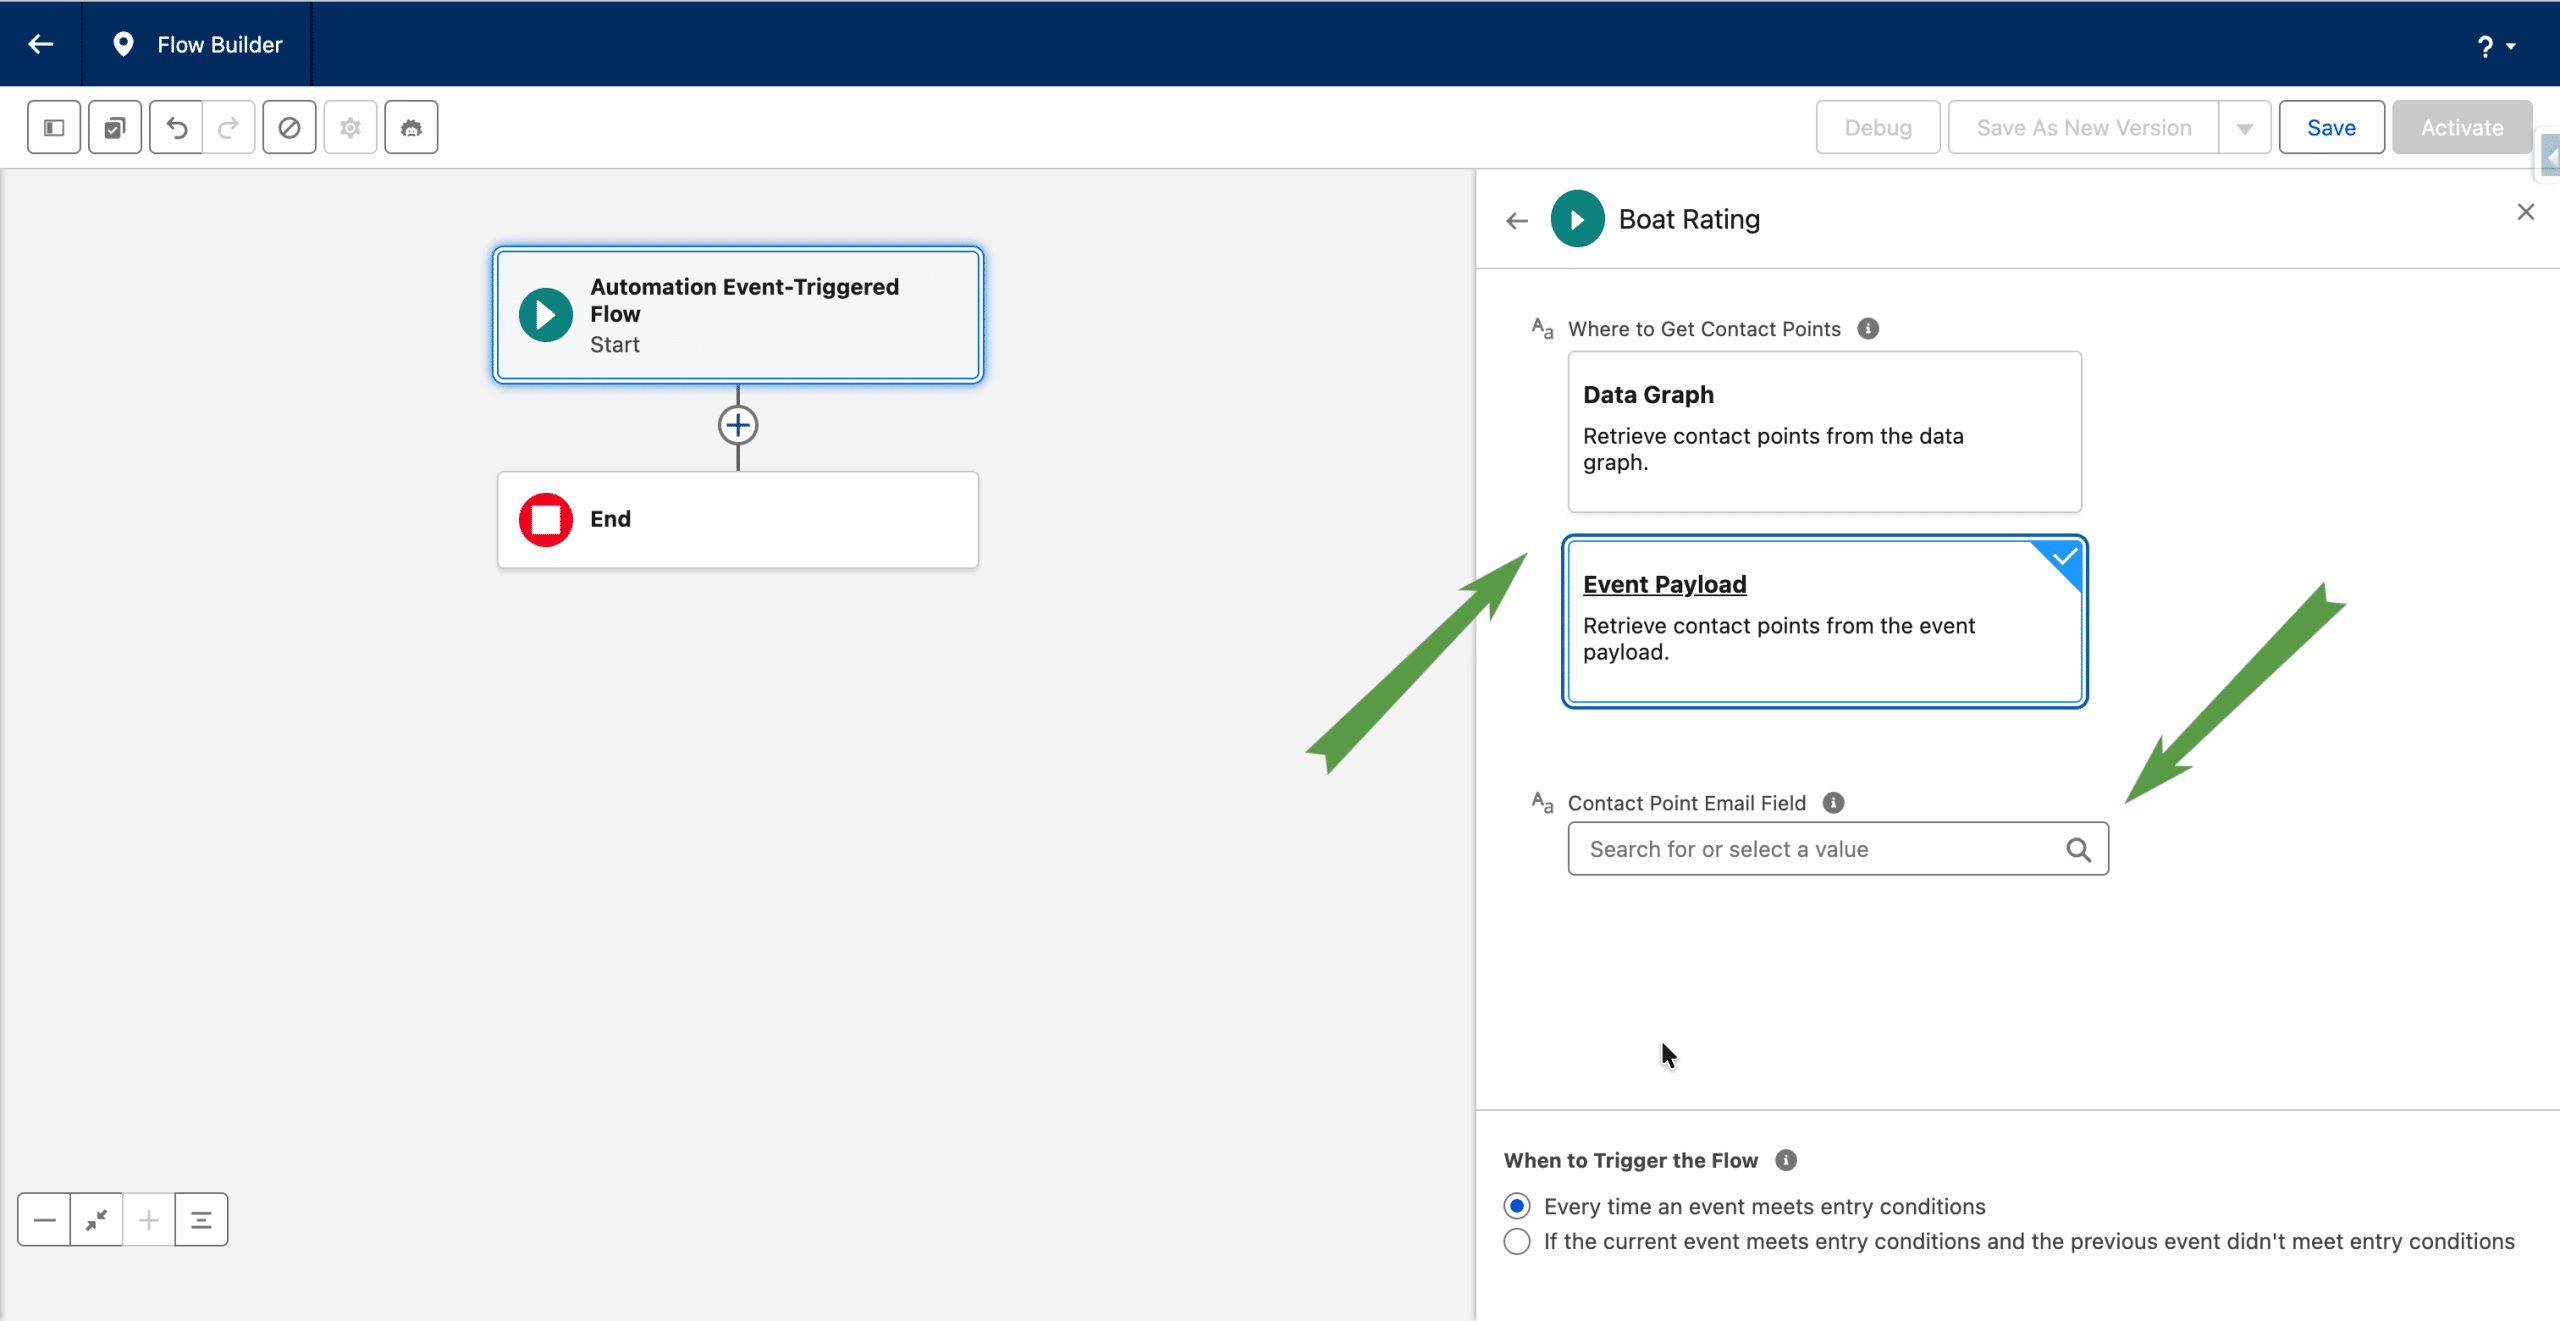
Thanks to Activation Templates, the Contact Point to use is tied to the Individual or Engagement record, without any Identity Resolution needed. The same type of feature was brought in Spring ’26 for Engagement Signals used as events in an Automation Event Triggered Flow. You can select the Email Address from a Field of the Engagement Signal DMO.