In Spring ’26 (260.10+), a long-awaited feature was introduced: Segment-Triggered Flows no longer require a segment of Unified Individuals. Segments of Individuals (or engagement data) can now trigger them as well. However, there are important differences depending on whether the flow is triggered by a segment of Unified Individuals or a segment of Individuals. The table below highlights the main distinctions.
| When a Segment Triggered Flow is triggered by a Segment of... | ||
|---|---|---|
| Unified Individuals | Individuals (new) | |
| Identity Resolution | Needed | Not Needed (only ingestion as a record in the Individual DMO) |
| Data Graph | Needed | Not Needed |
| Delay before a new profile record can be used | 24h (Identity Resolution and Data Graph needed) | 1h (Segment refreshed by the Flow) |
| Email Personalization | Data Graph | Apex Class / Content Variables |
| Activation Template | Optional | Required |
| Segment Creation | Visual Builder, Quick Filters and Einstein Segment Builder | Visual Builder |
| Segment Builder | Level 1: Unified Individual Attributes and DMOs related to both Unified Individual and Individual DMOs | Level 1: Individual Attributes and DMOs related to the Individual DMO |
| Deduplication | With an Activation Template, only one Email per Unified Individual is used | One Email per Individual is used, but one email address can be tied to multiple Individuals |
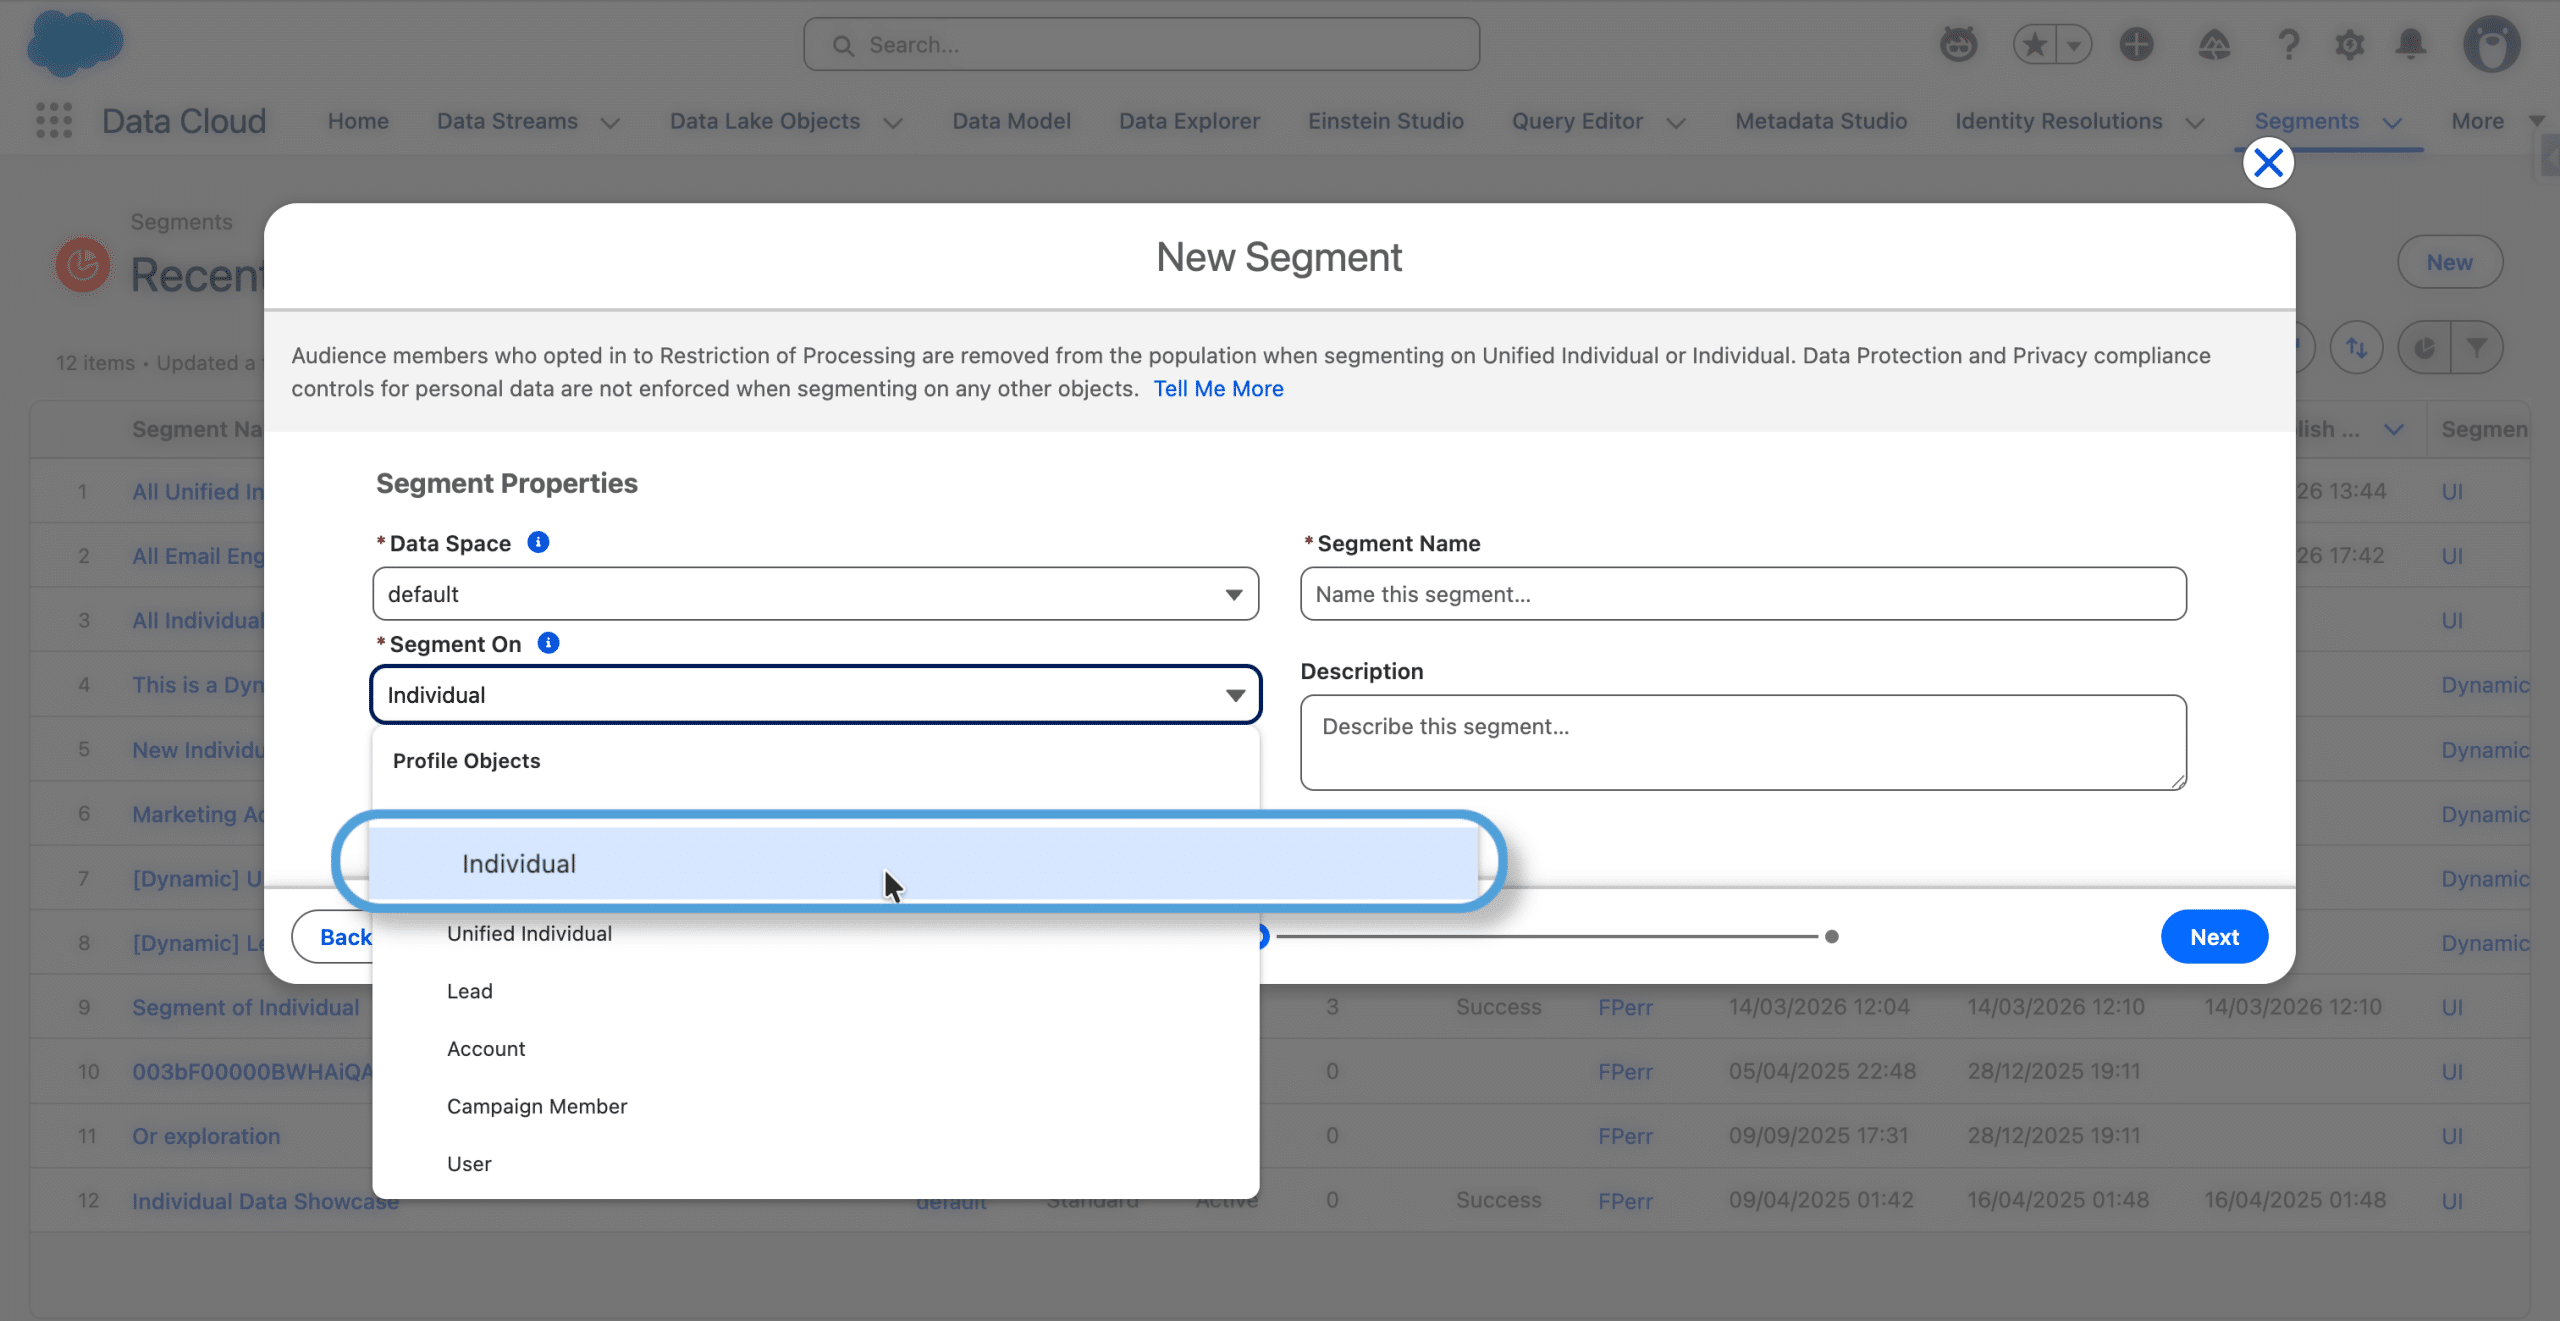
Creating a Segment of Individuals
The process is similar to the one used to create a Segment of Unified Individuals. You select the Individual DMO to Segment On (or an Engagement Data DMO, like the Email or Website Engagement DMO. For the rest of this article, we’ll focus on Individuals).
Then, the Segment Visual Builder gives us access, in the left sidebar, to the Attributes of the Individual DMO on top and to the DMOs related to the Individual DMO. We can then drag the fields and set criteria on the canvas, or drill down the Data Model. The only difference with creating a Segment of Unified Individuals (see here for a step by step video and main gotchas) is that the starting point in the builder is not the same (different Attributes and related DMOs).
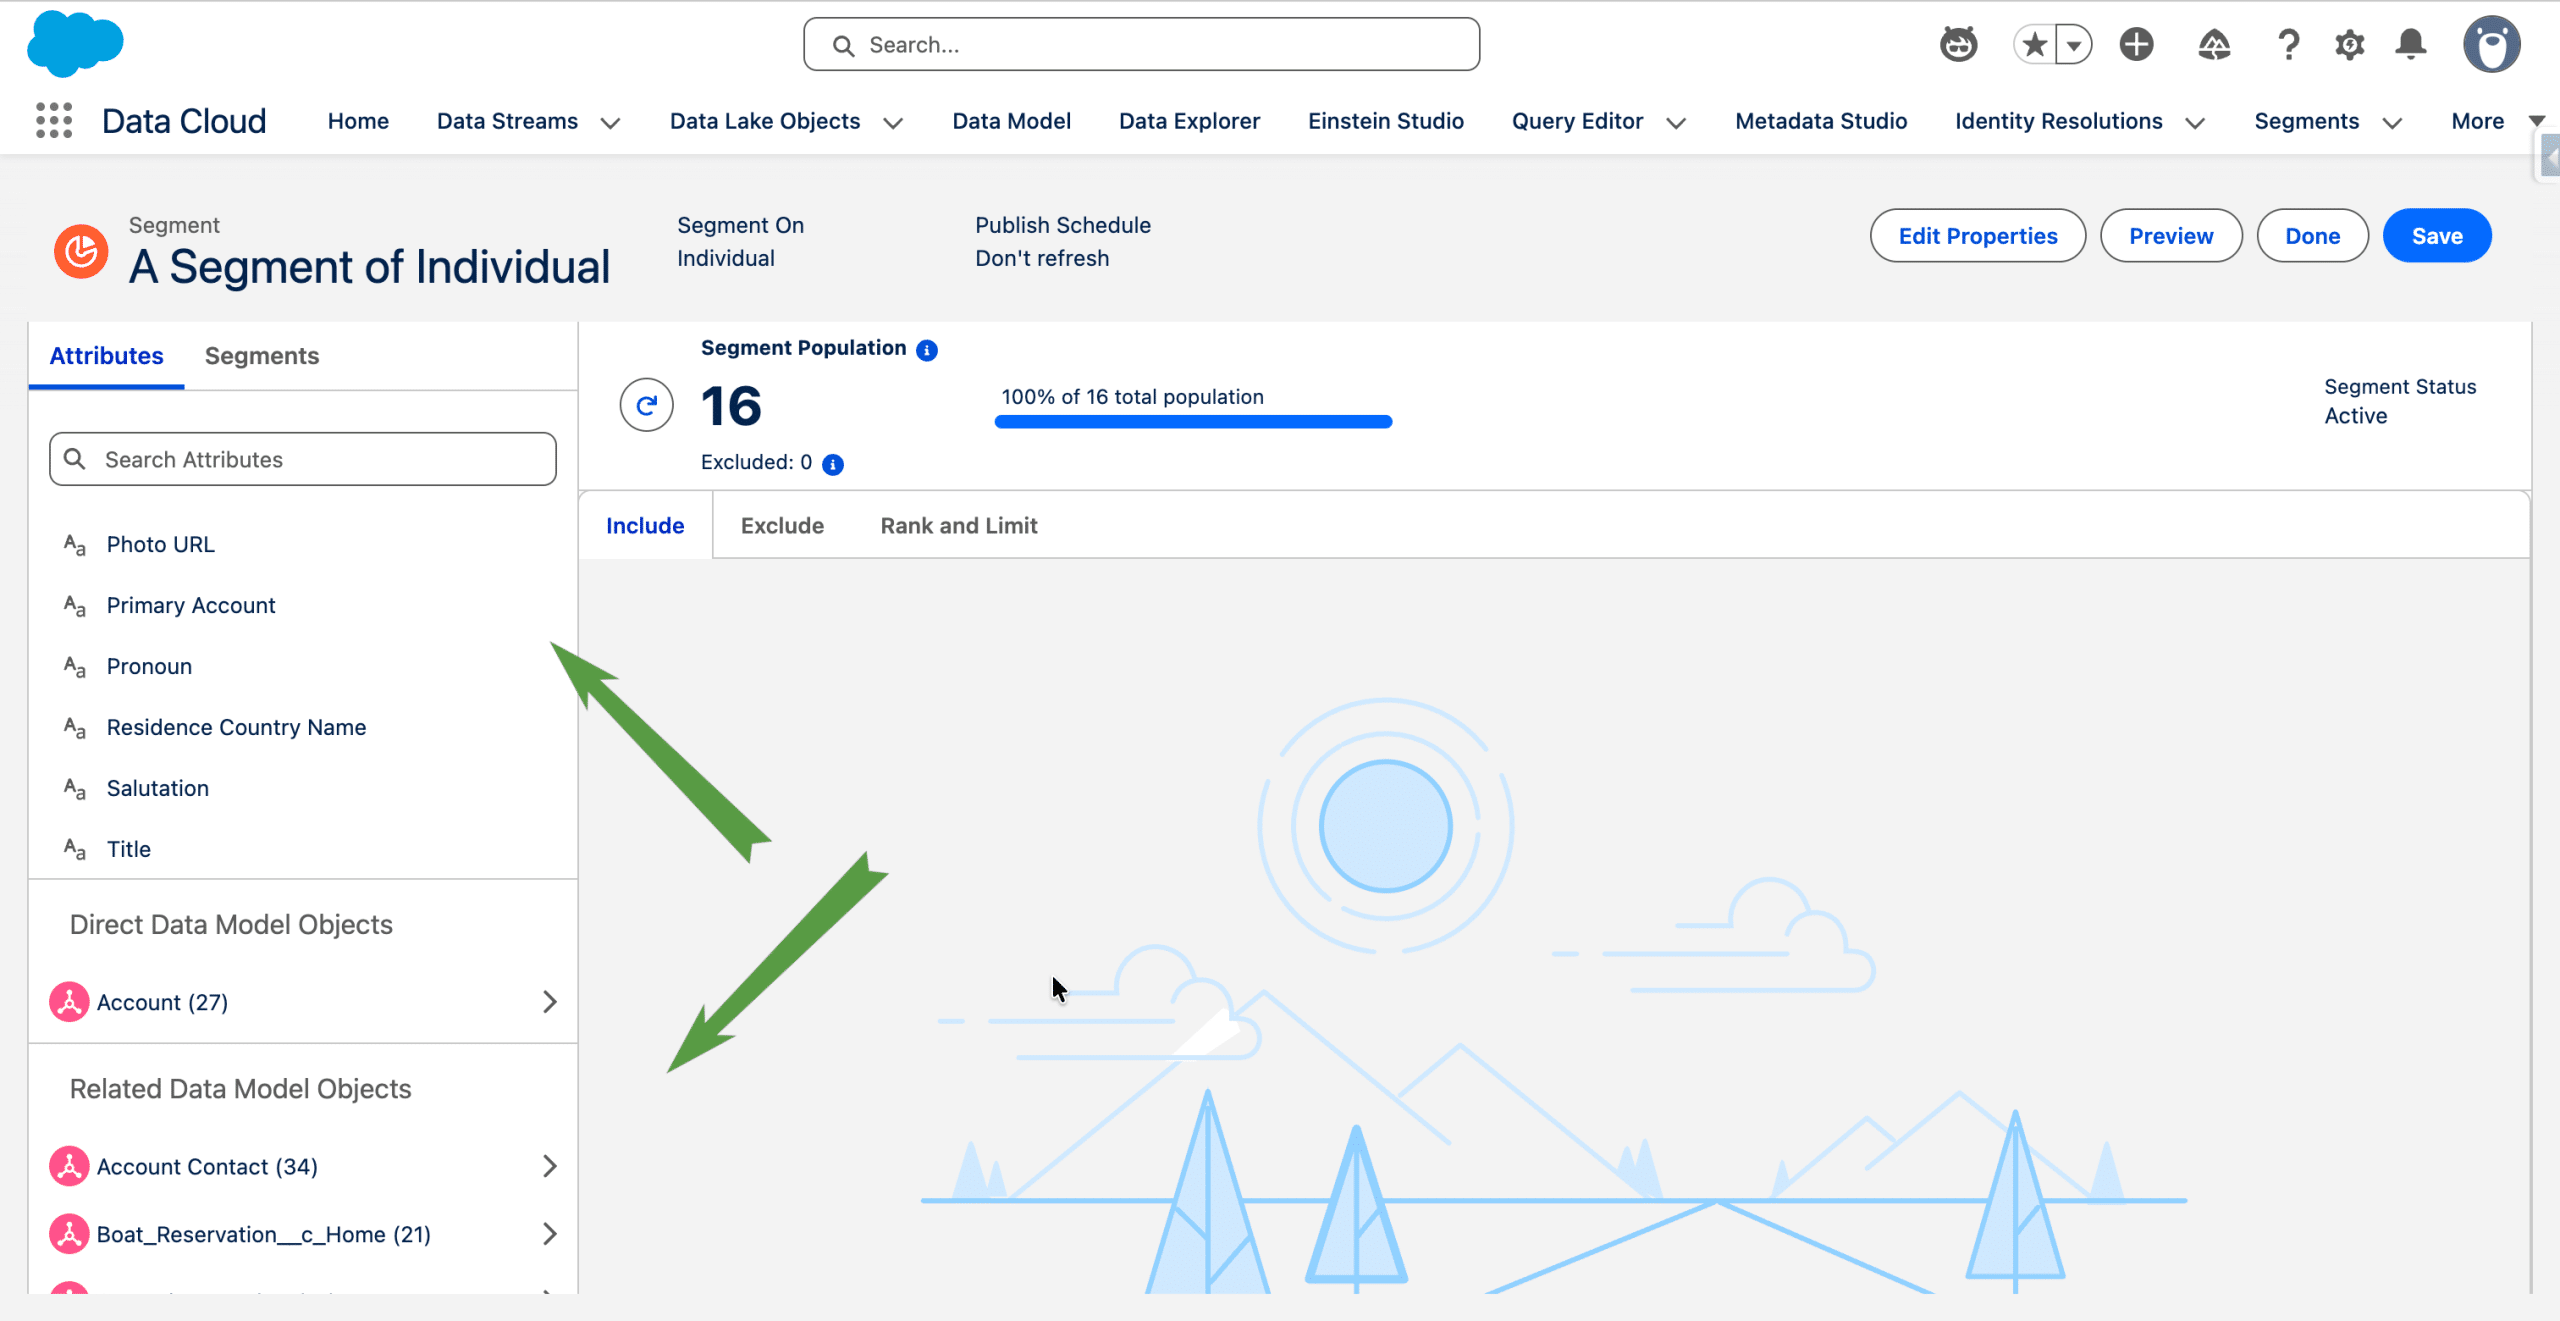
Once the Segment is created, and published, it can be used in a Segment Triggered Flow, provided we have configured an Activation Template.
Creating a simple Activation Template
Activation Templates are Data 360 Activations, where you specify how a Contact Point is related to a given DMO, and which email address you want to use. If you used the standard Sales bundle from Marketing Cloud Next’s Assisted Setup to install your Data Streams and Data Model, by default, a new Prospect, Lead or Contact creates one record in the Individual DMO and one in the Contact Point Email DMO.
We’ll create a simple Activation Template to handle this situation, but if you use multiple email addresses for a given Individual you may want to create a more elaborated one. In that case see our Deep Dive article on Activation Templates.
In Data 360, Activations > +New, and Select Template (Create Contact Point Template for later use).
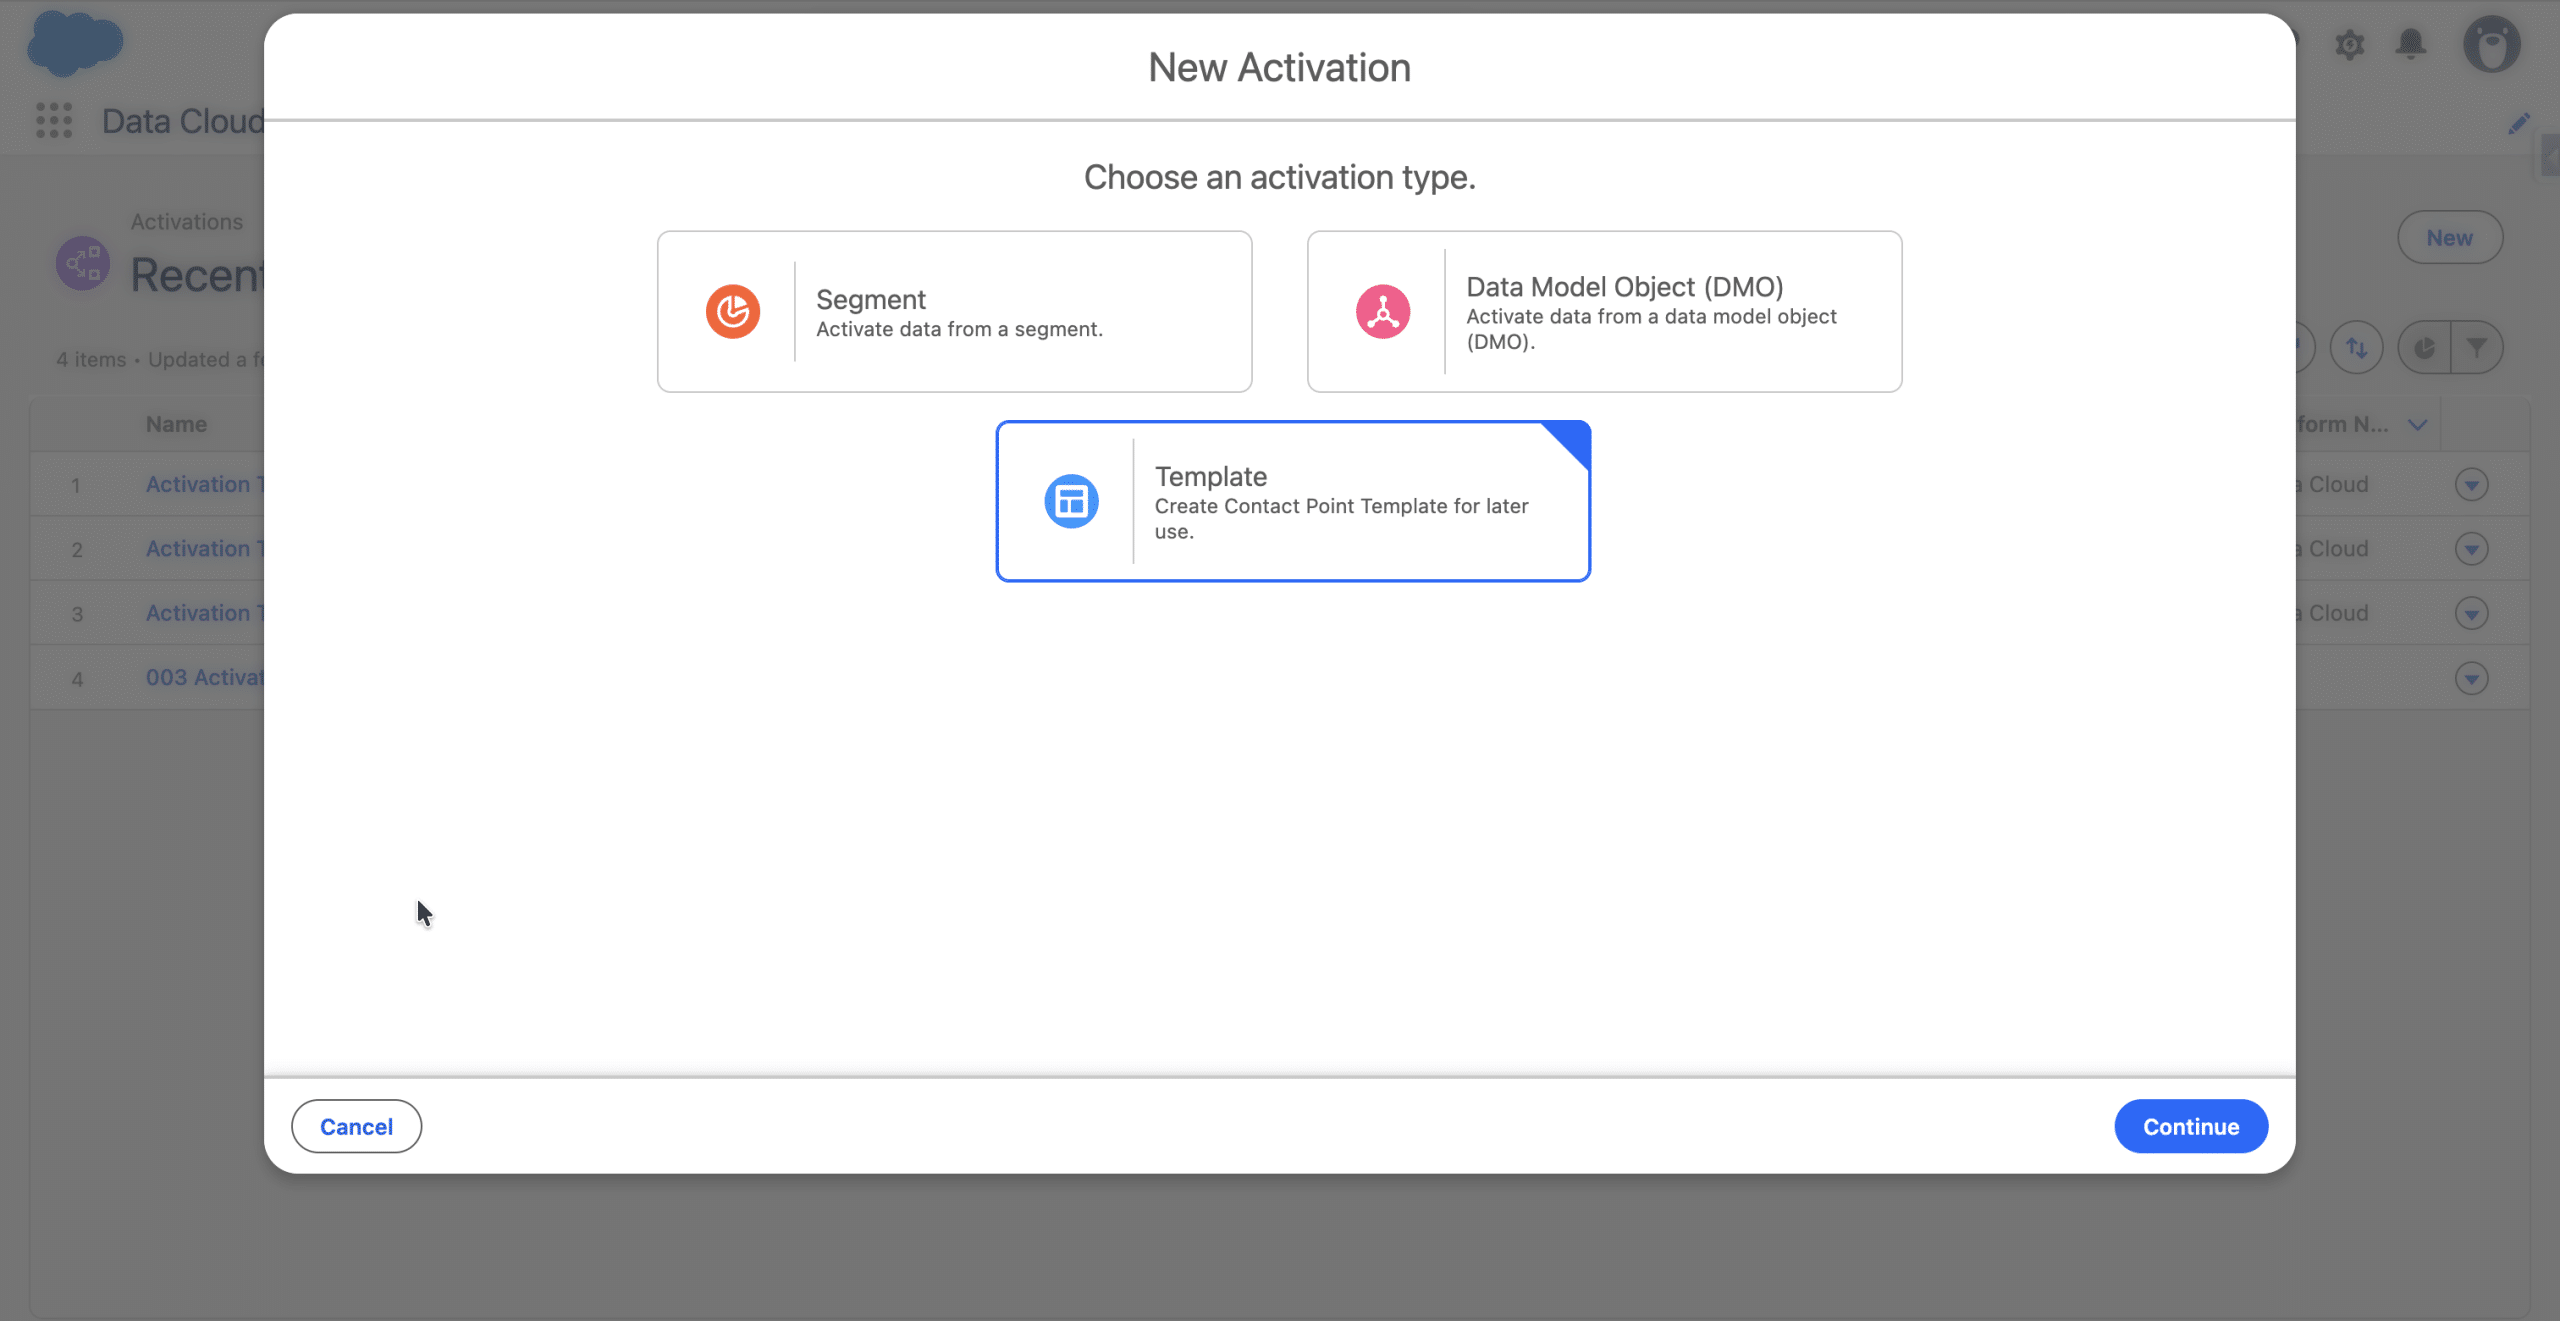
+Continue and Select “Individual” (or your Engagement DMO) for Data Model Object and “Data Cloud” for the Platform. +Continue. Then +Select, to add a new email address in the Activation.
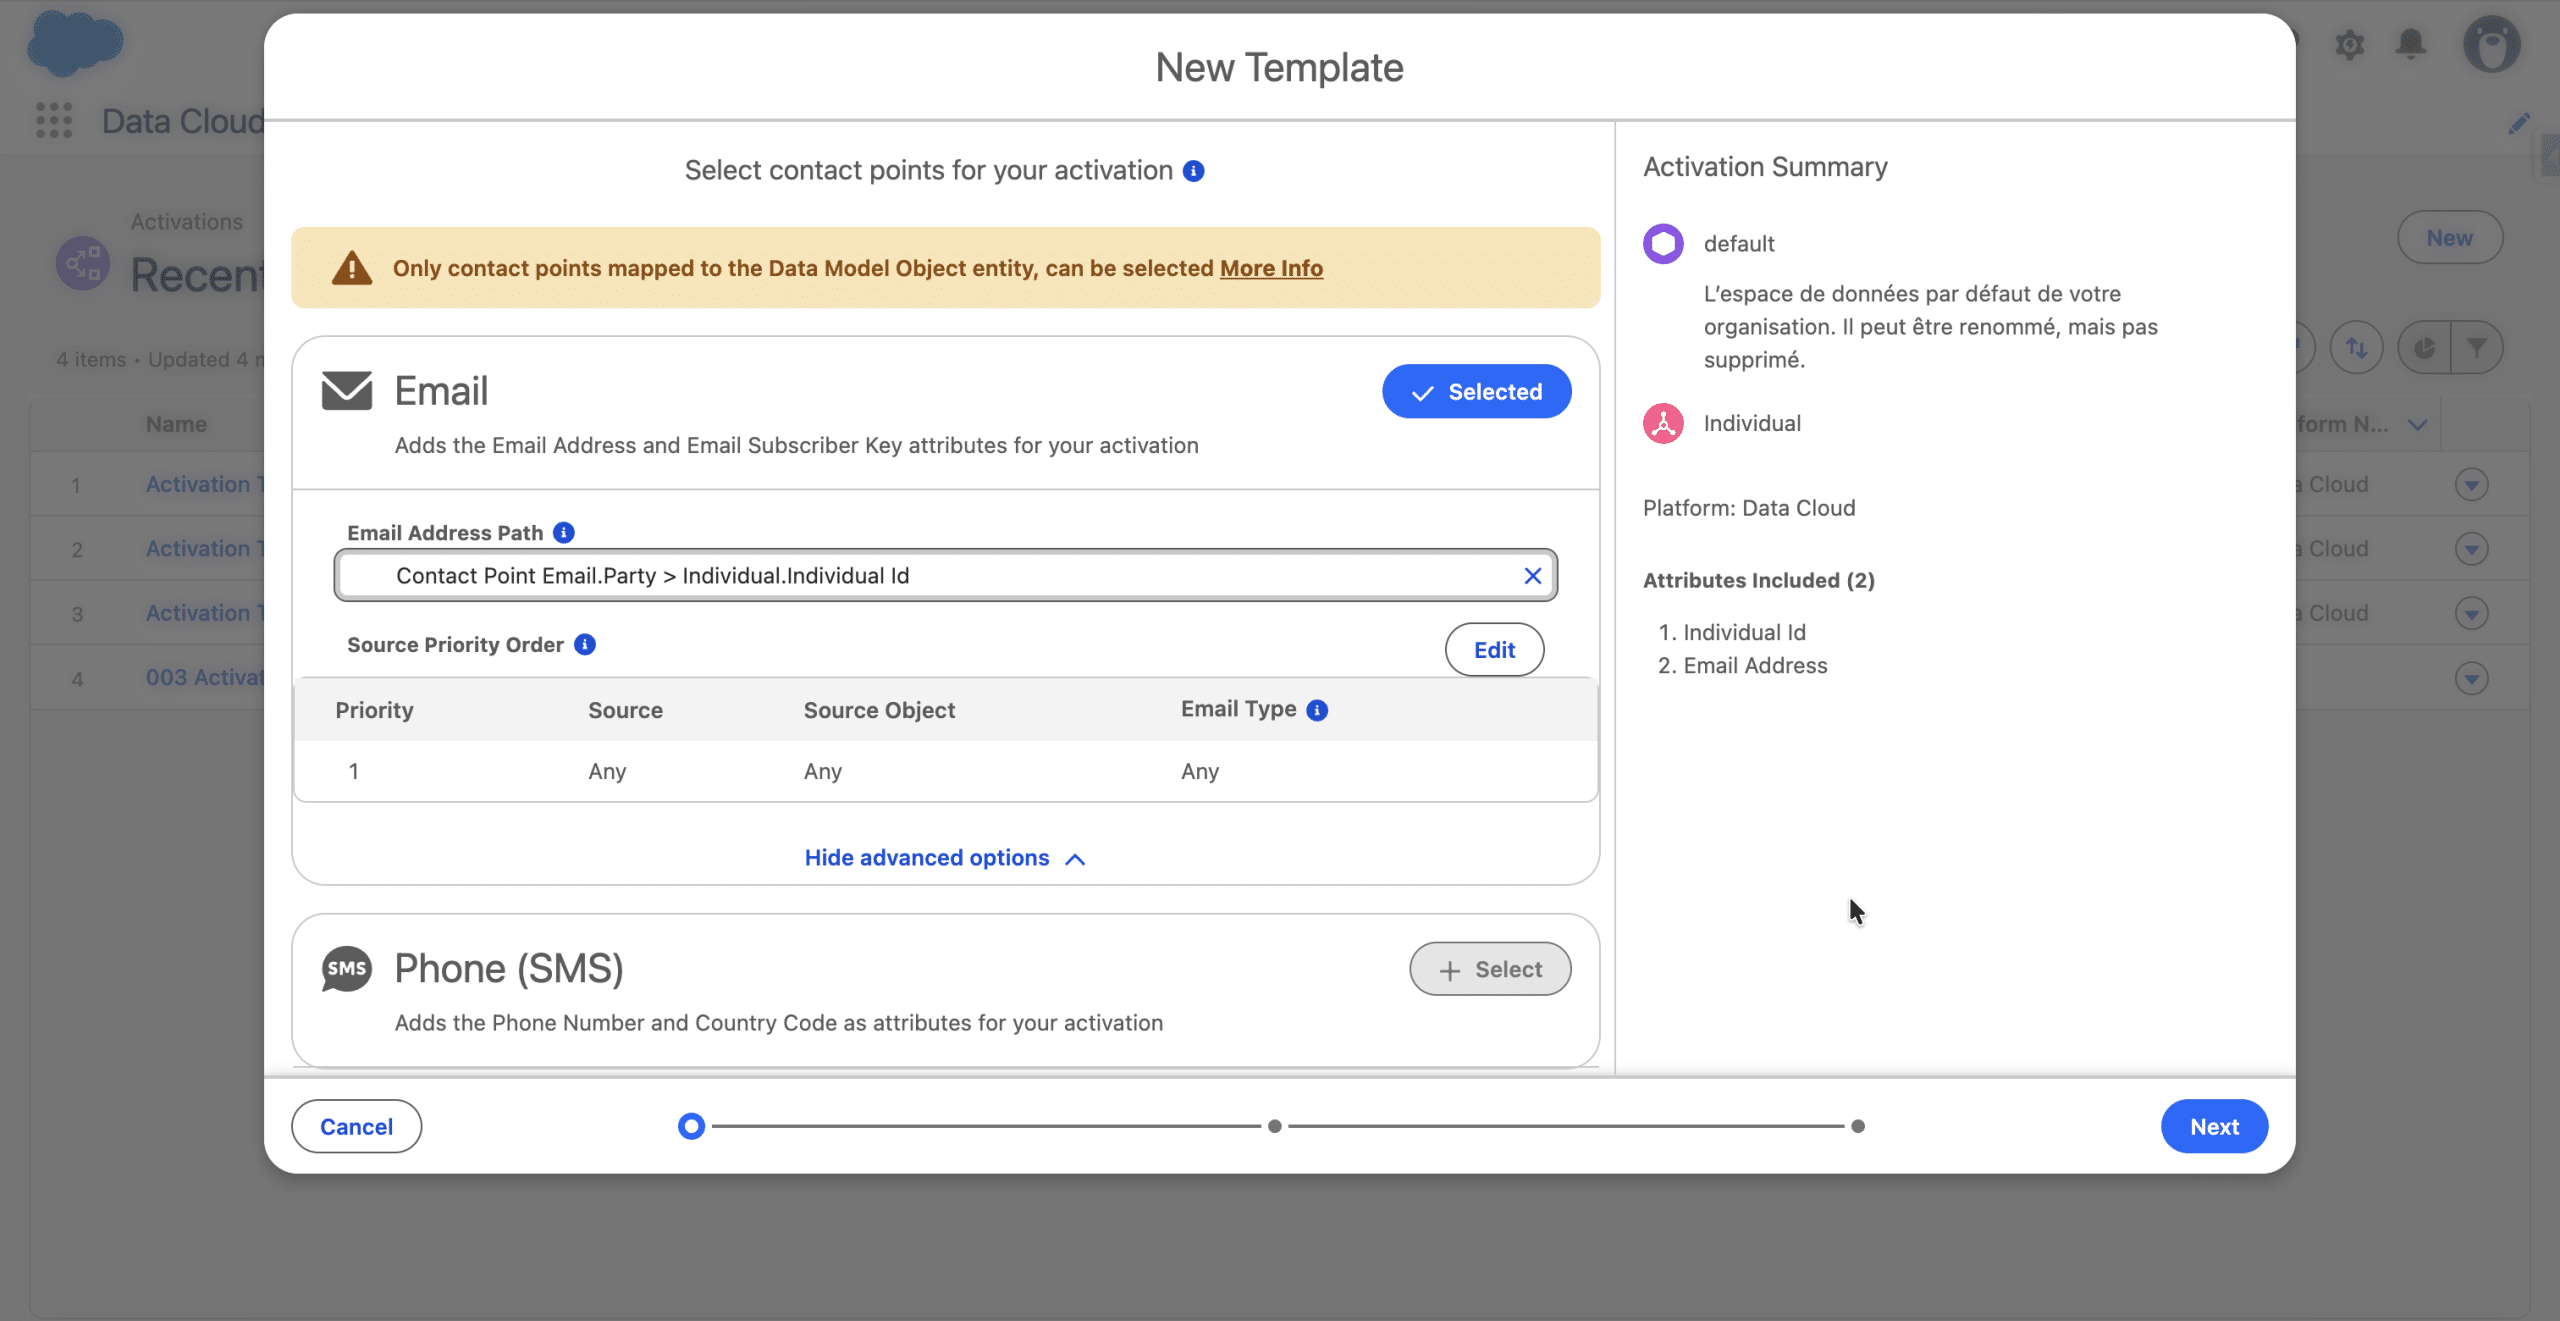
We keep the default Email Address path and we don’t edit the Priority Source (see our deep article if needed), basically a catch-all rule. +Next. We won’t add a Filter. +Next. Finally we give our Activation Template a name. +Save.
We can use this simple Activation Template any time you need in a Segment Triggered Flow, you don’t have to recreate one.
Segment Triggered Flow triggered by a Segment of individuals
Setting up the Flow Start
In Flows > +New and select Segment Triggered Flow for the Flow type. We don’t have to select a Data Graph. +Next. The Start options are the same as the ones we’re already using, for a one-time Flow or a recurring Flow. In this example we use “Run Once” and “Start Immediately after Activation”. +Select Segment.
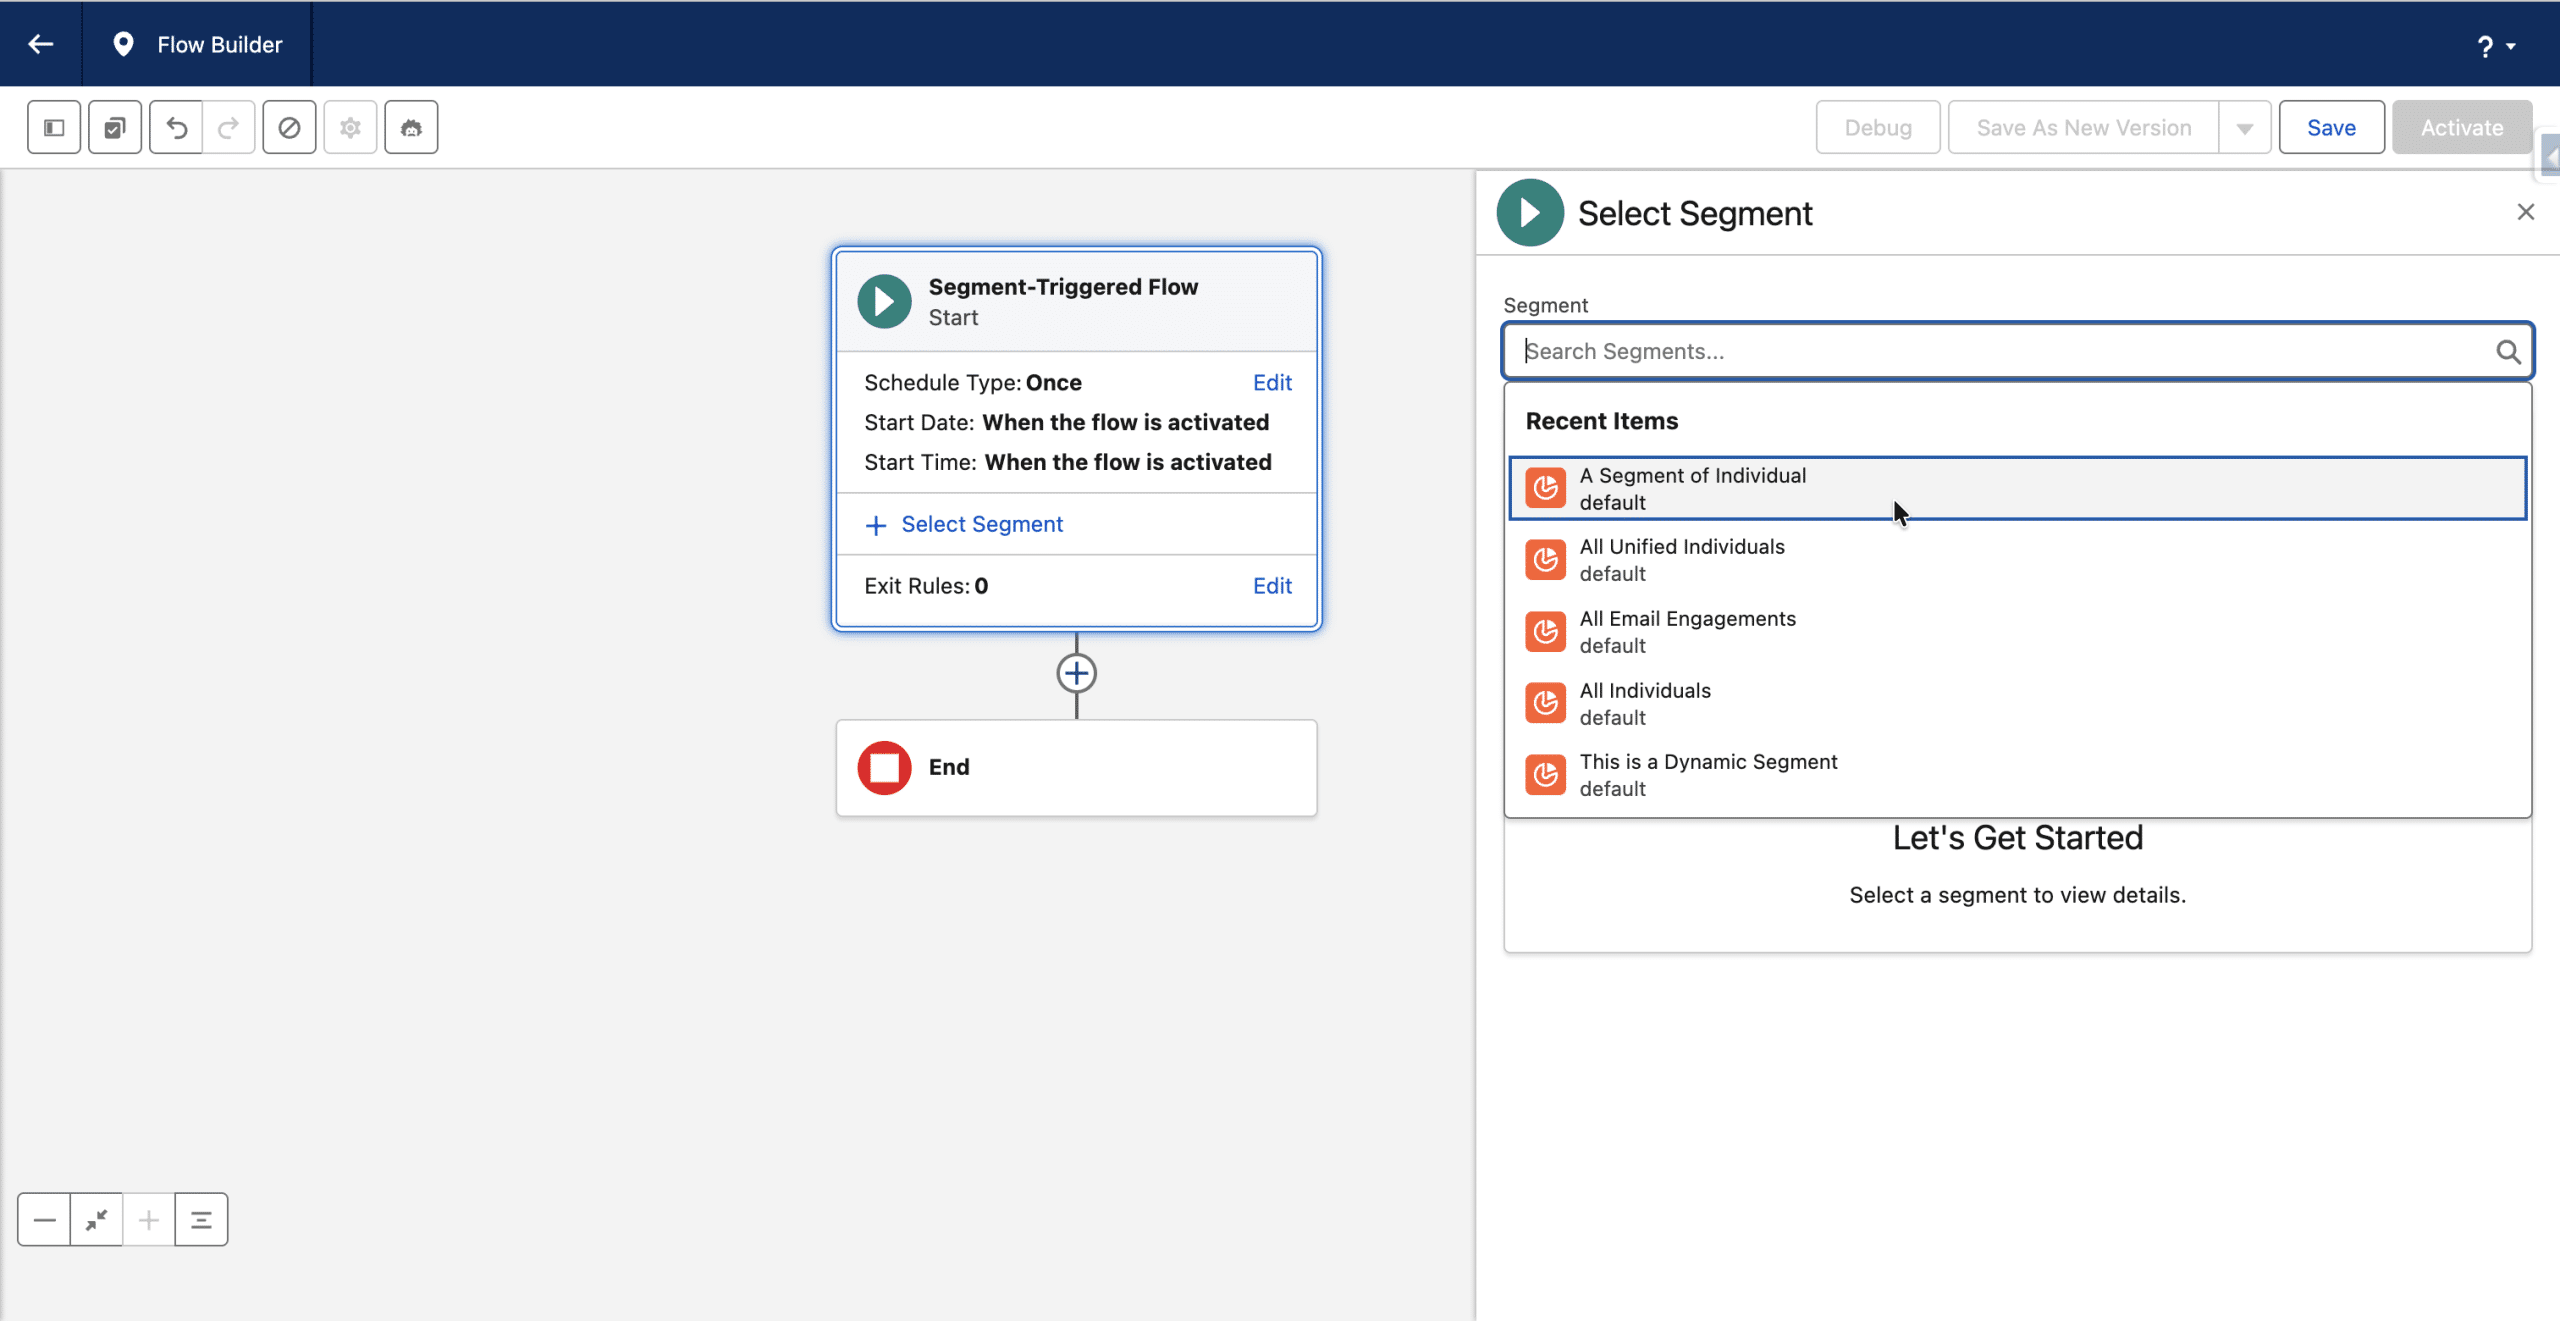
We select the Segment of Individuals we created previously, and the simple Activation Template we just created.
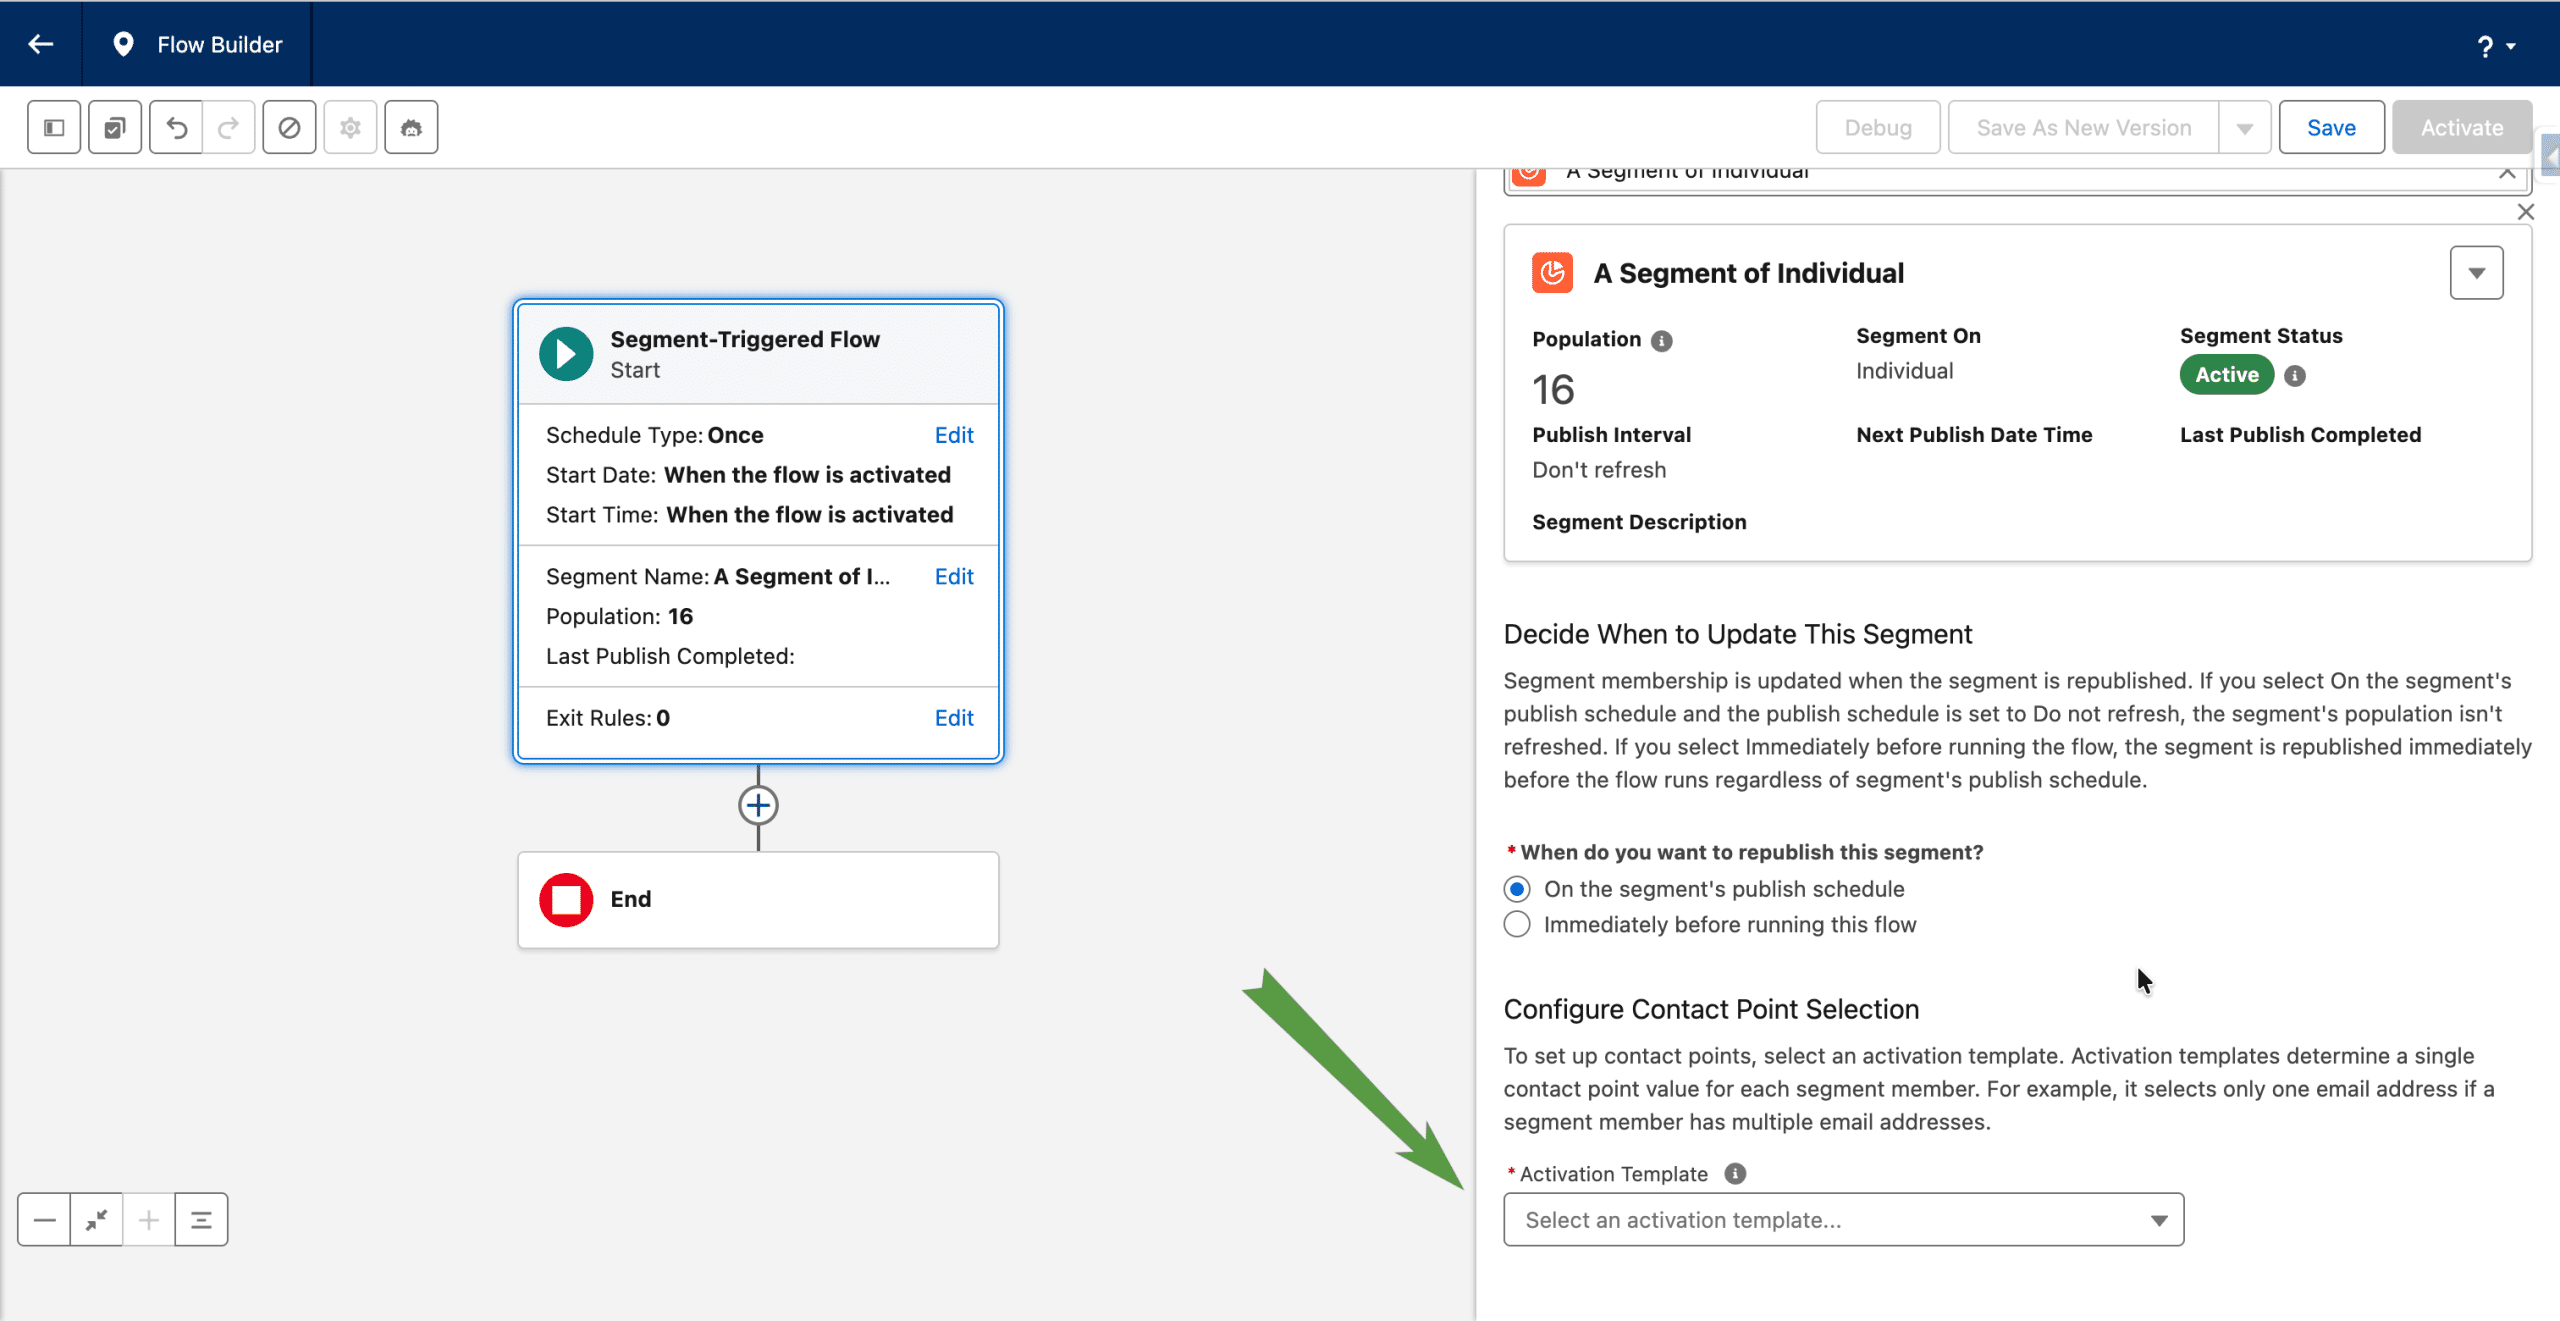
You can activate the refresh of the Segment by the Flow, for a recurring Flow. In that case, the Segment can be refreshed every hour. The Segment Triggered Flow is now ready to receive activities.
Note, you may warnings when saving the Flow (“The activation template uses source priority rules, but the ssot__ContactPointEmail__dlm object in the data graph is missing the ssot__DataSourceId__c field. You can activate the flow, but source priority ranking is disabled. All contact points are treated equally.” and/or “The Email channel in the specified activation template doesn’t have a direct path from the Individual to the contact point data model object (DMO). Data graphs use a direct path from the Individual to the contact point. If the flow resumes from a waiting state and the activation template uses an indirect path, the contact points we retrieve may be inconsistent between flow runs. Update the activation template so that it uses a path that goes from the Individual directly to the contact point data model object through the Unified Link Individual DMO.“). You can ignore them, as they disappear once the Flow is activated, and the criteria they refer to are met with our default setup using a simple Activation Template.
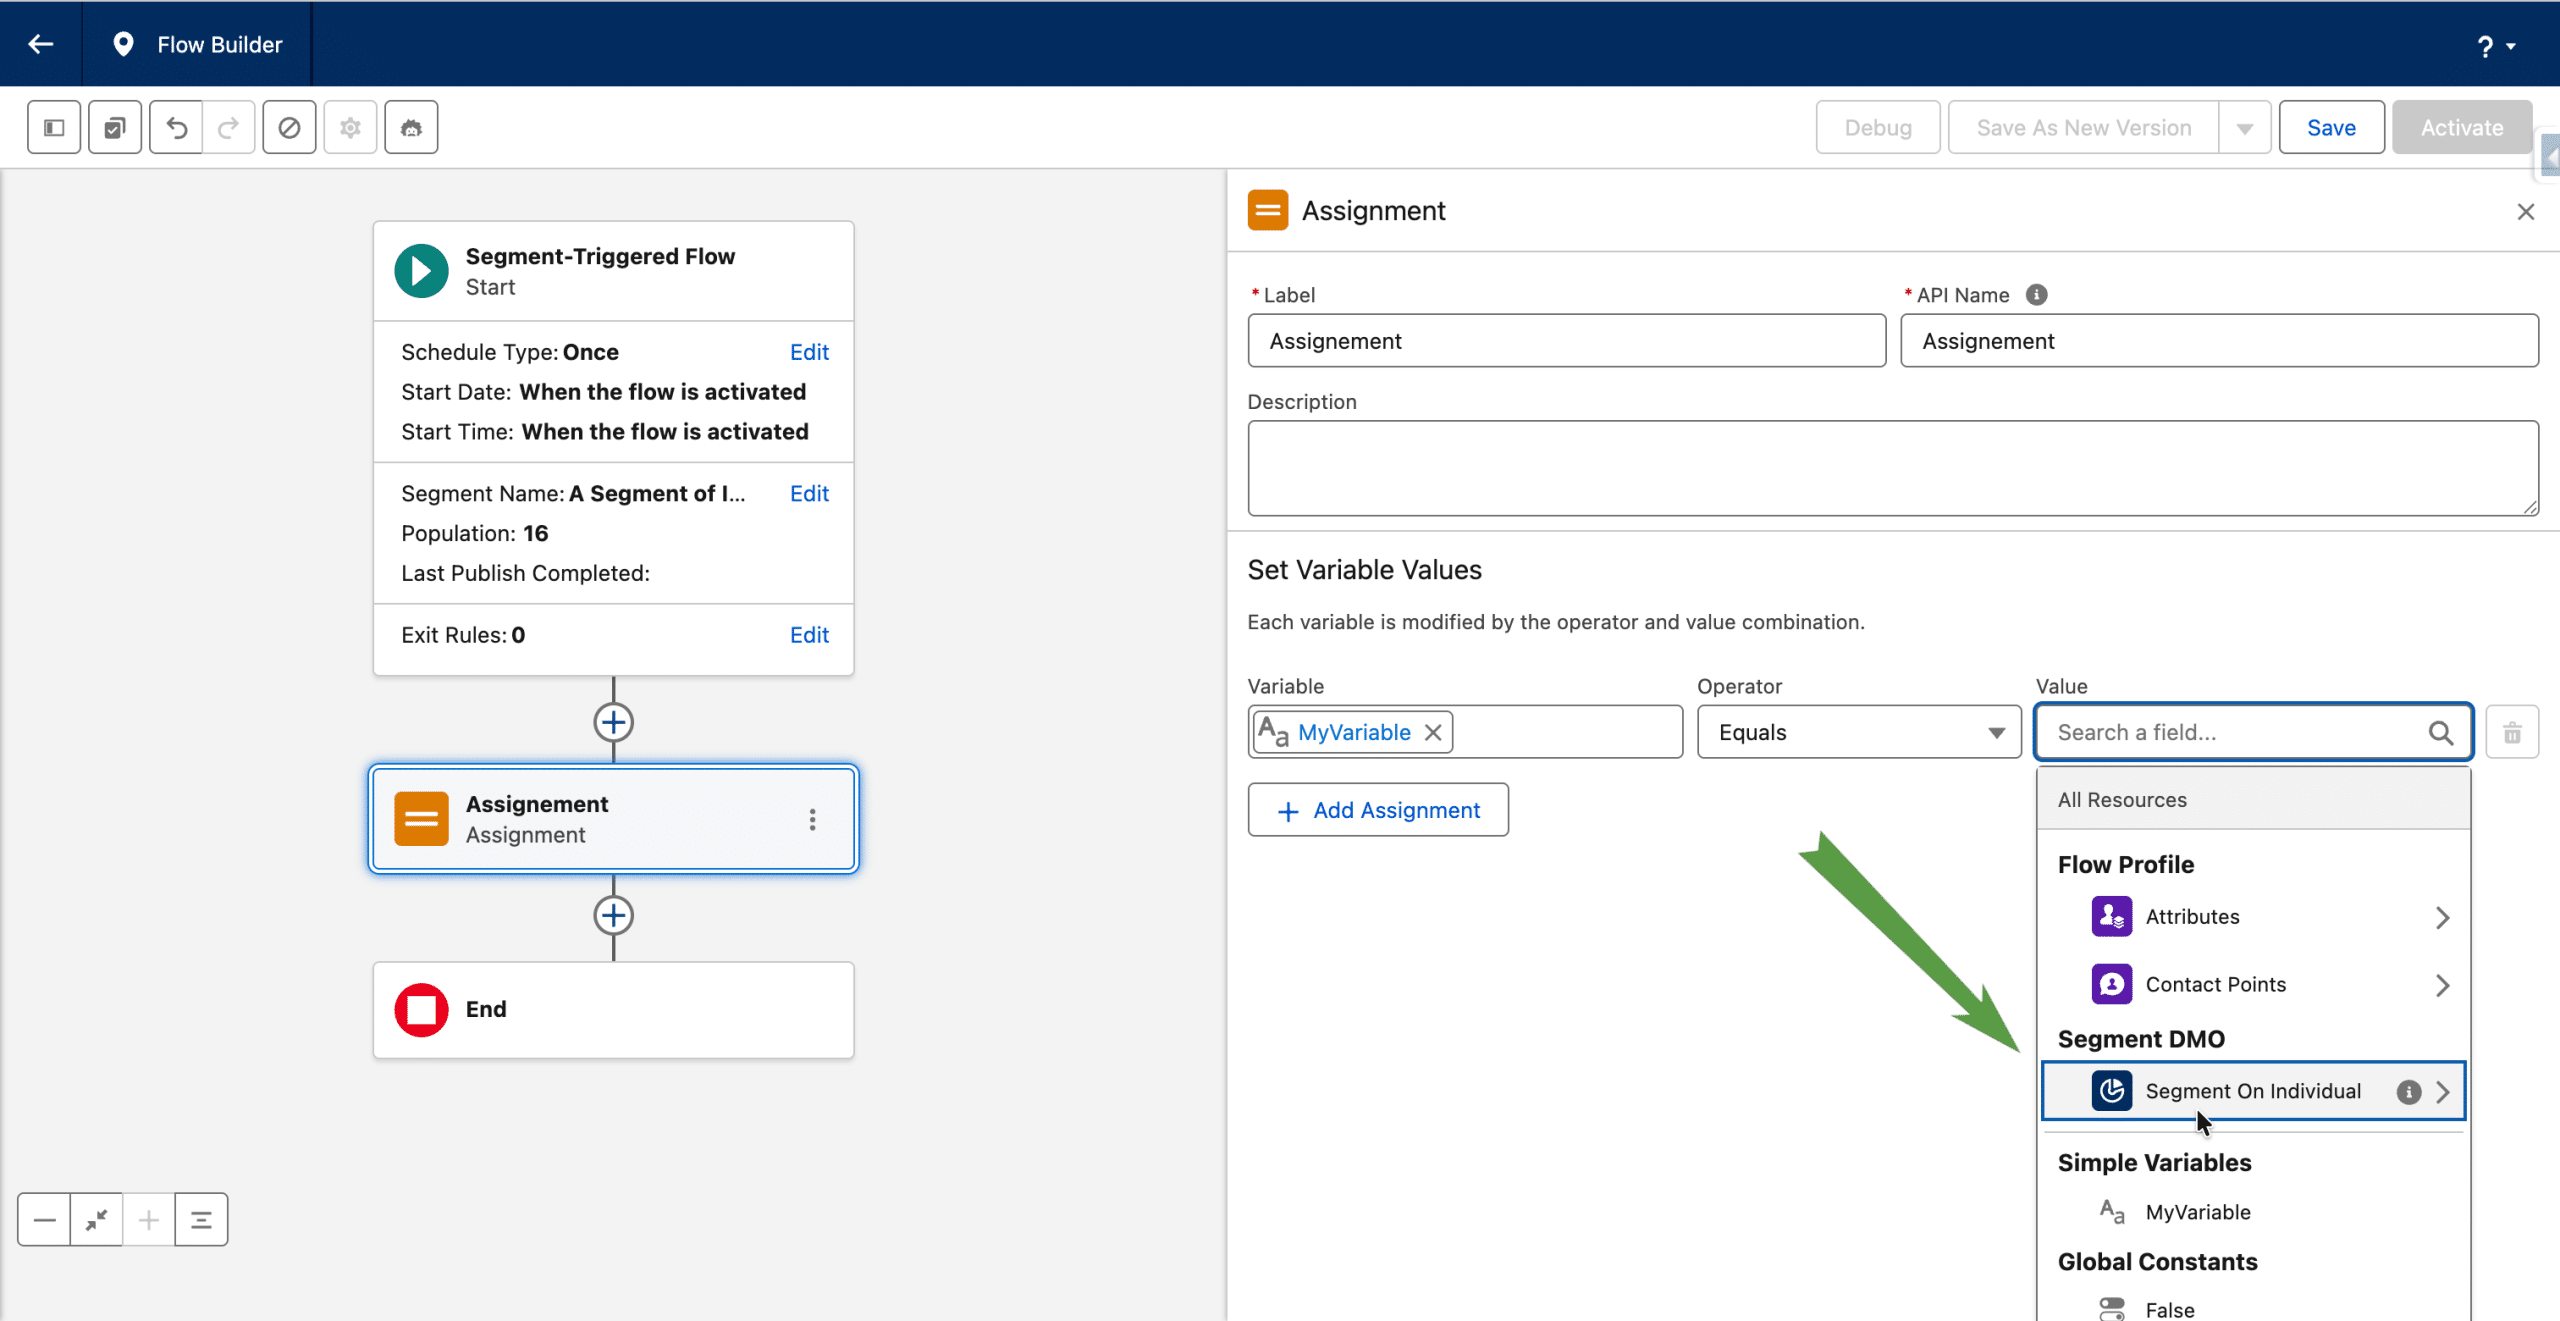
Accessing the current Individual
If you need to access information from the Individual (or Engagement data) in the current Flow interview, for example for an Assignment, the whole Individual DMO is available in the Segment DMO section.
Personalizing an Email
If you use a Send Email Message from the Flow, only one Email Address will receive it since we had to use an Activation Template. If you want this email to be personalized, as there is no Data Graph, you use an Apex Class that you instantiate in the Flow as Variable, assign it in the Flow using the data from the current Individual (cf. previous section). Finally, in the Email, you add your Apex Class as a Data Source. This process is identical as the one we used to personalize an email sent from an Automation Event Triggered Flow, using the Prospect, Lead, Contact or Related Record Change event.
[Edit 08/07/2026] In Summer ’26, Content Variables were introduced, and you no longer need to create an Apex Class. In the Email Builder, under Data Sources, you’ll see the option to Add a Content Variable (you can add mulitple if you like). Then, they will be availble as Merge Fields. You assign ther value directly from the Flow, in the settings of the Send Email Message (in the Personalize Message section)