The Inbound Generation Agent can be deployed on your website and can answer your Visitor’s questions, ask for their infos and set up a meeting with your Team. In a Converstational era, the line between Marketing and Sales is becoming incredibly thin (Sales and Marketing aren’t just aligning anymore: they’re merging into a single, seamless engine).
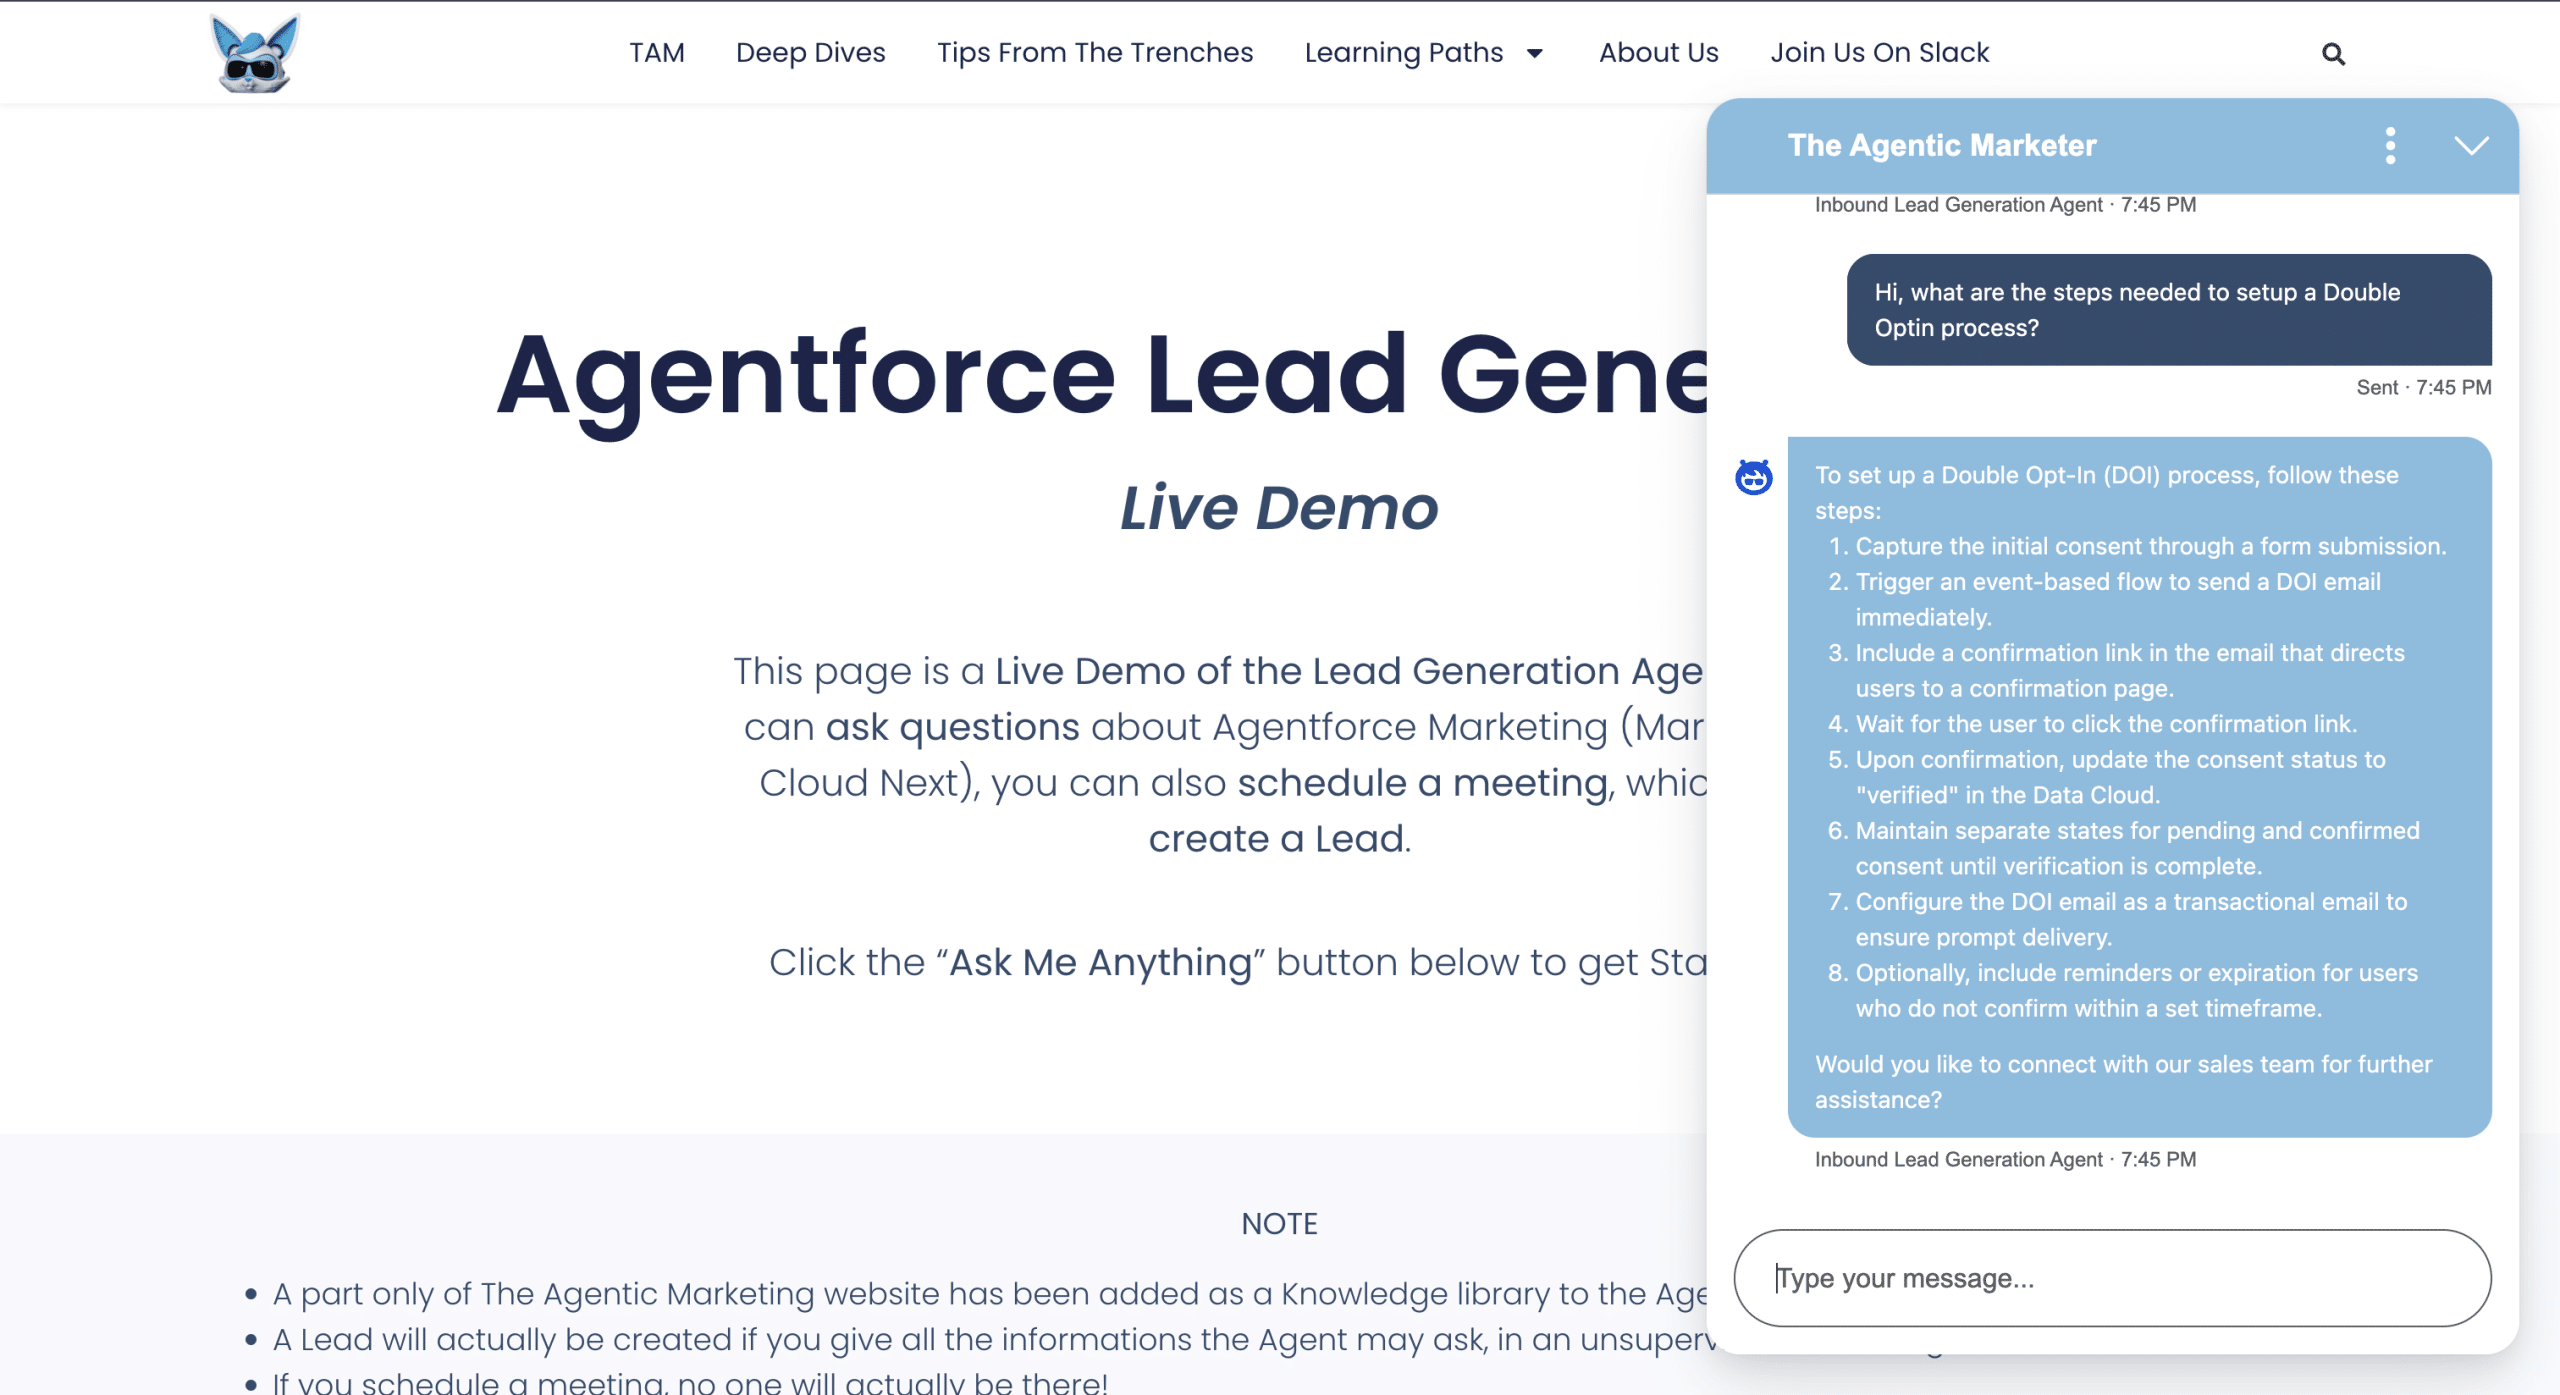
This article is a step-by-step guide to setup the Agent and deploy it on your website.
What is Agentforce Inbound Lead Generation?
It is a special type of Service Agent, with pre-configured Topics and Actions and a setup wizard.

Each Topic has its set of predefined Actions which the Agent can orchestrate:
- Inbound Sales Record Creation
- Get Fields to Create Sales Record
- Create Sales Record
- Product Inquiries and Qualification
- Answer Questions with Knowledge
- Prospect Meeting Scheduling
- Return Calendar Link
The Agent rationale is guided by its intructions, which are set via a wizard, that we’ll trigger soon. We can summarise its main features:
- Provide answers to questions, using the Knowledge base.
- Often propose to schedule a meeting
- Create Leads or Contacts
- Handle the meeting invite thanks to a connection to an Email/Calendar account (Salesforce Inbox).
The Messaging logic (Routing, Deployment, MIAW, Omni-Channel) relies on Agentforce Service features. This Agent a very good starting point to add or change default Topics or Actions.
Do you want to see a Lead Generation (and Lead Nurturing) Agent in motion?
Guided Setup to install and configure Agentforce Inbound Lead Generation
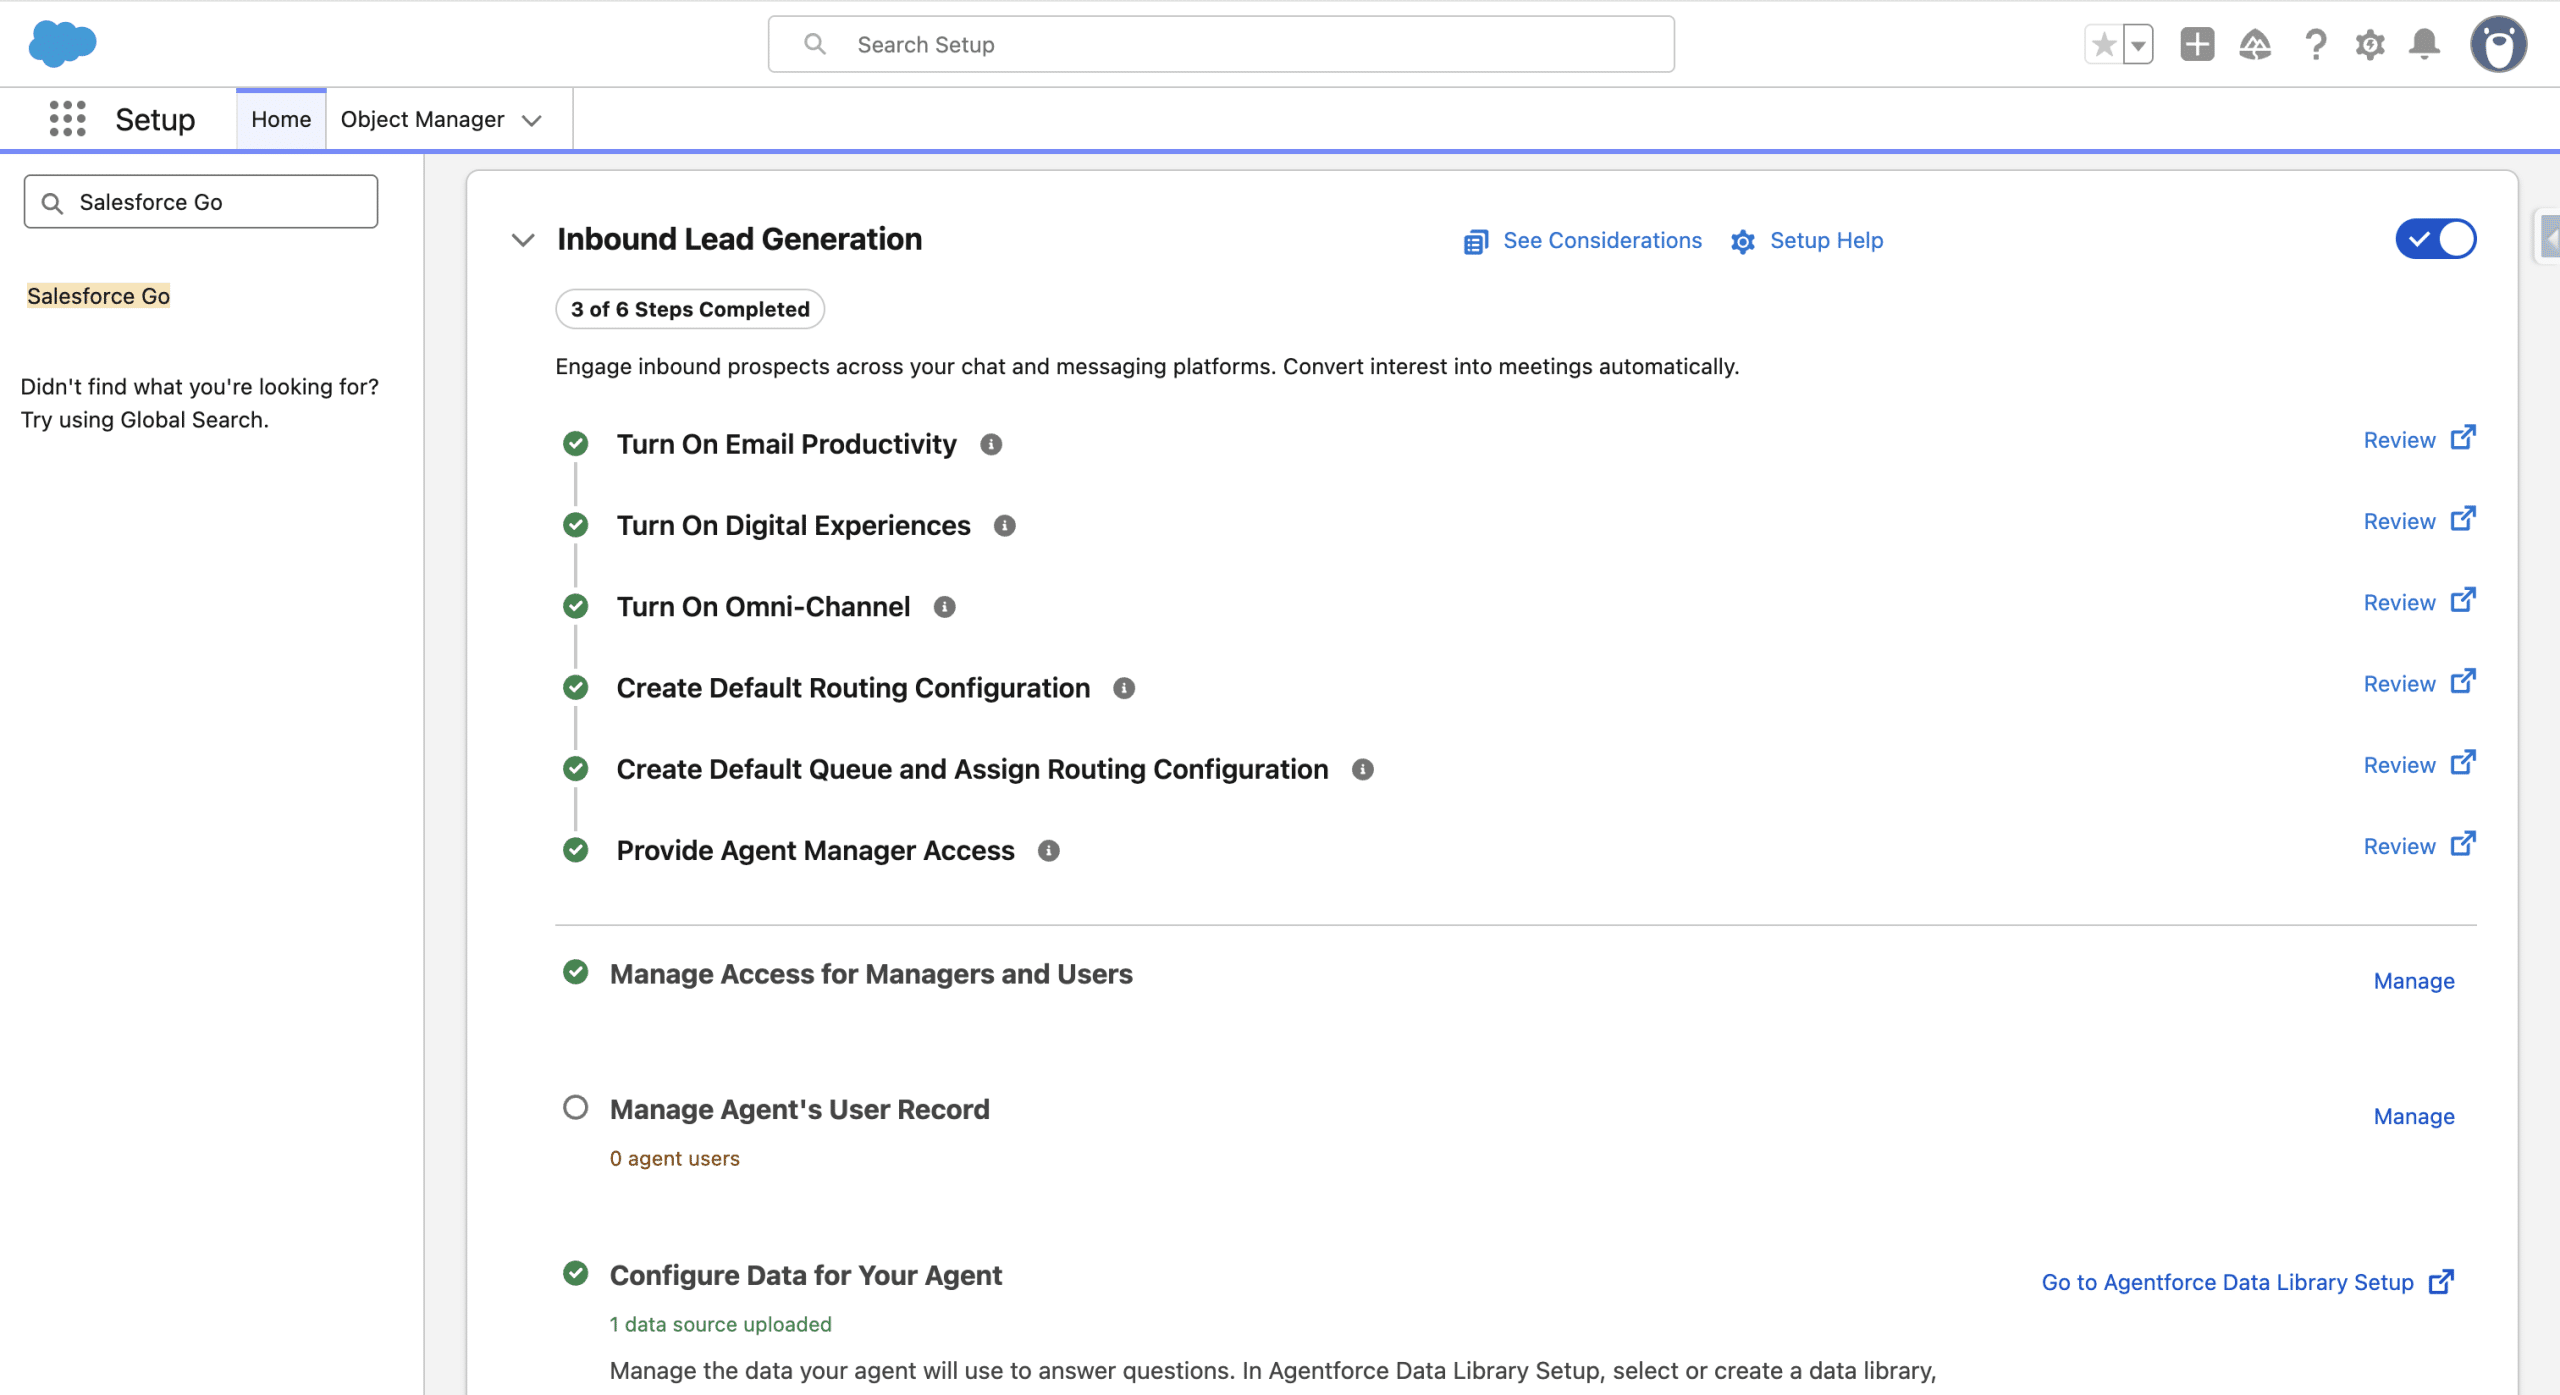
1. Activate Inbound Lead Generation
In Setup, search for Agentforce for Sales and go down to Inbound Lead Generation. On the top of the Page, you should see that Agentforce is activated (if not follow activate it by following the instructions).

Click on the right Toggle and Confirm (read the Discaimer about AI). It takes several minutes before the toggle is actually On. Salesforce Inbox was activated if it was already during this step.
2. Create an Agent’s User
Your new Agent requires a user record to work within Salesforce. We’ll create new user, by clicking Manage, next to Manage Agent’s User Record. Then +New User, and give it a First and Last Name.
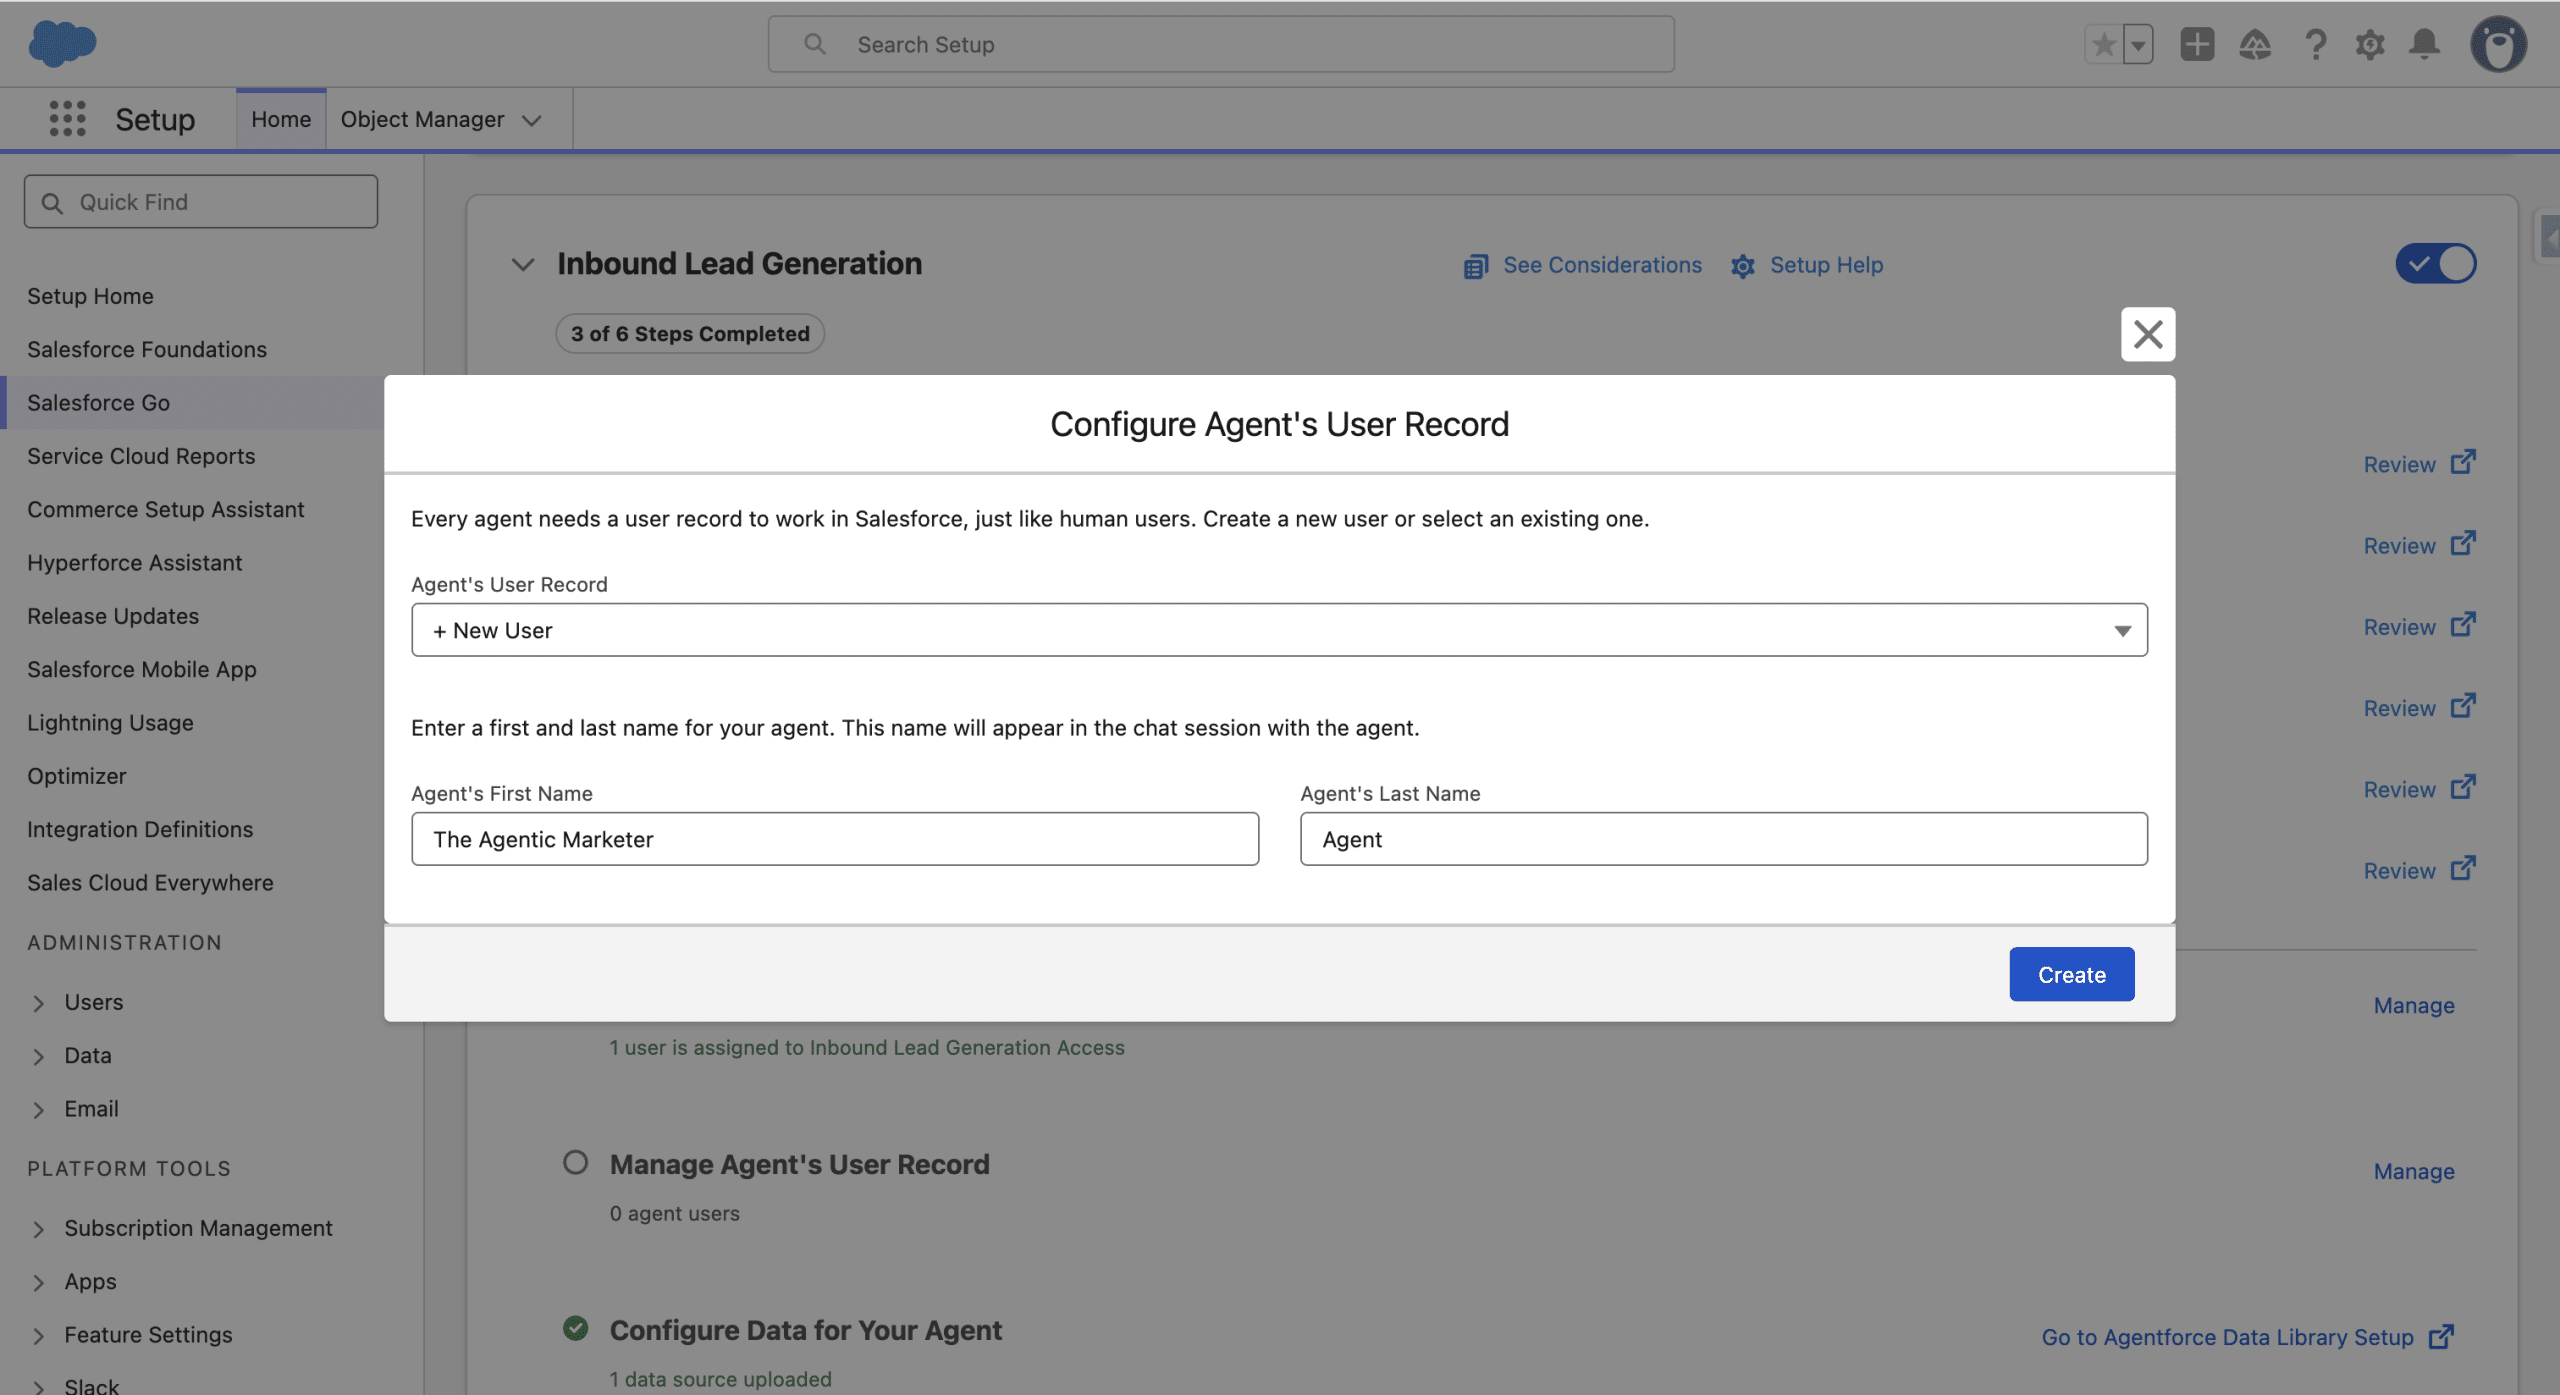
Once the user is created and the permissions are assigned, click Done. Next, we click the Go link to launch the wizard.
3. Create an Inbox User
If you don’t have an Inbox user, you’ll need to create one. Salesforce Inbox ties a Salesforce User to an external Inbox (Gmail, Office 365 or Exchange), to read and write new Emails as well as create Calendar invites on behalf of the tied user. You should see a toast stating “Salesforce Inbox is enabled.To start using it, connect your email and calendar to Salesforce.”, if not click your user avatar and search for Email and Calendar Accounts. Connect Account, then check “I’ve read and understand these terms.” and Next.
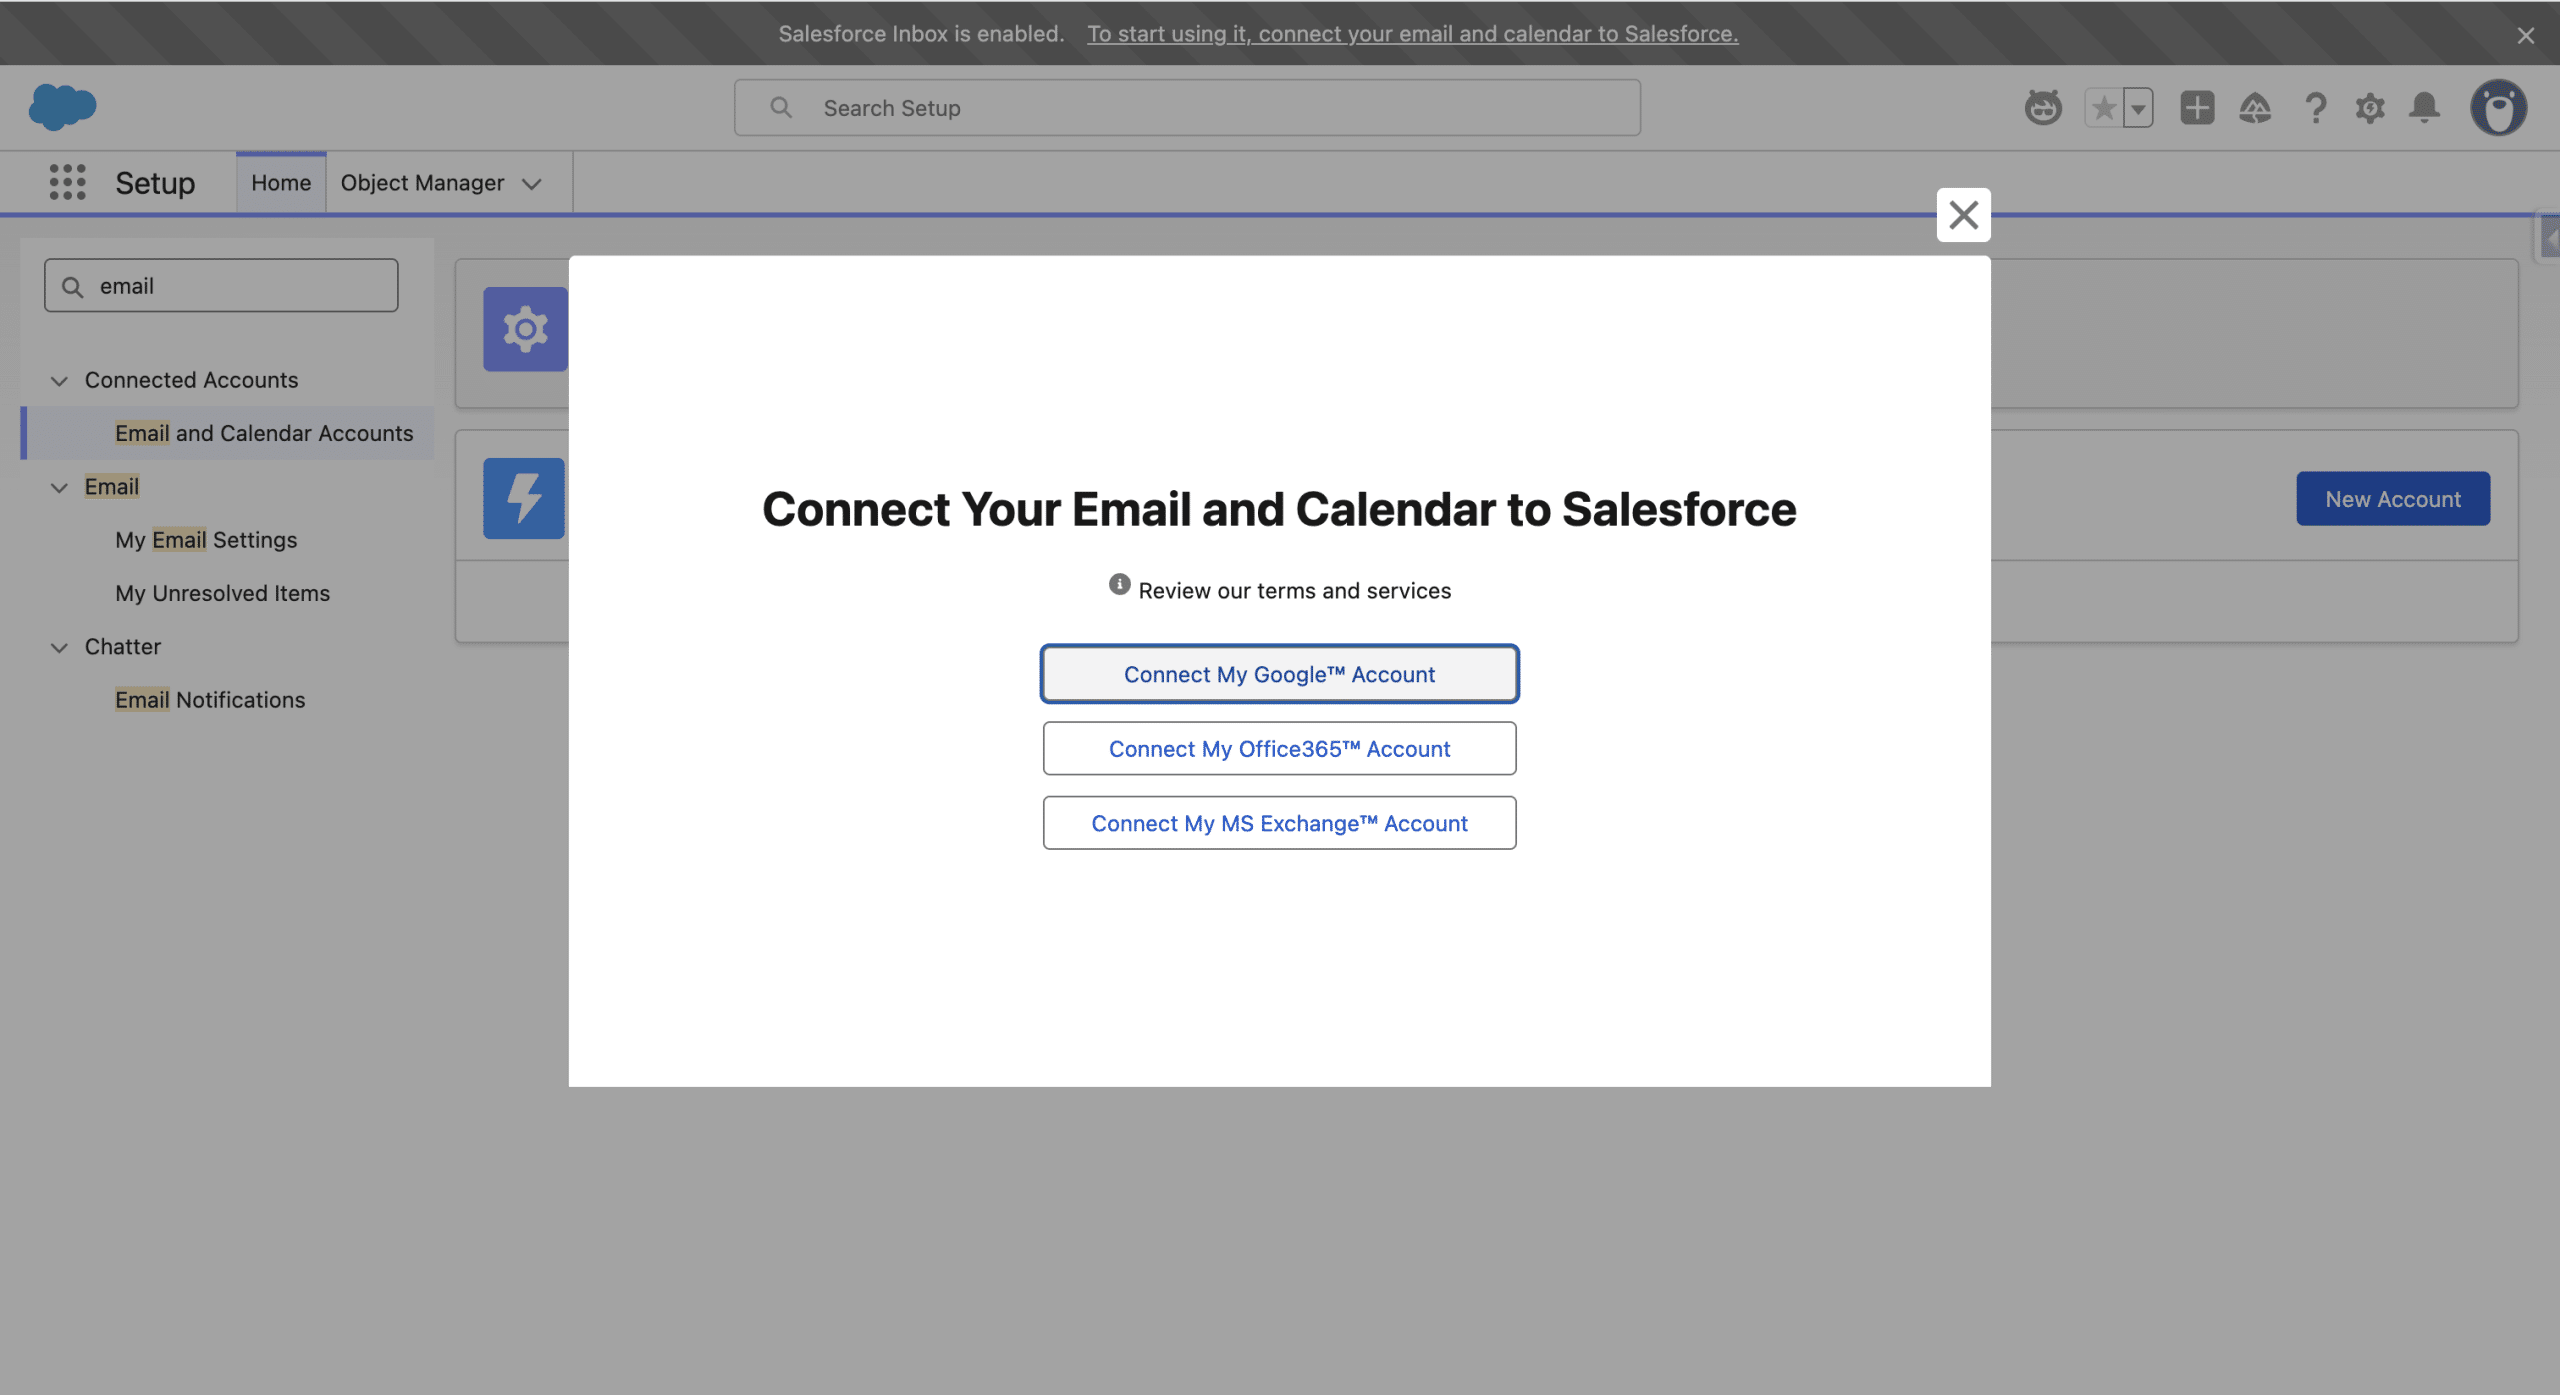
The steps to connect the external provider depend on the provider, but you’ll need to connect to your external account and grant access to Salesforce.
4. Build and Manage Agents Wizard

We’ll need to get some informations to the wizard, which will then be used to create the Agent. Let’s Get Started. Then select the Inbound Lead Generation and Continue.
4.1 Basic informations
The User Record should already be created, so you’ll need to define the Agent’s Internal Name, your Company Name, the default Language (other languages can be added later in Agentforce Builder) and a Company Description. Once done, click Save and Continue.

4.2 Conversation Settings
We’ll define the core messaging purpose of the Agent, by adding its Primary Value Proposition and its key achievements (3 to 5 metrics).

So far, the Agent has little knwoledge of youyr Company. You can however click Save and Preview to start chatting with your Agent. Once done, click Continue.
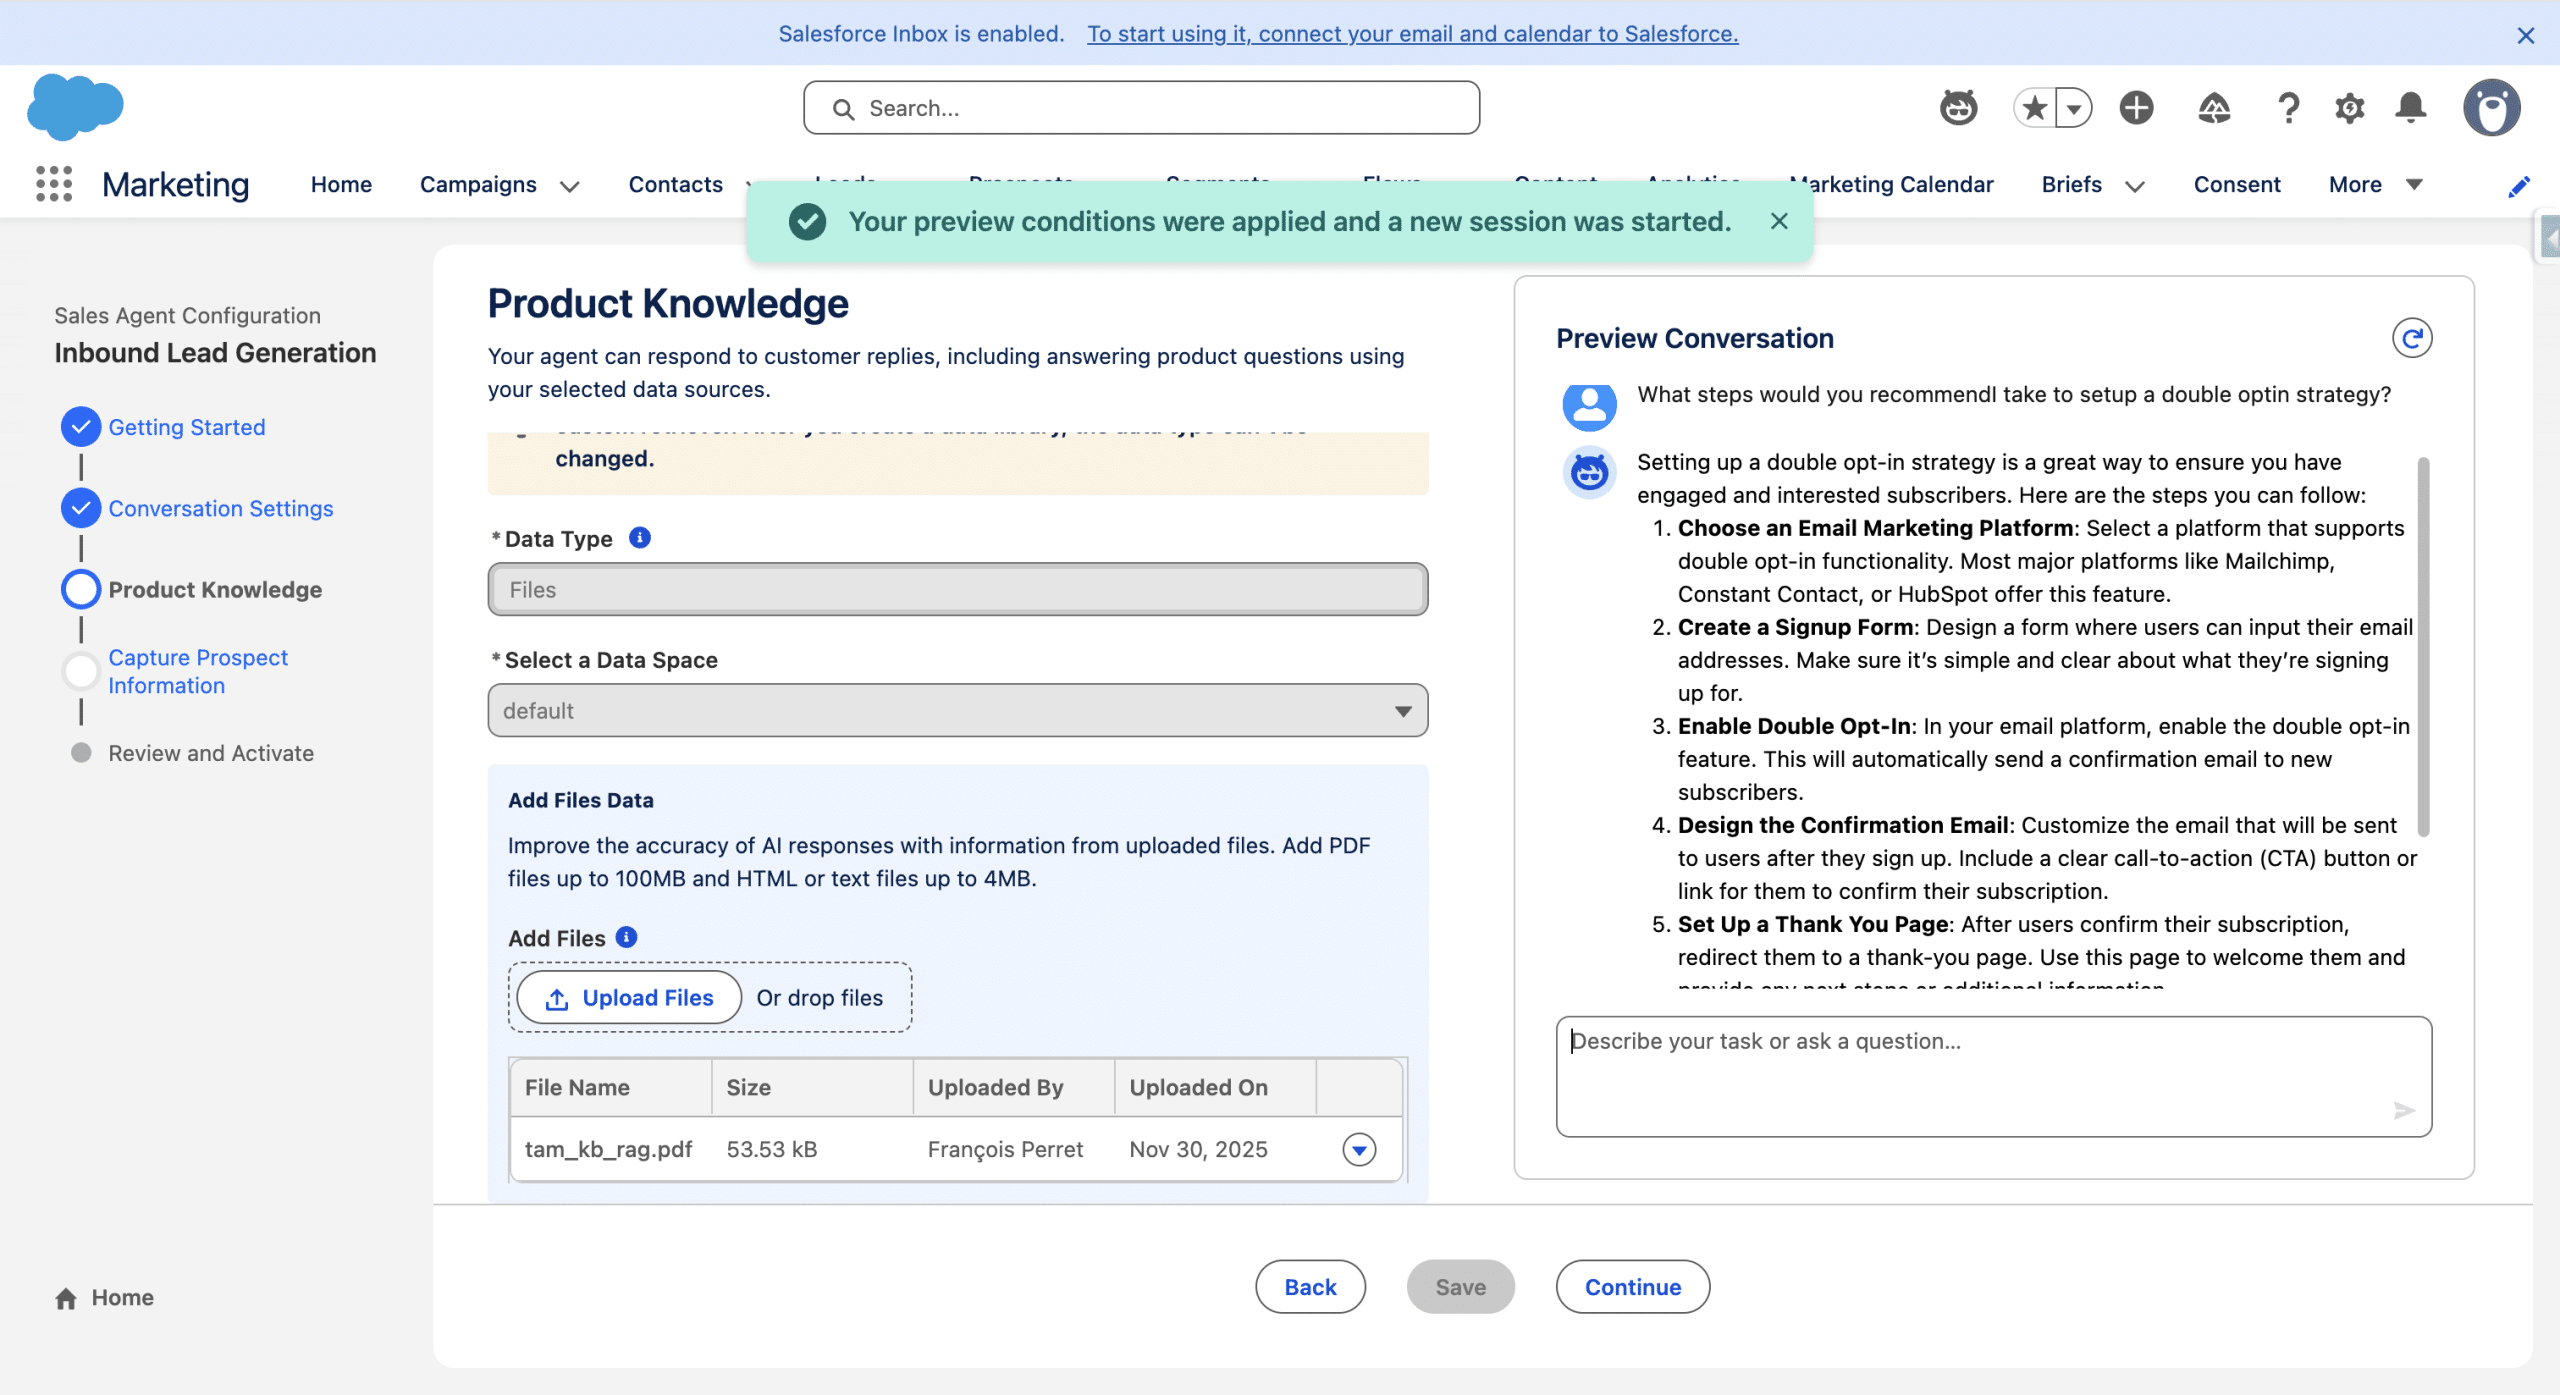
4.3 Product Knowledge
Here, we will create a Data Library, and add informations about our business. This can be a collection of Service Knowledge articles, Files, Web or specific Retrievers. For TAM, we asked an external LLM to generate a file, RAG ready, containing a summary, a step by step guide and key takeaways of a chosen list of Deep Dives and Tips from the Trenches Article. From Data Library, click New Library (or reuse an existing one if you already have one), in Data Type, selet Files, then upload your new File. Save an Preview to see if your Agent is able to answer questions related to your product and services. Then Continue.
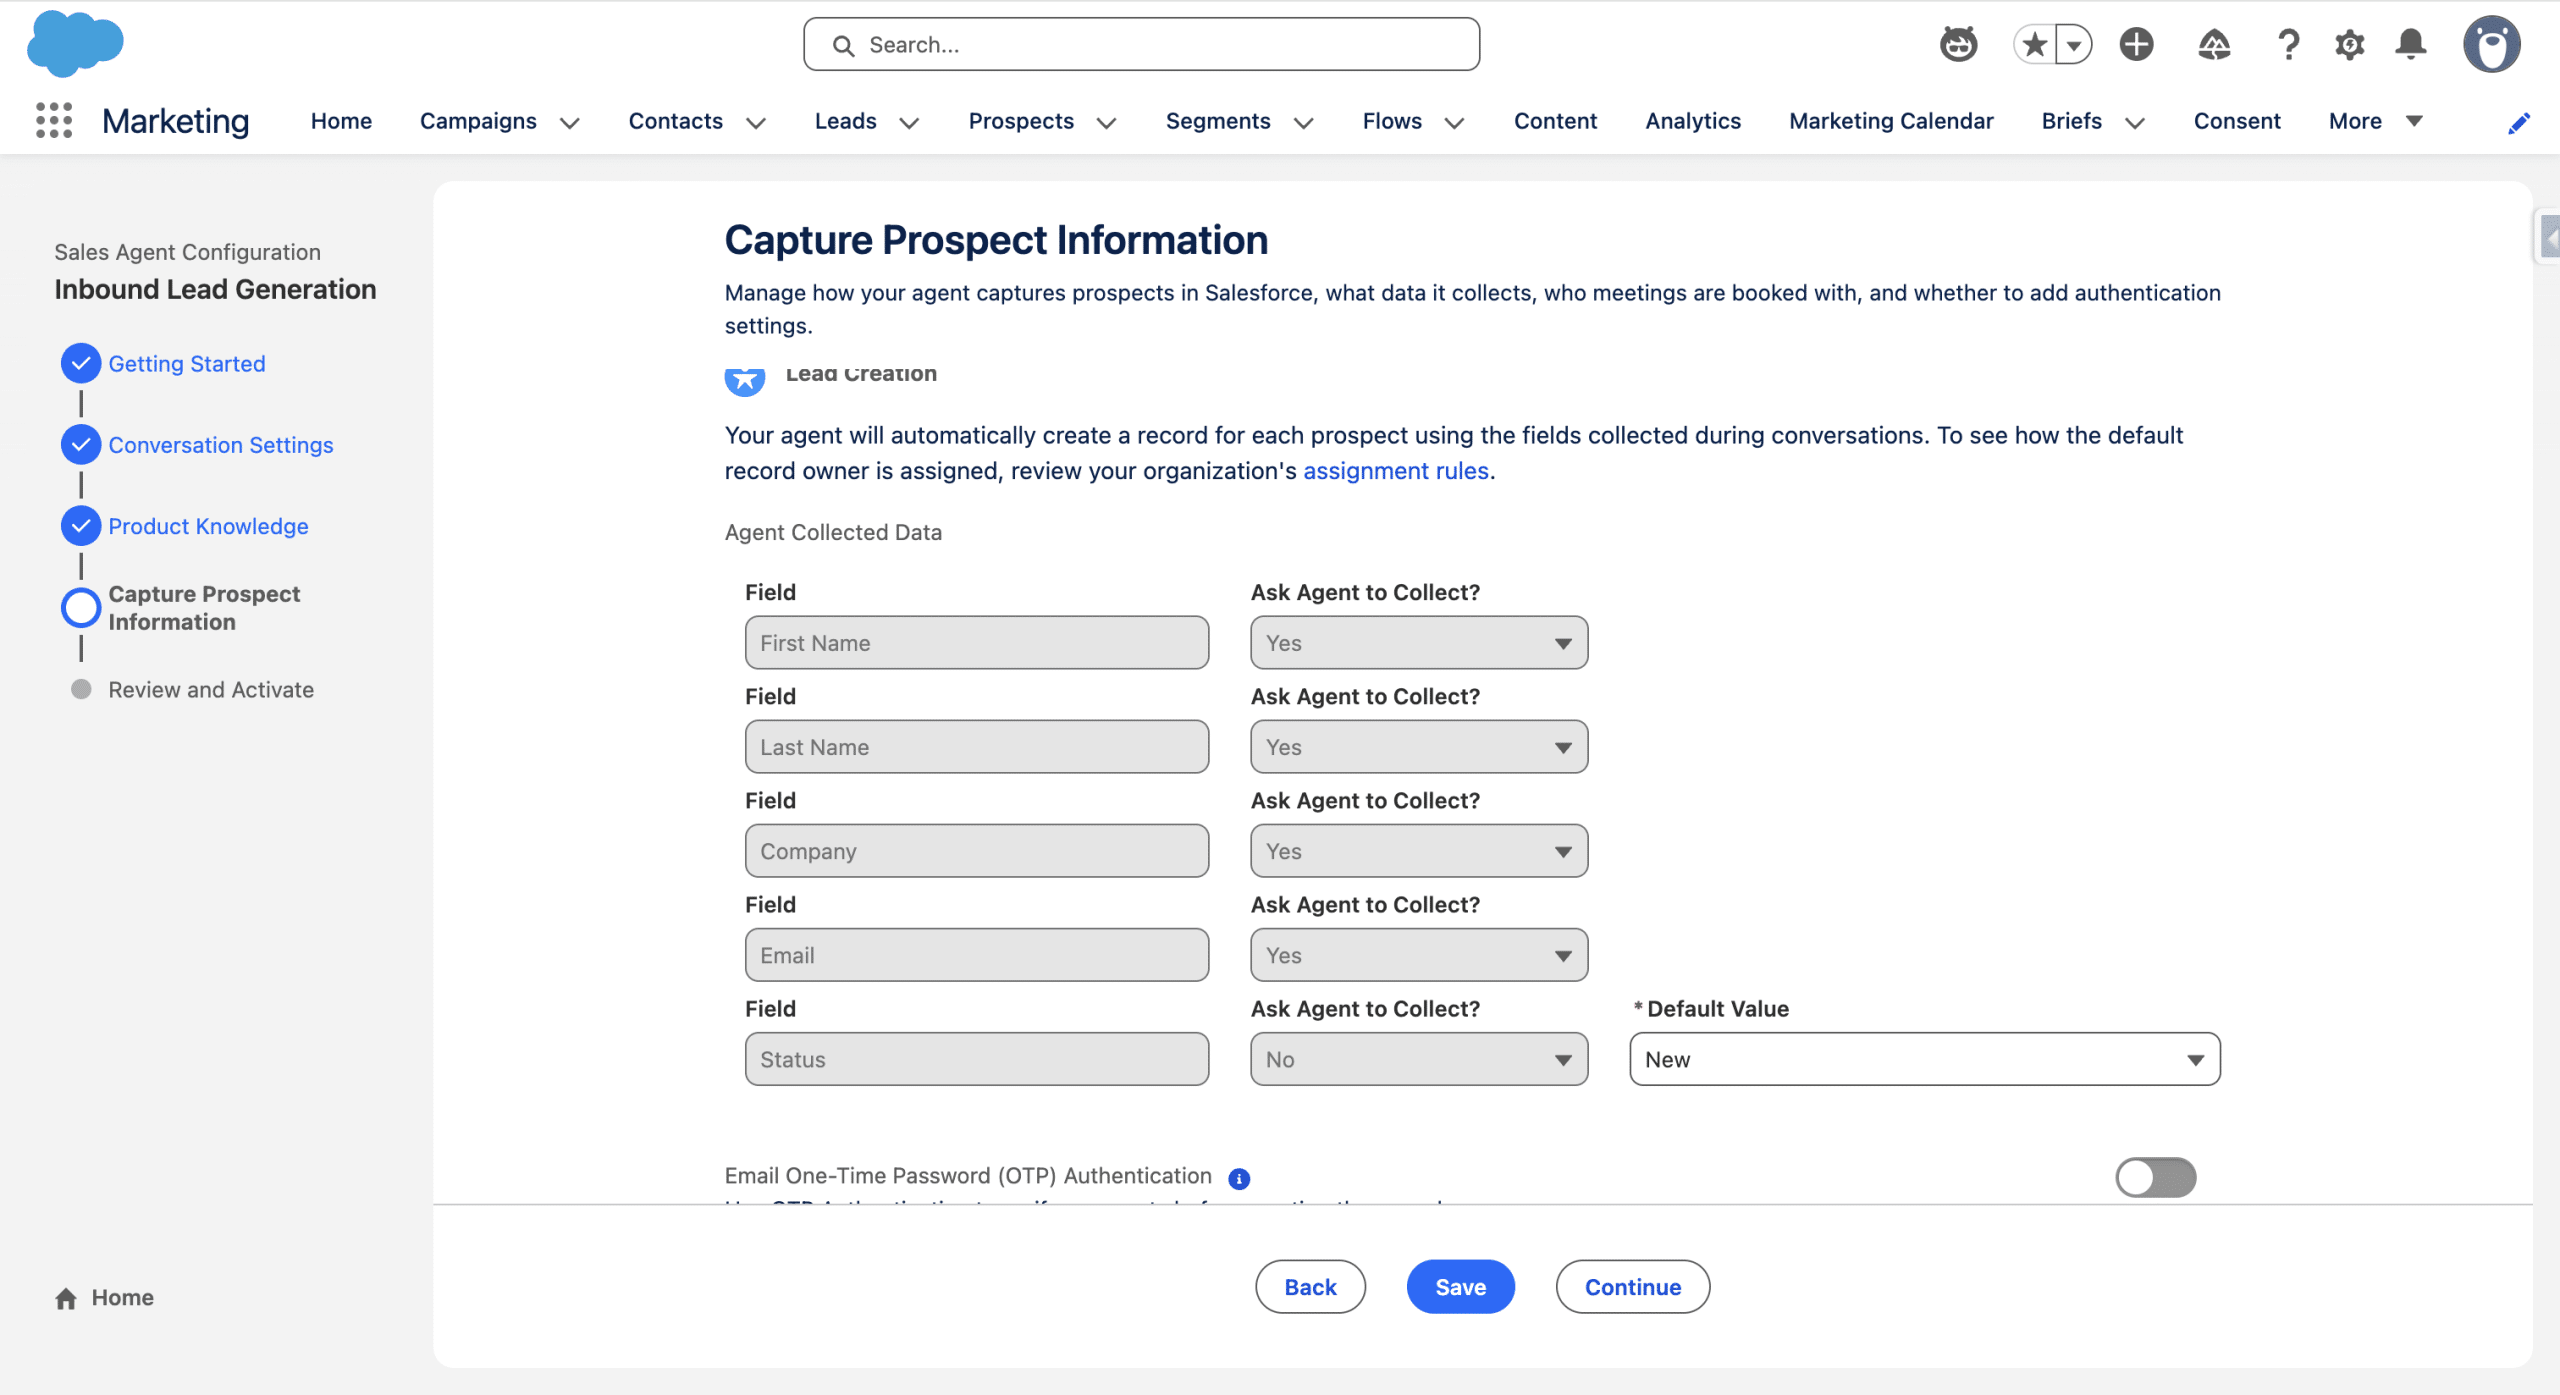
4.4 Prospect Information
In this fourth step of the wizard, we’ll define what informations are needed to create a new Prospect record, along with the type of Record we want the Agent to create. We keep the default Lead creation and set the Status to New (You can define which fields should be captured by the Agent in the Chat). In Meeting Scheduling, we use the Connected account (Inbox User) we defined on step 3.
Save and Continue.
4.5 Activating the Agent
In the Review and Activate final step of the wizard, we can test if:
- the Agent answers are questions about our products correctly
- asks us for informations about us
- creates a Lead out of it
- and provide a working meeting reservation link
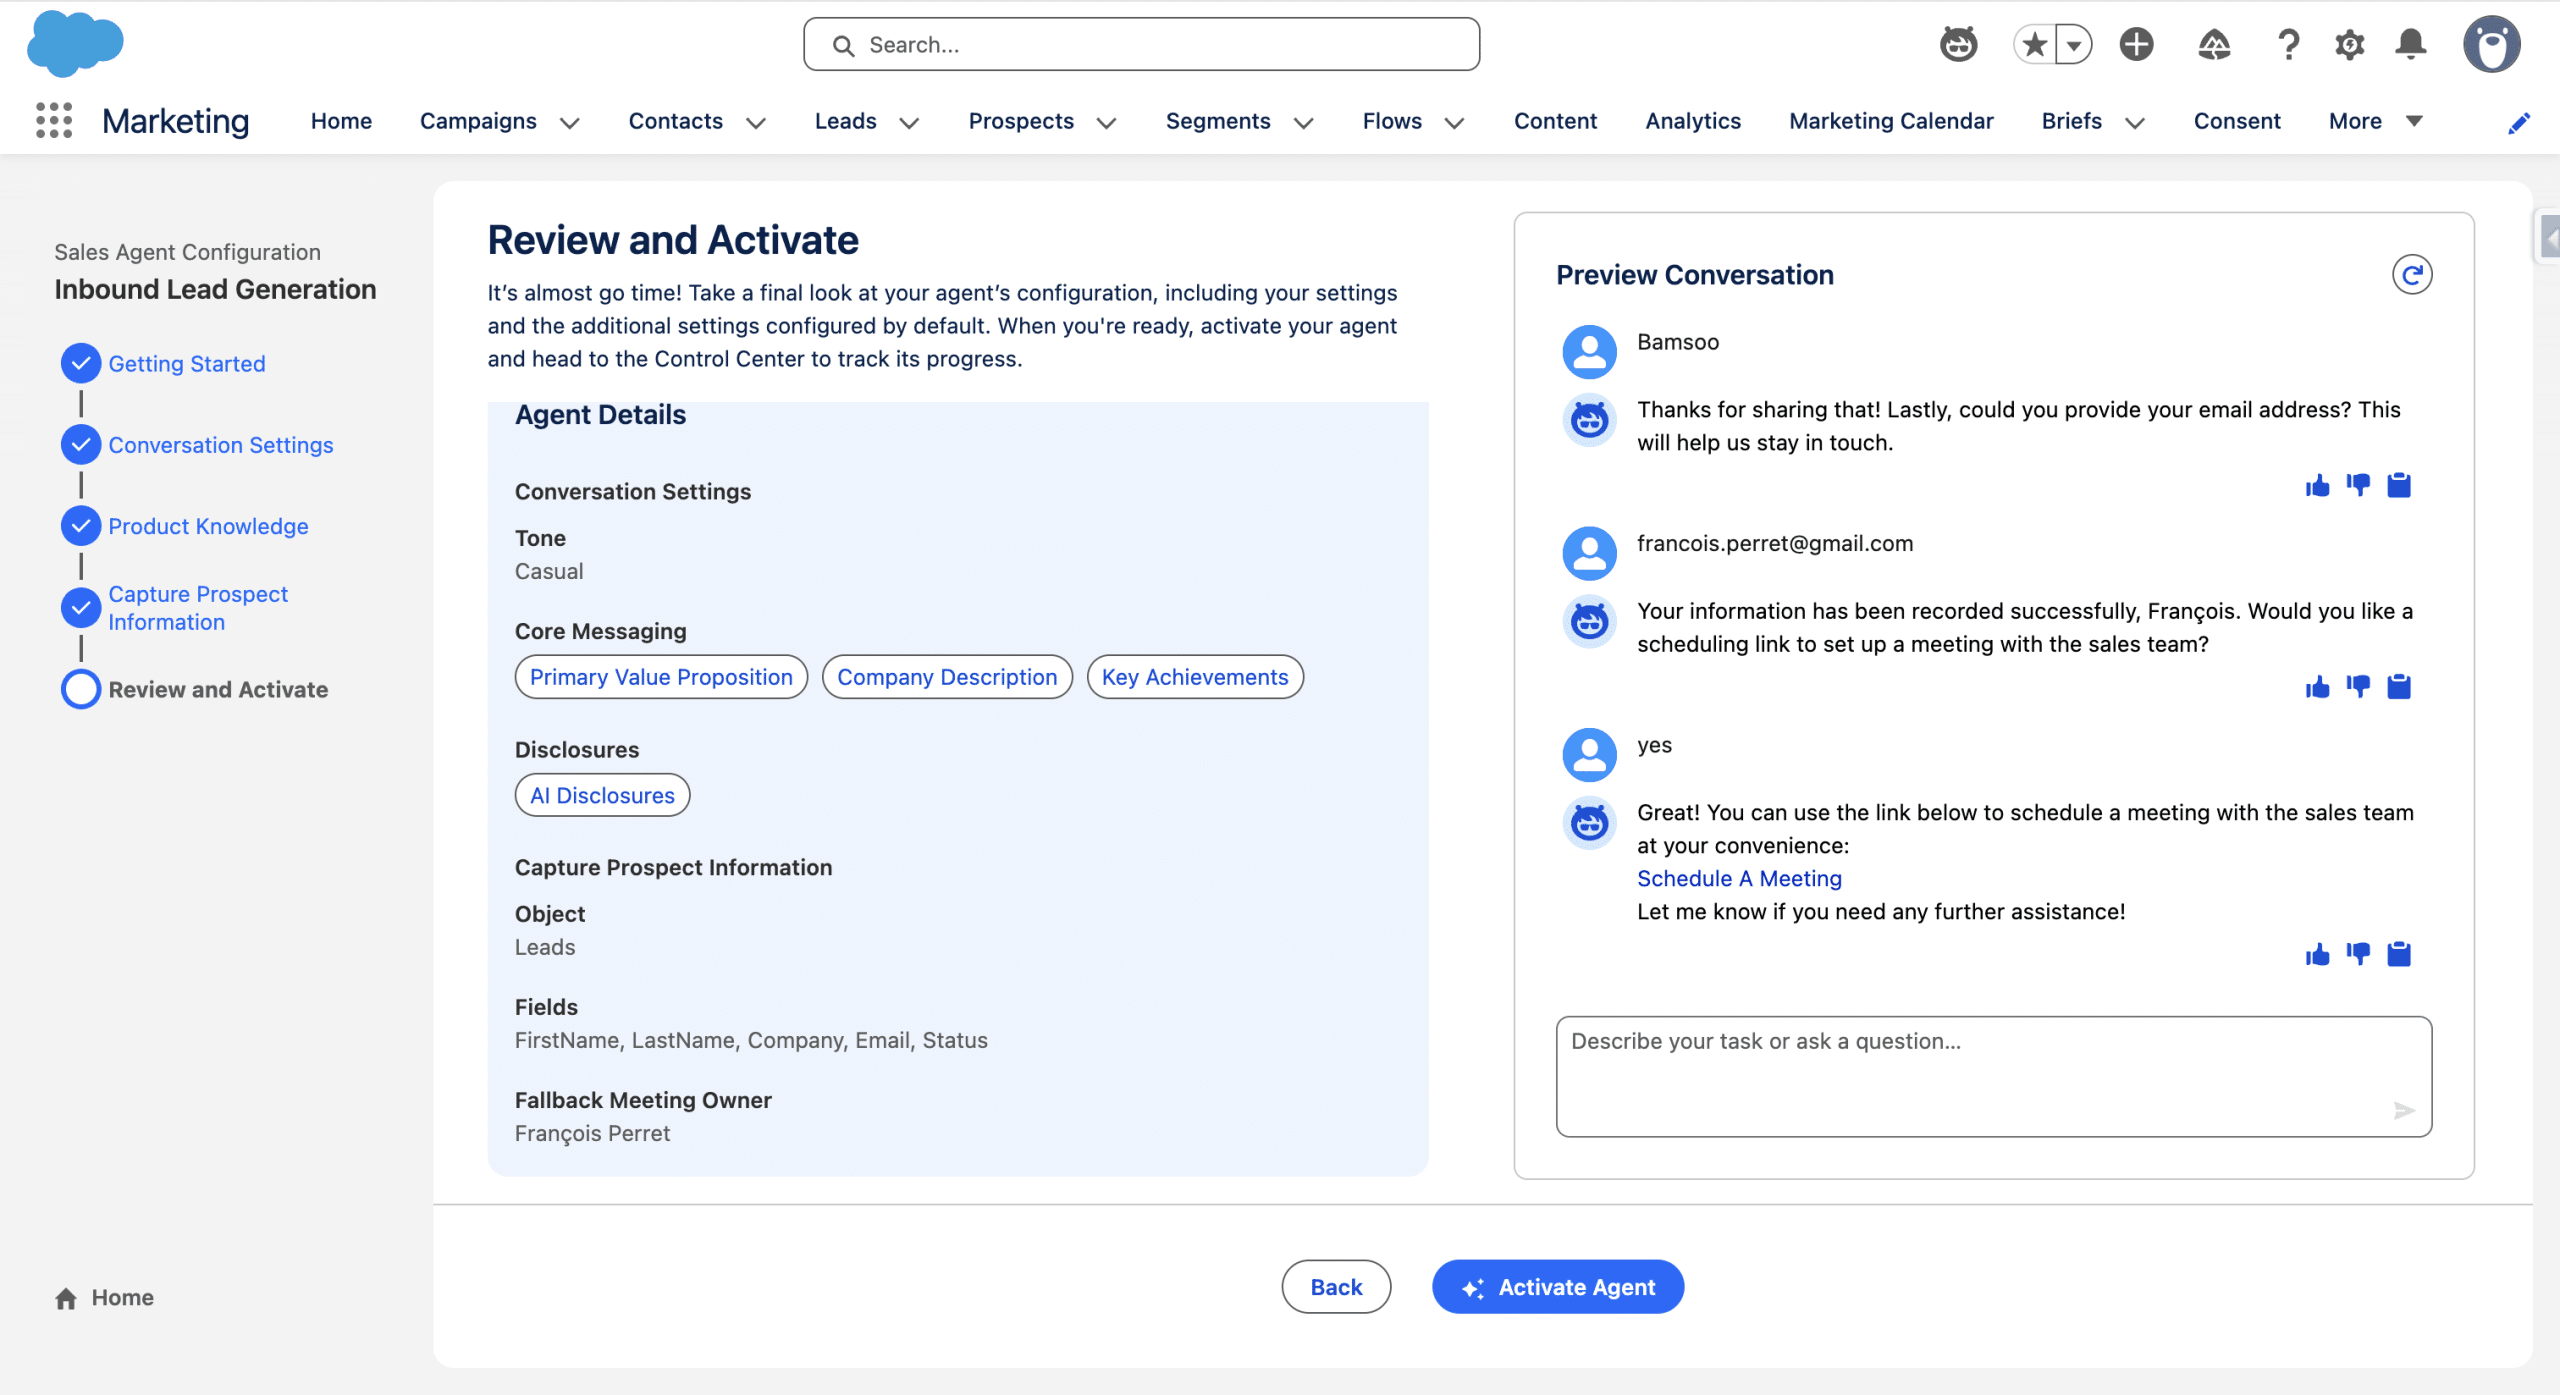
Once the test is ok, click Activate Agent.
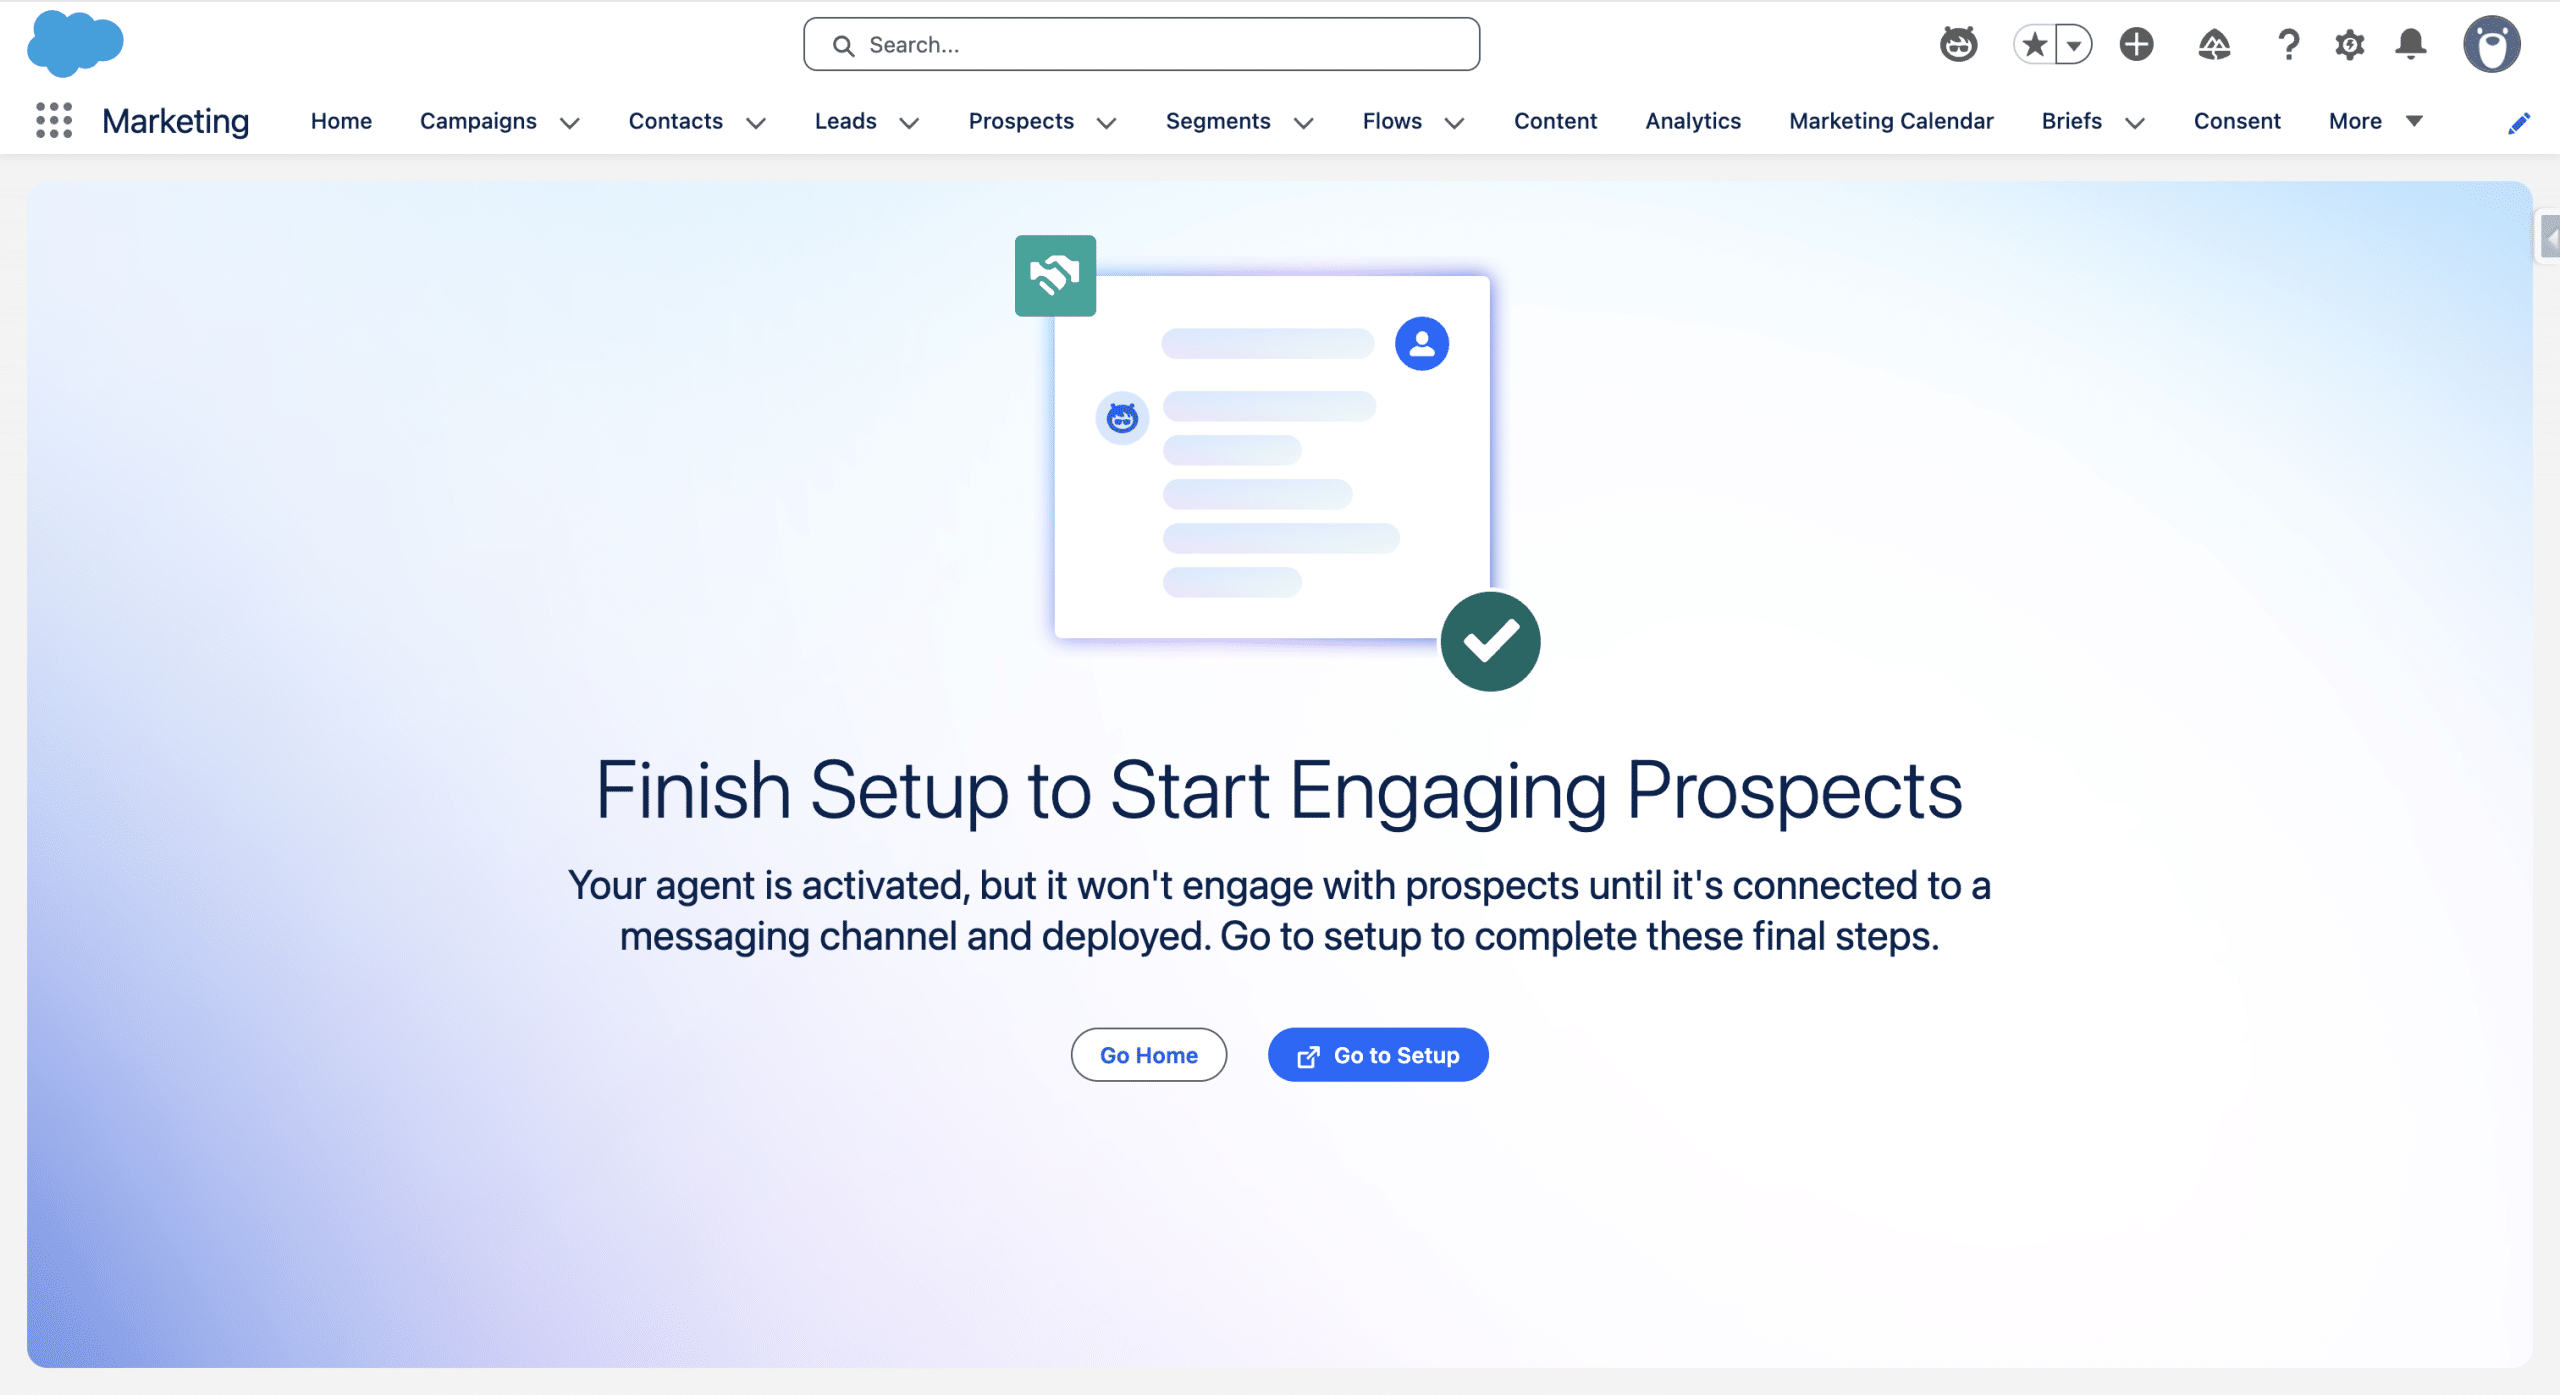
Click Go To Setup. This takes us back to where we started the setup process, where we will start connecting the Agent to the website so that our visitors can chat with it.
5. Creating a Messaging Channel
5.1 Inbound Omni-Channel Flow
We’ll create a simple Omni-Channel Flow to route conversations and messaging sessions to our Agent. Setup, Flow, New and Search for omni-channel flow.

Click the Omni-Channel Flow to create a new Flow. We then add a Text input Variable, recordId, which the Flow caller will set with the current Messaging Session Id.

Available for Input must be check. Done. Next, we add a Route Work element to the Flow, give it a Name, we’ll define the Single work record to route with the input Variable we just defined. For the Service Channel, we select one that is related to the Messaging Session Salesforce Object. For Route To, we’ll select Agentforce Service Agent and select the Agent we created earlier in Agentforce Service Agent. Finally we set the Fallback Queue to MIAW Queue (MIAW stands for Messaging for In-App and Web).

Save, give the Flow a Label (like Website to Inbound Lead Agent Routing). Activate.
5.2 Messaging Channel and Deployment
From the Agentforce for Sales setup page, we click Connect Channel and Start. When presented with a list of native Channel, we select Enhanced Chat.
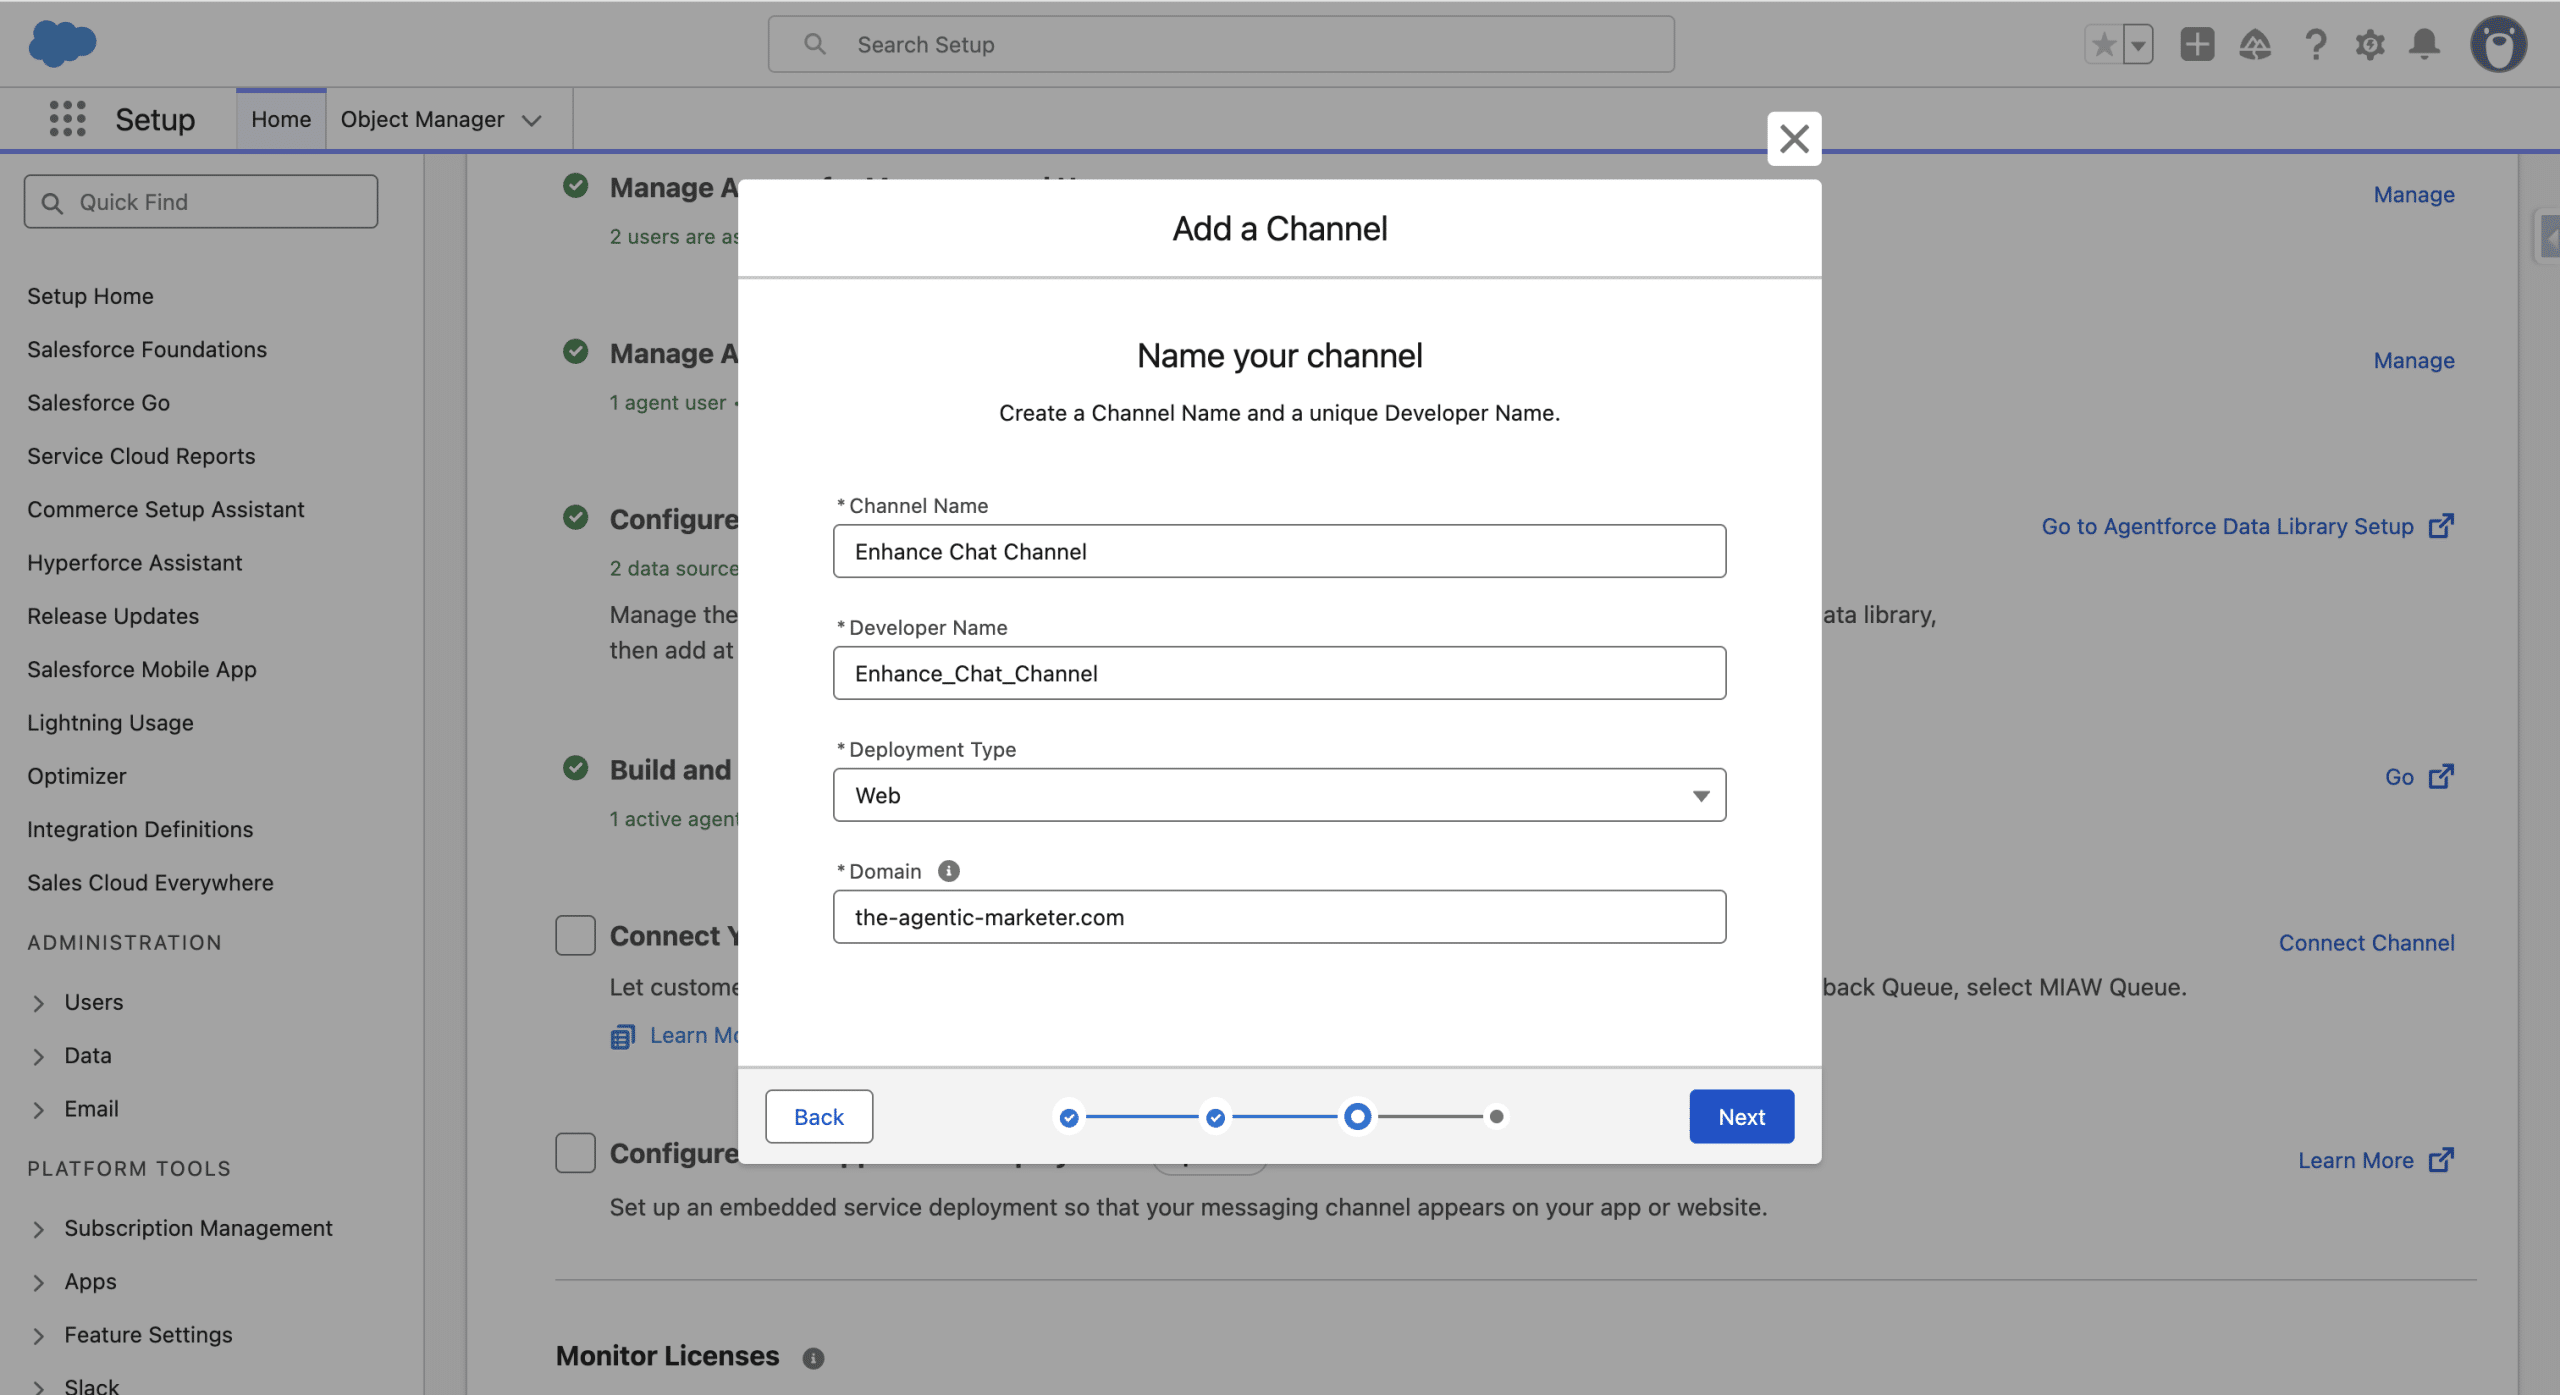
We give the new Channel a name, keep the default Web deployment type and specify the Domain we want to host the Agent into. Next. We then select the Omni-Flow routing type, and in the Flow Definition we choose the Omni-Channel Flow we created in Step 5.1 (you need to input the first letter of the Flow Label). For the Fallback Queue, we select MIAW Queue.
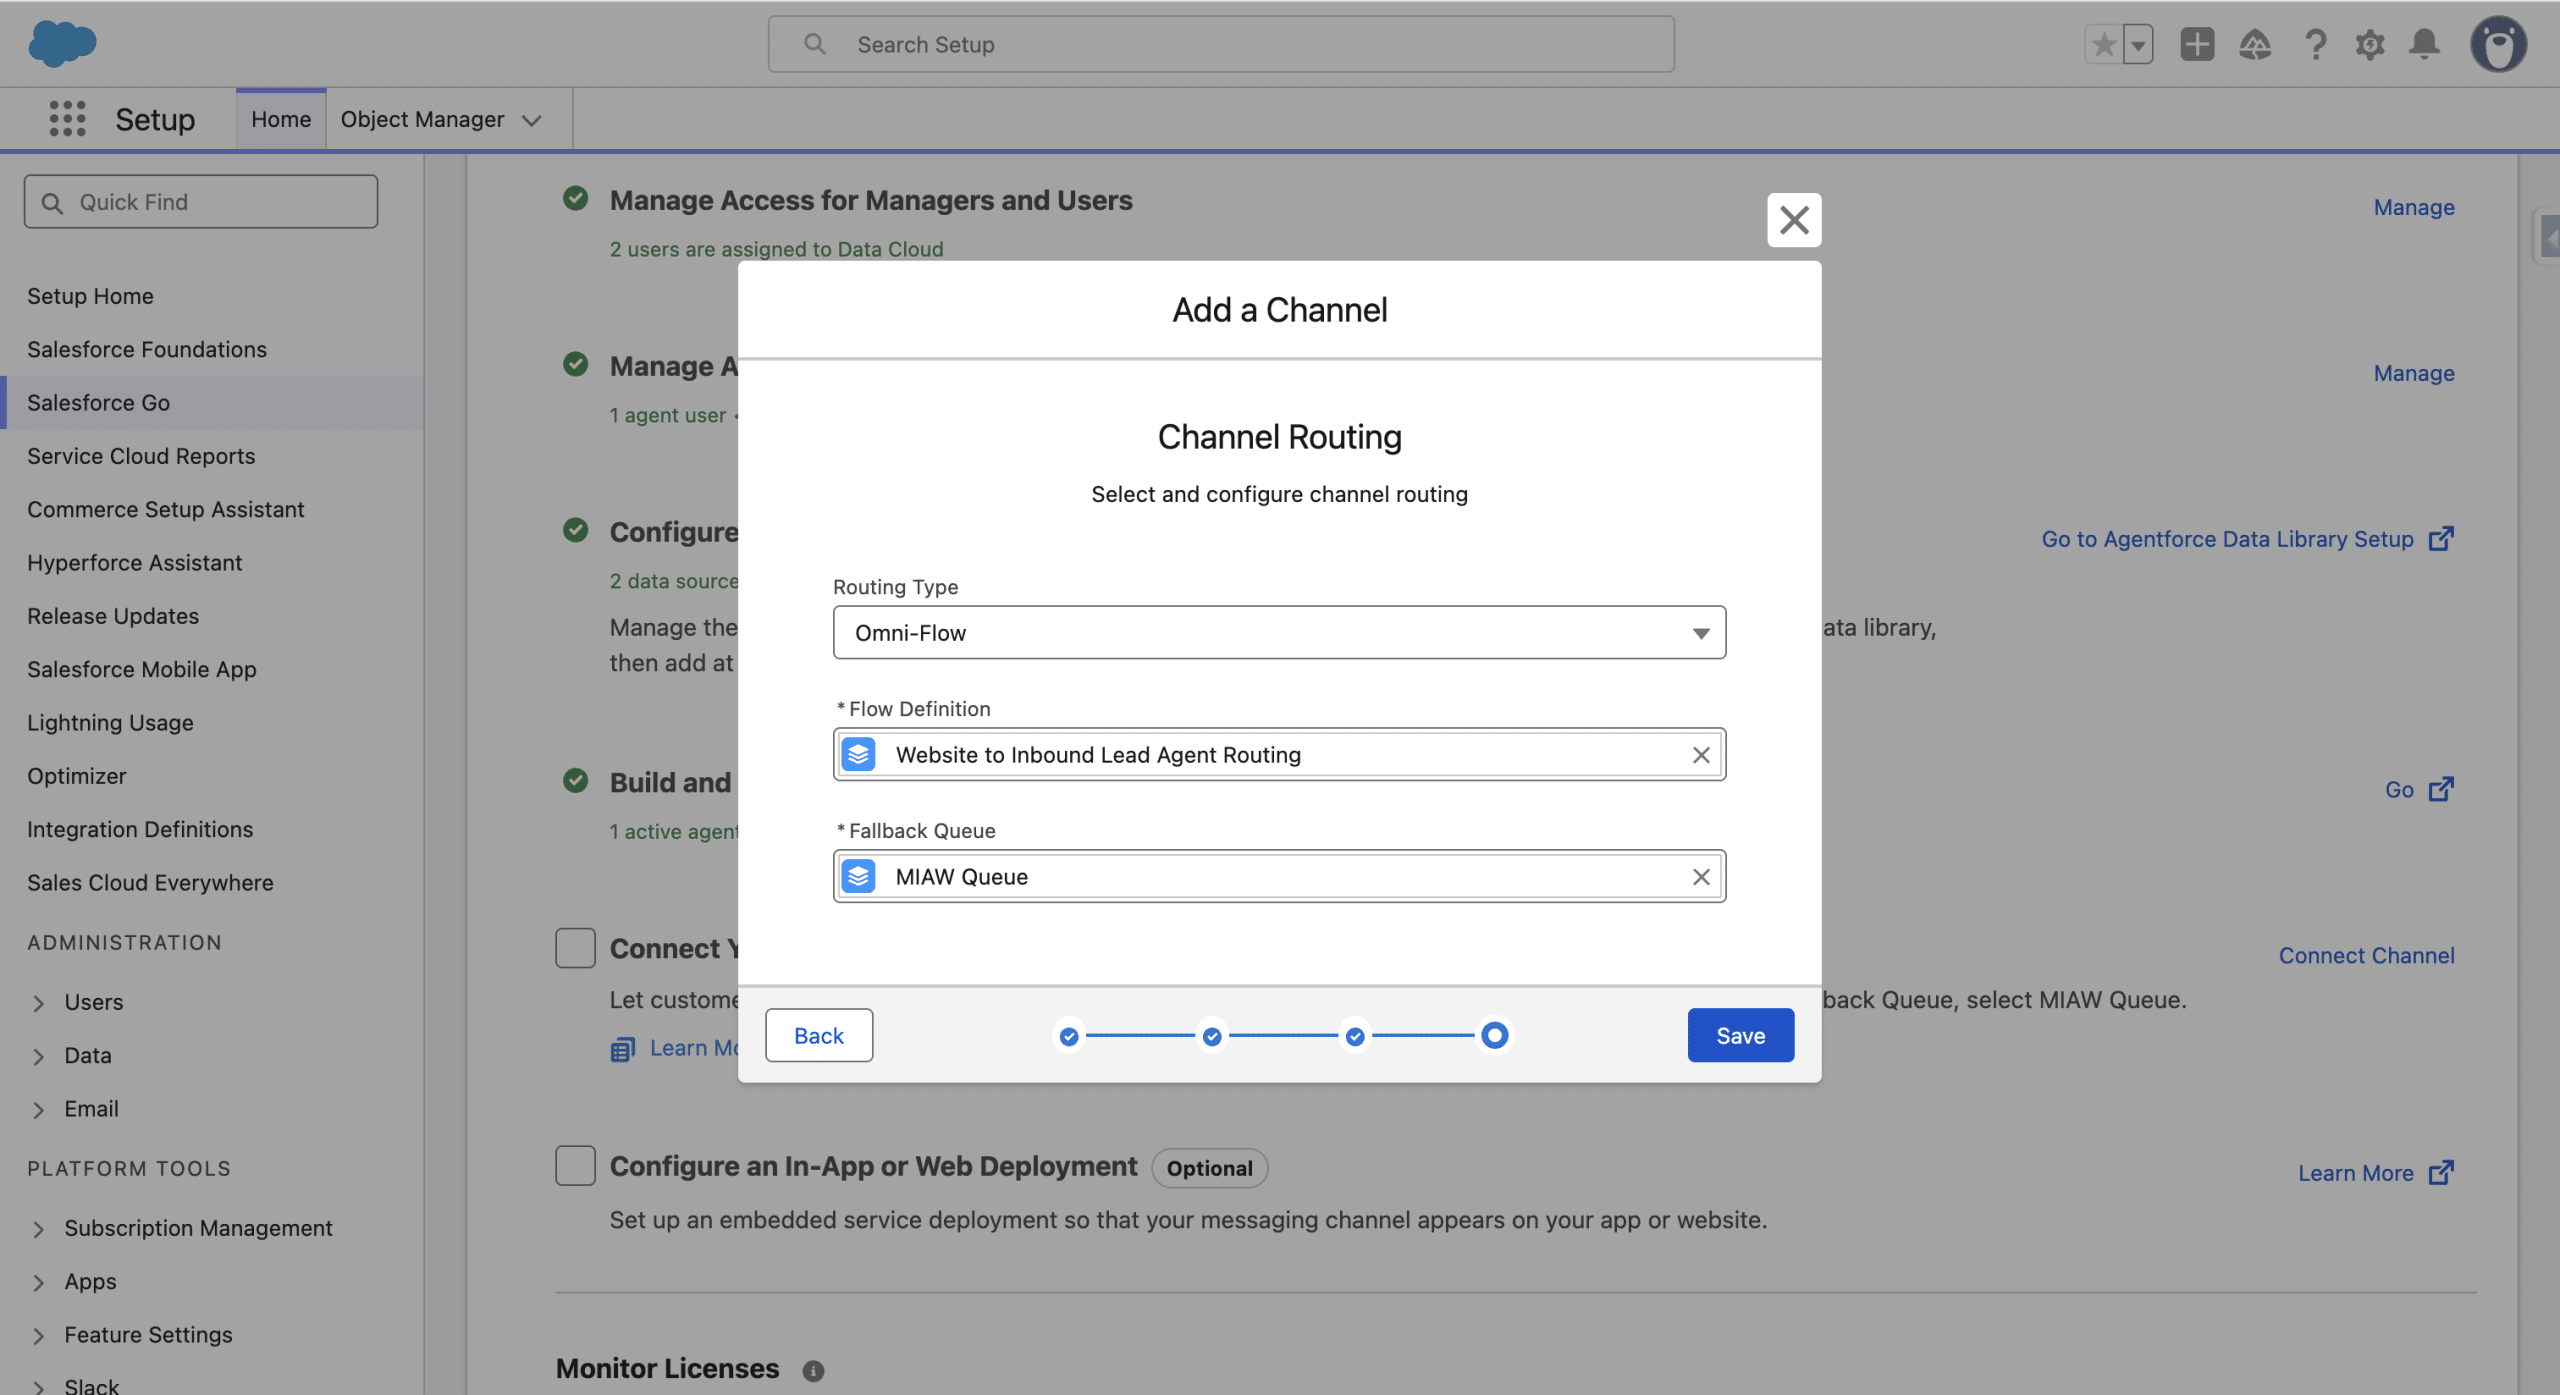
Save (accept condition and save). Our Enhanced Chat Messaging Channel is now created and deployed.
5.3 Turning on the New Connection Panel
In Setup, search for Agents and Select Agentforce Agents, open your new Agent, the Open in Builder and choose Connections in the left sidebar.
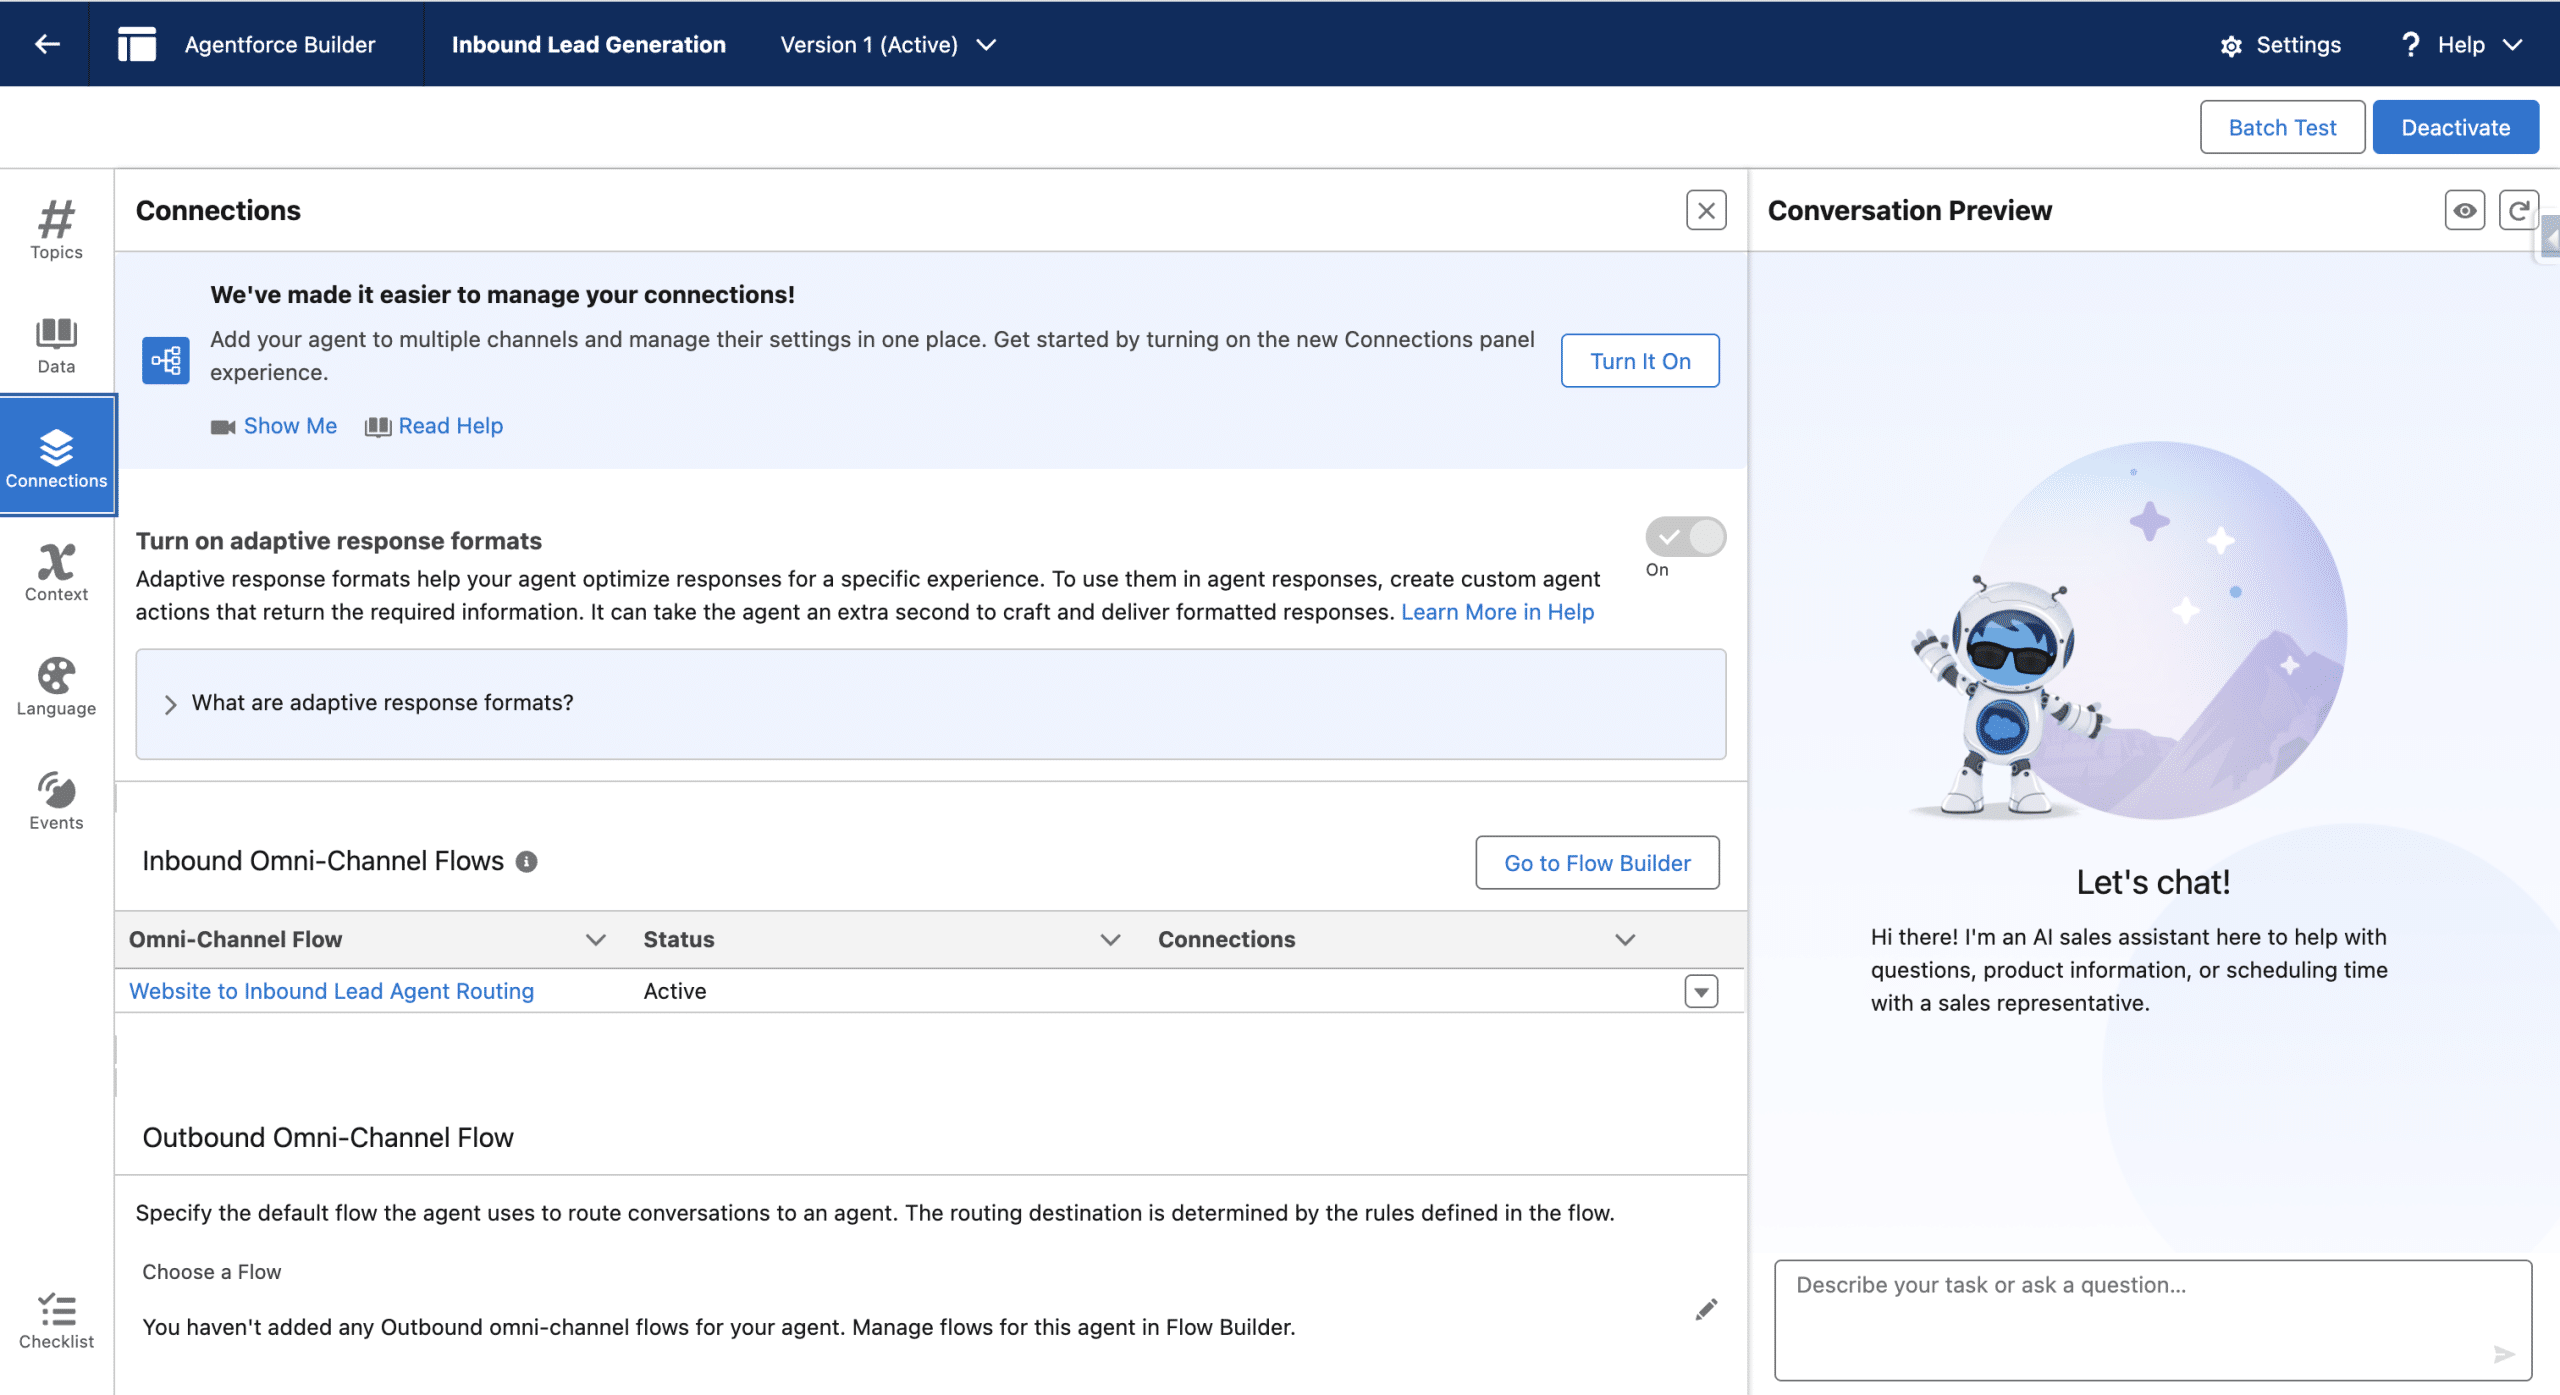
Although optional, activating the new Connections Panel streamlines the Messaging handling. Click Turn it On.
Making the Agentforce Inbound Lead Generation available from the website.
Adjusting the Chat Look and Feel
Setup, search for Embedded Service Deployment and Open the Deployment we created in step 5.2. Click Switch to V2, which is the latest version of the Chat window on the website.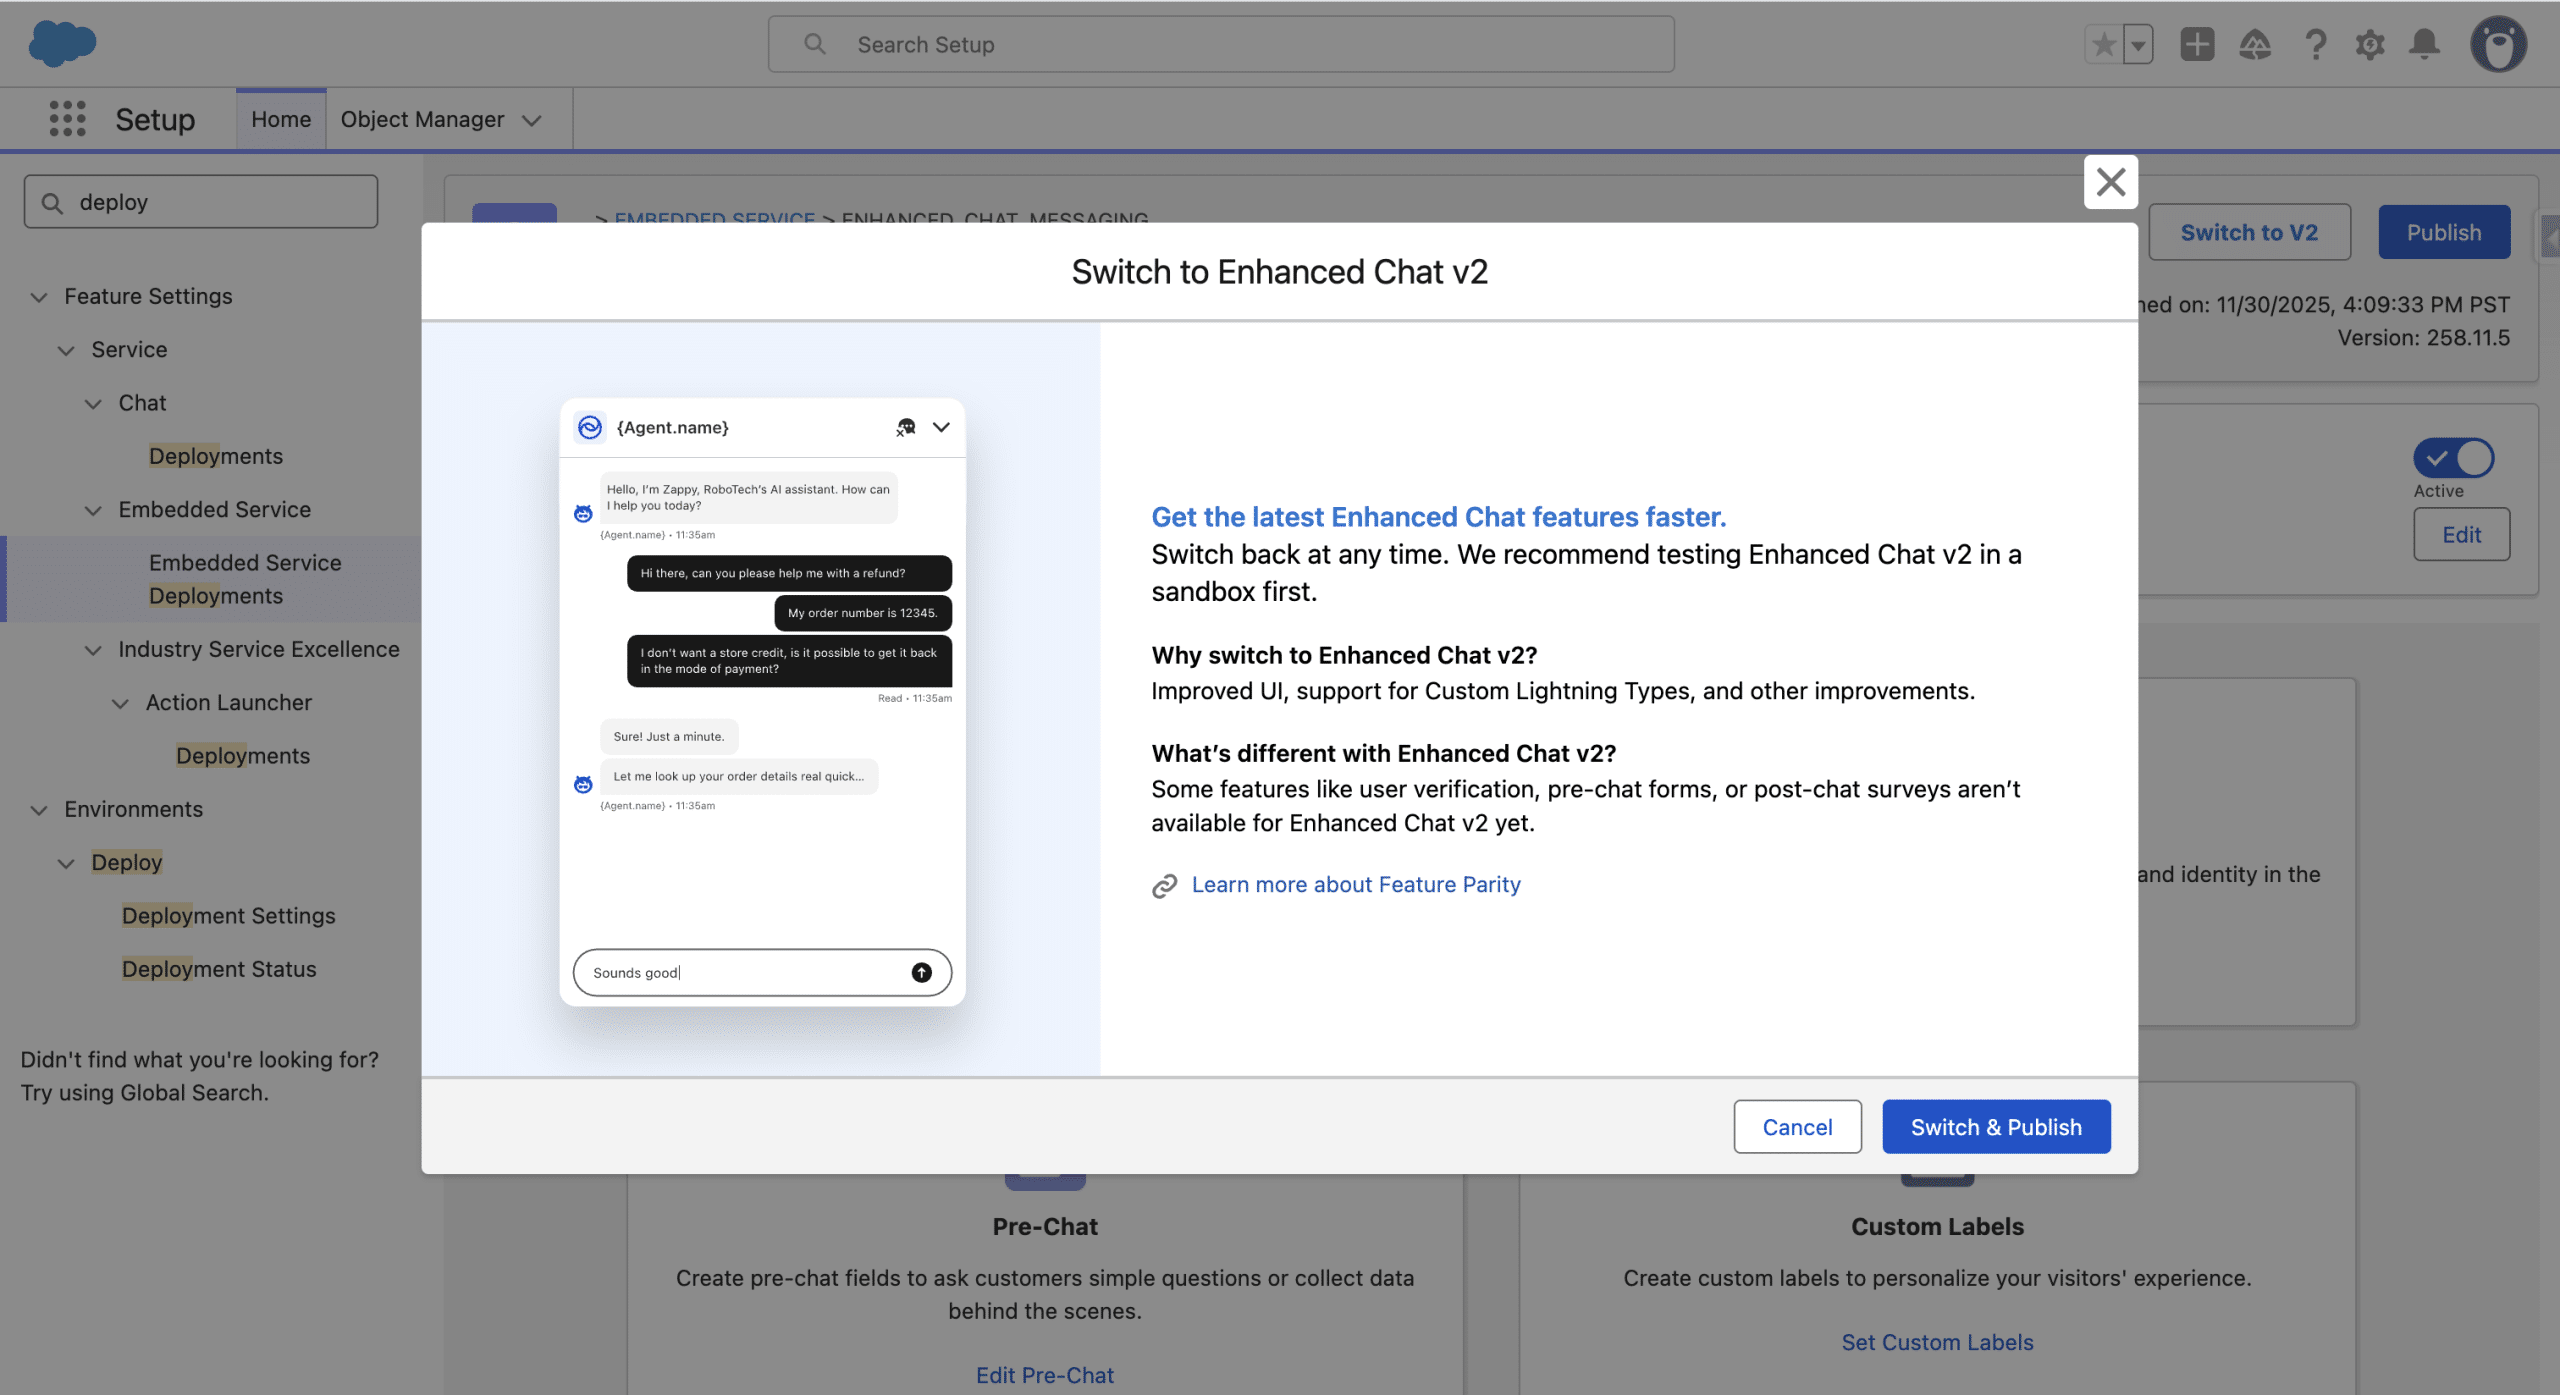
Click Switch & Publish. You’ll receive an Email once the V2 version is activated. In this Version, the Chat button on the website displays “Ask Me Anything” and the Chat window is larger. From the same Embedded Service Deployment Settings page, you’ll find:
- Branding: to modify the text fonts and colors
- Custom Labels: to change the default texts in the Chat
Deploying
To make the Chat available on your website, click the install Code Snippet in the Embedded Service Deployment Settings page. Copy the Chat Code Snippet to your website, and paste it before the closing body, on the pages where you want it to appear. See it in action on this website.
Final Thoughts
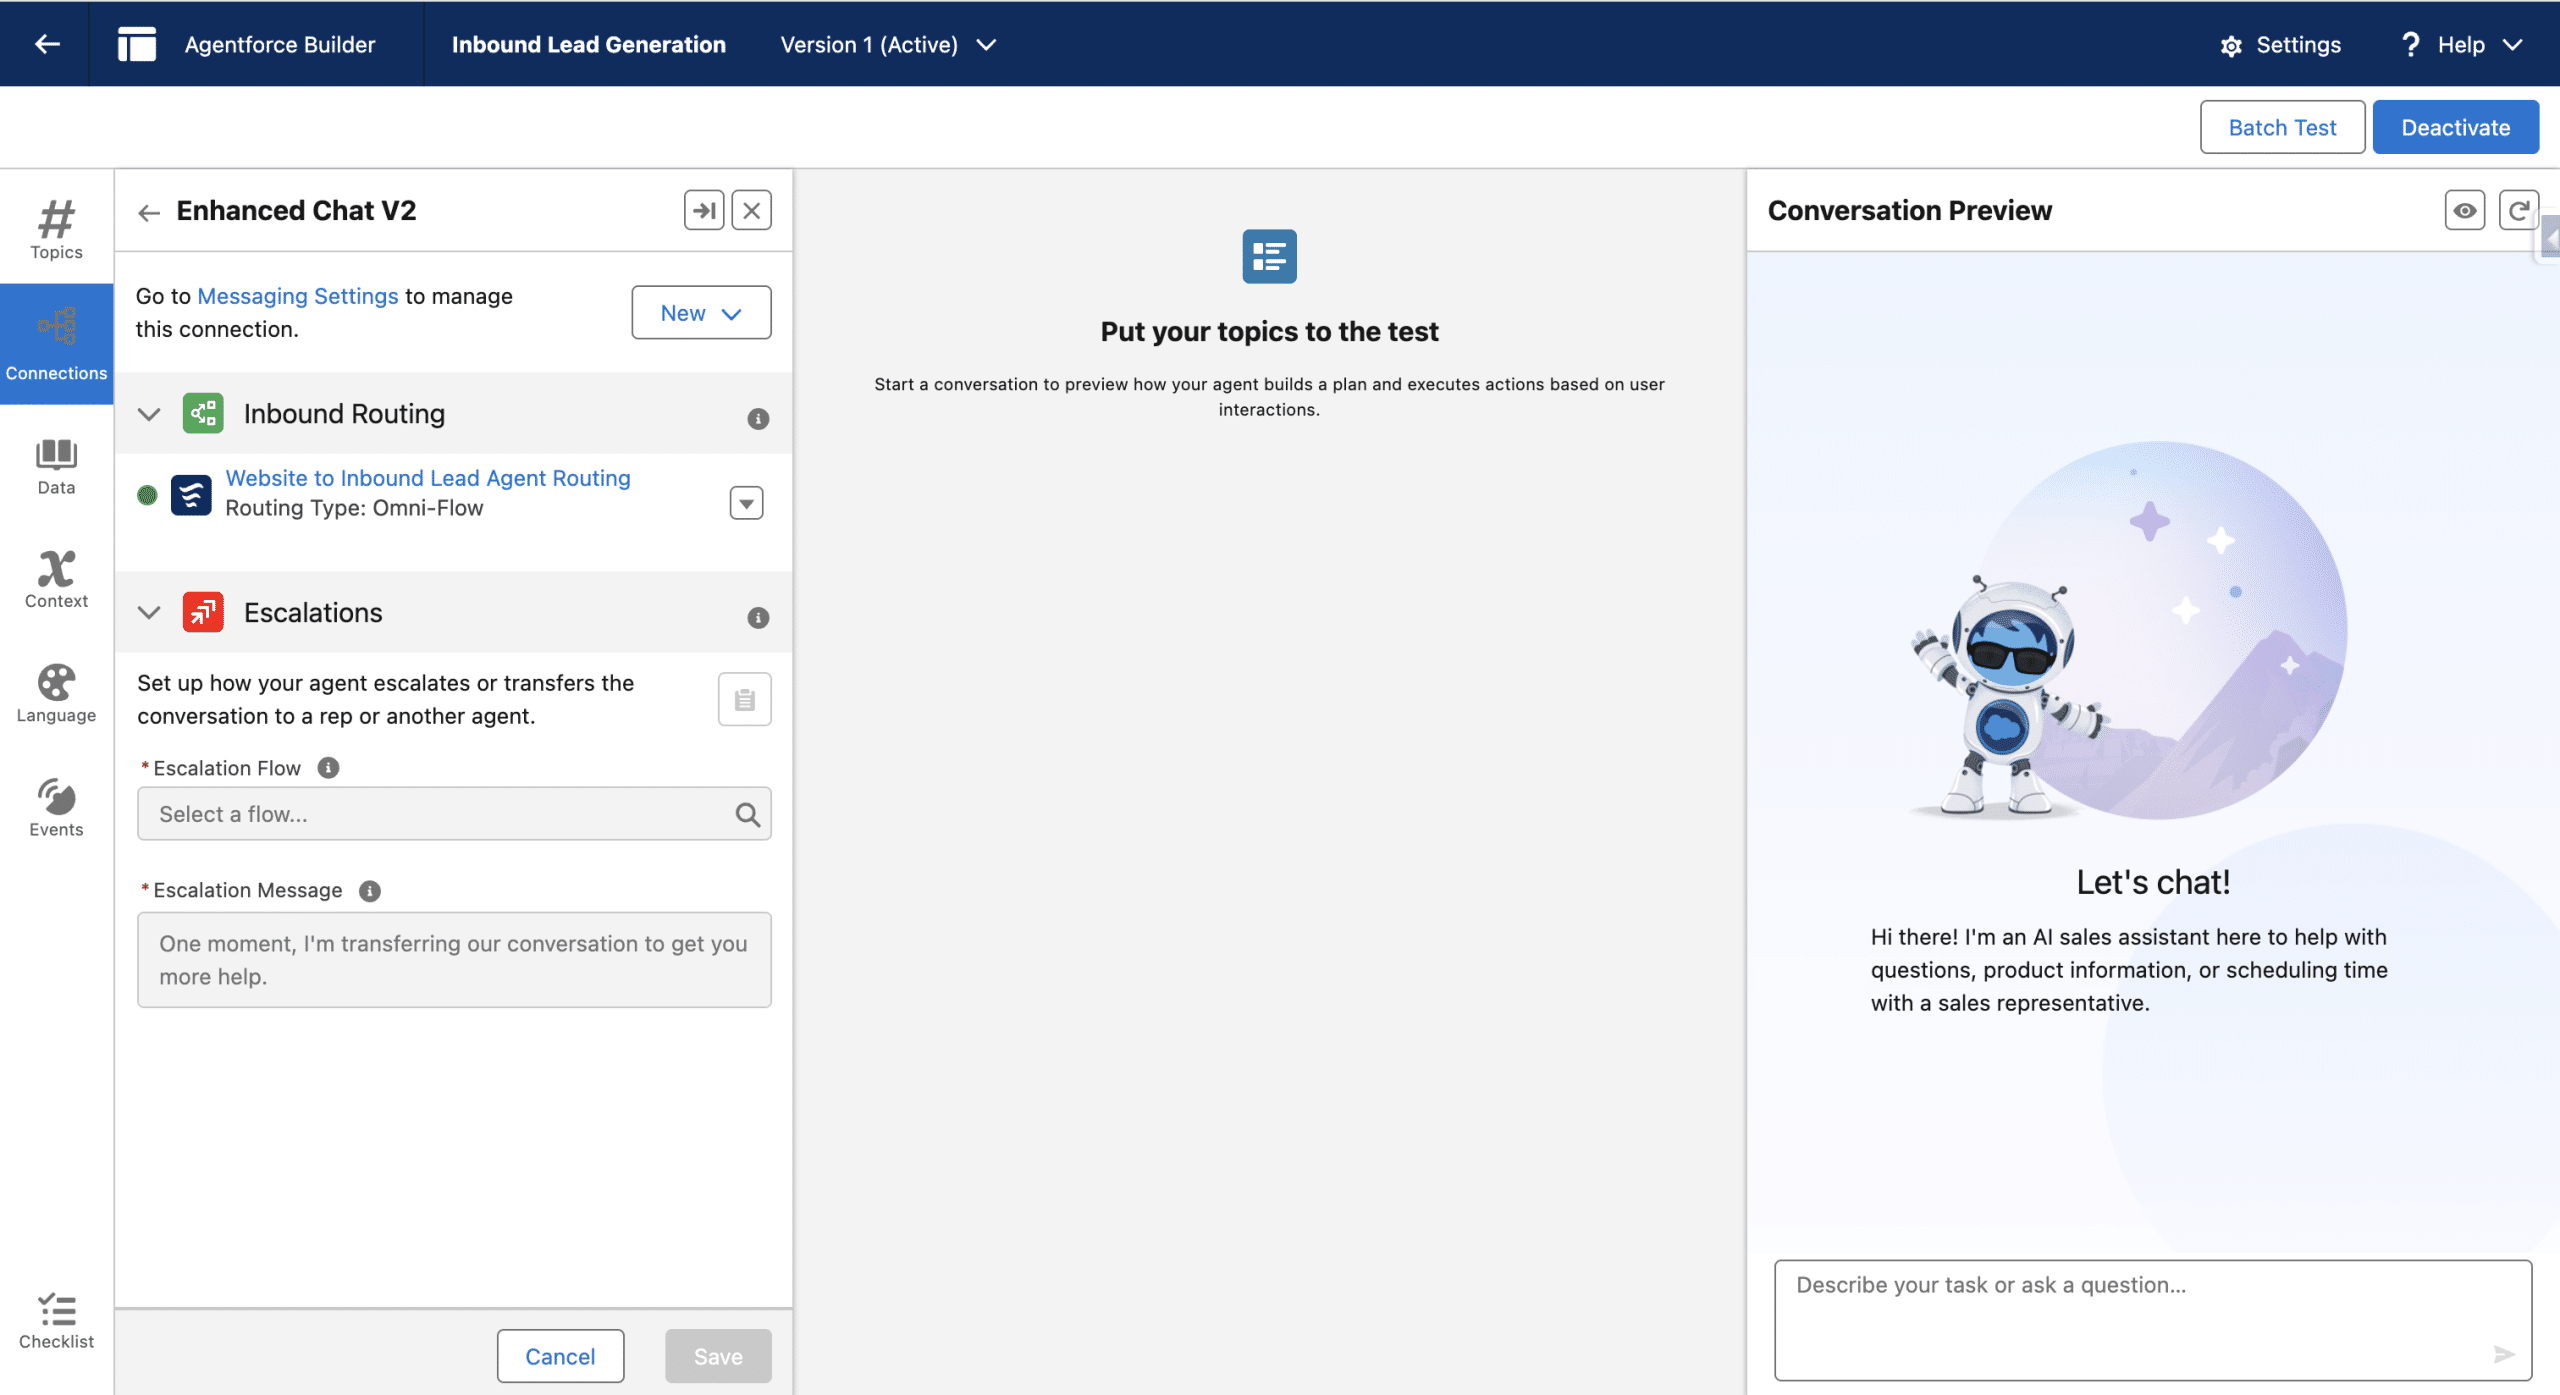
We did not define an Escalation Flow, in the Connections Panel, which is a handy a way to handoff the conversation from the Agent, to a human Sales or Service Agent. This is done using an Omni-Channel Flow and selecting the target. The actual Target configuration depends on your instance setup.
The Labels used in the Chat window can be configured both from the Deployment and from Agent Builder.
We recommend to use the Testing Center, by preparing Batch test of possible questions, and ensure the Agent’s outcomes are compliant to your messages.
Finally, this Agent is an excellent starting point, and you may change its Instructions, add topic or actions. When adapted to your marketing Strategy and Personas, this Agent, along with the Lead Nurturing one (personalised email sequences) is an important step to becoming an Agentic Brand.