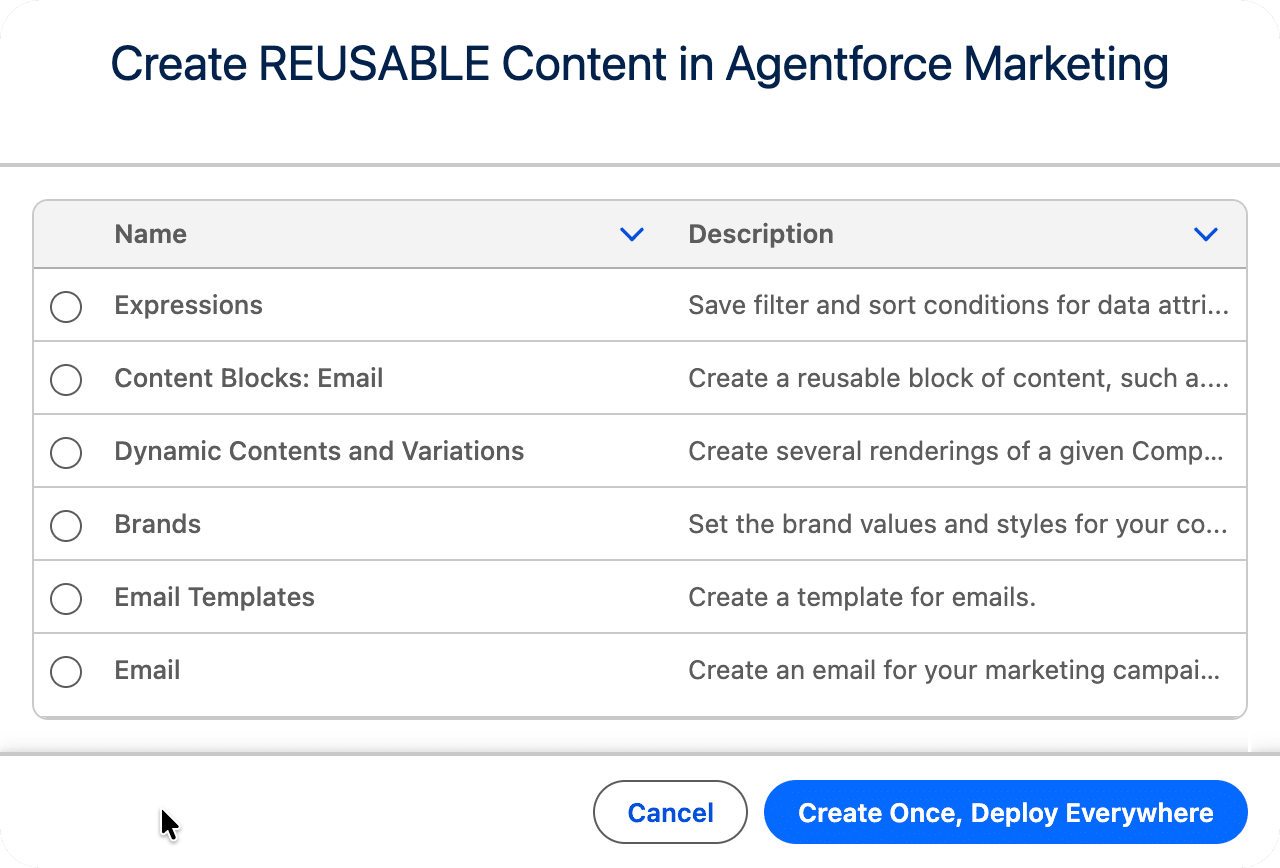
Agentforce Marketing in MC Next allows users to create reusable components, like Expressions and Content Blocks, so that complex logic and brand assets can be built once and deployed across all channels instantly.
In this article we’ll mainly focus on the Email channel, but most of the features we’ll describe can also be used in SMS, WhatsApp and Landing Pages.
Reusability is the secret sauce of MC Next, which Agentic Marketers leverage to:
- Save Time: Eliminate manual builds by deploying Saved Expressions and Content Blocks across every campaign in seconds.
- Ensure Consistency: Maintain a single “source of truth” for brand assets and logic, ensuring a unified customer experience across all MC Next touchpoints.
- Streamline Maintenance: Update a single Saved Variation or component to instantly propagate changes across your entire marketing ecosystem.
- Lower Error Risks: Replace risky copy-pasting with pre-vetted, reusable modules that guarantee technical accuracy and data integrity every time.
In this article, we’ll describe the main features and tools that Marketing Cloud Next makes available to achieve reusability.
Create Merge Fields templates as «Expressions»
An Expression, or Saved Expression, in Marketing Cloud Next is just a template for a Merge Field. You create an expression so that you don’t have to recreate the same Merge Field from scratch in every email, and others from the team can also benefit from it.
How to create an Expression
Expressions are created from the CMS.
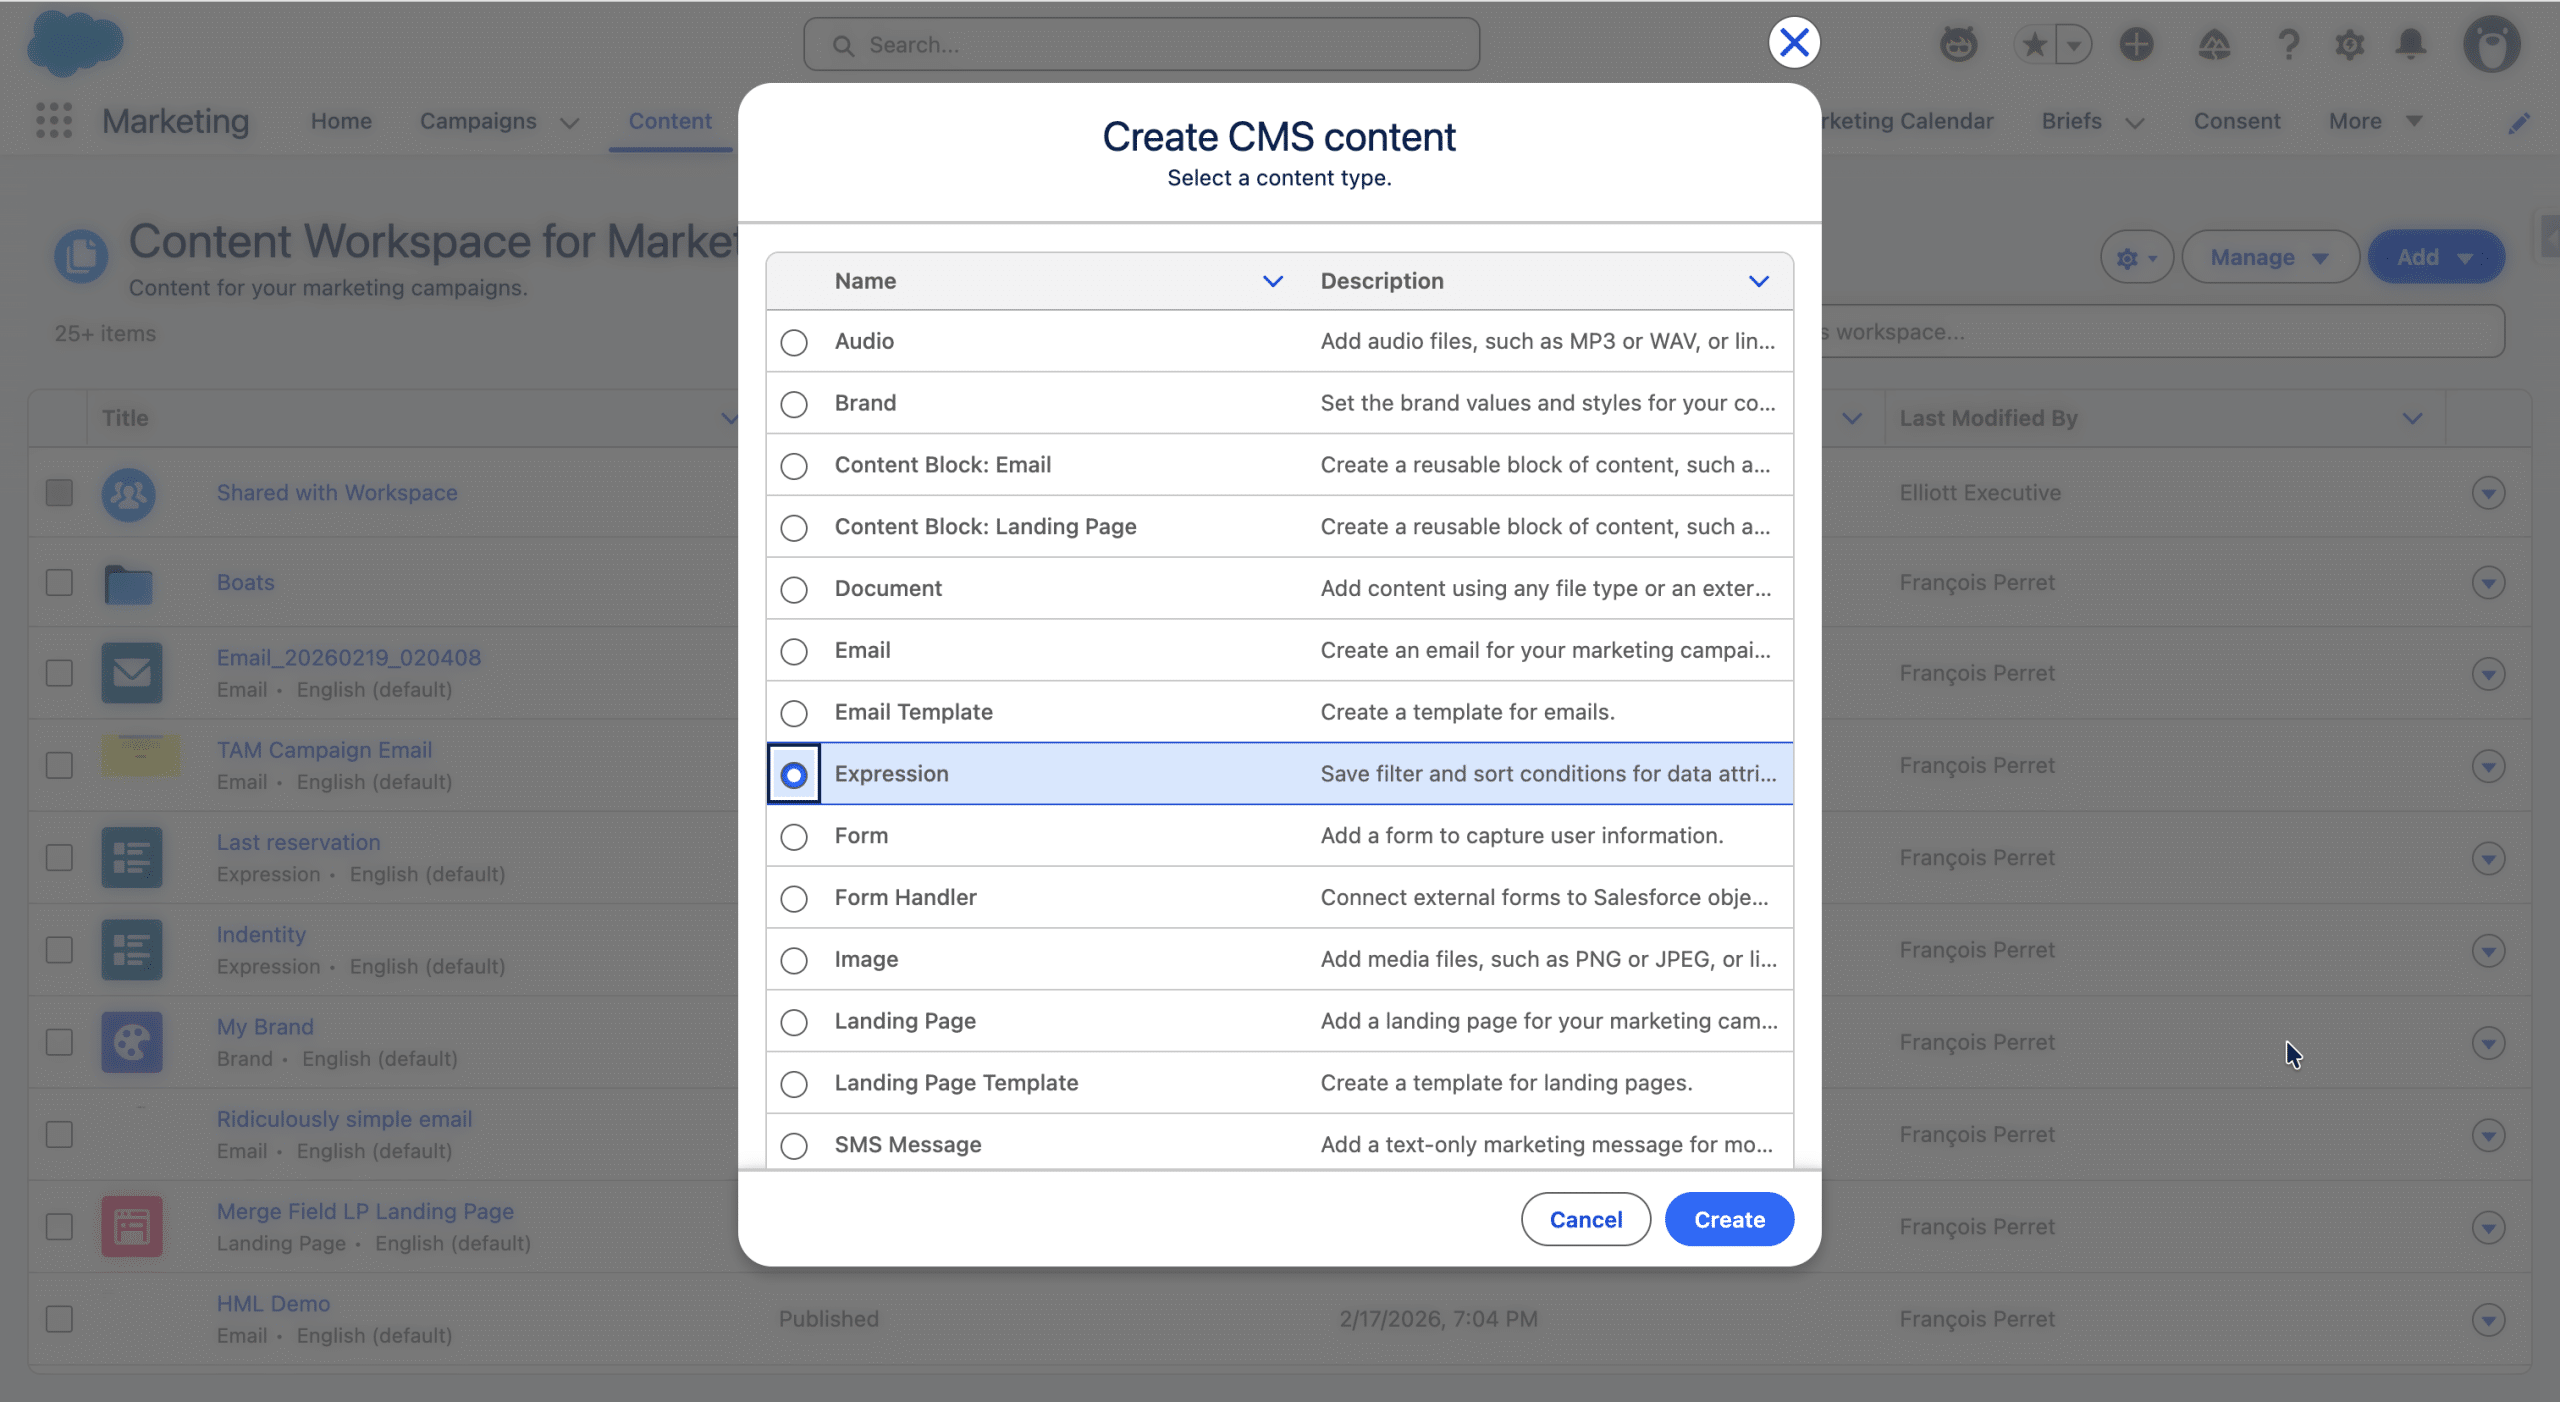
Once the Expression is created, you need to define the following elements:
- Title: This will be the Expression name in the CMS
- Description: Not mandatory, but a good practice is to describe its purpose and when to use this Expression
- Data Source: This is the Data Graph, the default one is used. The following criterias are coming from it
- Attribute: This is what will be displayed in the Asset. It can simply be an Attribute of the Unified Individual DMO, or any Attribute in a related DMO.
- Sort By: Even though the selected Attribute can be tied to mutilple records (like Boat reservations in this example), you can only have one record’s attribute displayed, so you need to sort them (use Repeaters to display them all).
- Where: We don’t want every Boat reservations for this Unified Individual, only a specific Brand, so we add Filters
- Ressources: You can add more DMOs from the Data Graph for cross personalization.
Then you Save and Publish the Expression.
(Re)use an Expression
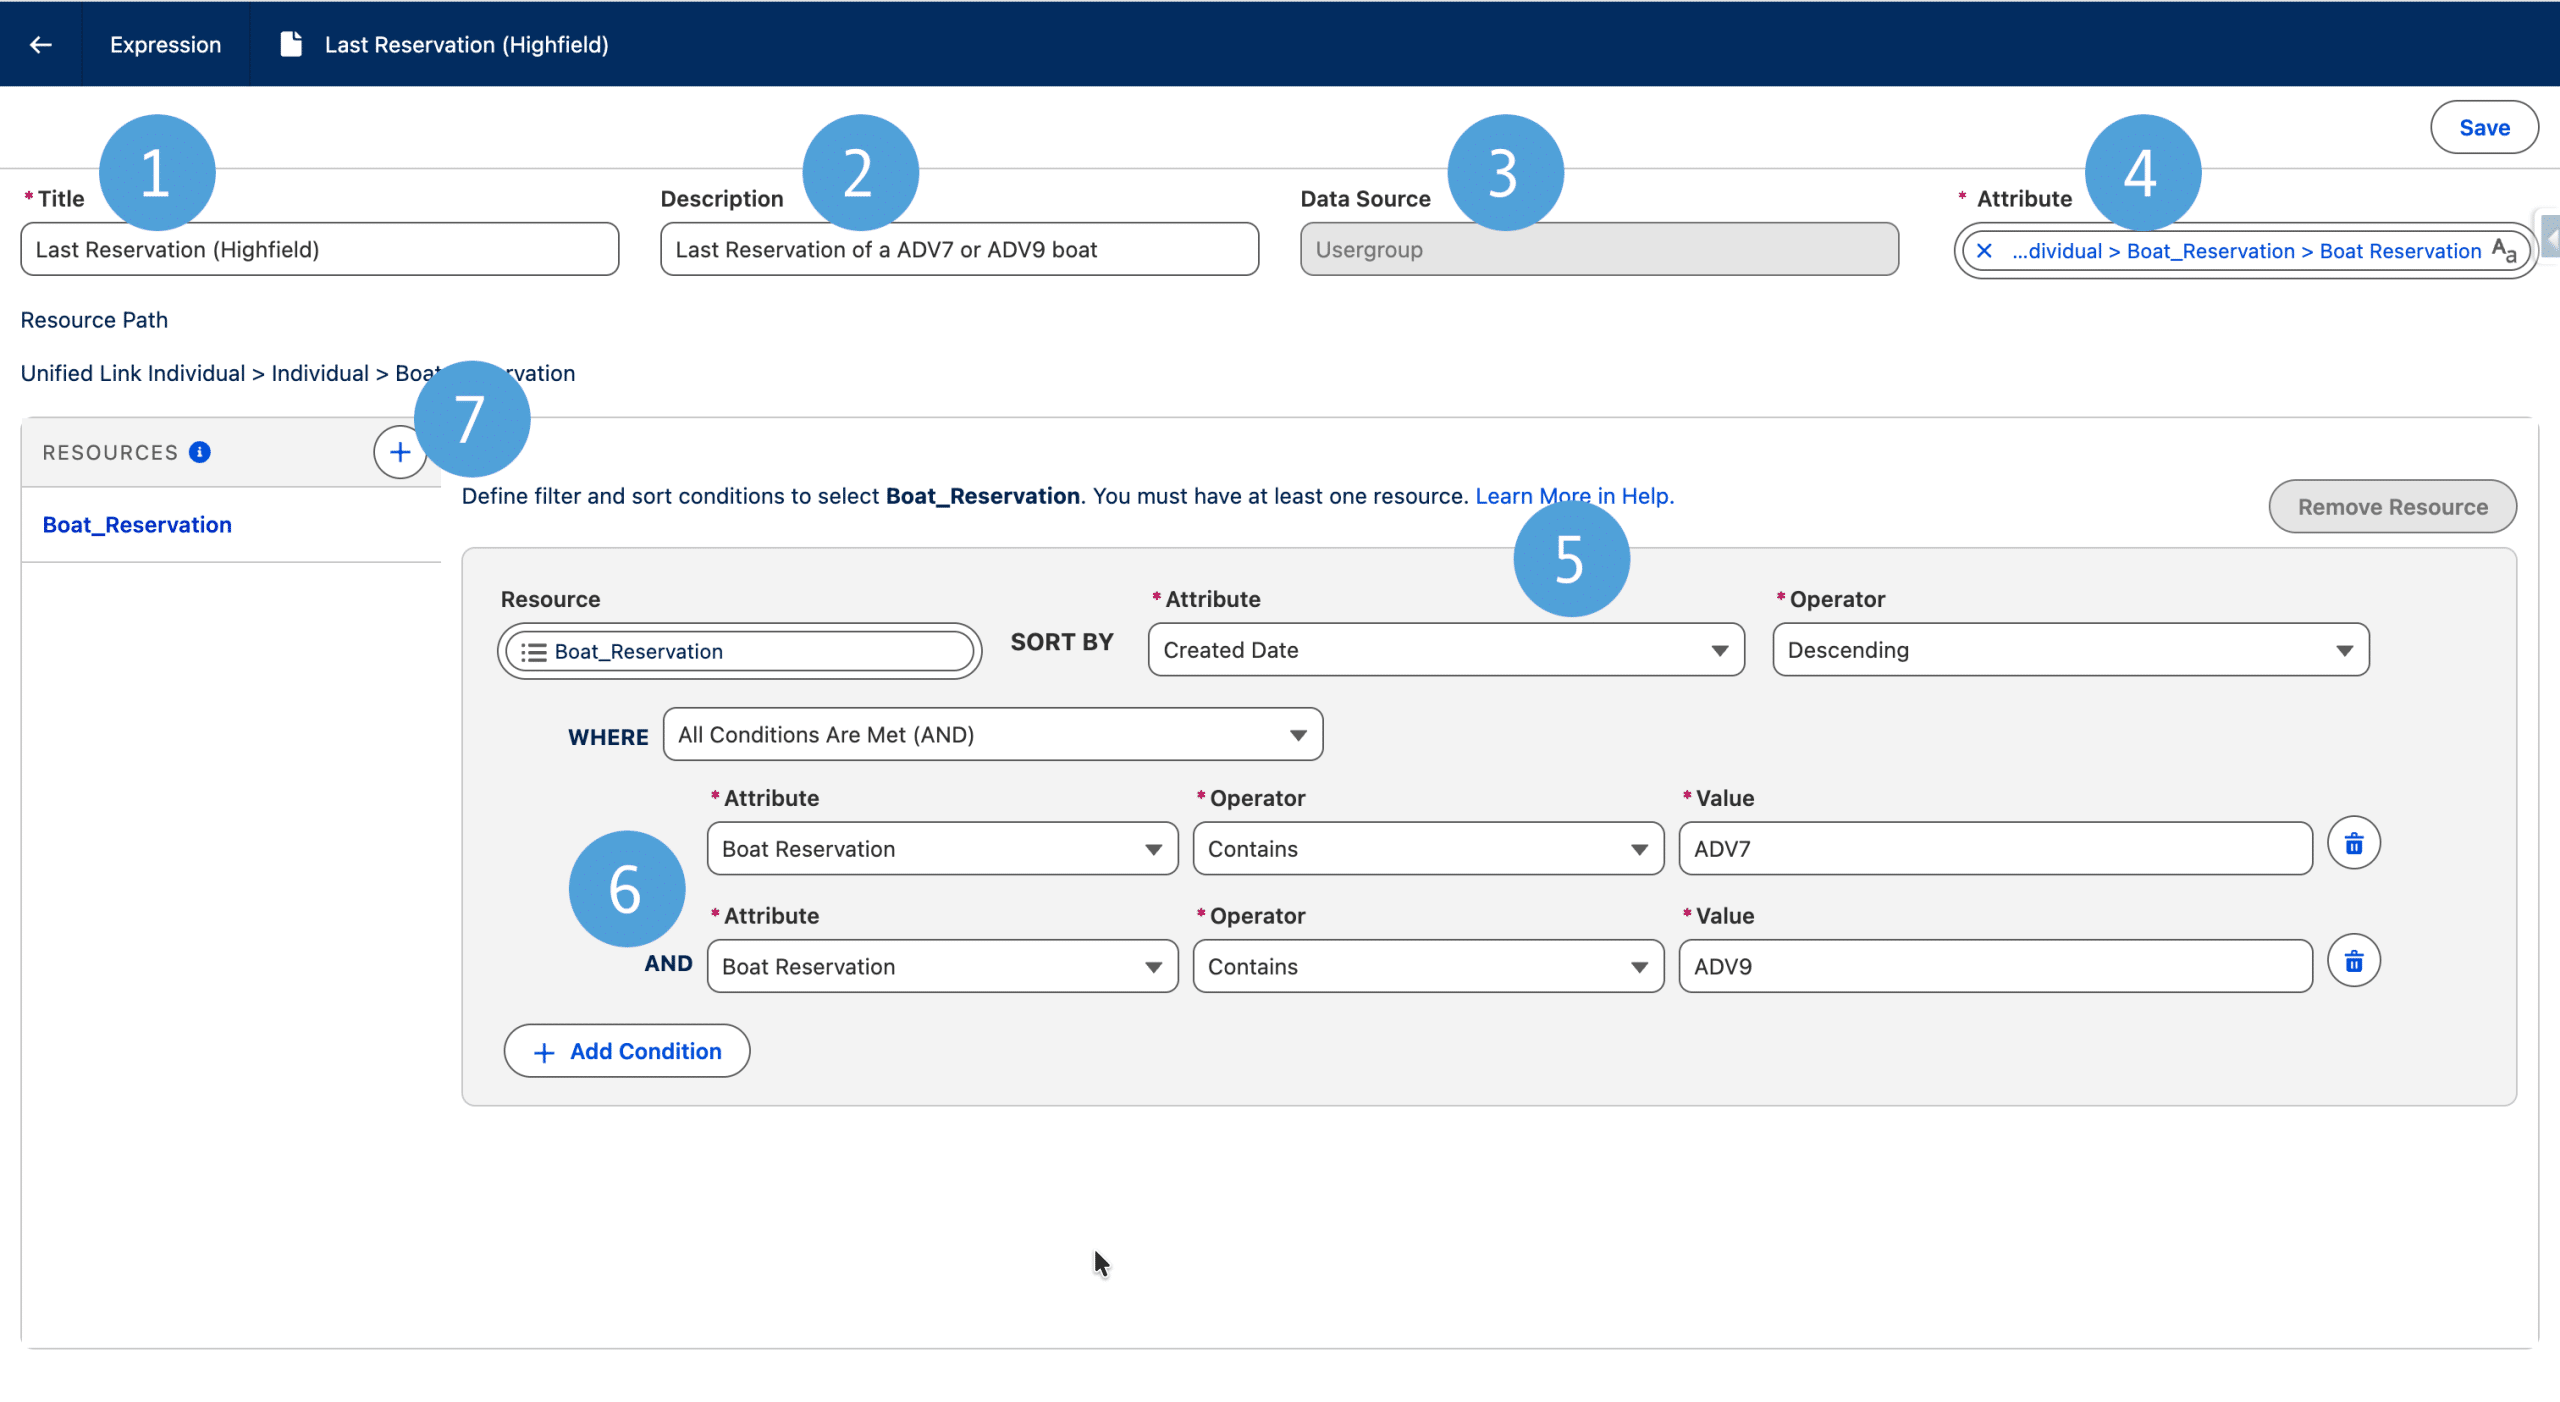
Now that our Expression is created and published, we can use it in one or more emails, by adding a Merge Field (using the {} in the toolbar) and selecting Saved Expression (you may need to scroll to see the option).
Then you select your Expression from the List (search for its name if you have many).

This is what makes Expressions handy, they are Merge Fields templates, which means that when using them to create your Merge Field you have a starting point, created for you by cloning the Expression criteria, and you can then use them as-is or adapt them to your needs (in that latter case, the Expression itself won’t be changed, it is just a starting point). Next.
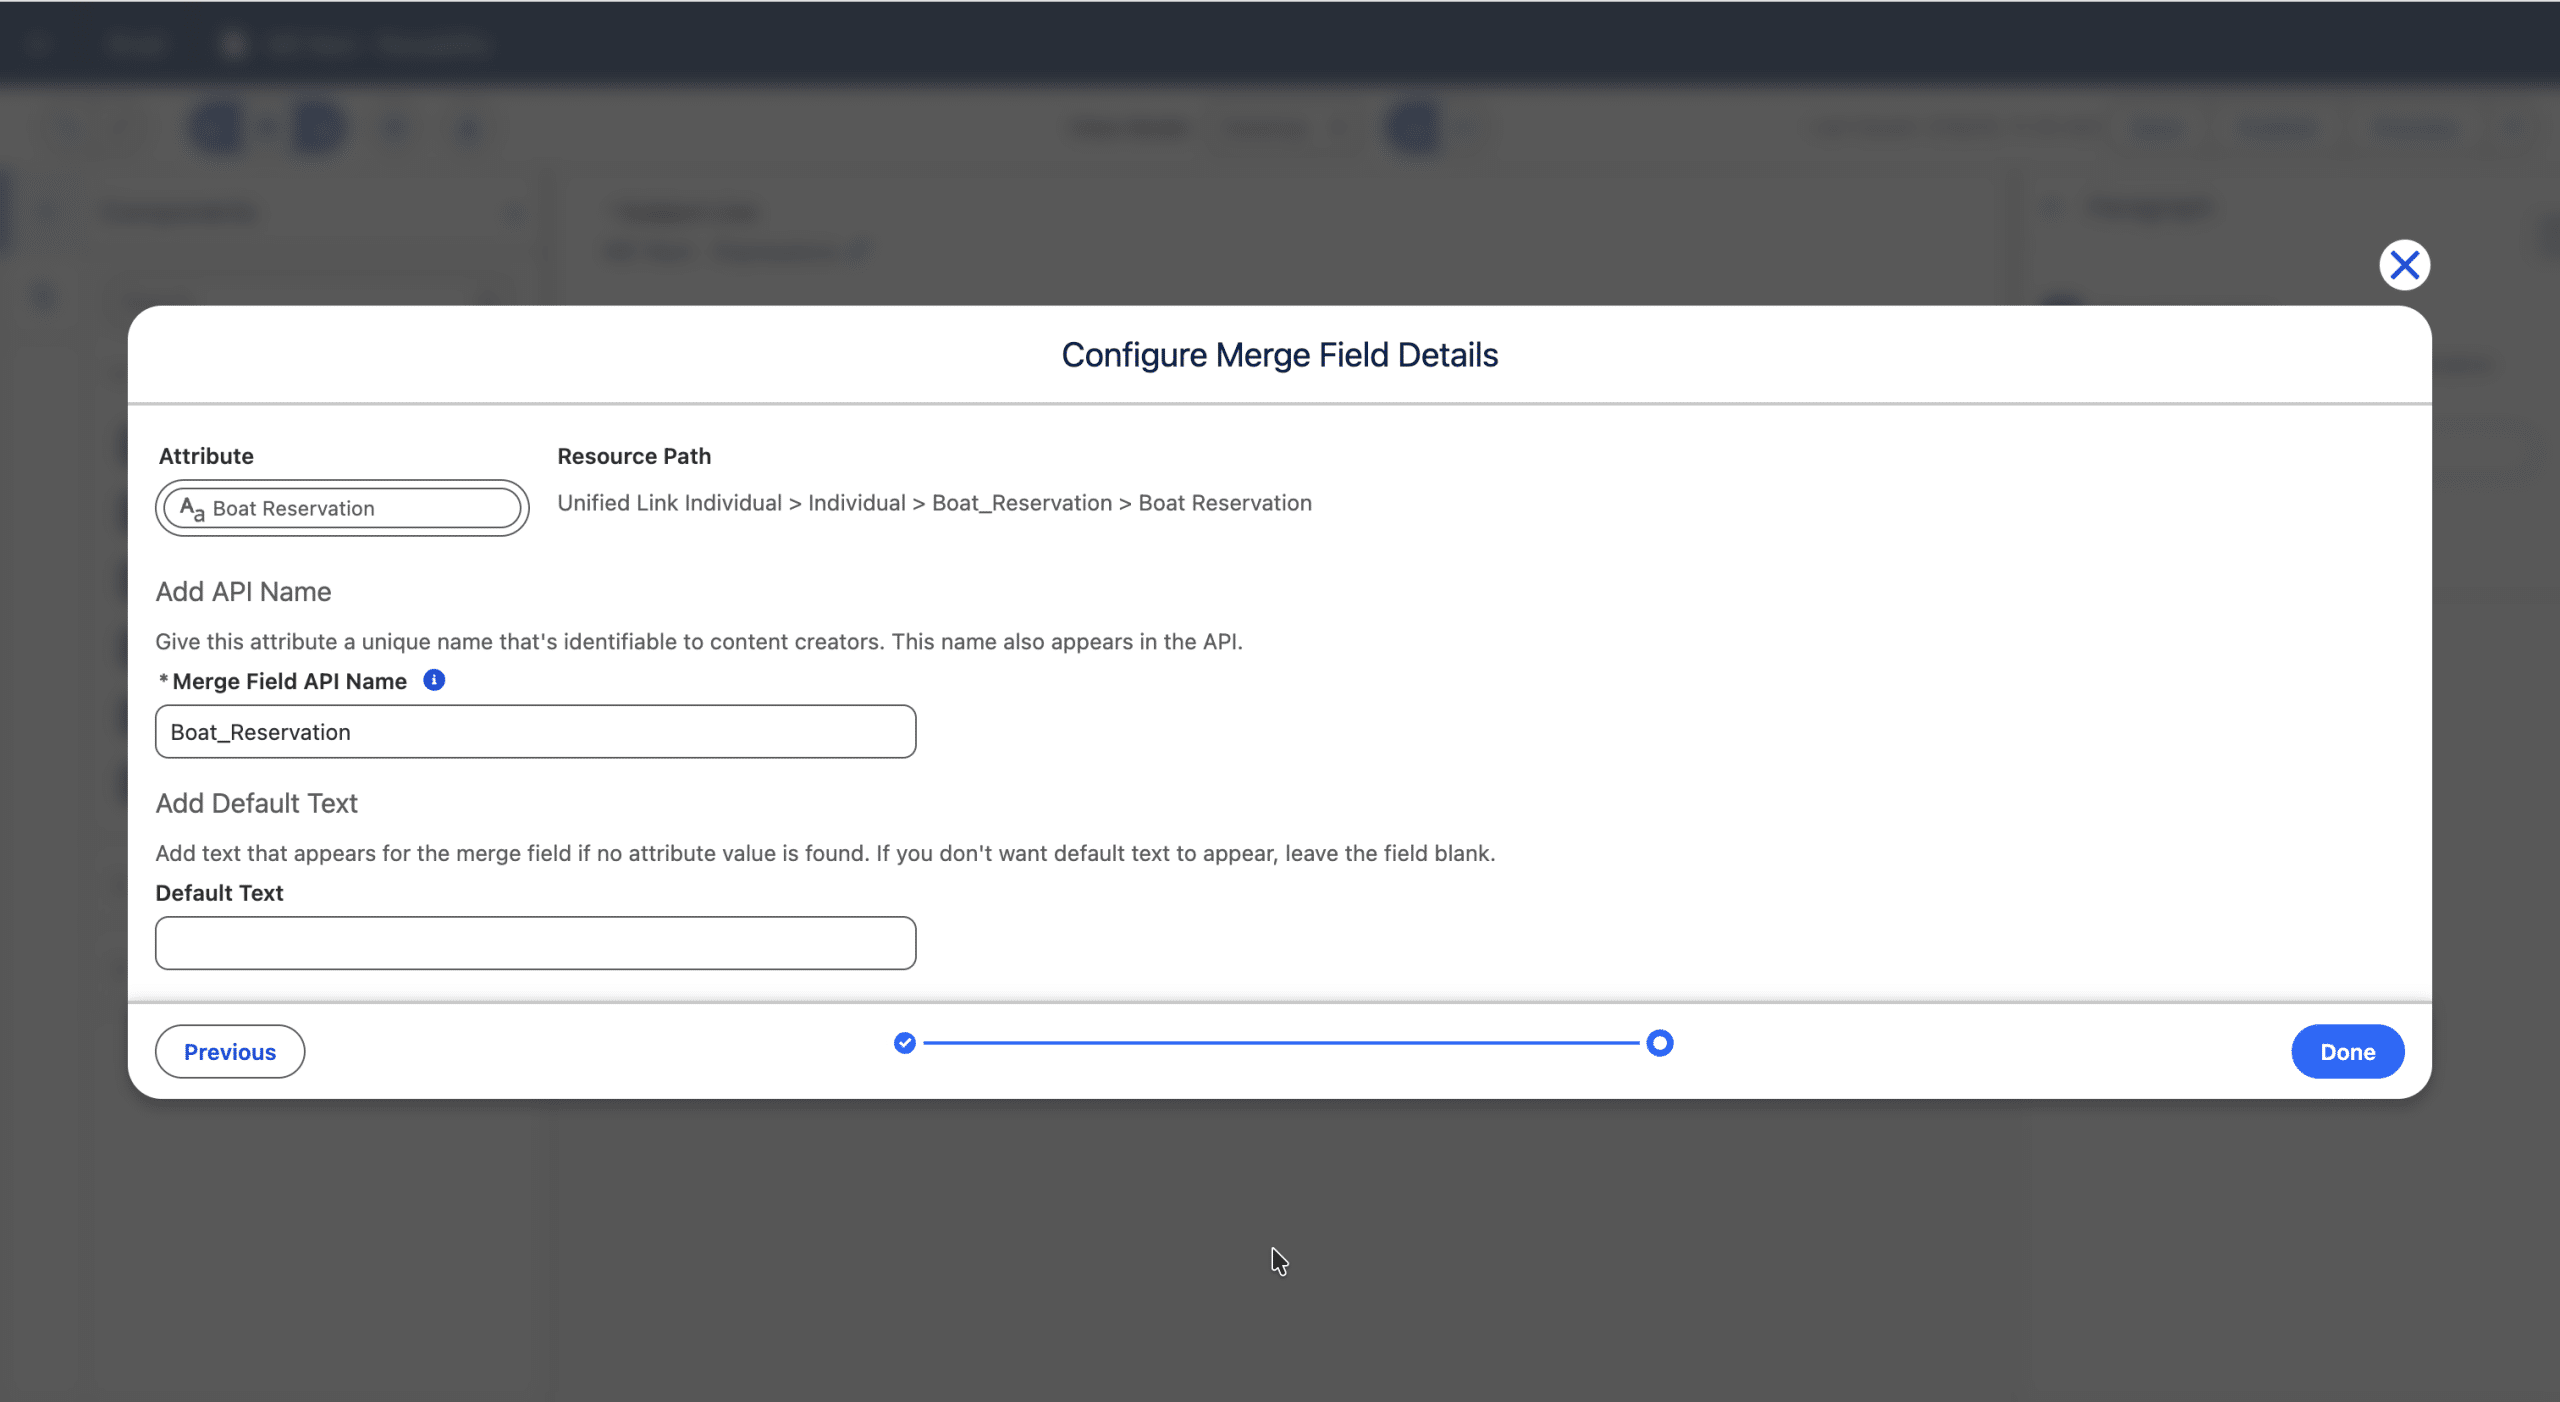
Define a Default Value in case the criteria return no value for a given recipient, and an API name (which will be visible in the Email canvas). It is a good practice to use the Preview feature of an Email to see how it renders for different recipients.
Define a section once, reuse it in multiple emails with «Content Blocks»
In Marketing Cloud Next, the Email Builder you can use predefined Components, like Paragraph, Button or Section. With Content Blocks, you can create a section made of standard components and use it in multiple emails. By changing the Content Block in one place, then every Email that include it can benefit from that centralised modification. Think Header or Footer for example.
How to create a Content Block
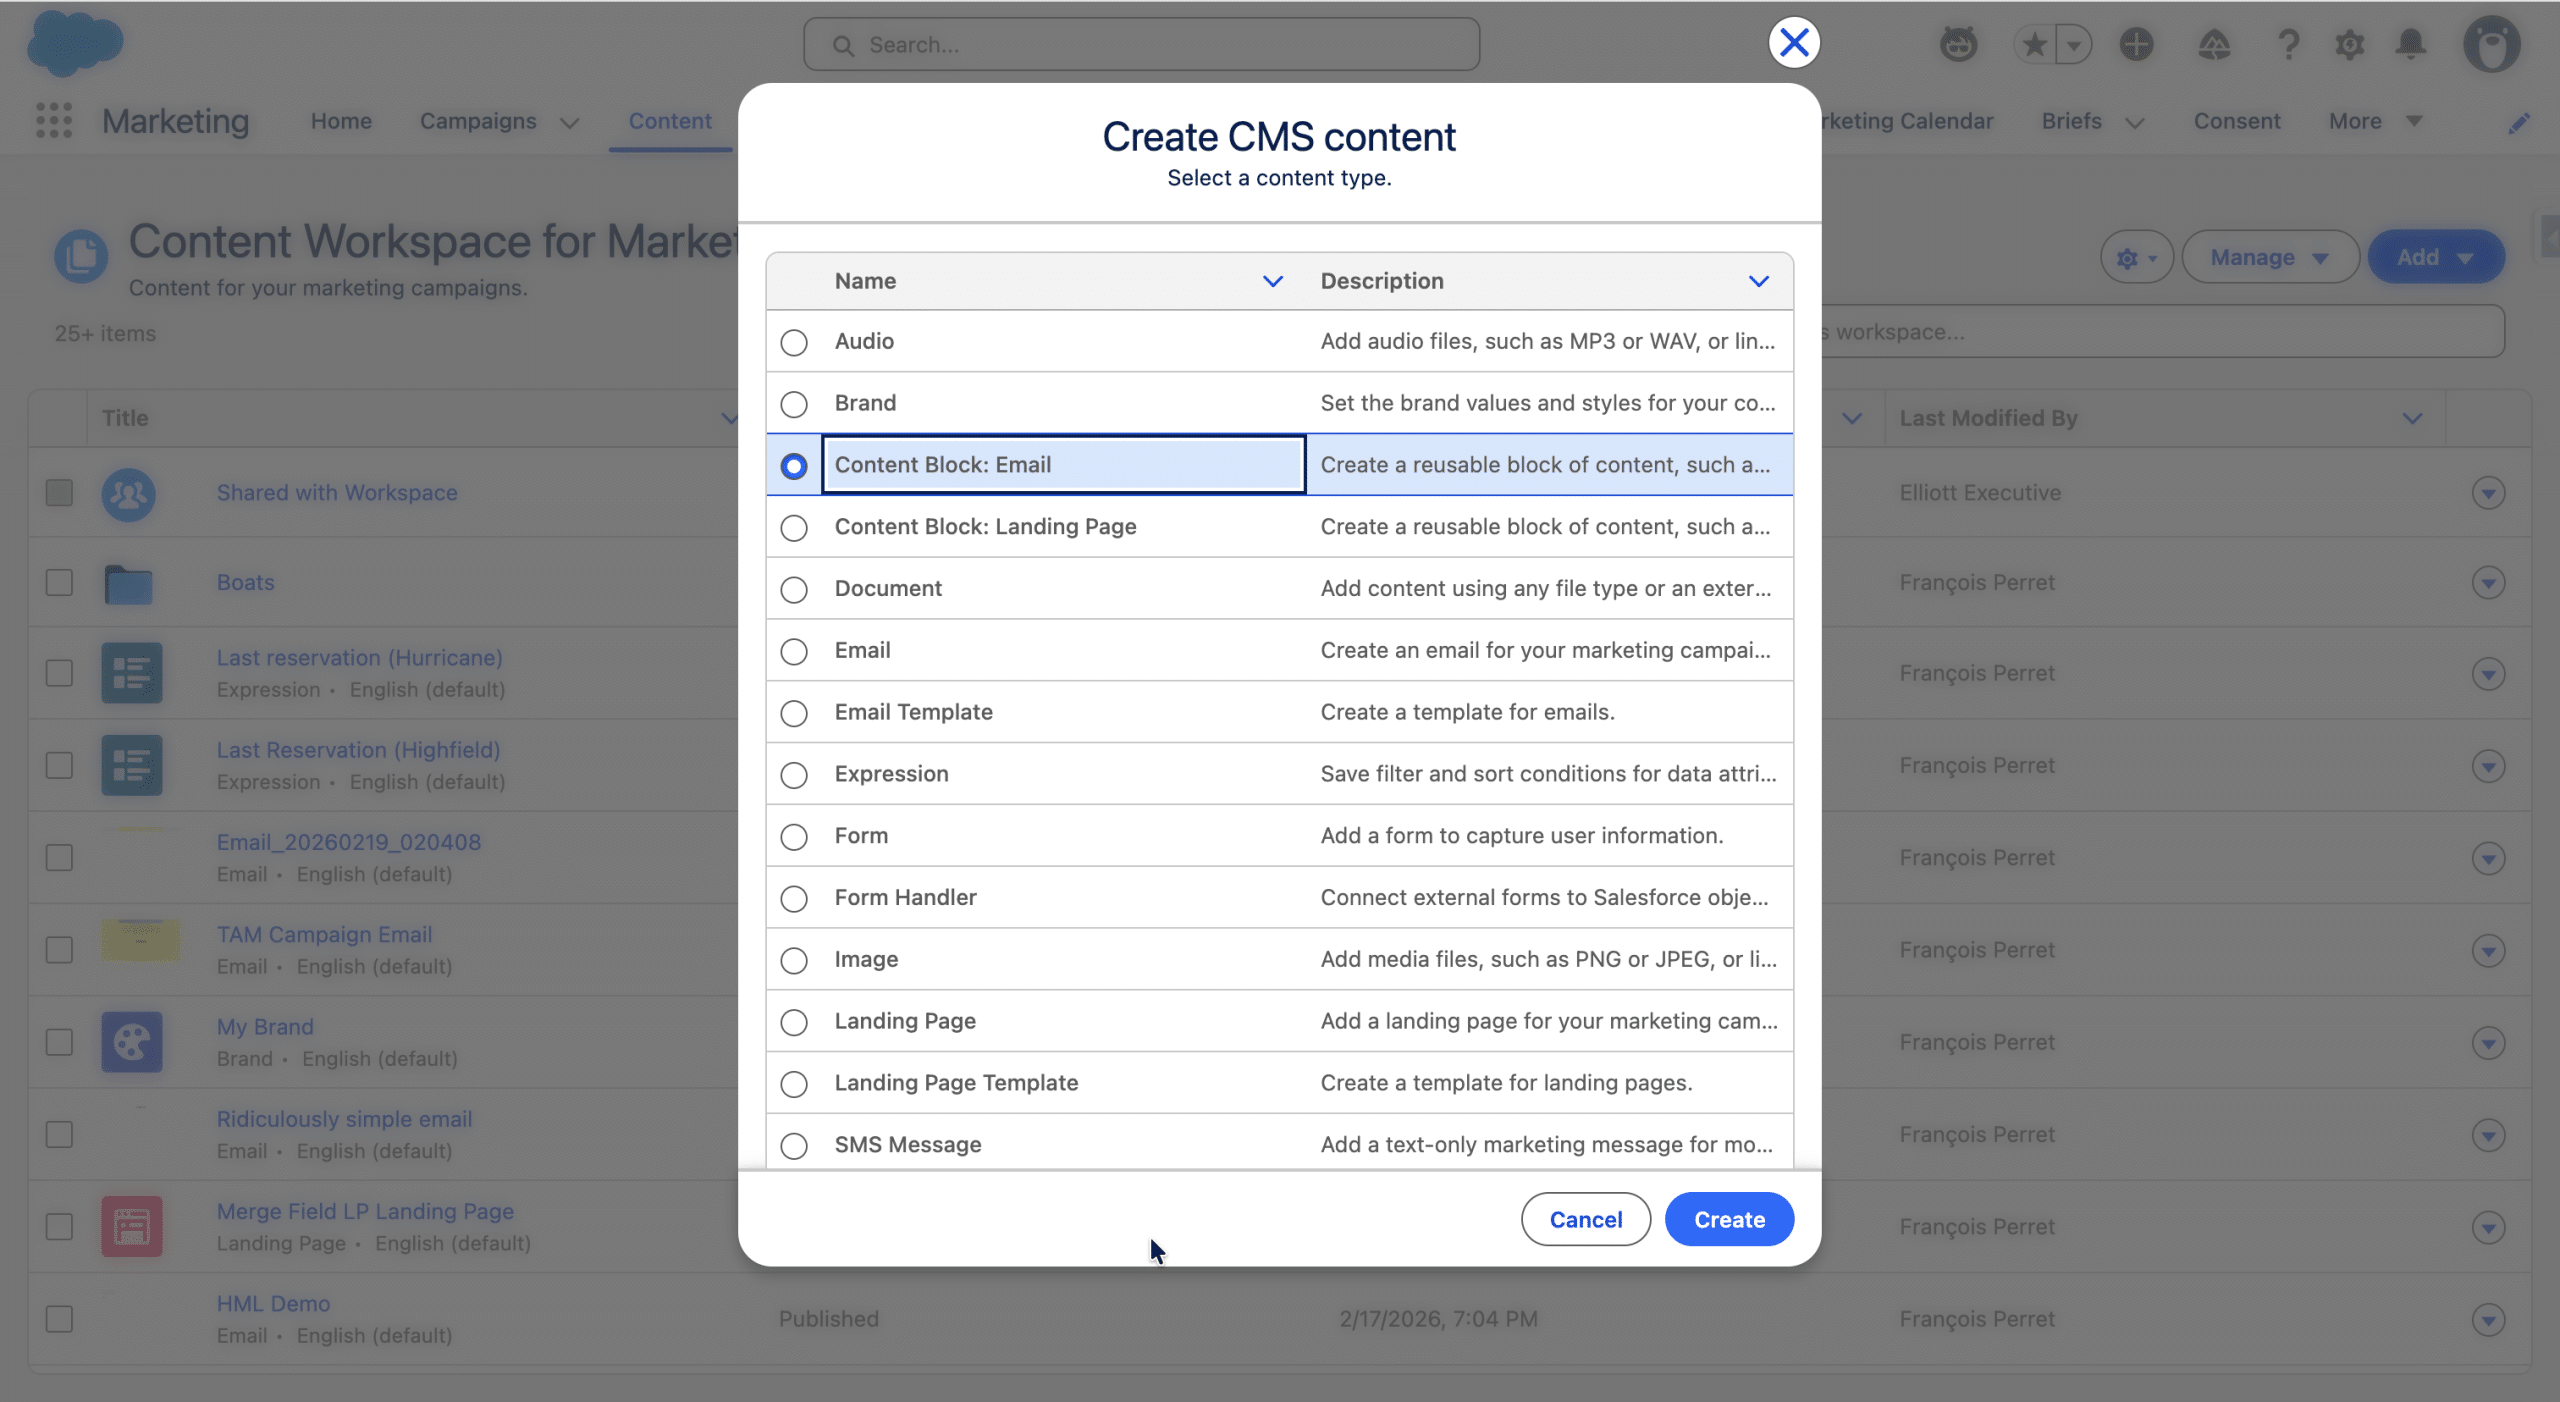
You can create a Content Block from the CMS (not from an Email, as there is no “Save as Content Block” yet).
Once created, you give the Content Block a name (use the pencil icon) and create your reusable section.
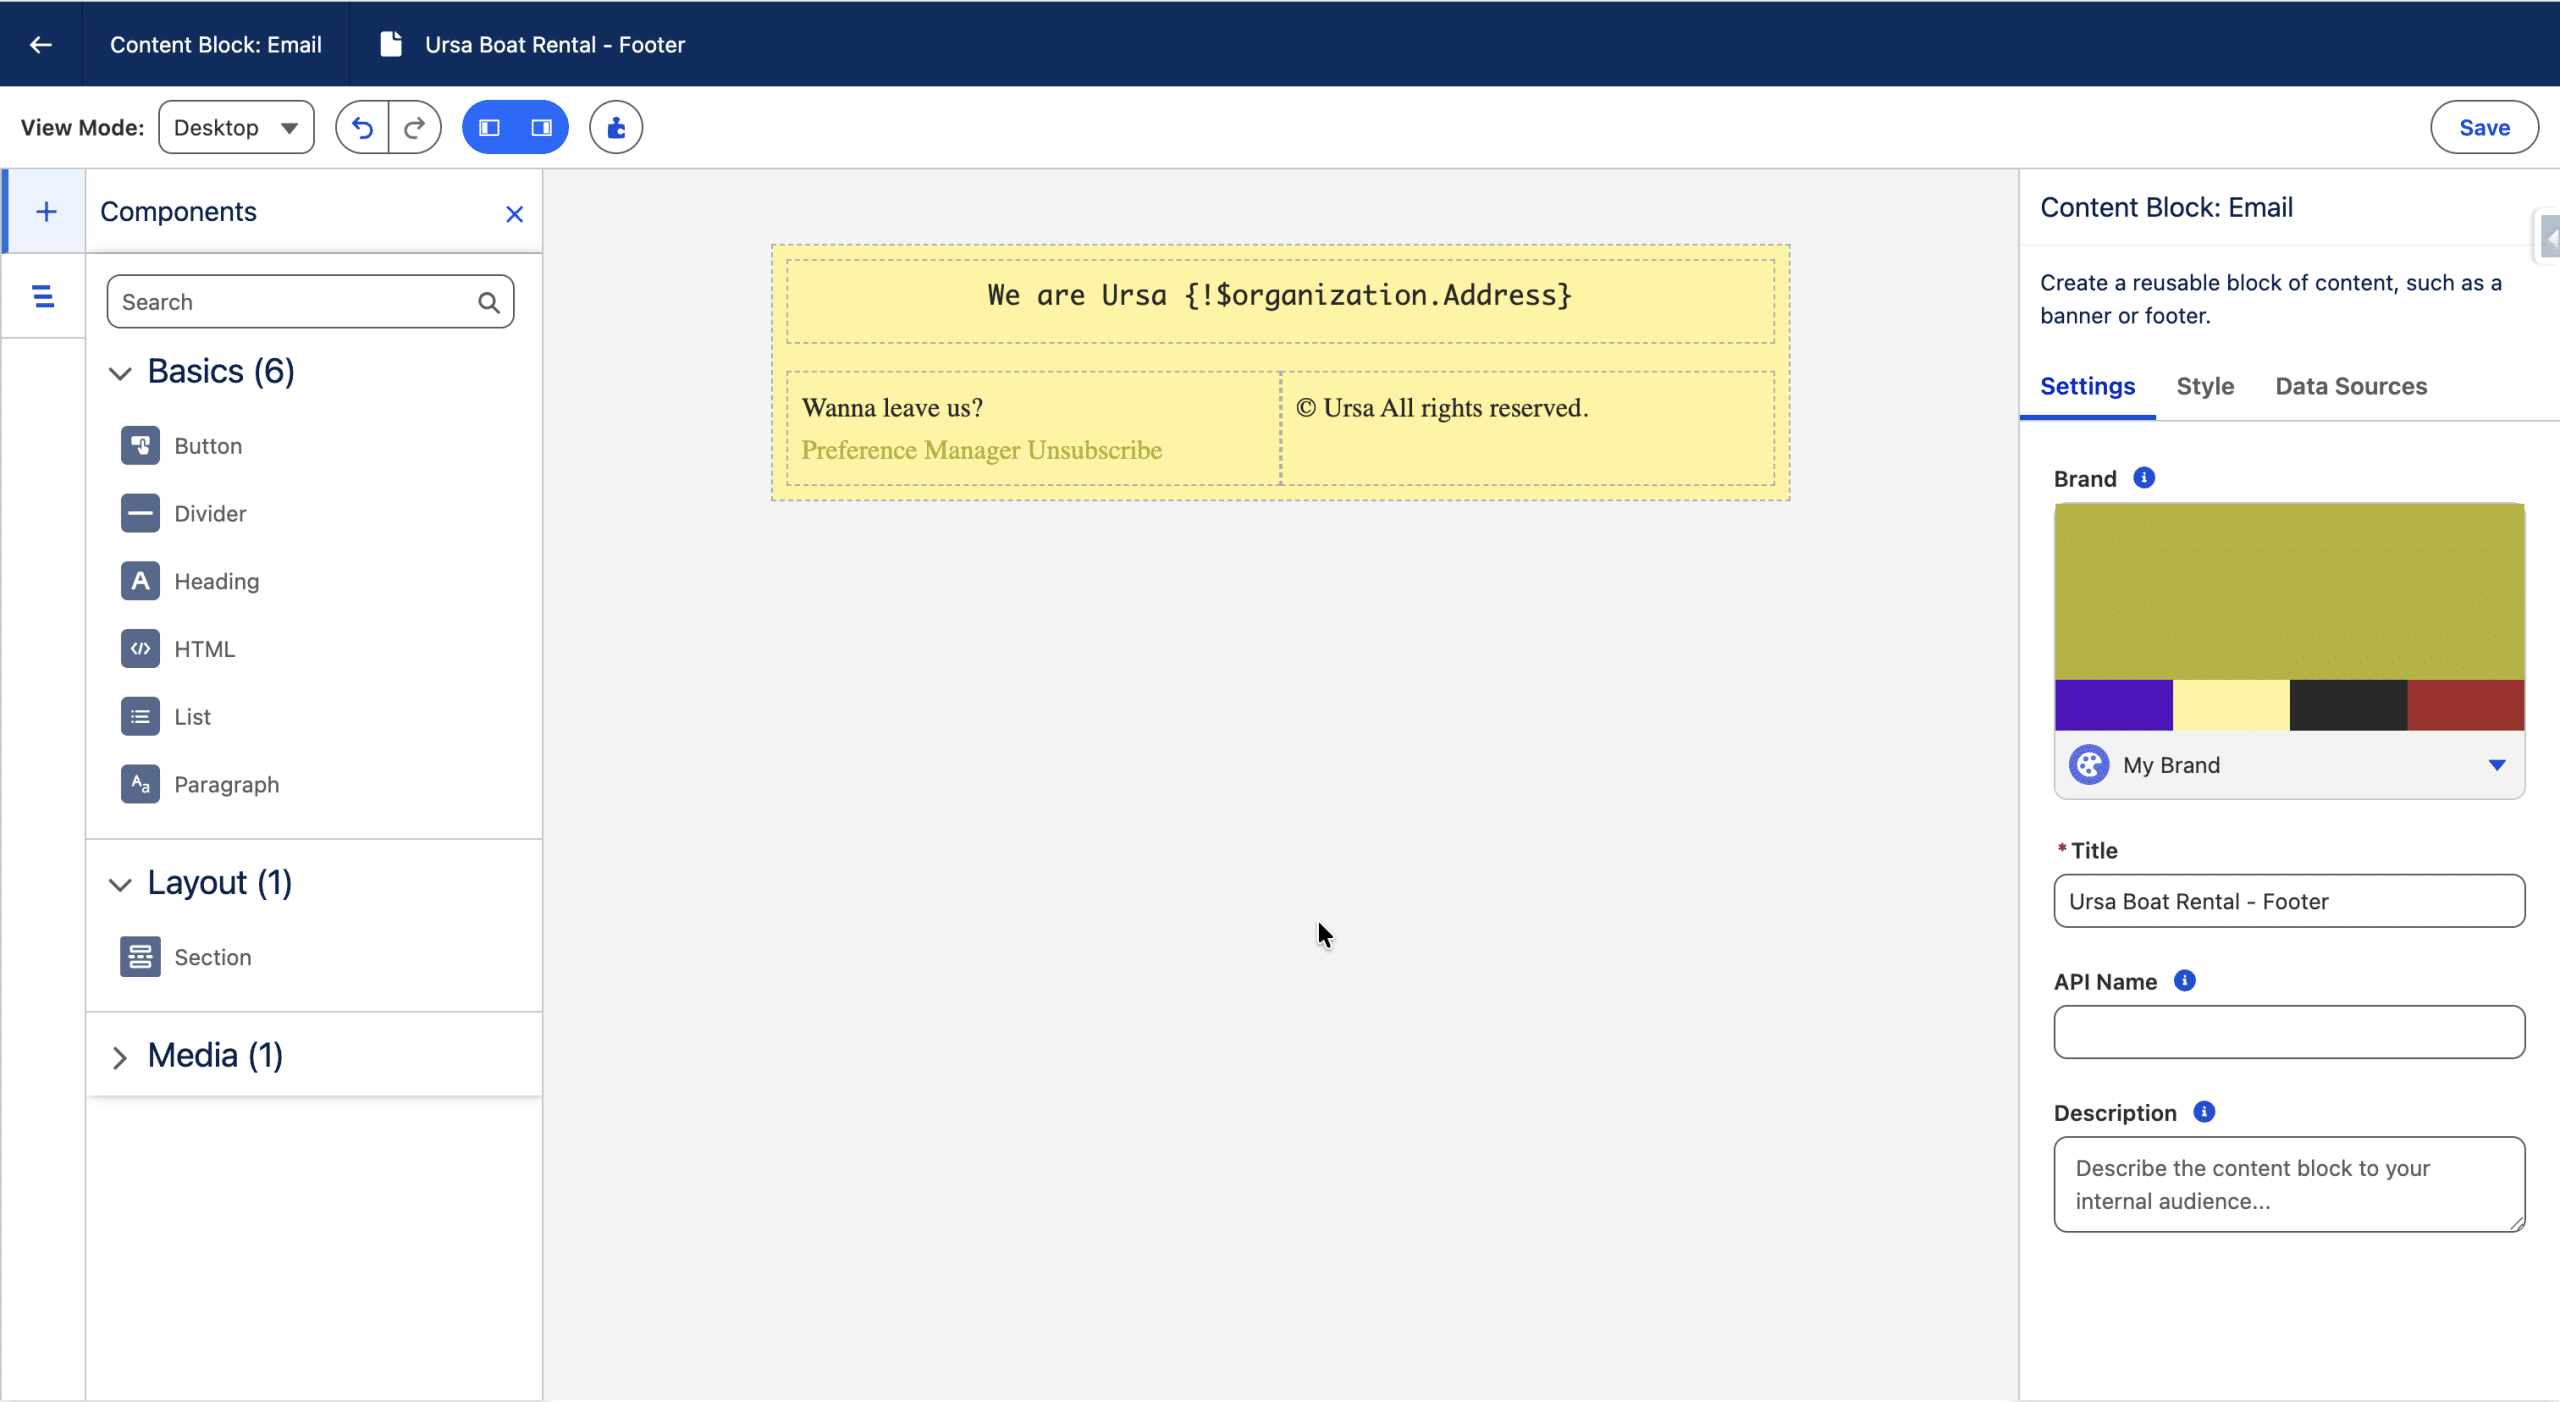
You can use every standard component on the left in your Content Block (including Expressions). You cannot nest an existing Content Block into another Content Block, and Repeaters are not available. The Variations (Dynamic Content we will explore in the next section) are not available in a Content Block (but you can create several Content Blocks and use them as Variations in an Email). If you use a Brand (you’ll discuss Brands later in this article) to style a Content Block, and the Email that uses this Content Block also has a Brand defined, the Email Brand has precedence.
Once done, Save and Publish your Content Block, which is now ready to be embedded.
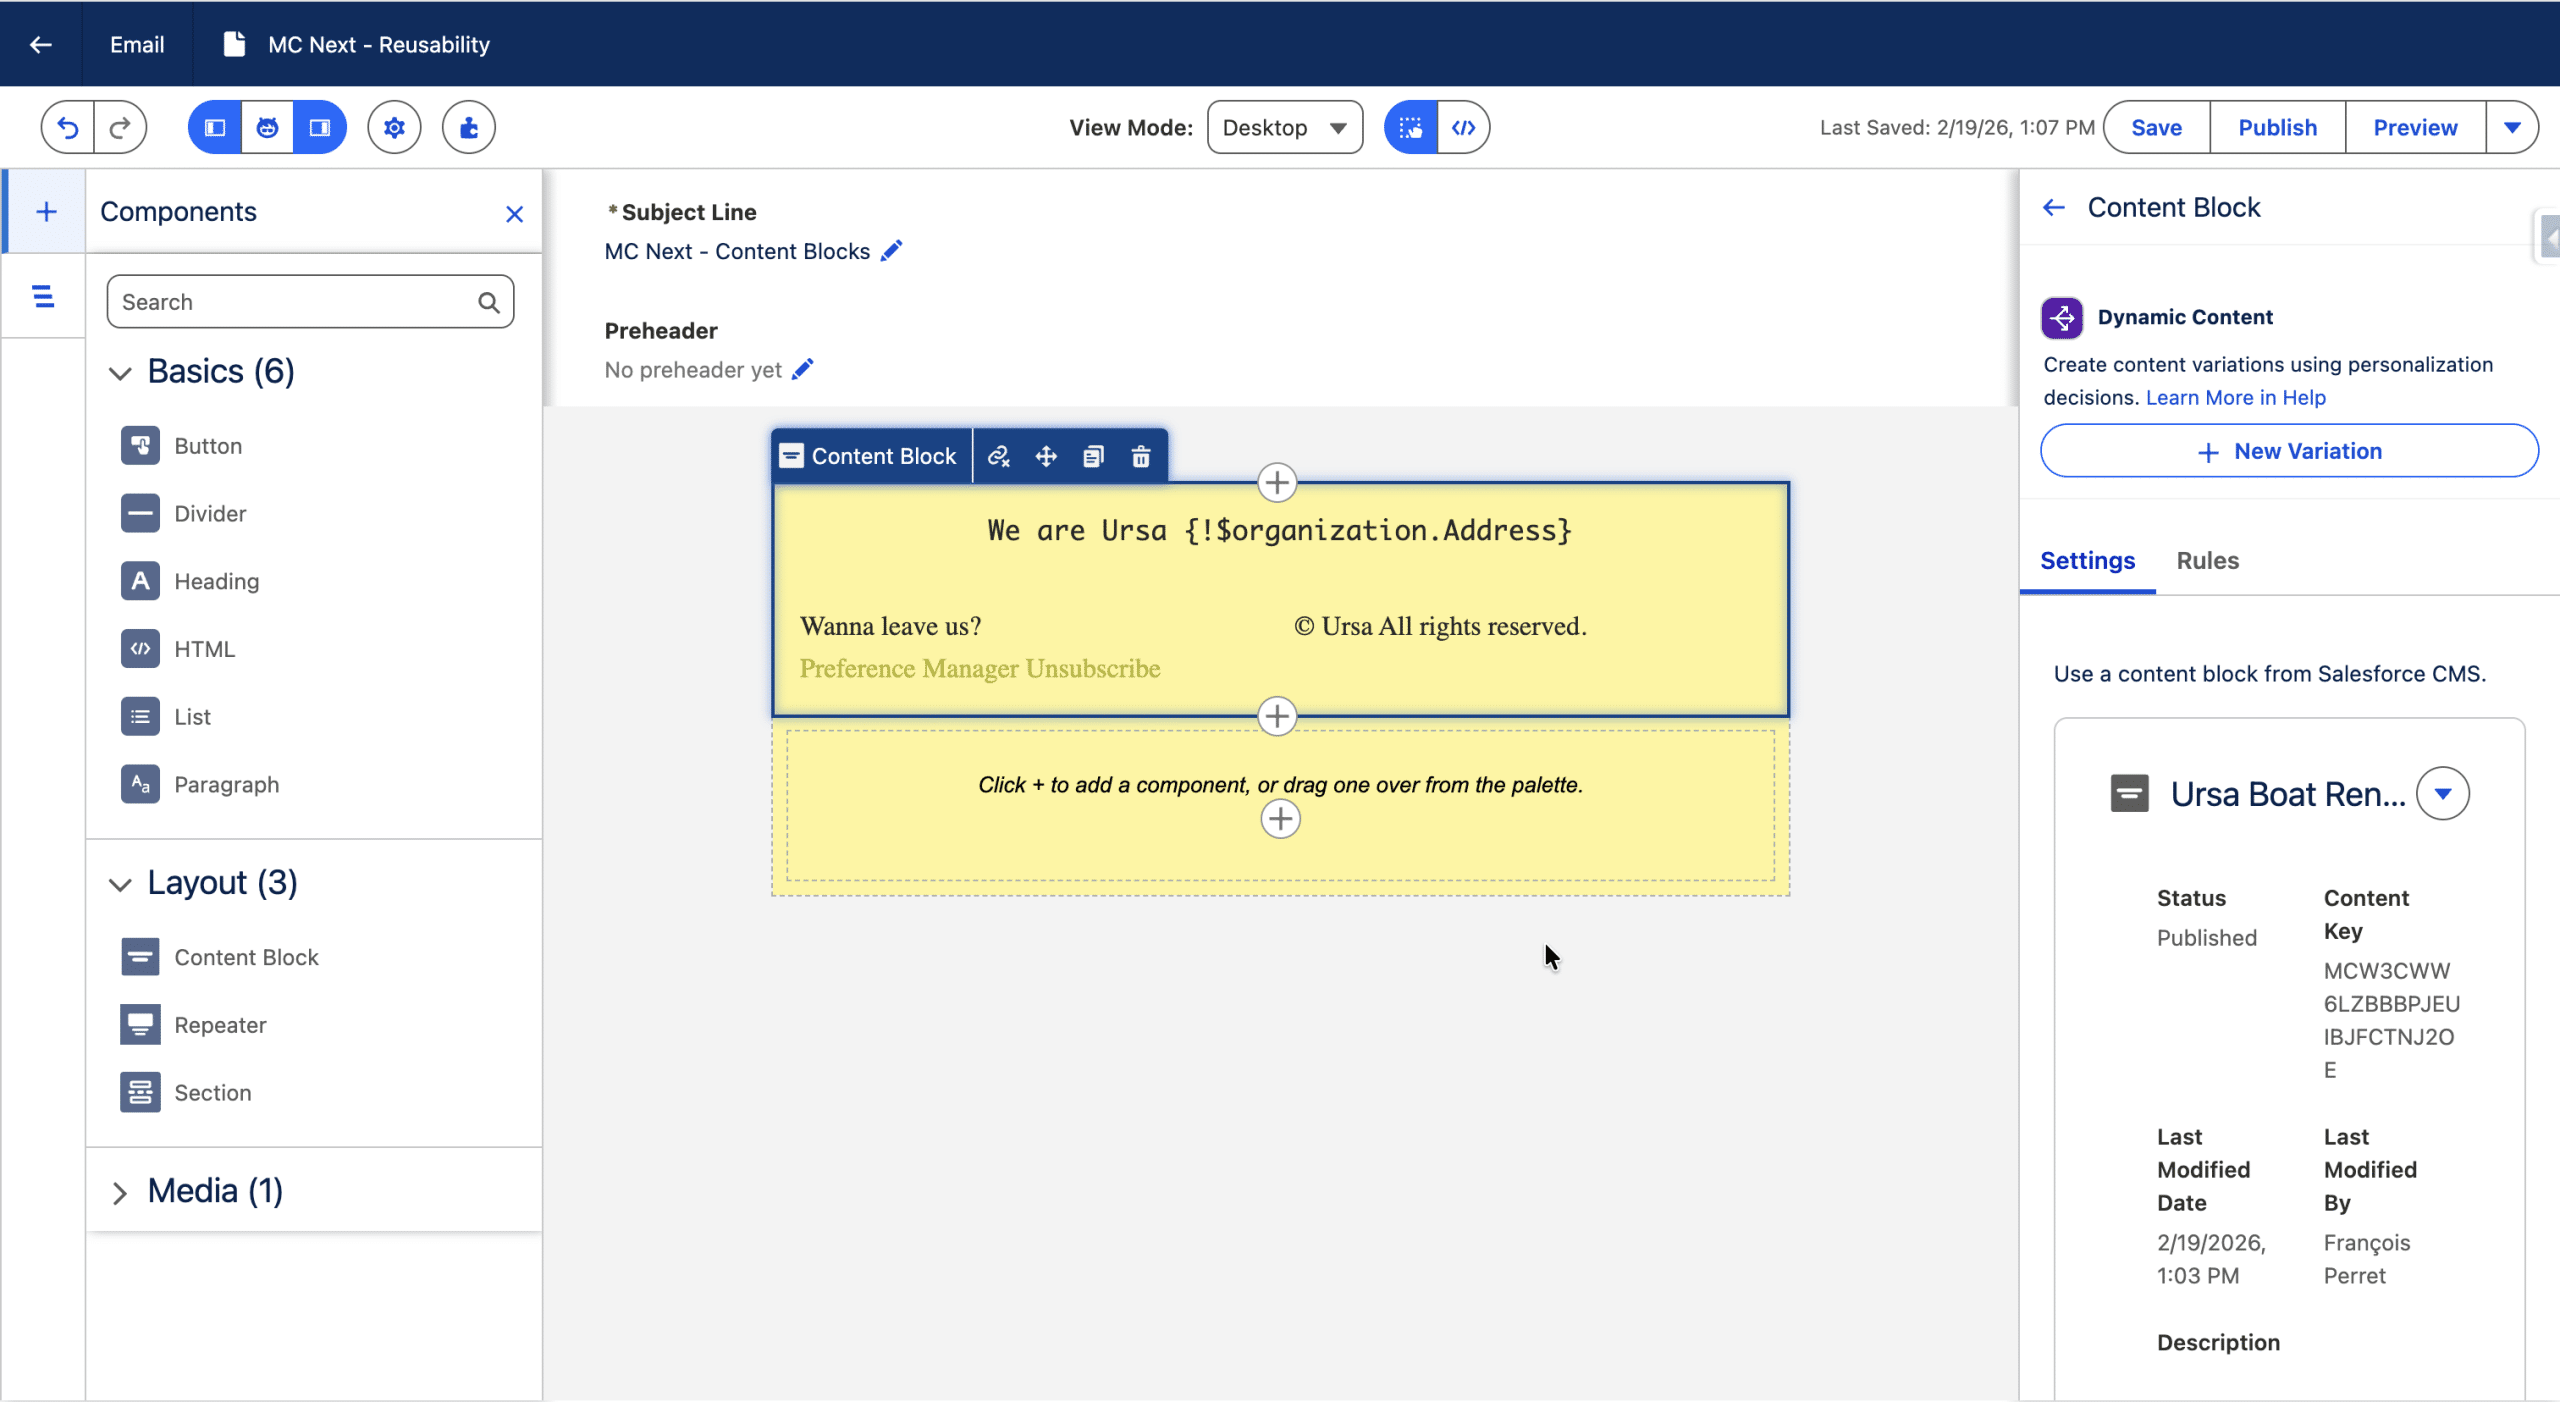
(Re)use a Content Block
From an Email, you drag the Content Block component from the left sidebar, in the Layout section, into the canvas of the Email Builder.
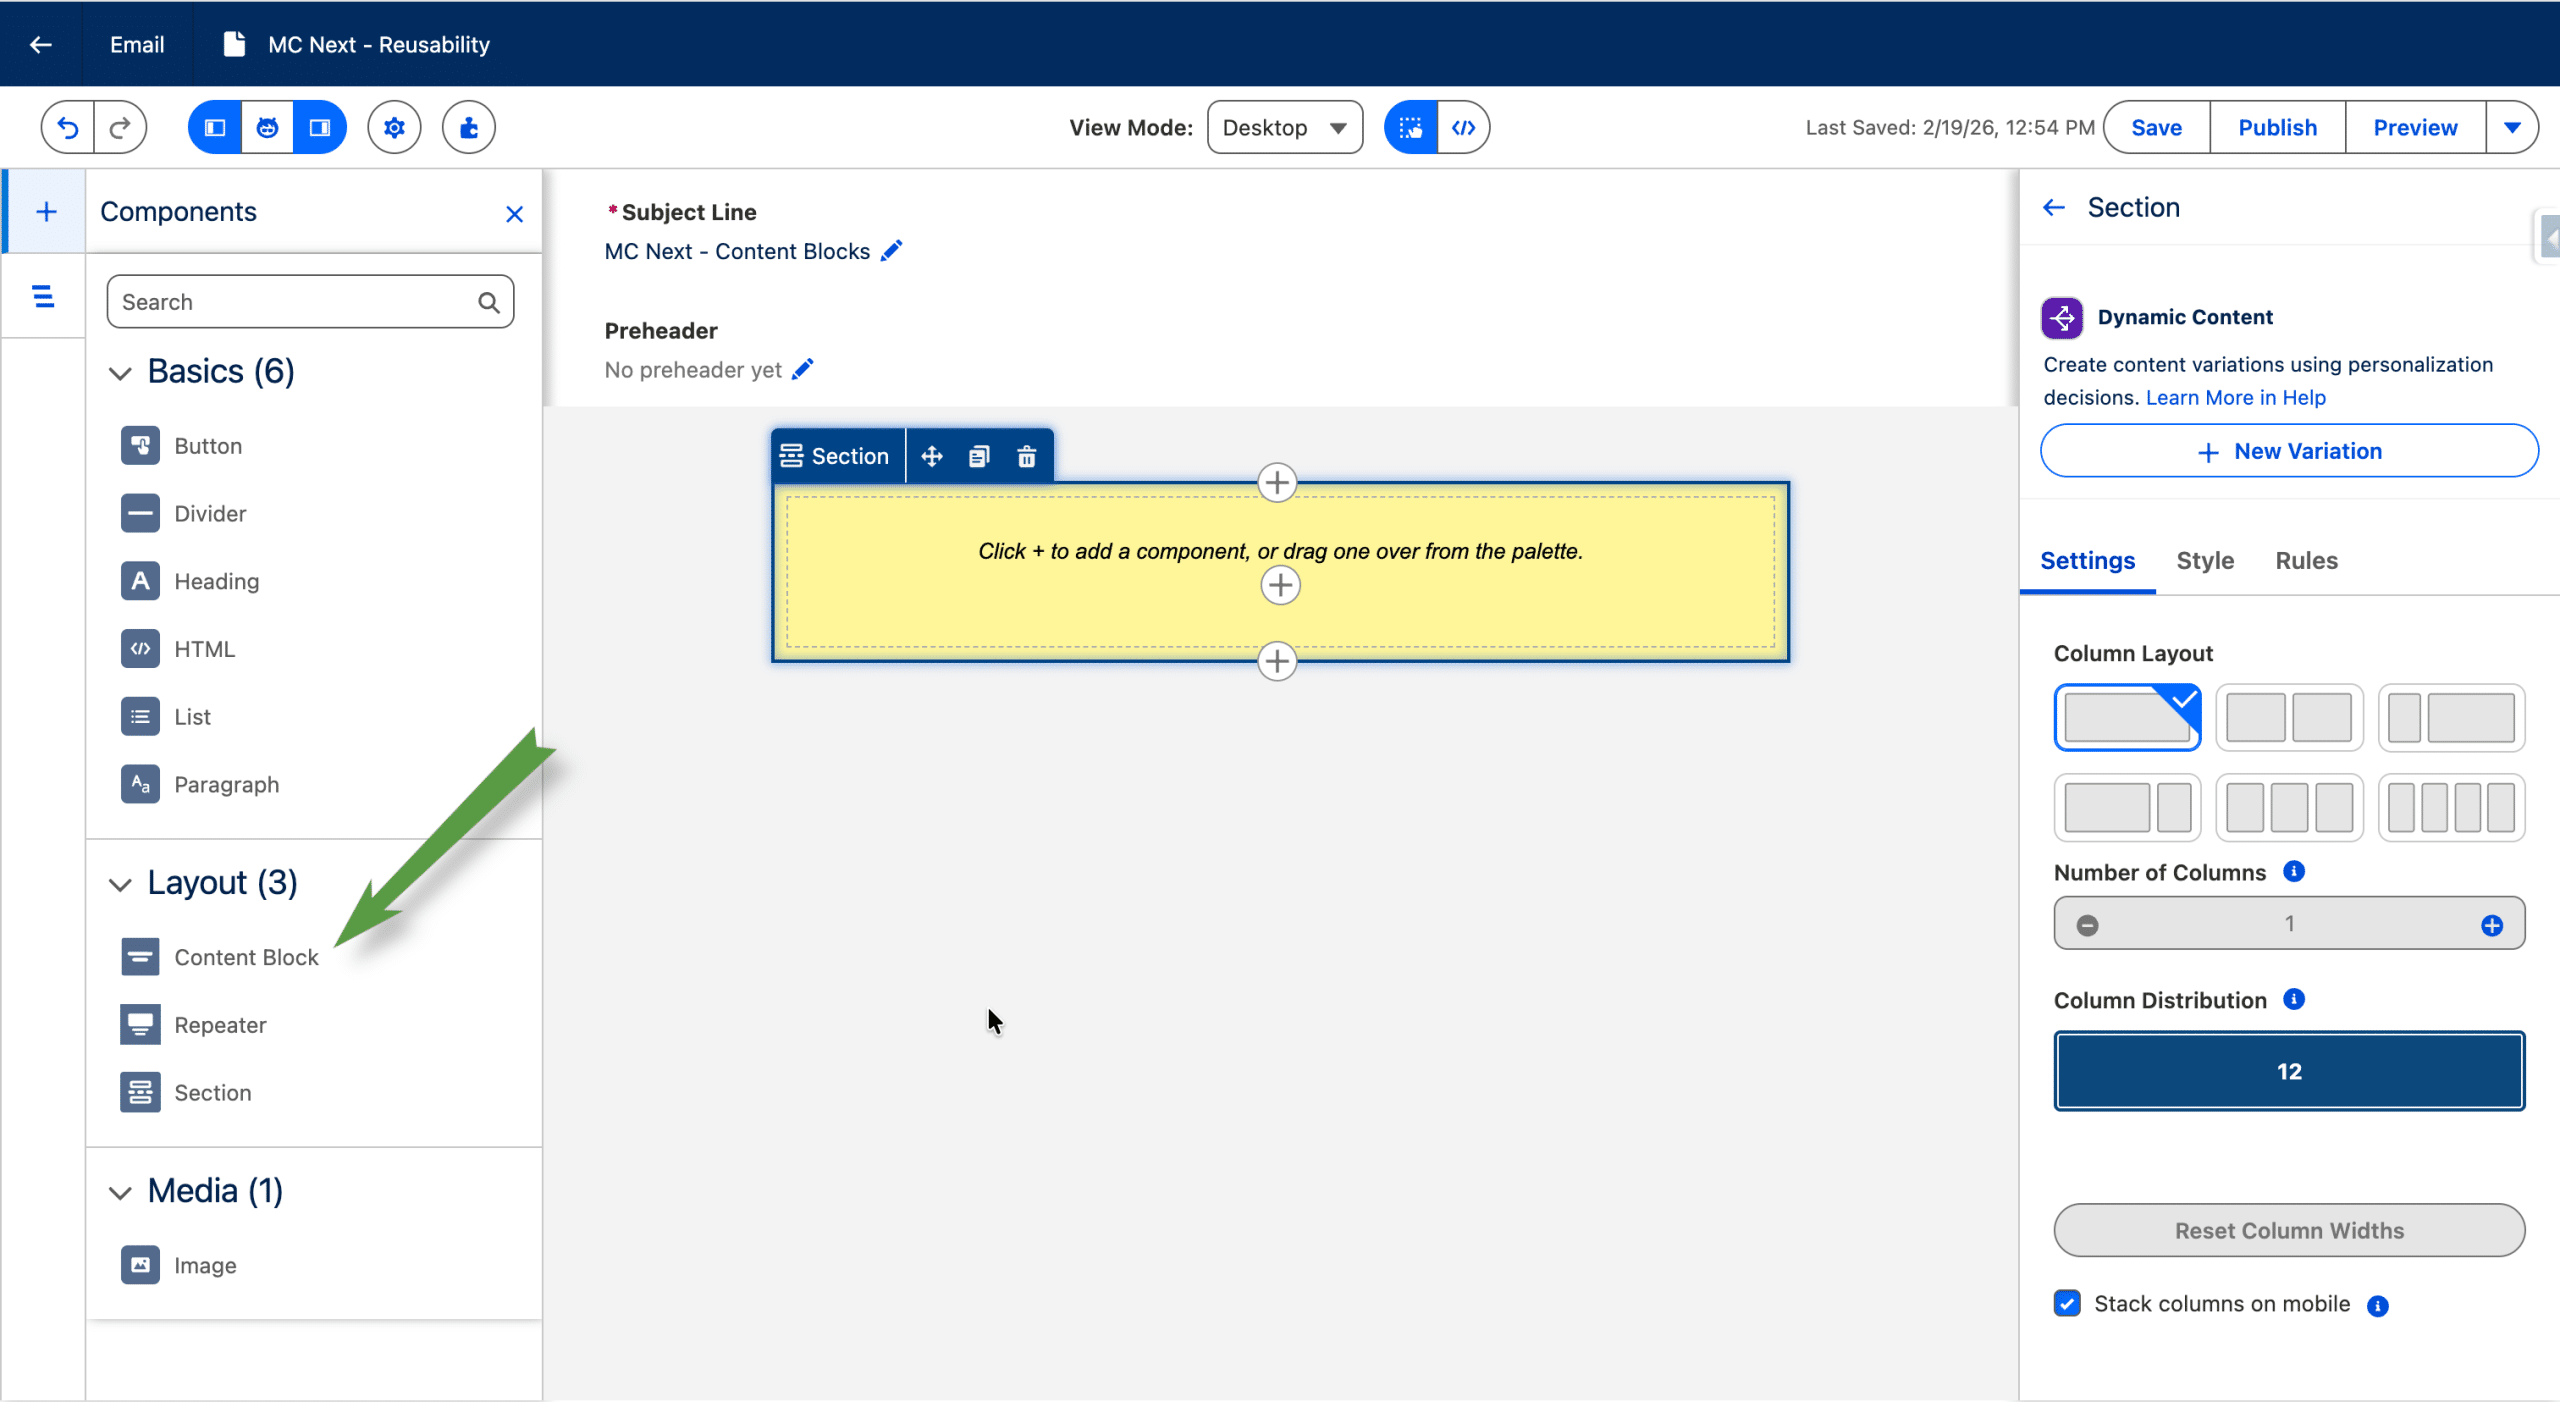
As a Content Block is essentially a Section, you cannot drop it in an existing Section (as Sections cannot be nested), so you need to drag it above, below or between the existing Sections. Then you select the Content Block you want to use, from the list of published ones.
You can define Variations, as we already stated above, but when inserted, if you want to edit the Content Block, you need to do it by opening it from the CMS and make changes.
If you want a Flow (Segment Triggered Flow or Form Triggered Flows for example) to use the latest version of the Email, you need to publish the Email (the Flow does not need be paused and there is no need for a new Flow version). So whenever you make changes in a Content Block embedded in an email, you need to:
- Publish the Content Block
- Publish the Email (even though the only changes are from the Content Block)
Since Spring ’26, you can also use the Convert to Section featute, which unlinks the Content Block, so that its elements are copied into the Email as new Components that you can then edit, without further reference to the original Content Block.
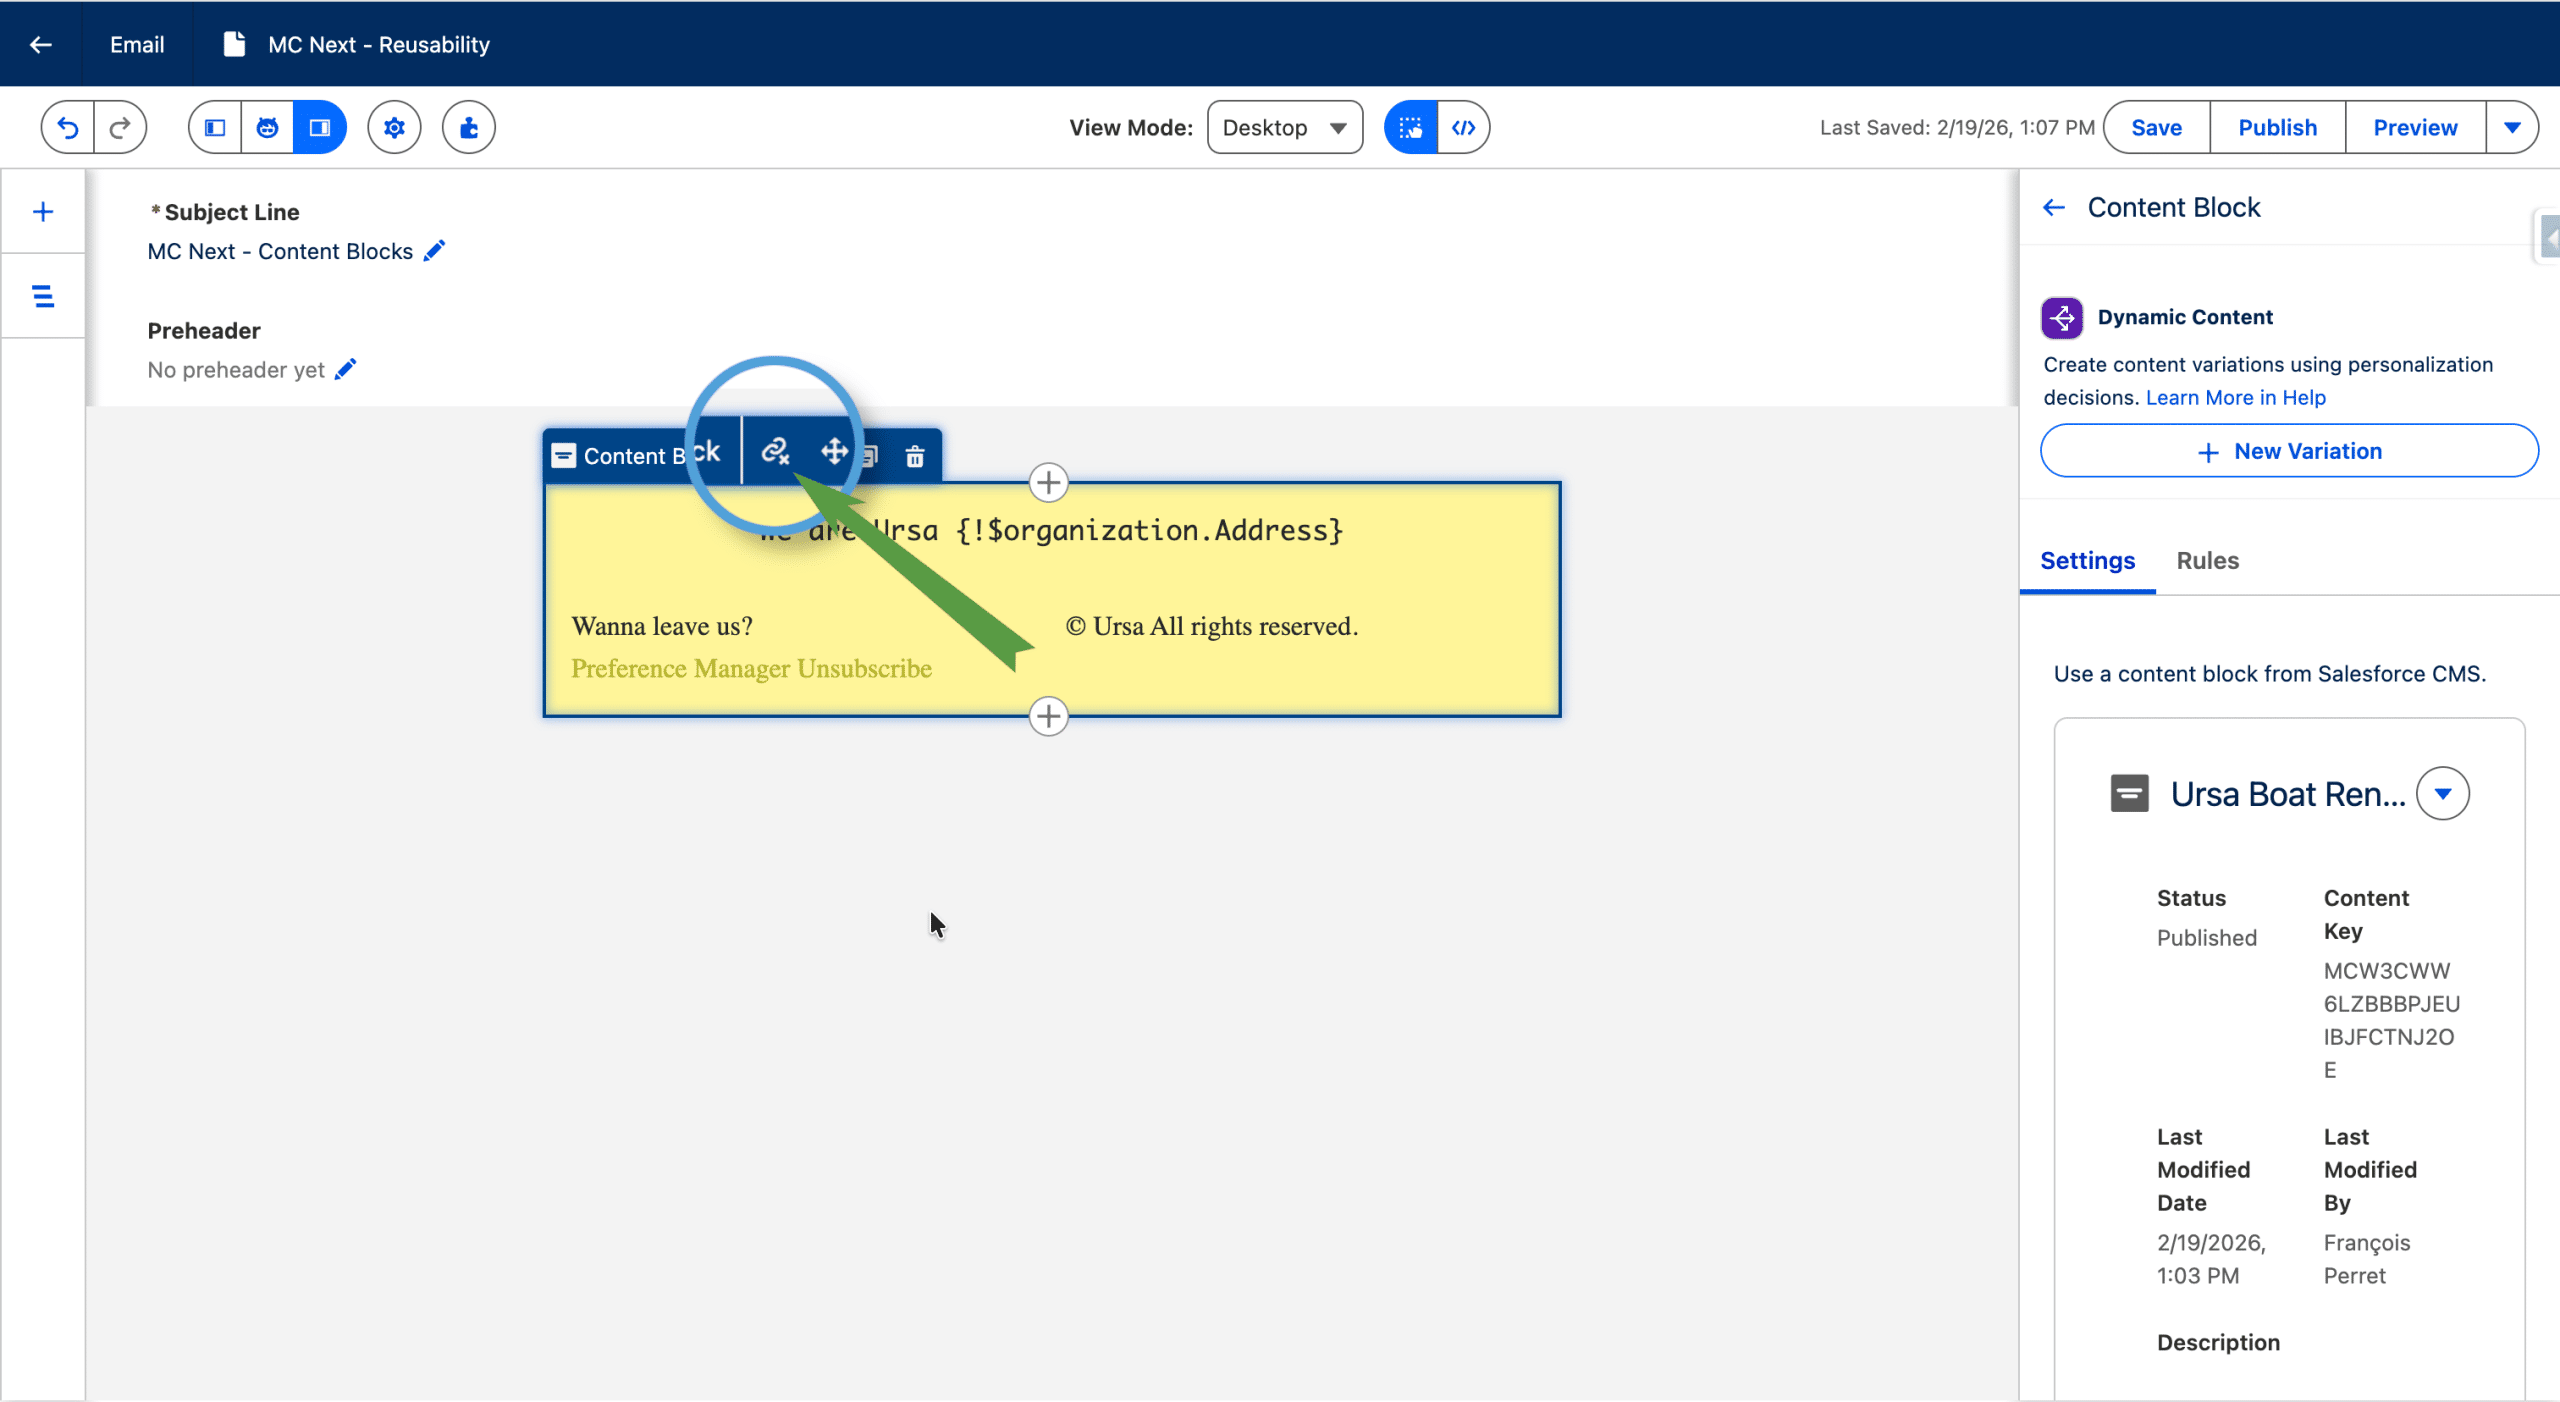
Once converted to a section, the changes you make locally leave the original Content Block unedited.
«Dynamic Content»: Reusing Decision Logic for Consistent Personalization
In Marketing Cloud Next’s Email Builder, every standard Components (with the only exception of repeaters), plus the Subject Line and Pre-header, can render differently depending on the recipient’s informations. This is called Dynamic Content. For example, depending on the value of a Calculated Insight, you may render different buttons.
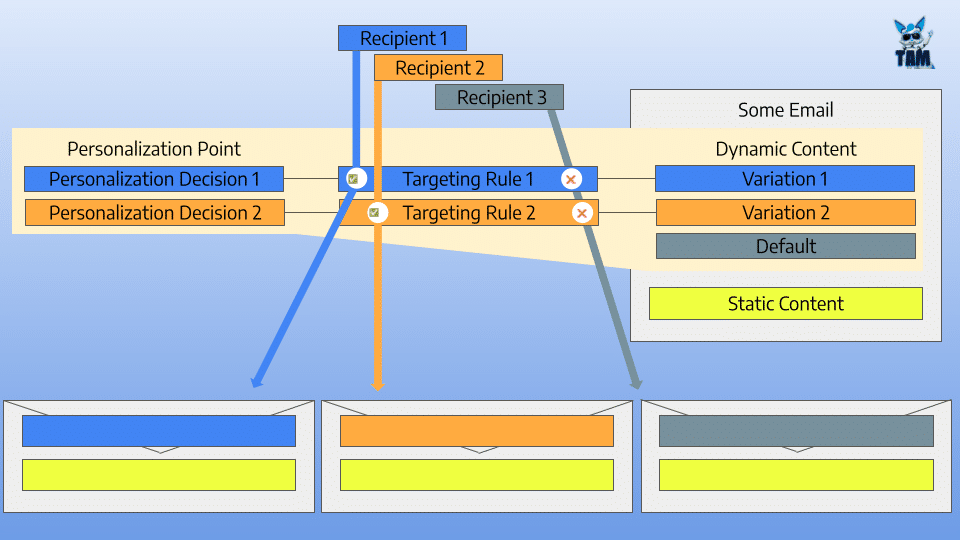
Before we create a Dynamic Content and see how to use/re-use some part of it, let’s explain the terms on the diagram above. At Send time, for a given recipient, the Targeting Rules (Data Graph based rules) are evaluated. The Rule that the recipient qualifies for is selected, and the associated Variation, a unique Content Version, is used in the sent email. A Variation and its related Targeting Rule is called a Personalization Decision. A Personalisation Point is tied to a specific Email (and one or more Component) and is related to its Personalization Decisions.
The Personalizations Points and Personalization Decisions are stored in Data Cloud (installed when deploying Personalization Foundational data) and are part of Salesforce Personalization, but can only be created, edited or deleted from the Email Builder.
How to create a Dynamic Content
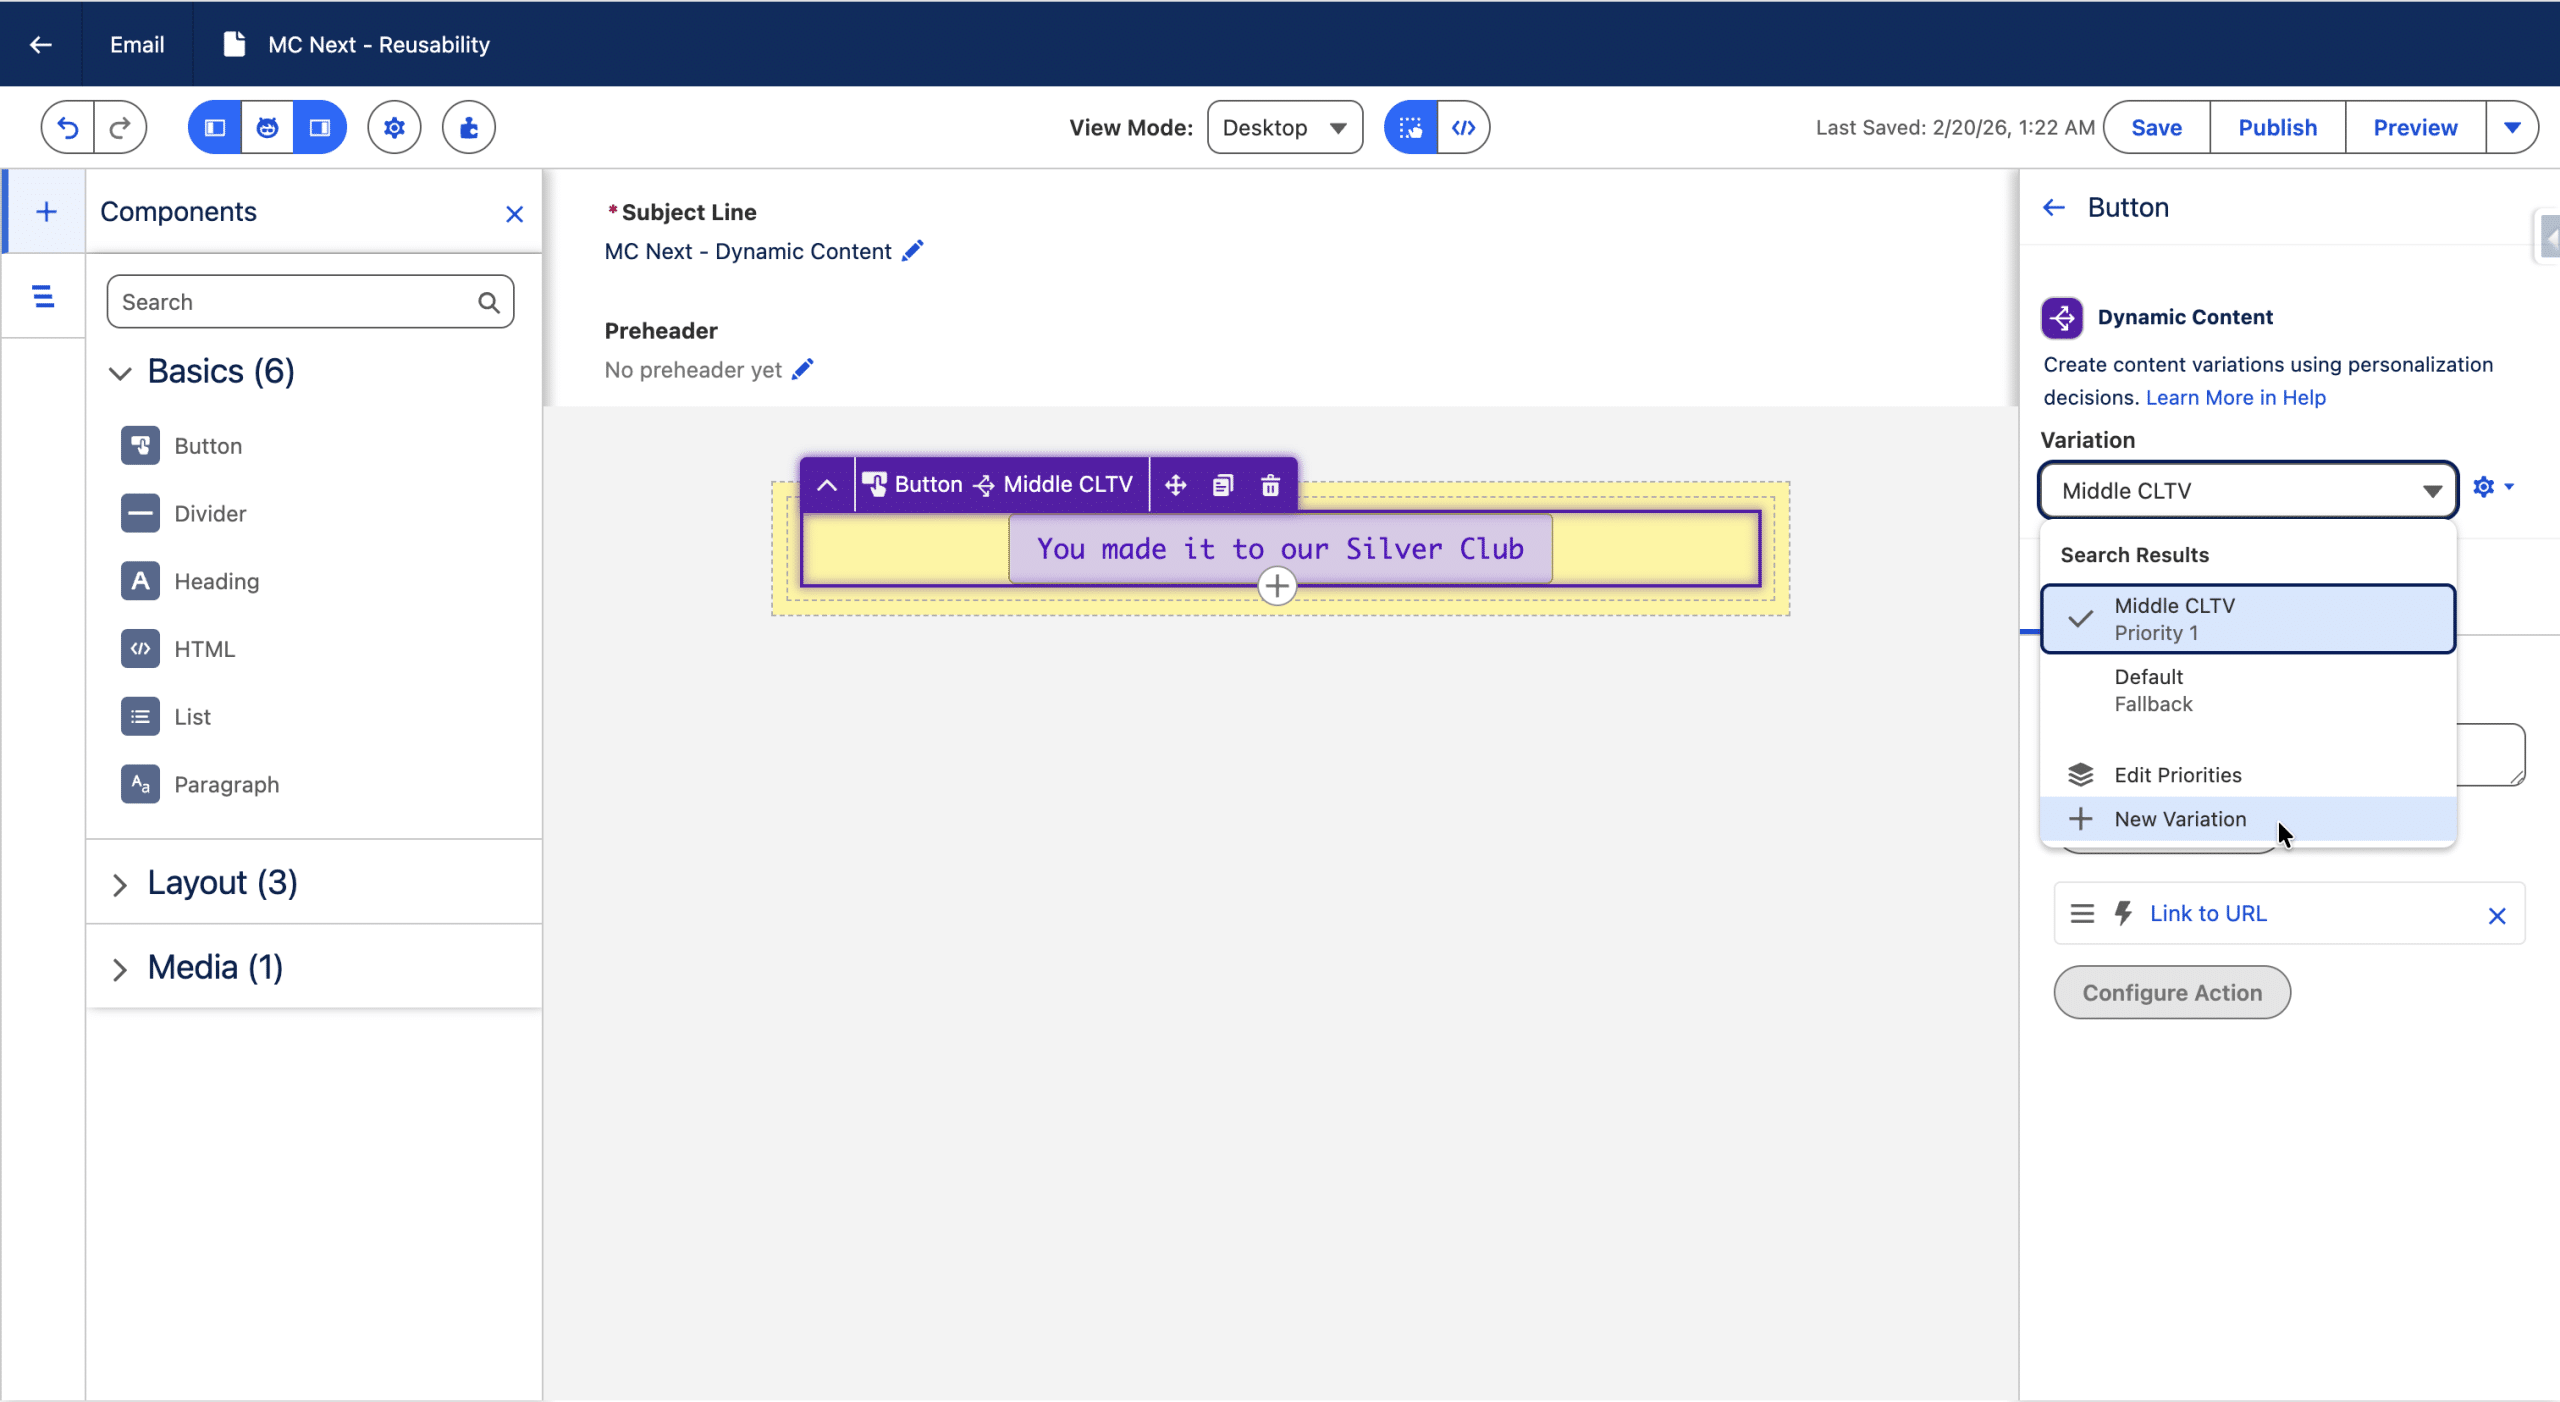
Let’s create a Dynamic Content, we’ll use a Button as an example, with a different link and label depending on the CLTV (Customer Life Time Value, a Calculated Insight store in the Data Graph). First we create a Button.
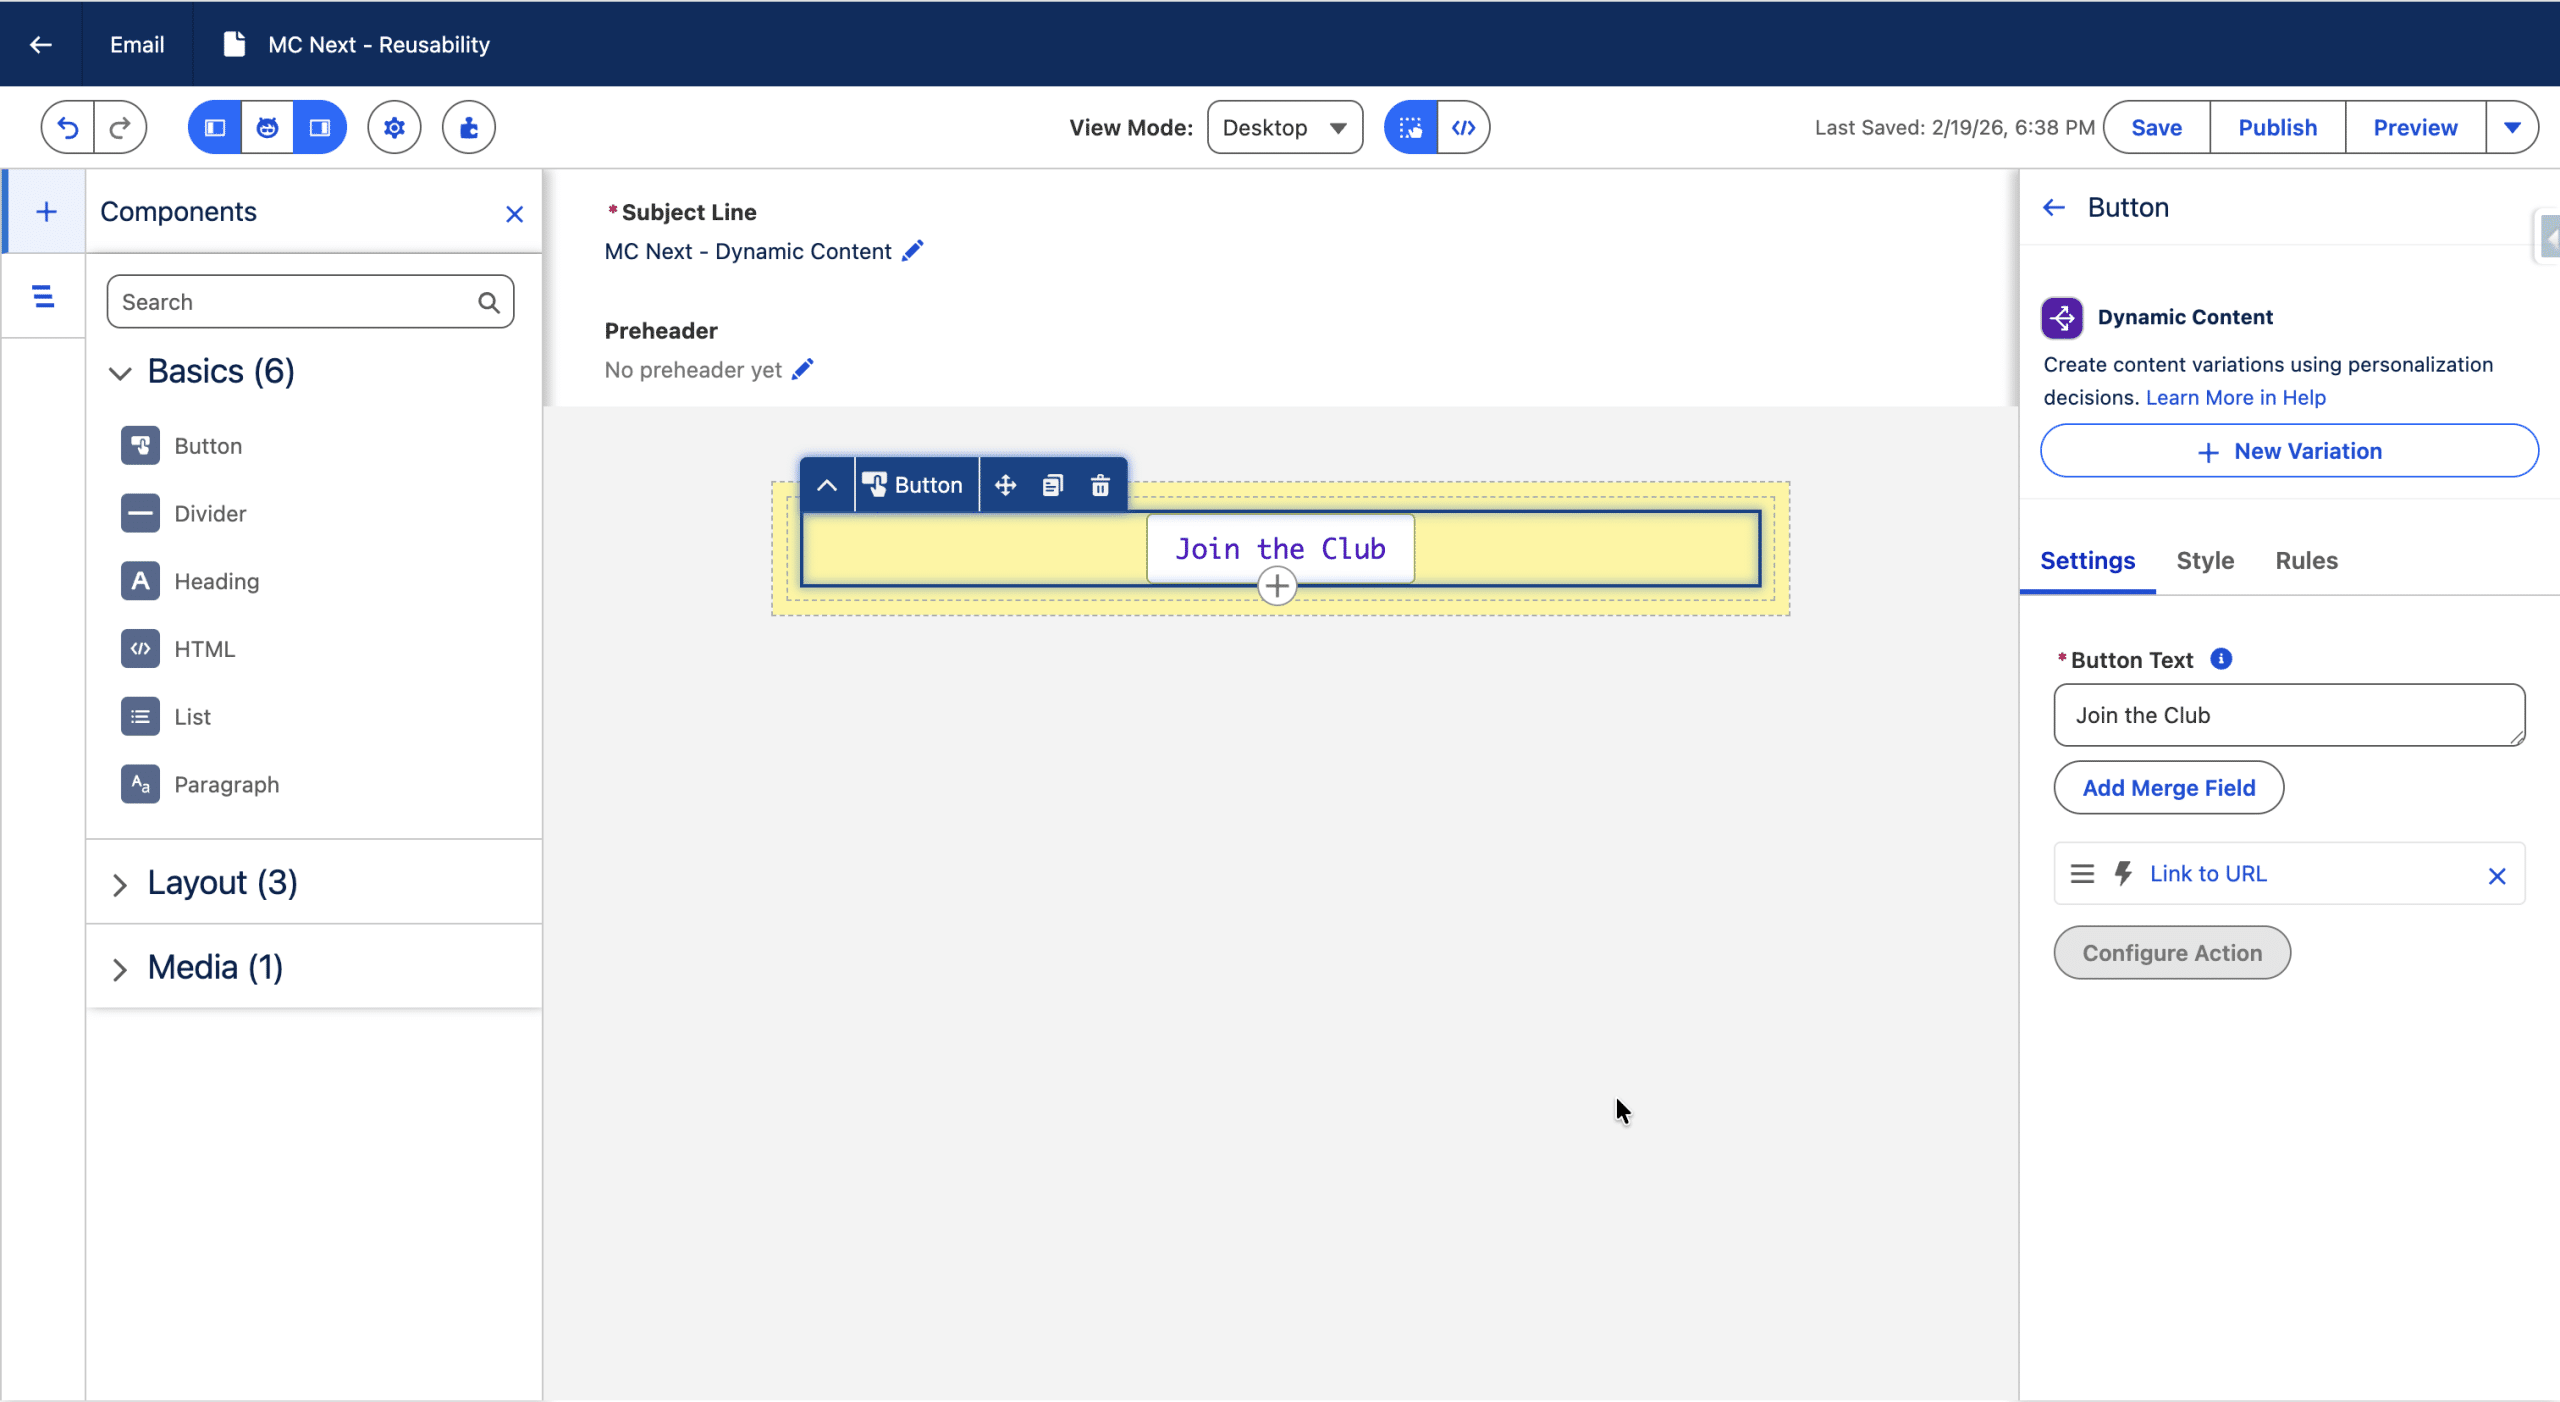
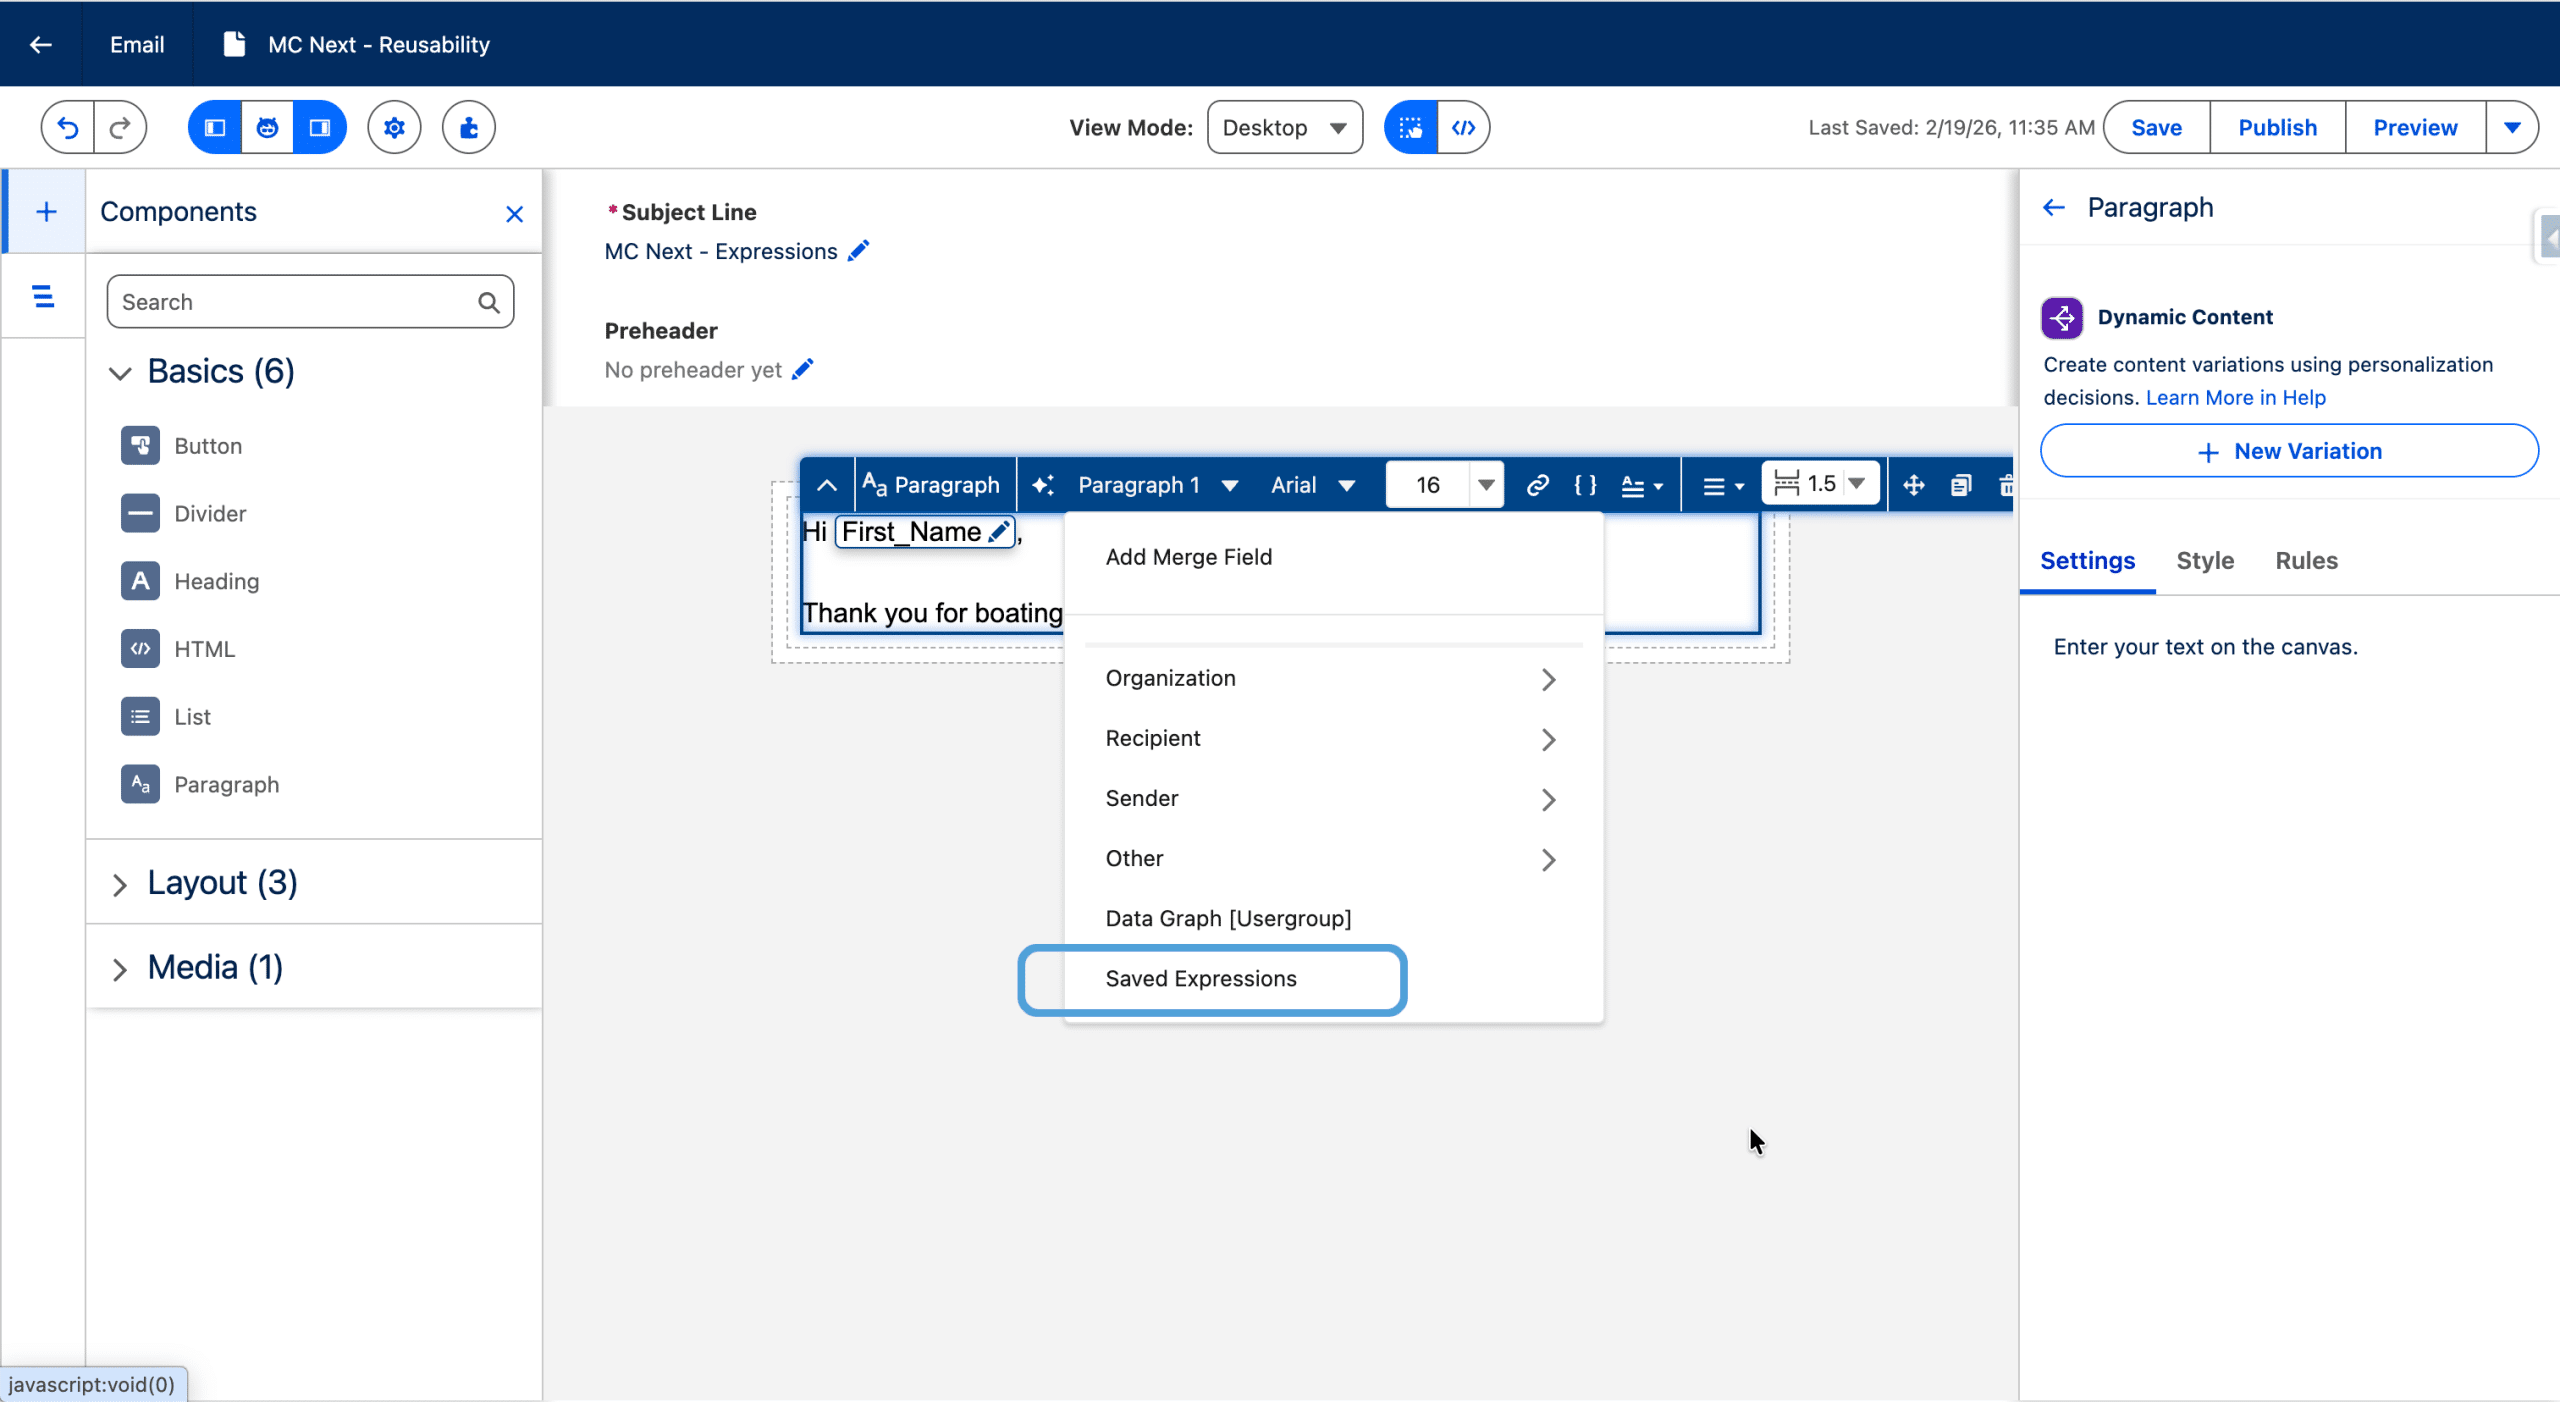
Then, on the right sidebar, we’ll click the “+ New Variation” button
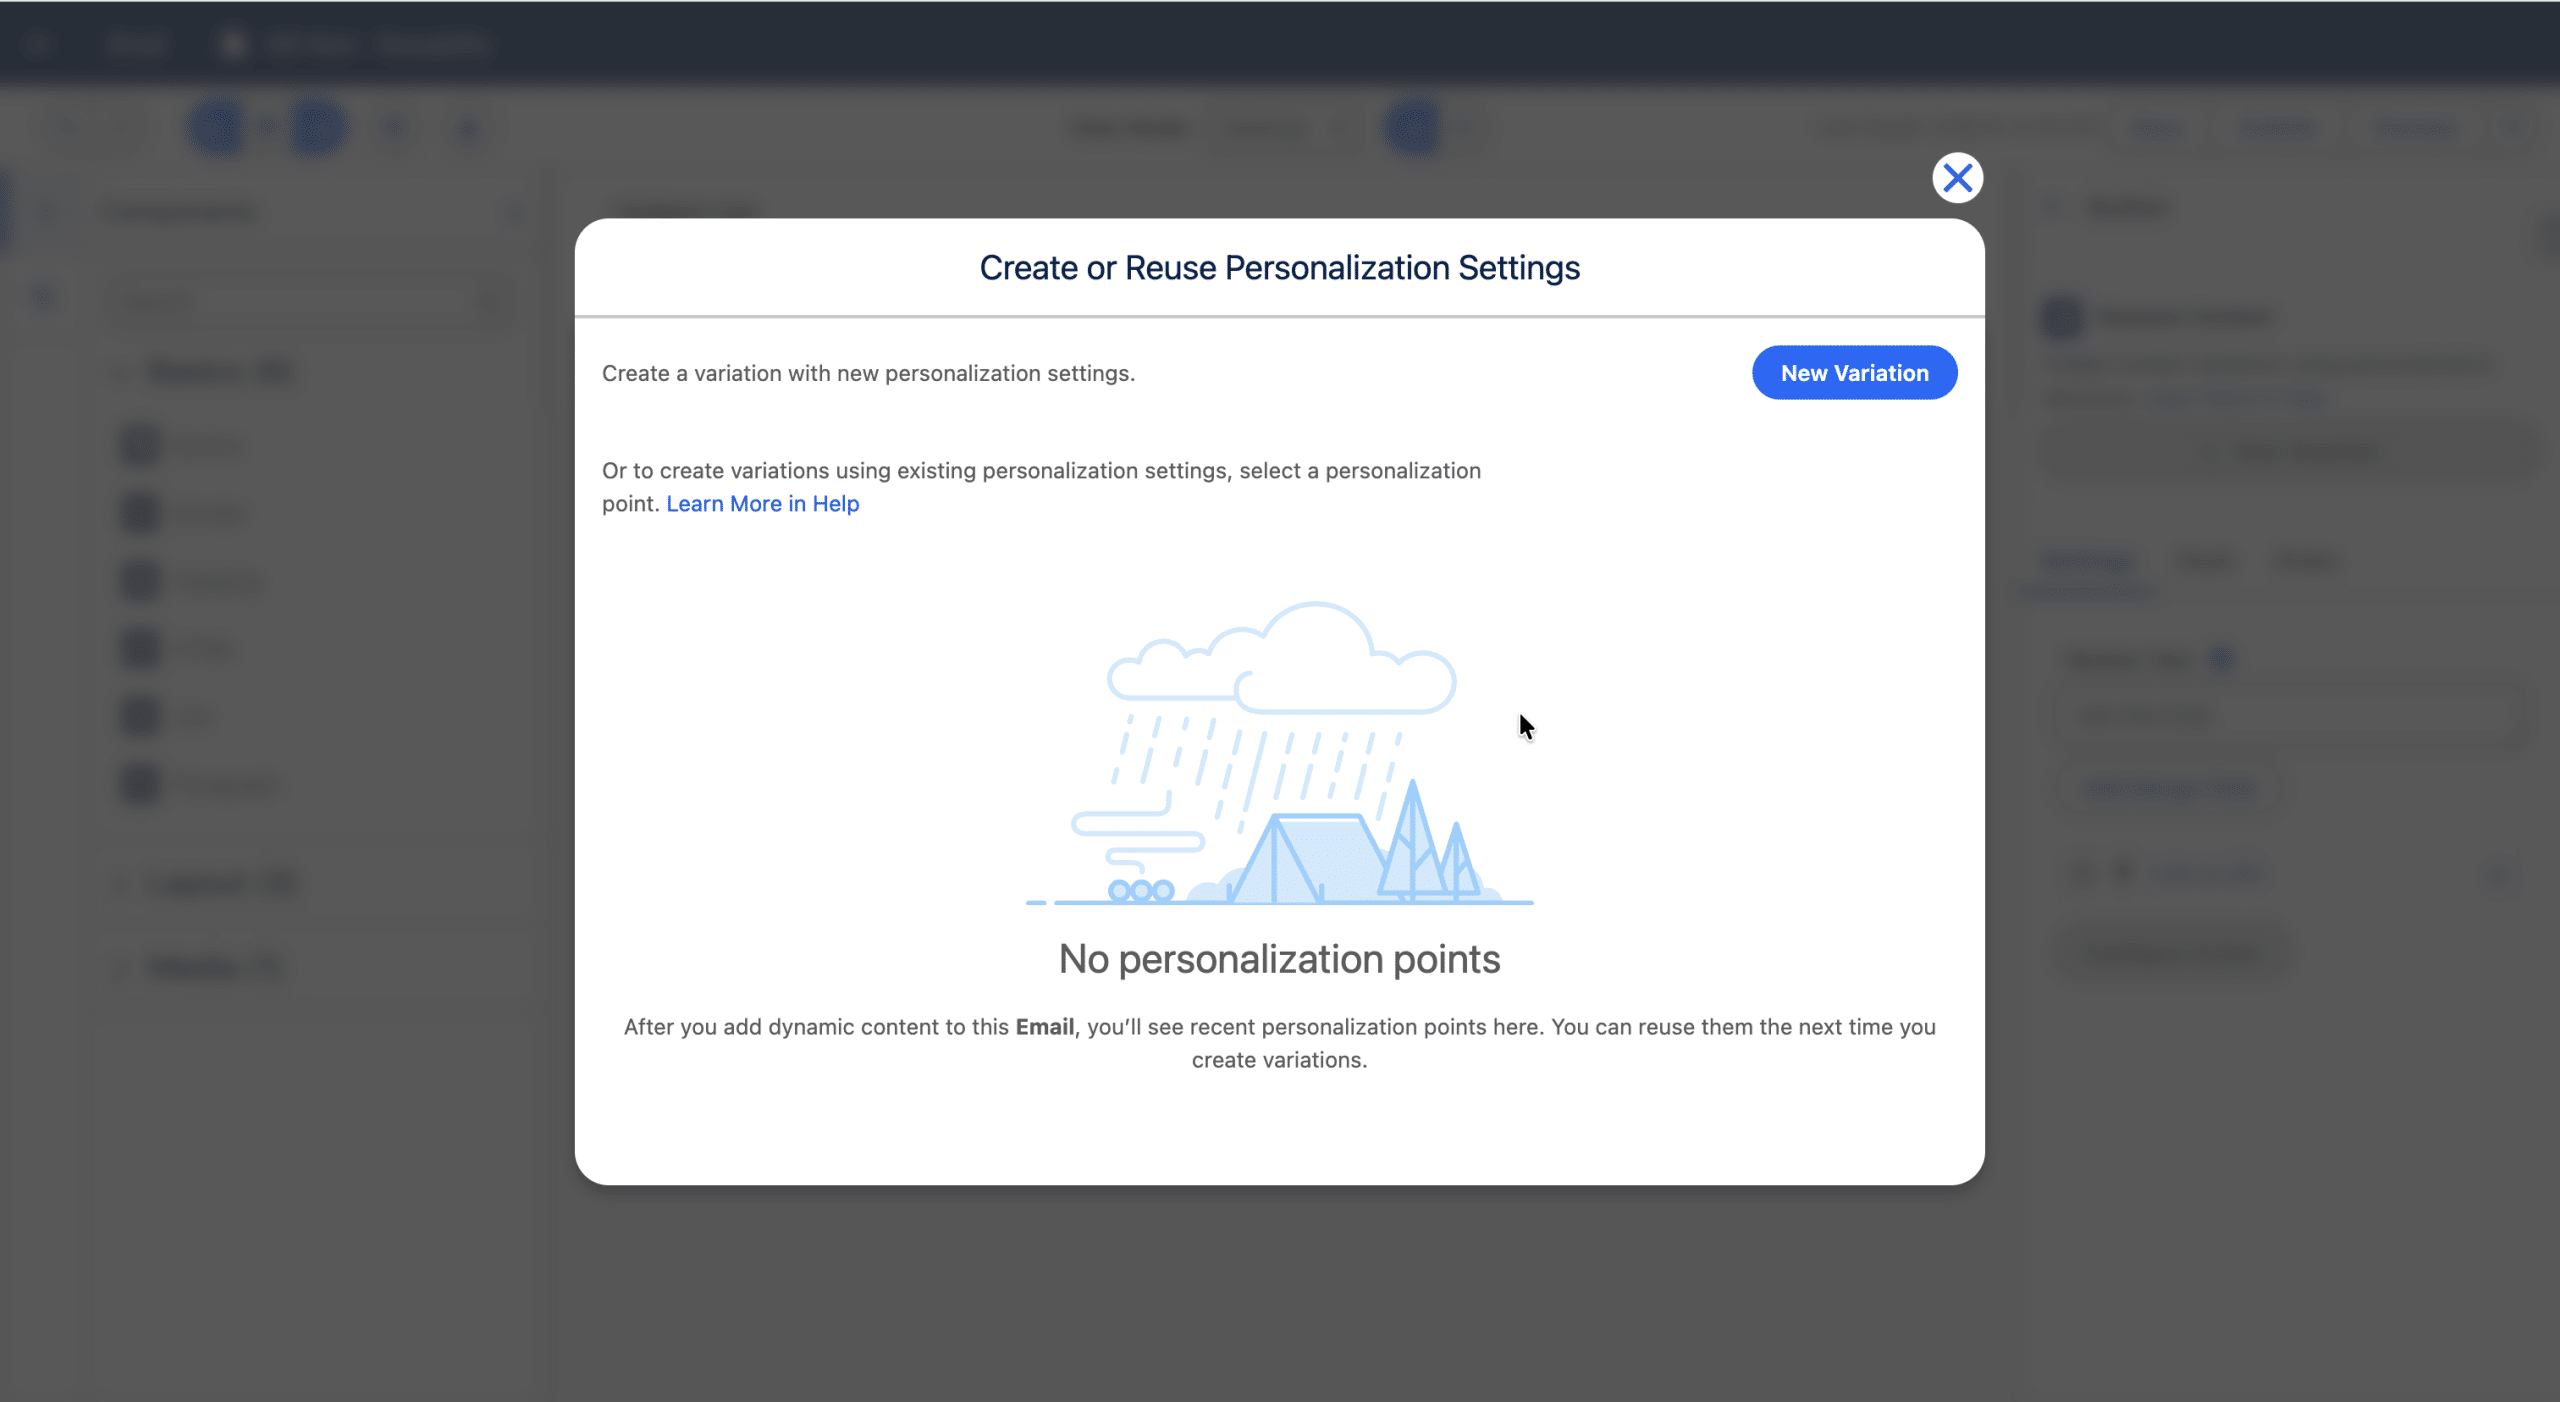
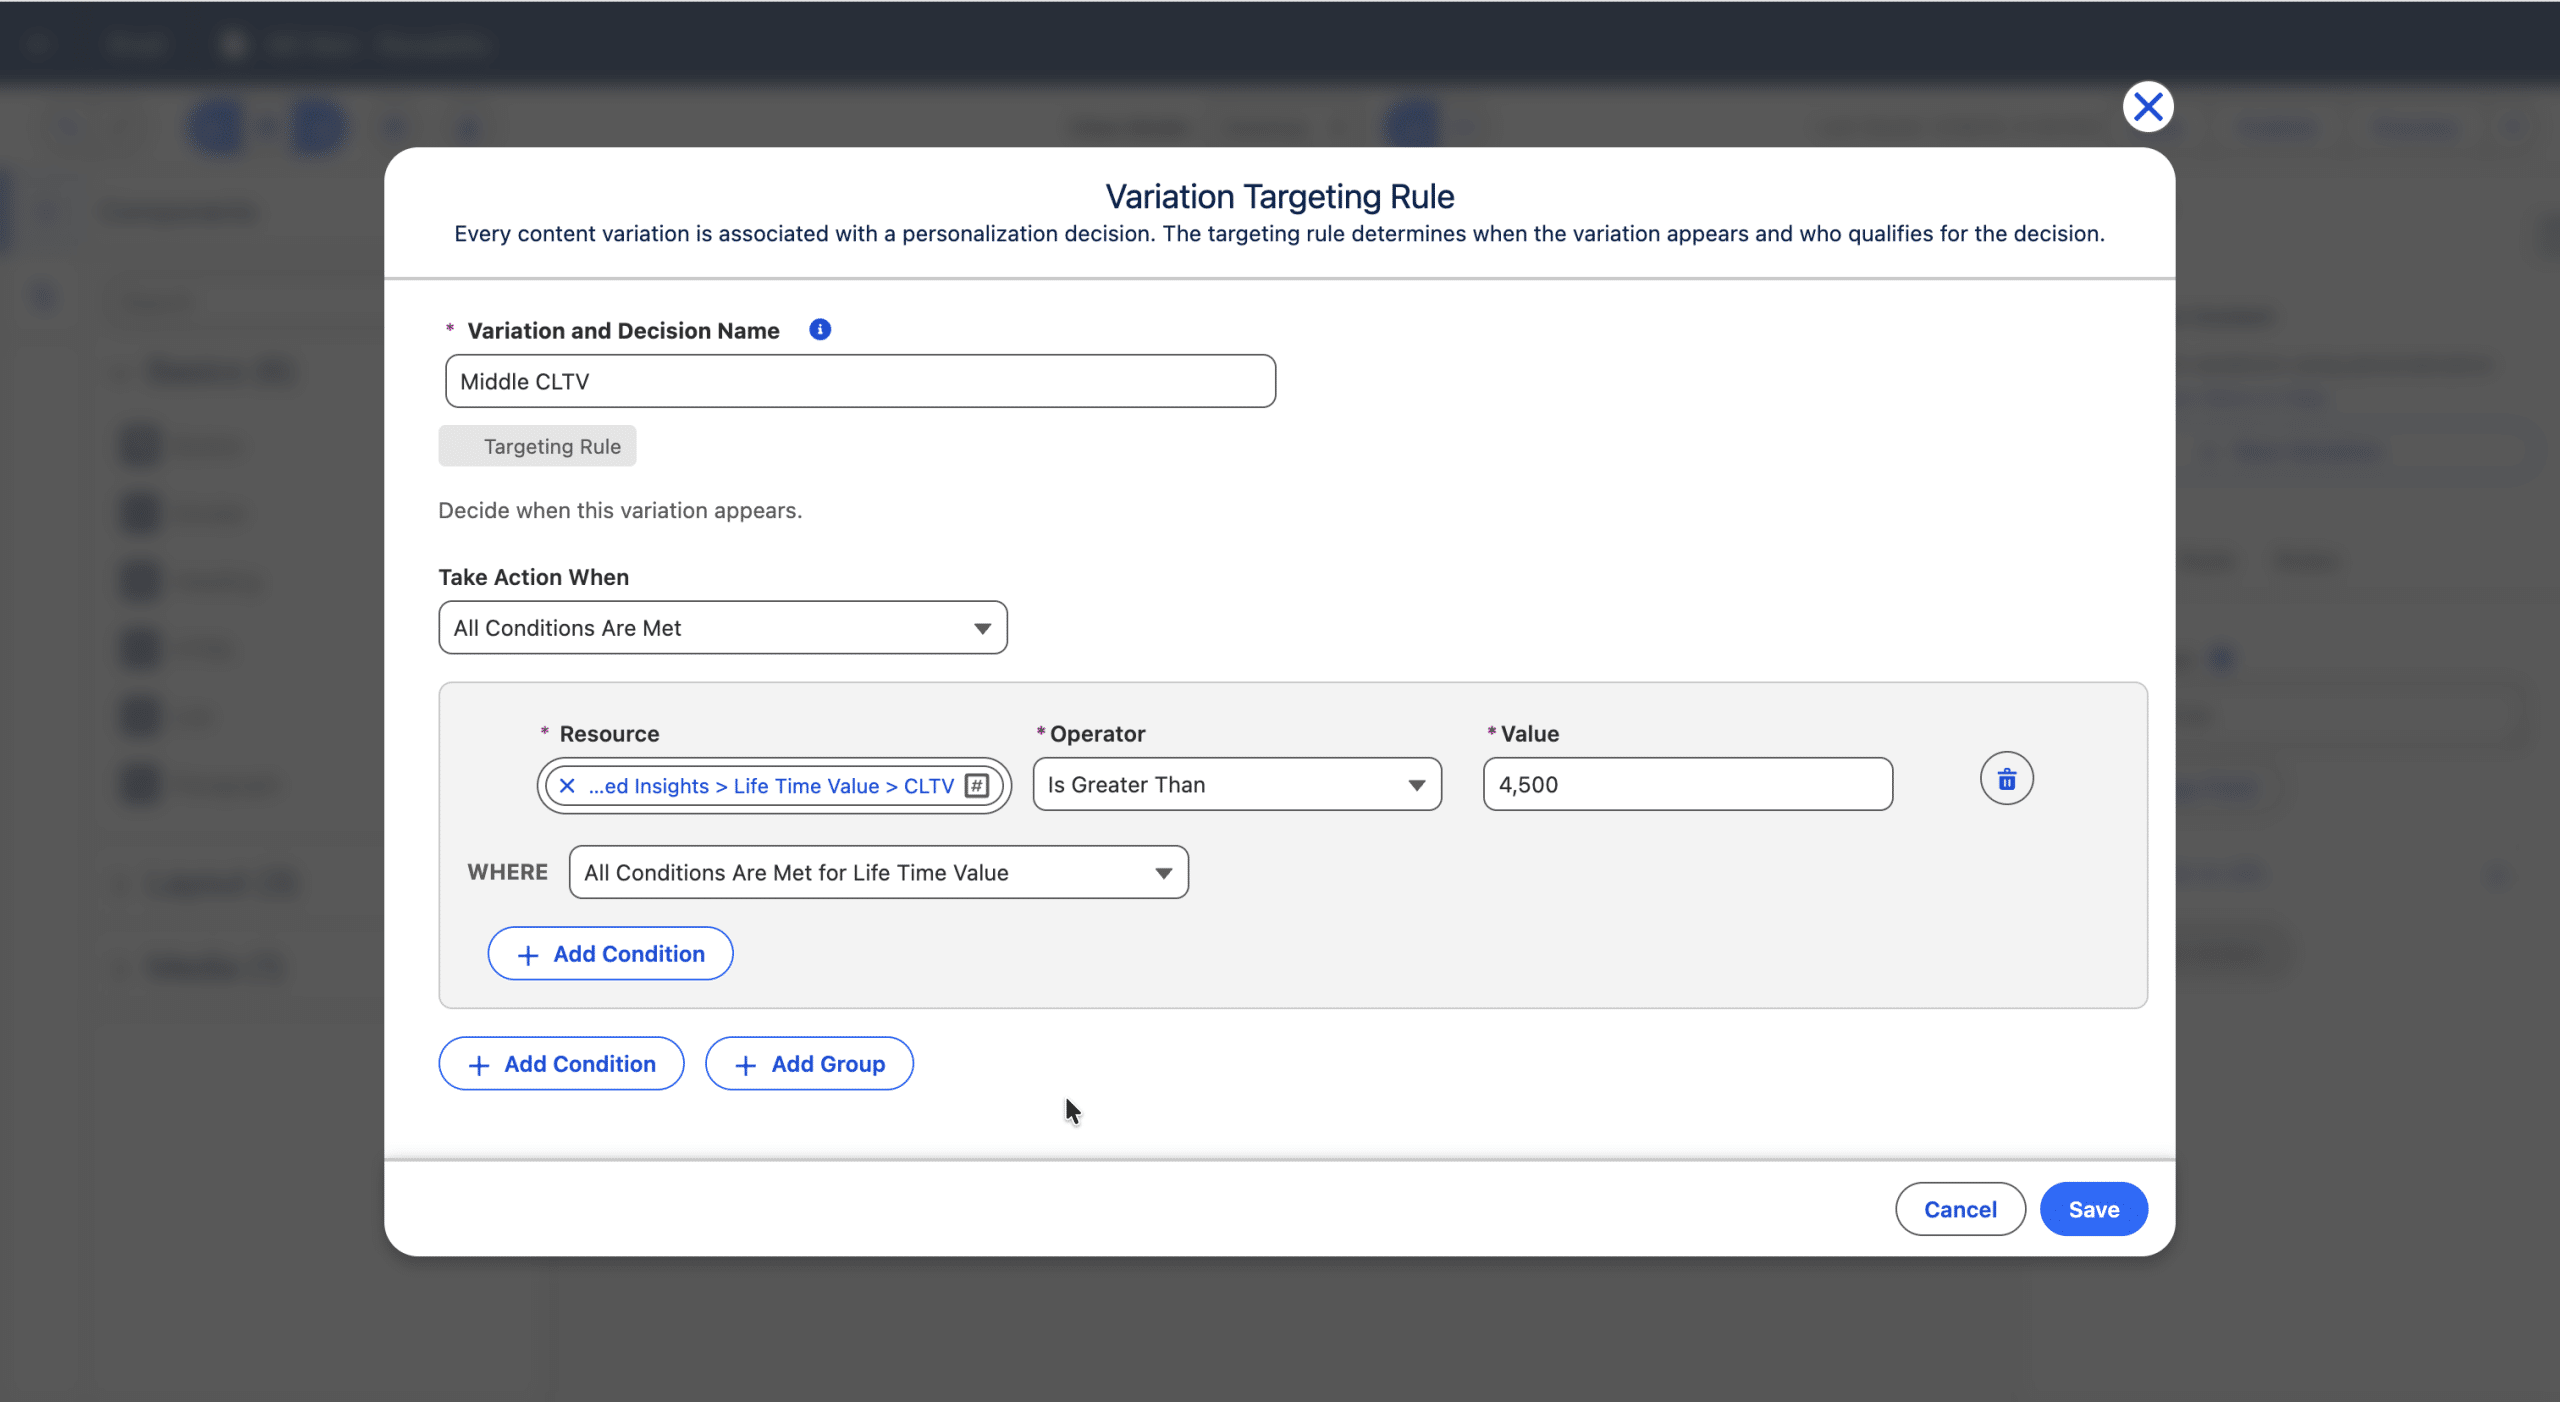
Then we click the blue “New Variation” button. We’ll be able to create the first Personalization Decision and Variation, and to define the related Targeting Rule (CLTV>$4500 for Middle CLTV customers in our example, but this can be any combinaison of criteria from the Data Graph).
Save. We just created a Personalisation Point, associated with our Button. It contains a default Variation (used when a recipient does not match any Targeting Rule) and a middle CLTV Variation. By default, the Content of the new Variation is the copied from the default Variation.
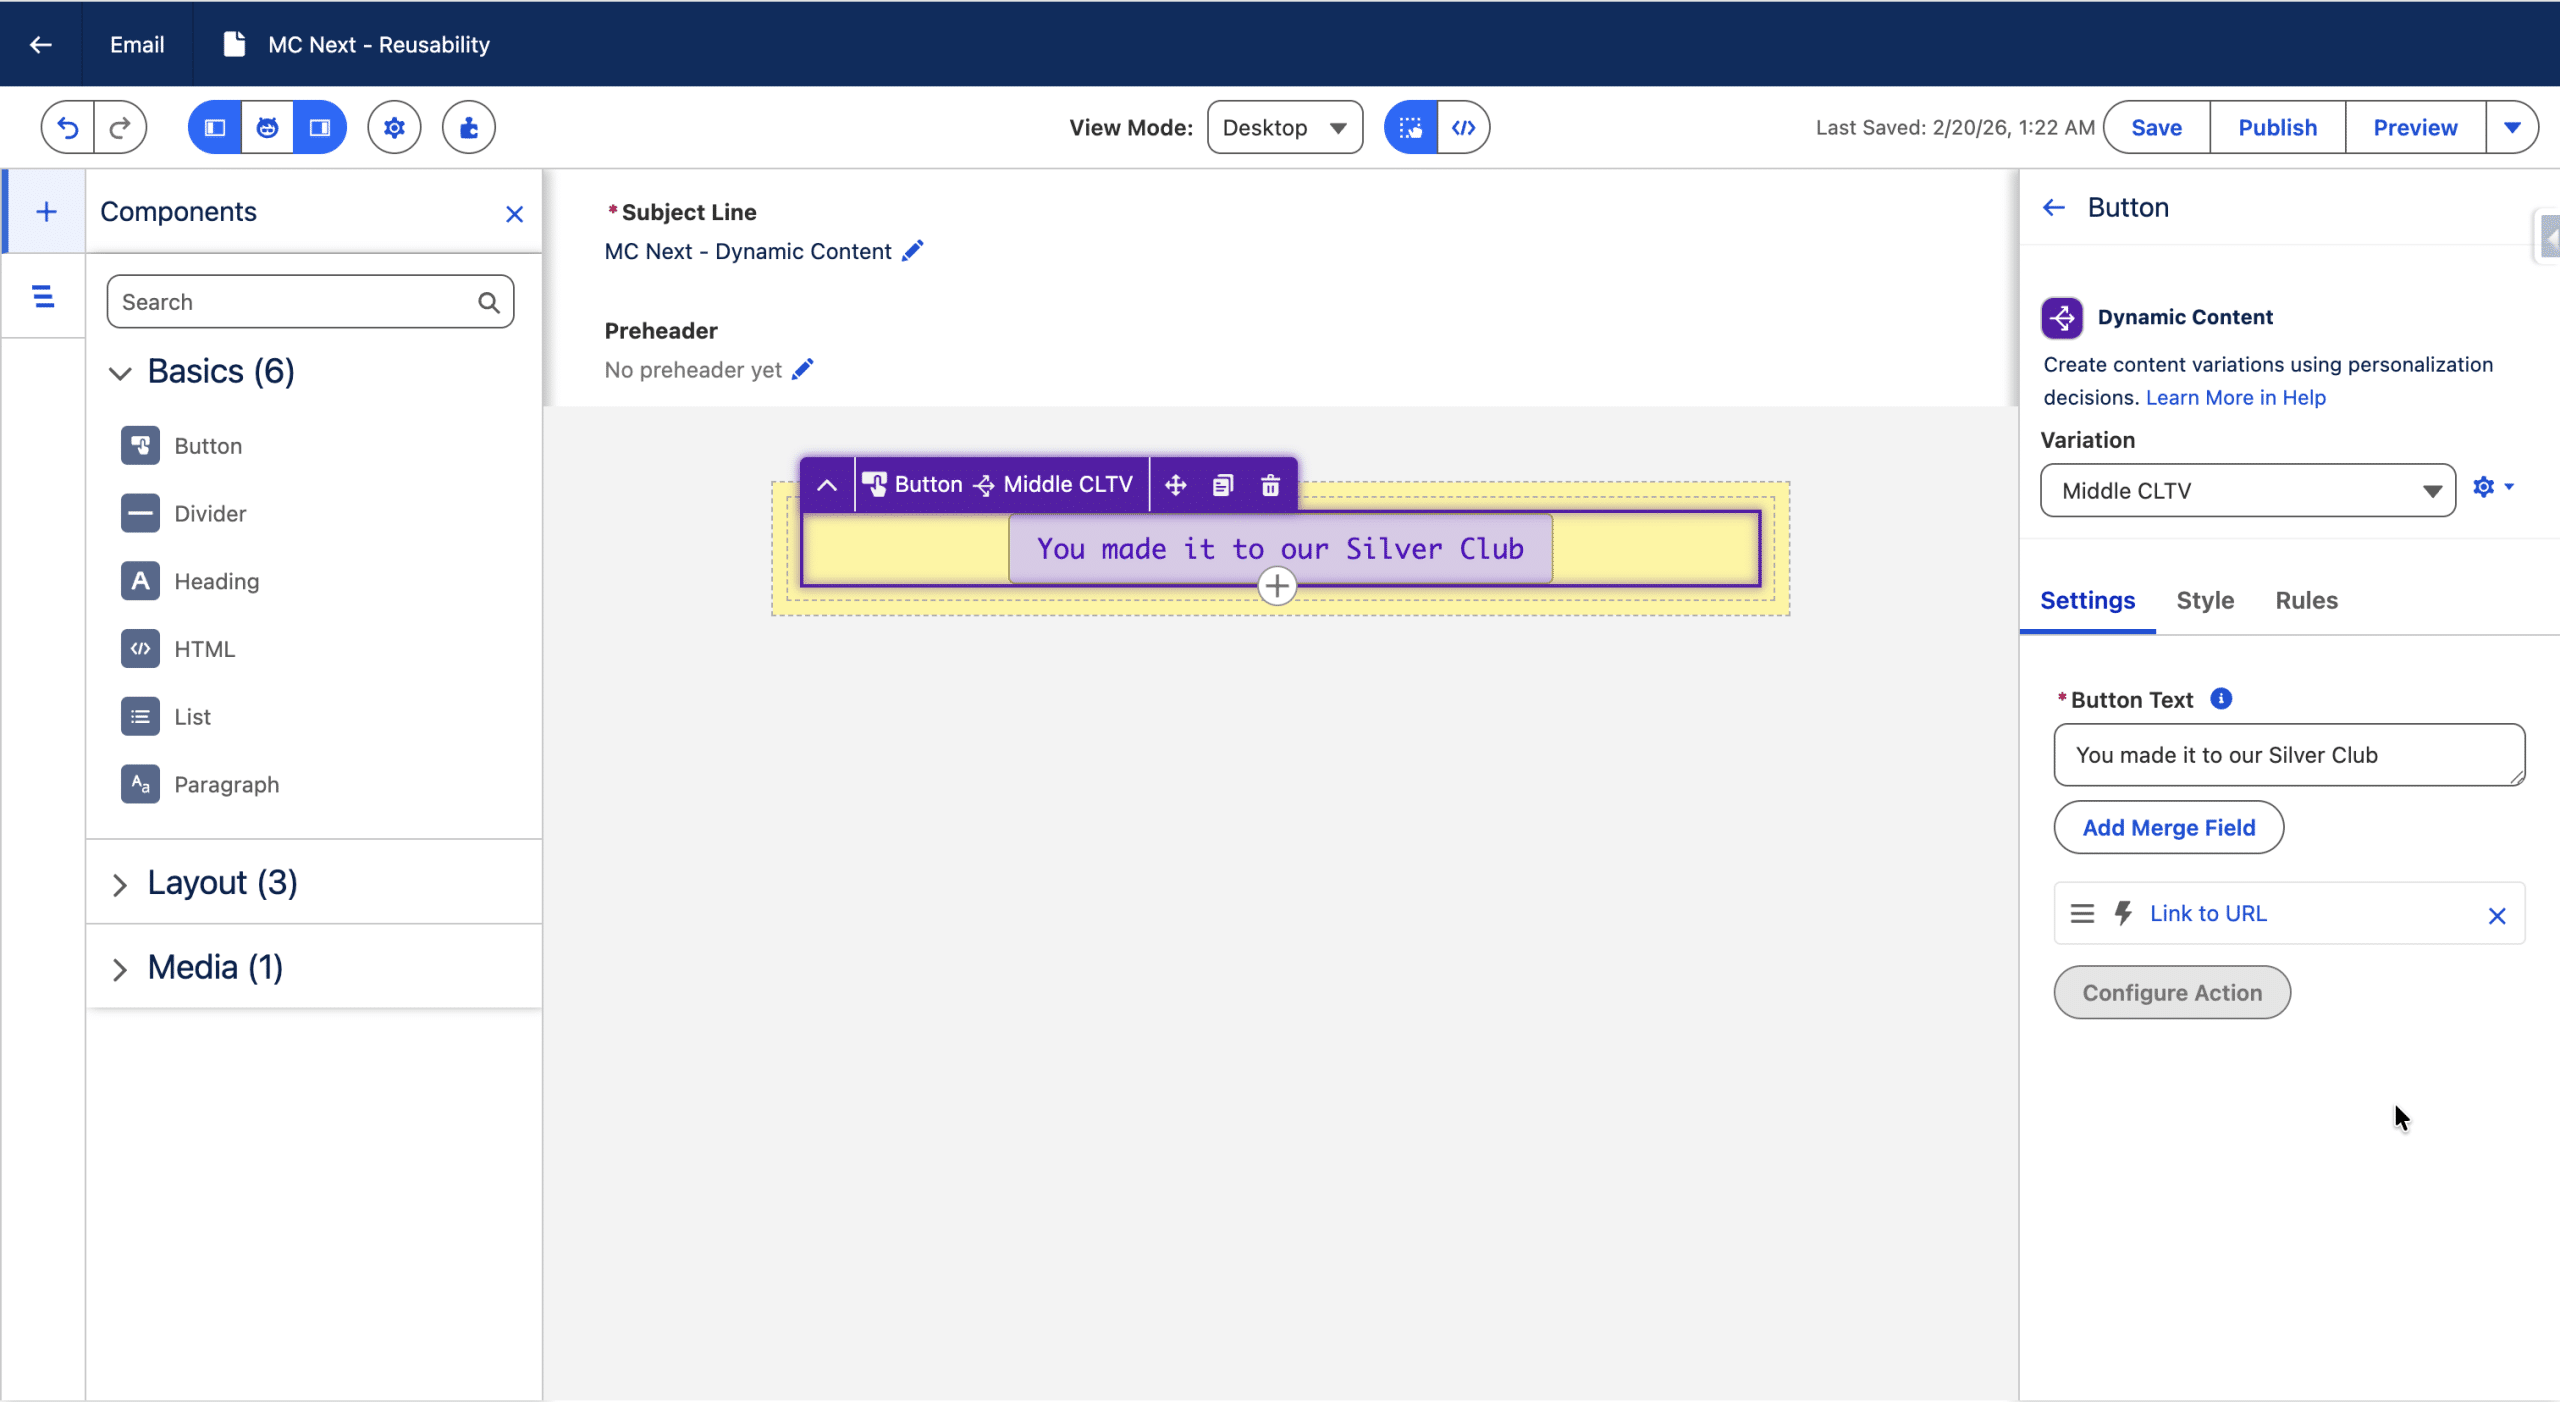
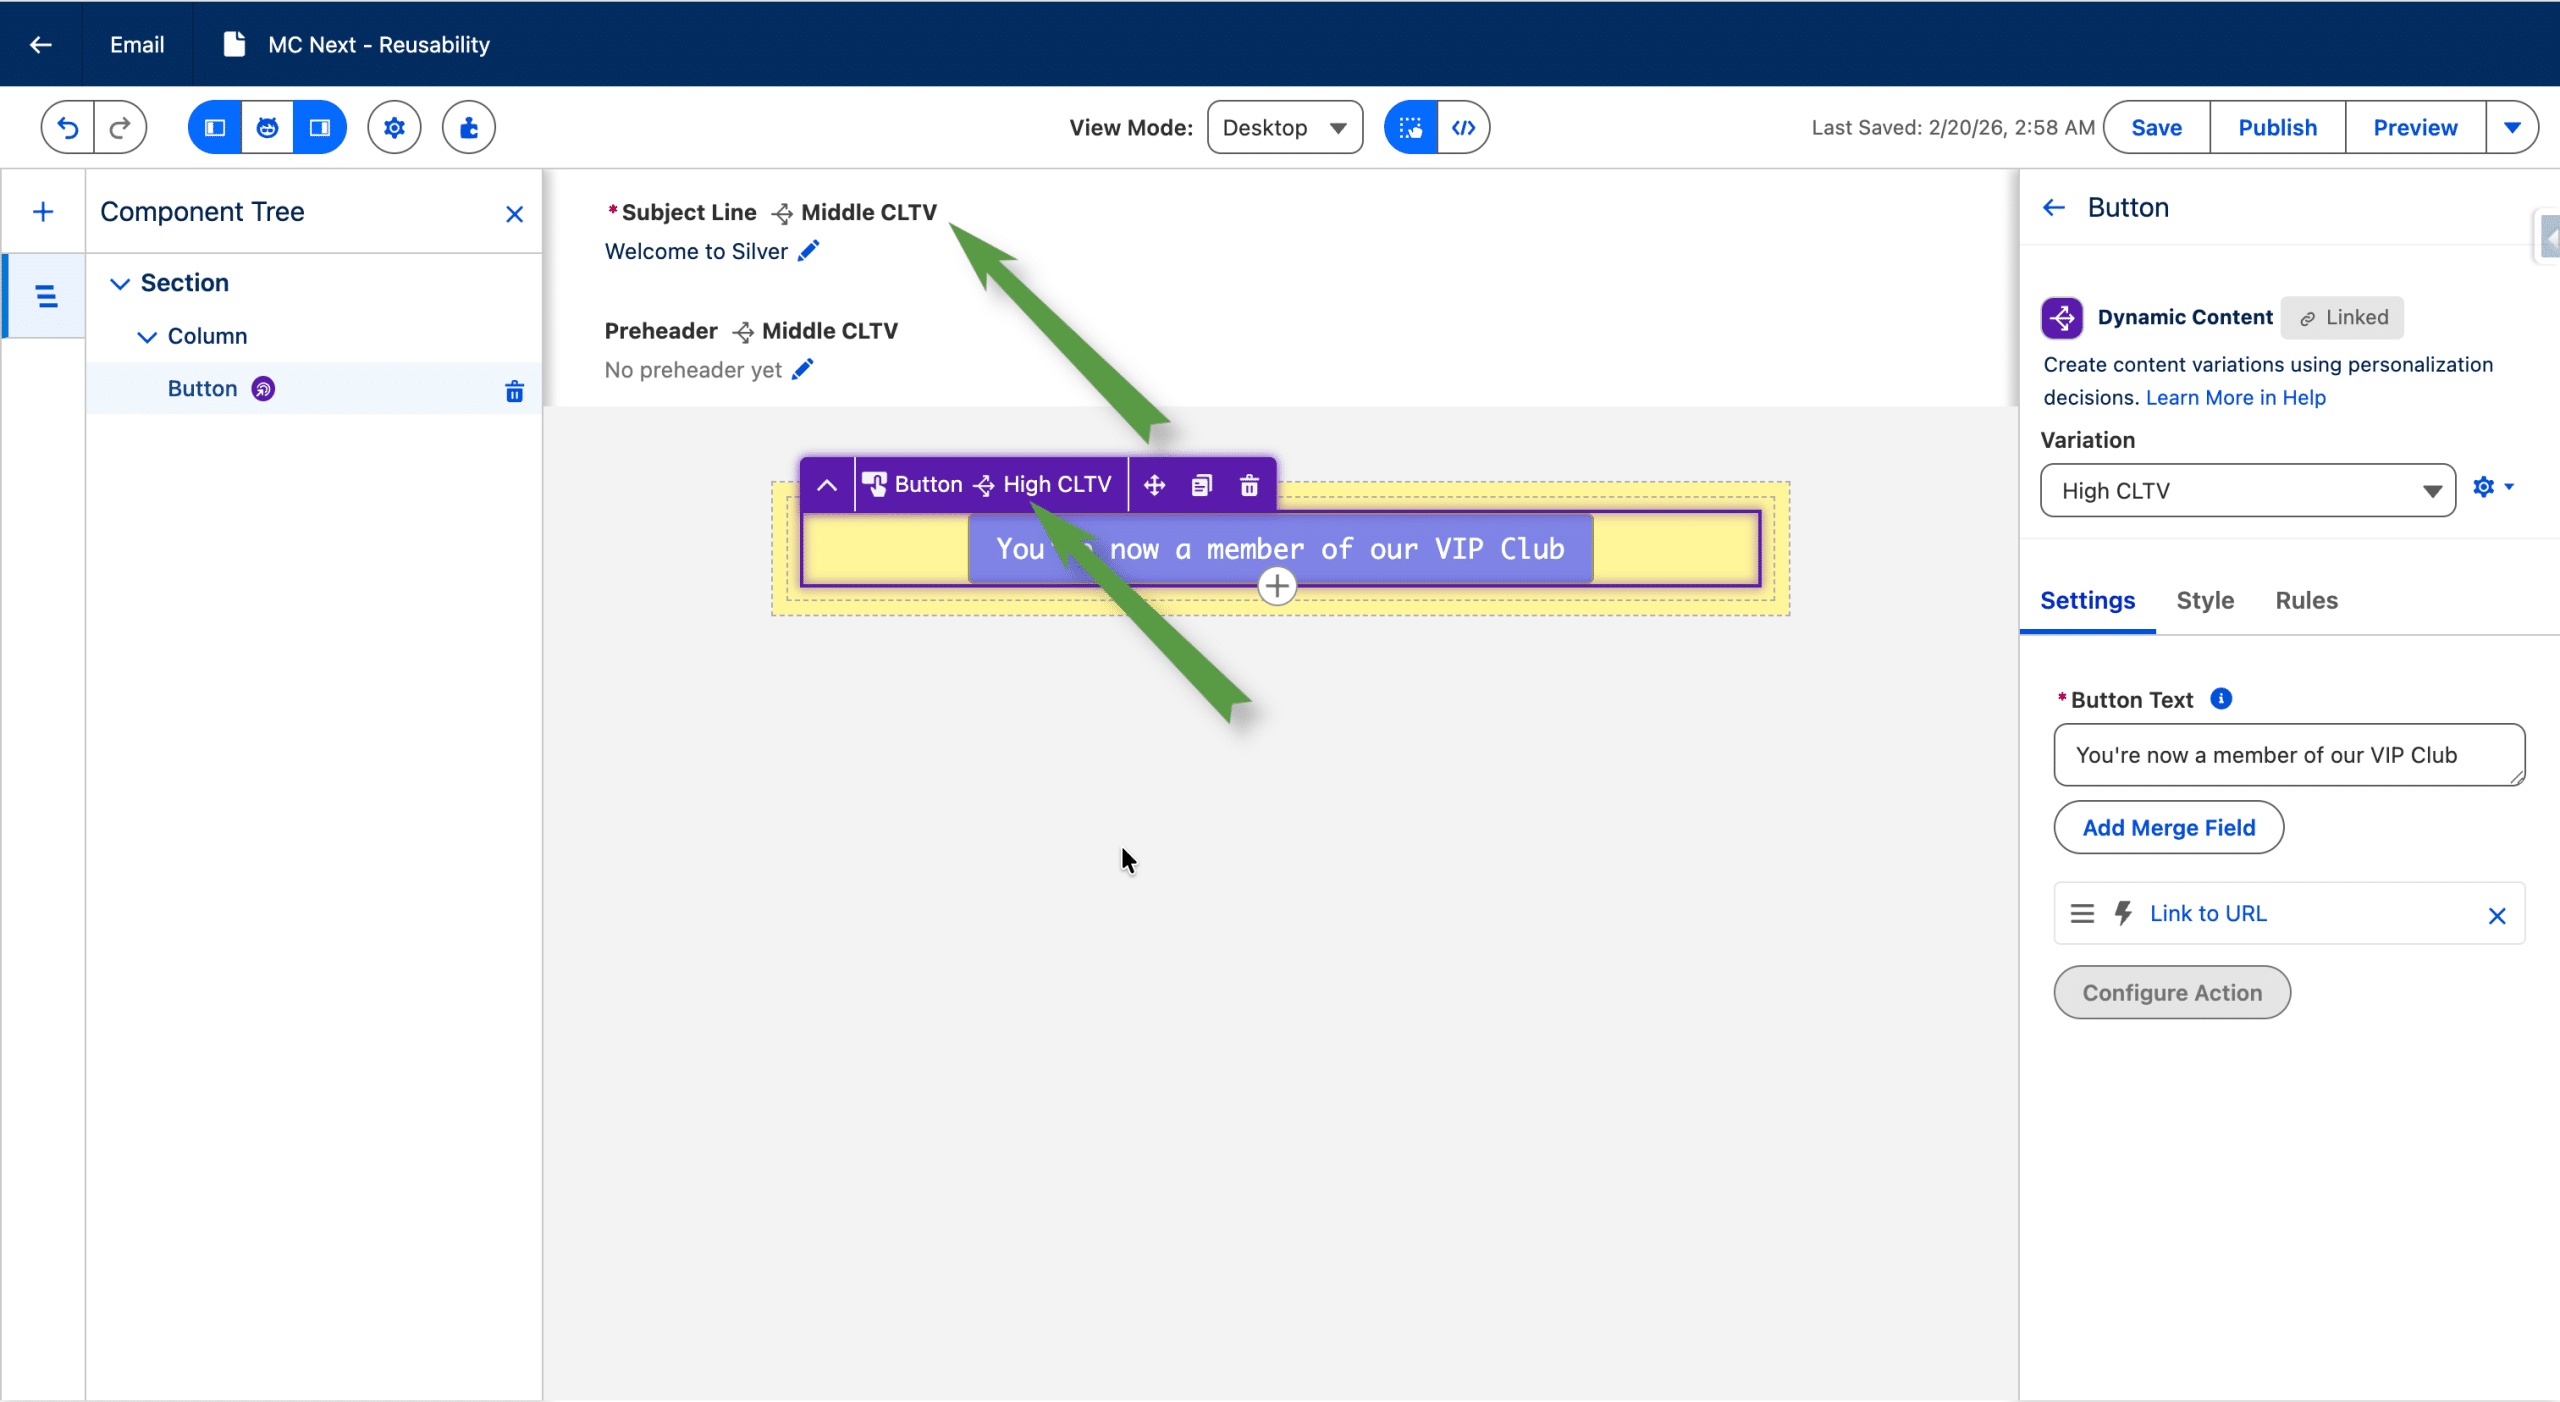
With the Middle CLTV Variation selected, we edit the button to taylor it for the intended audience.
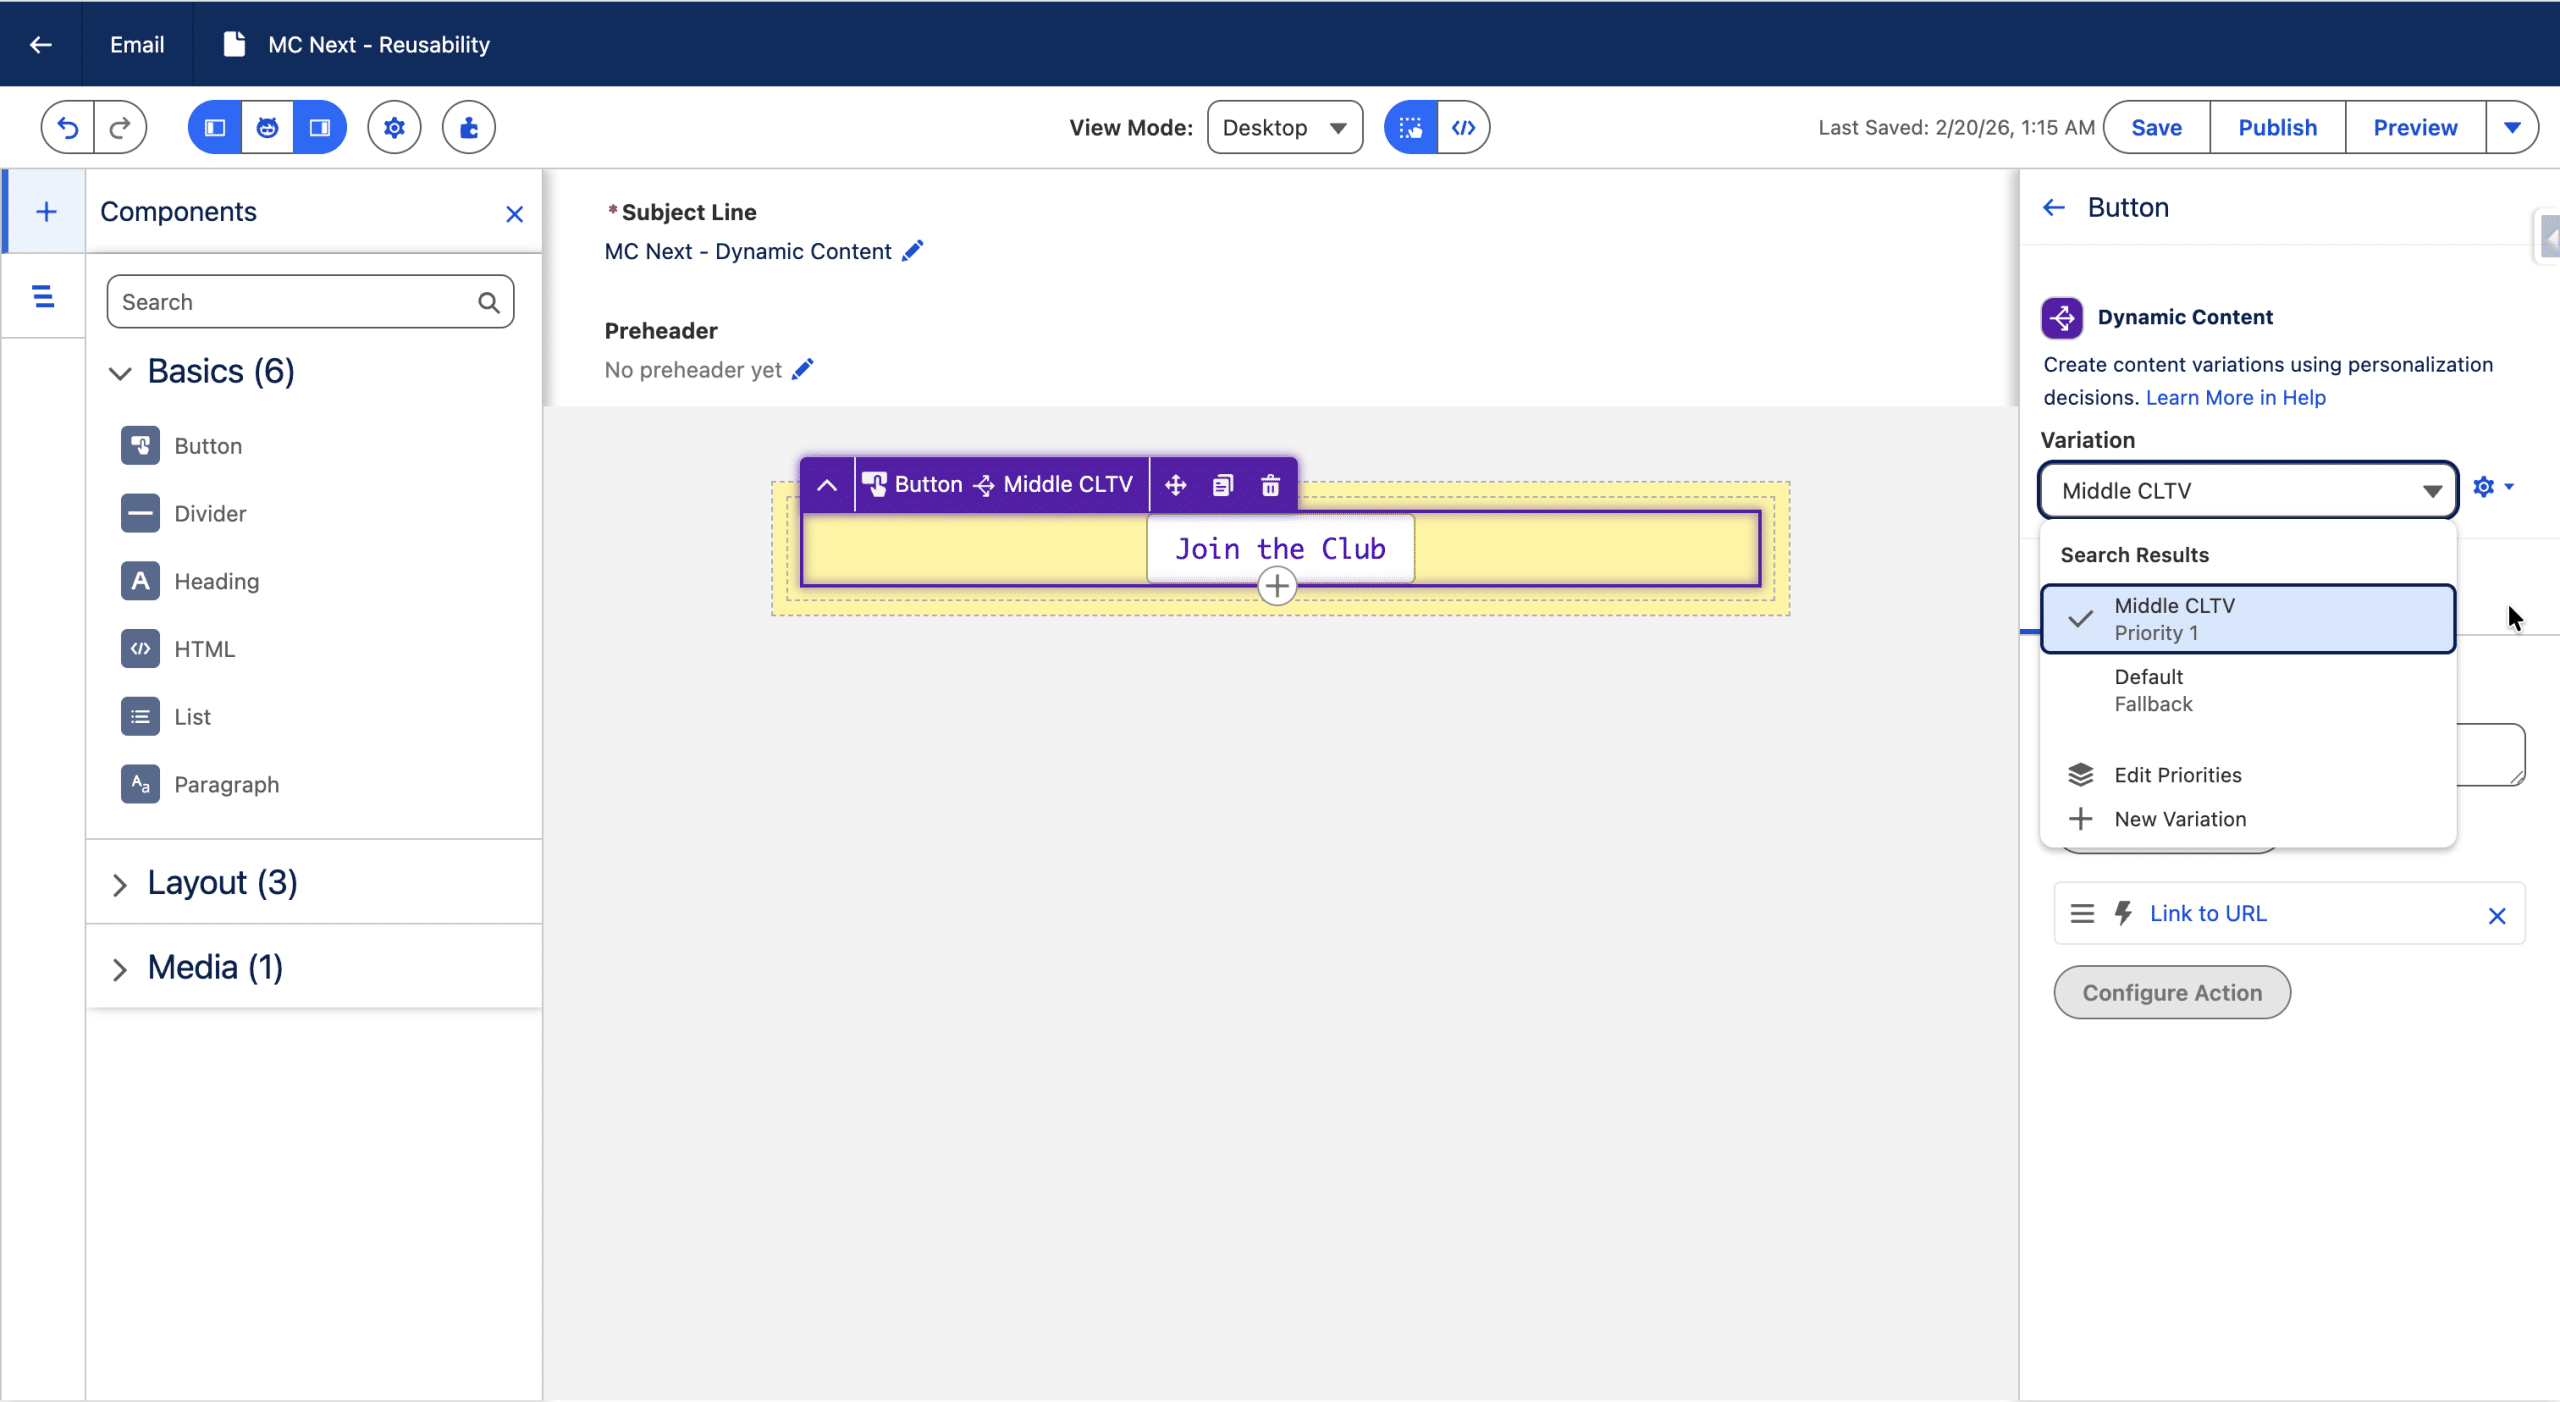
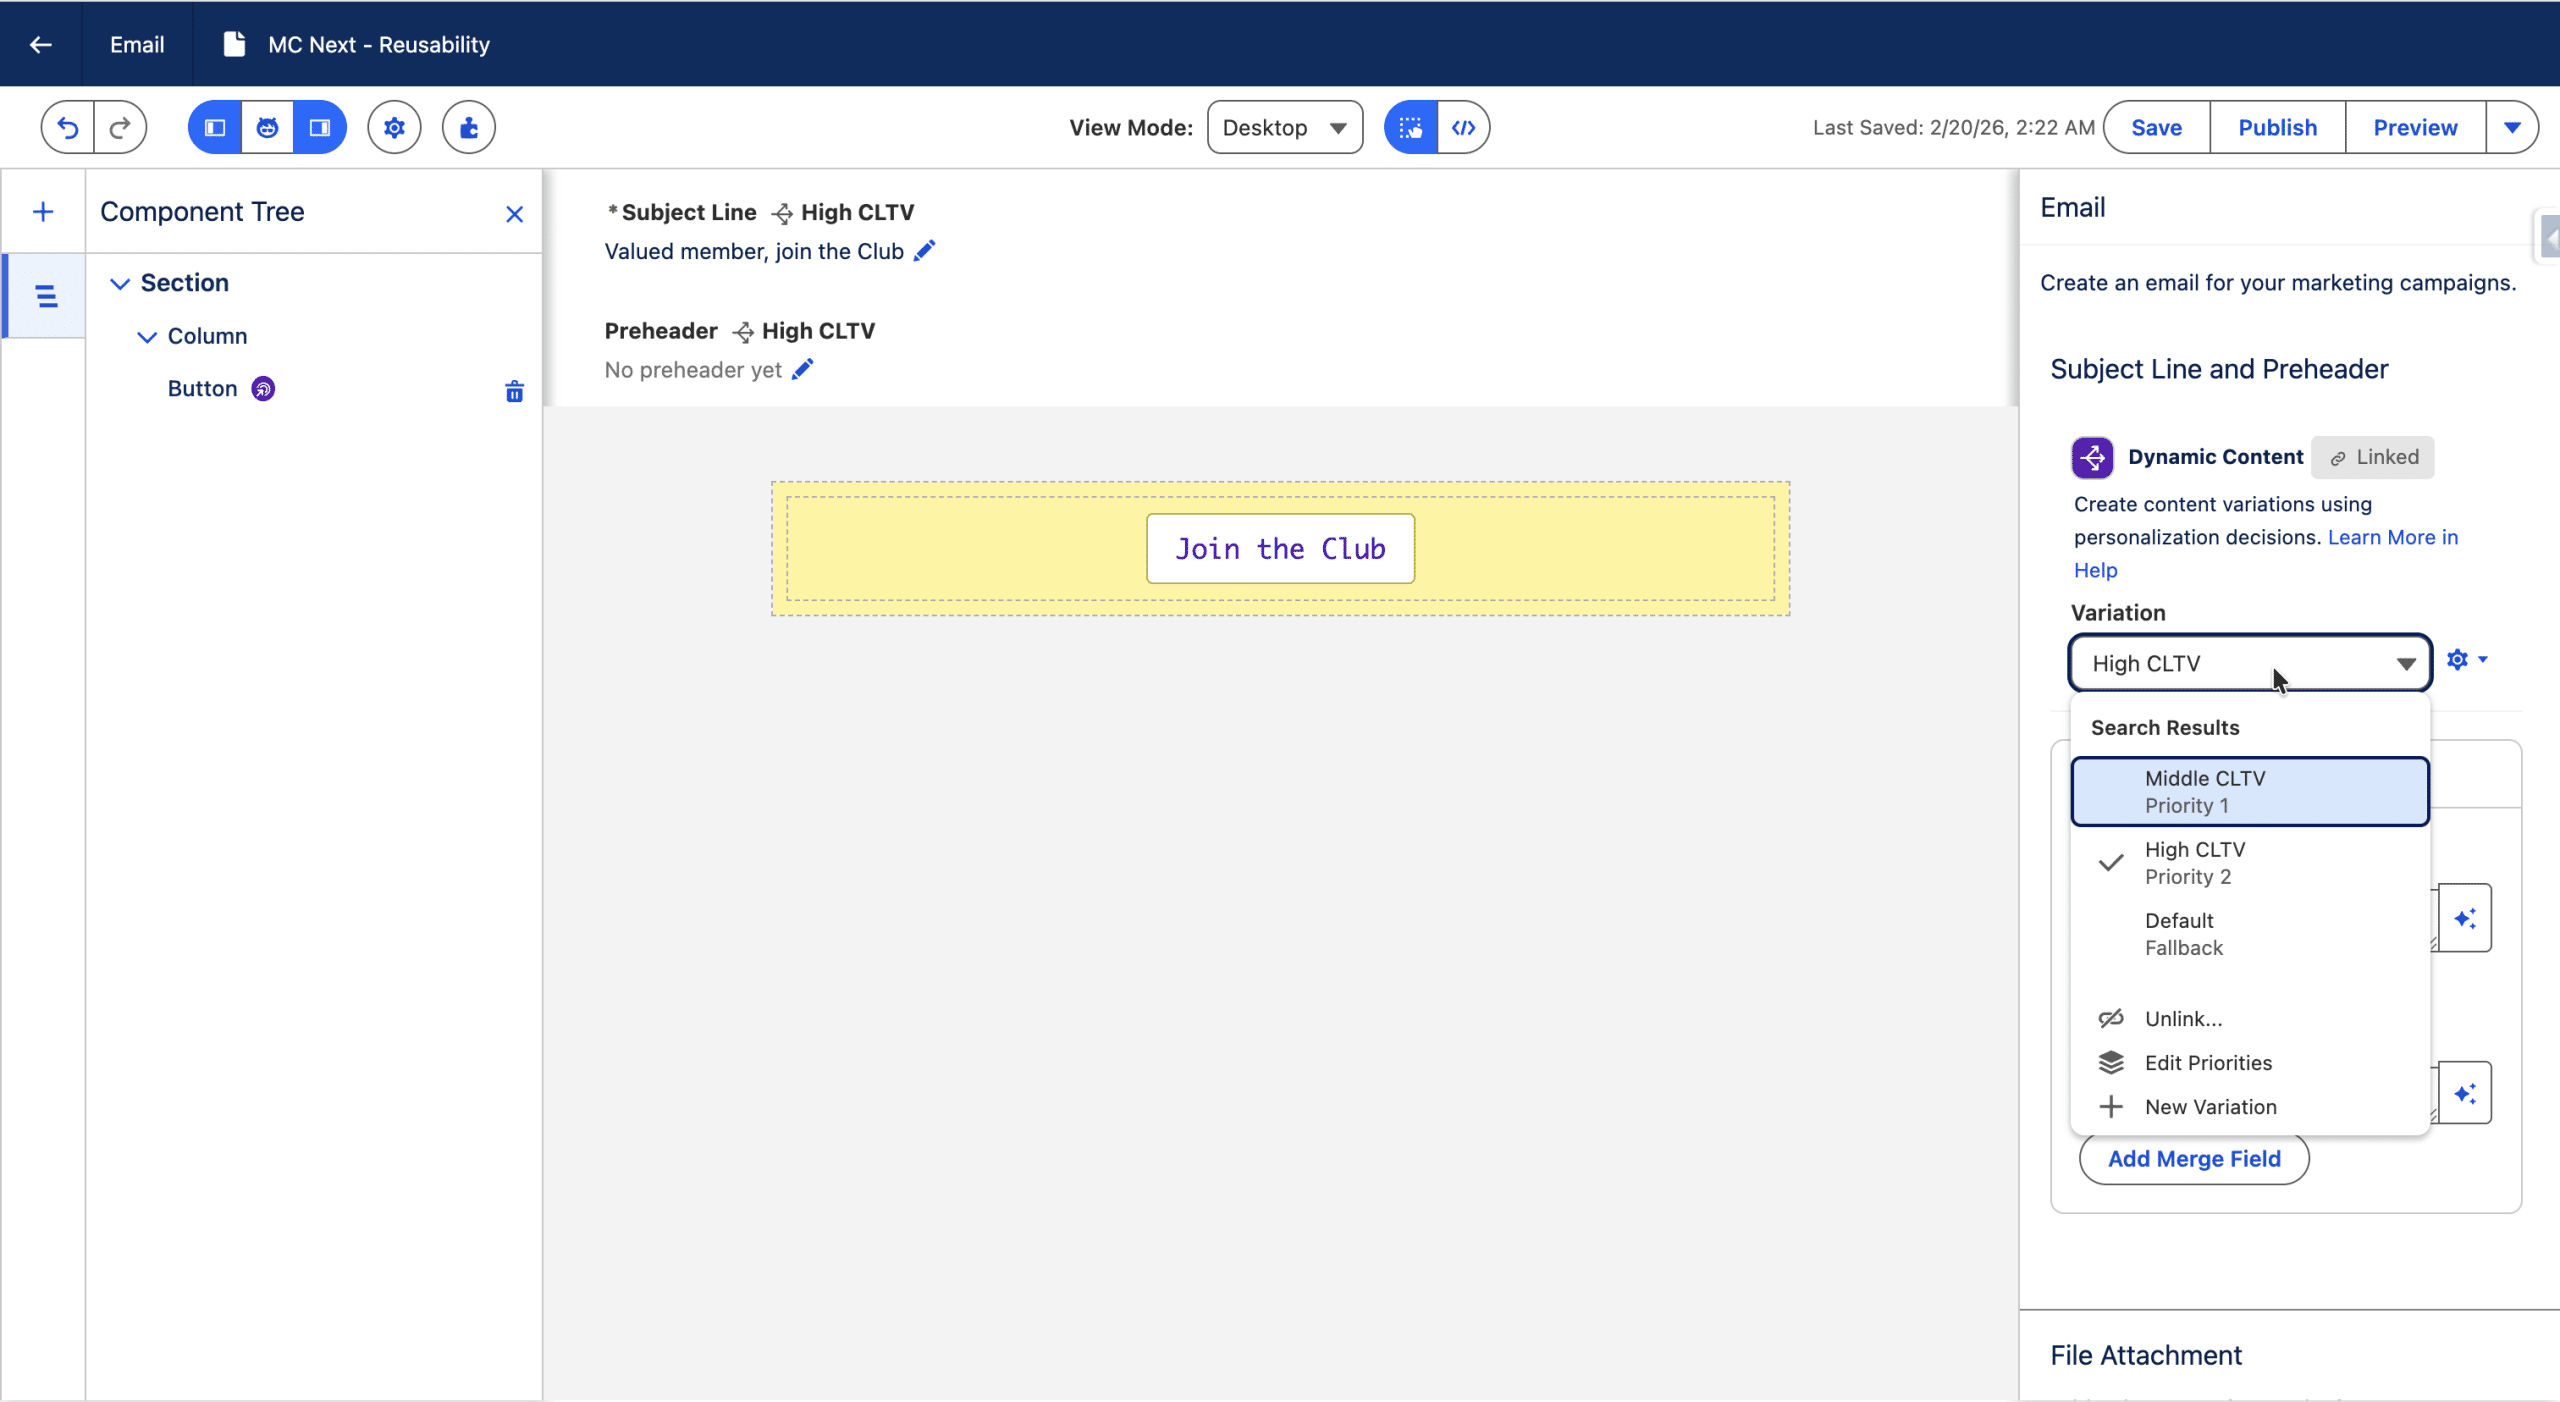
Then, we can create a second new Variation (we’ll thus have 3 Variations including the Default One). For this, we open the dropdown by clicking the Variation’s name.
+ New Variation
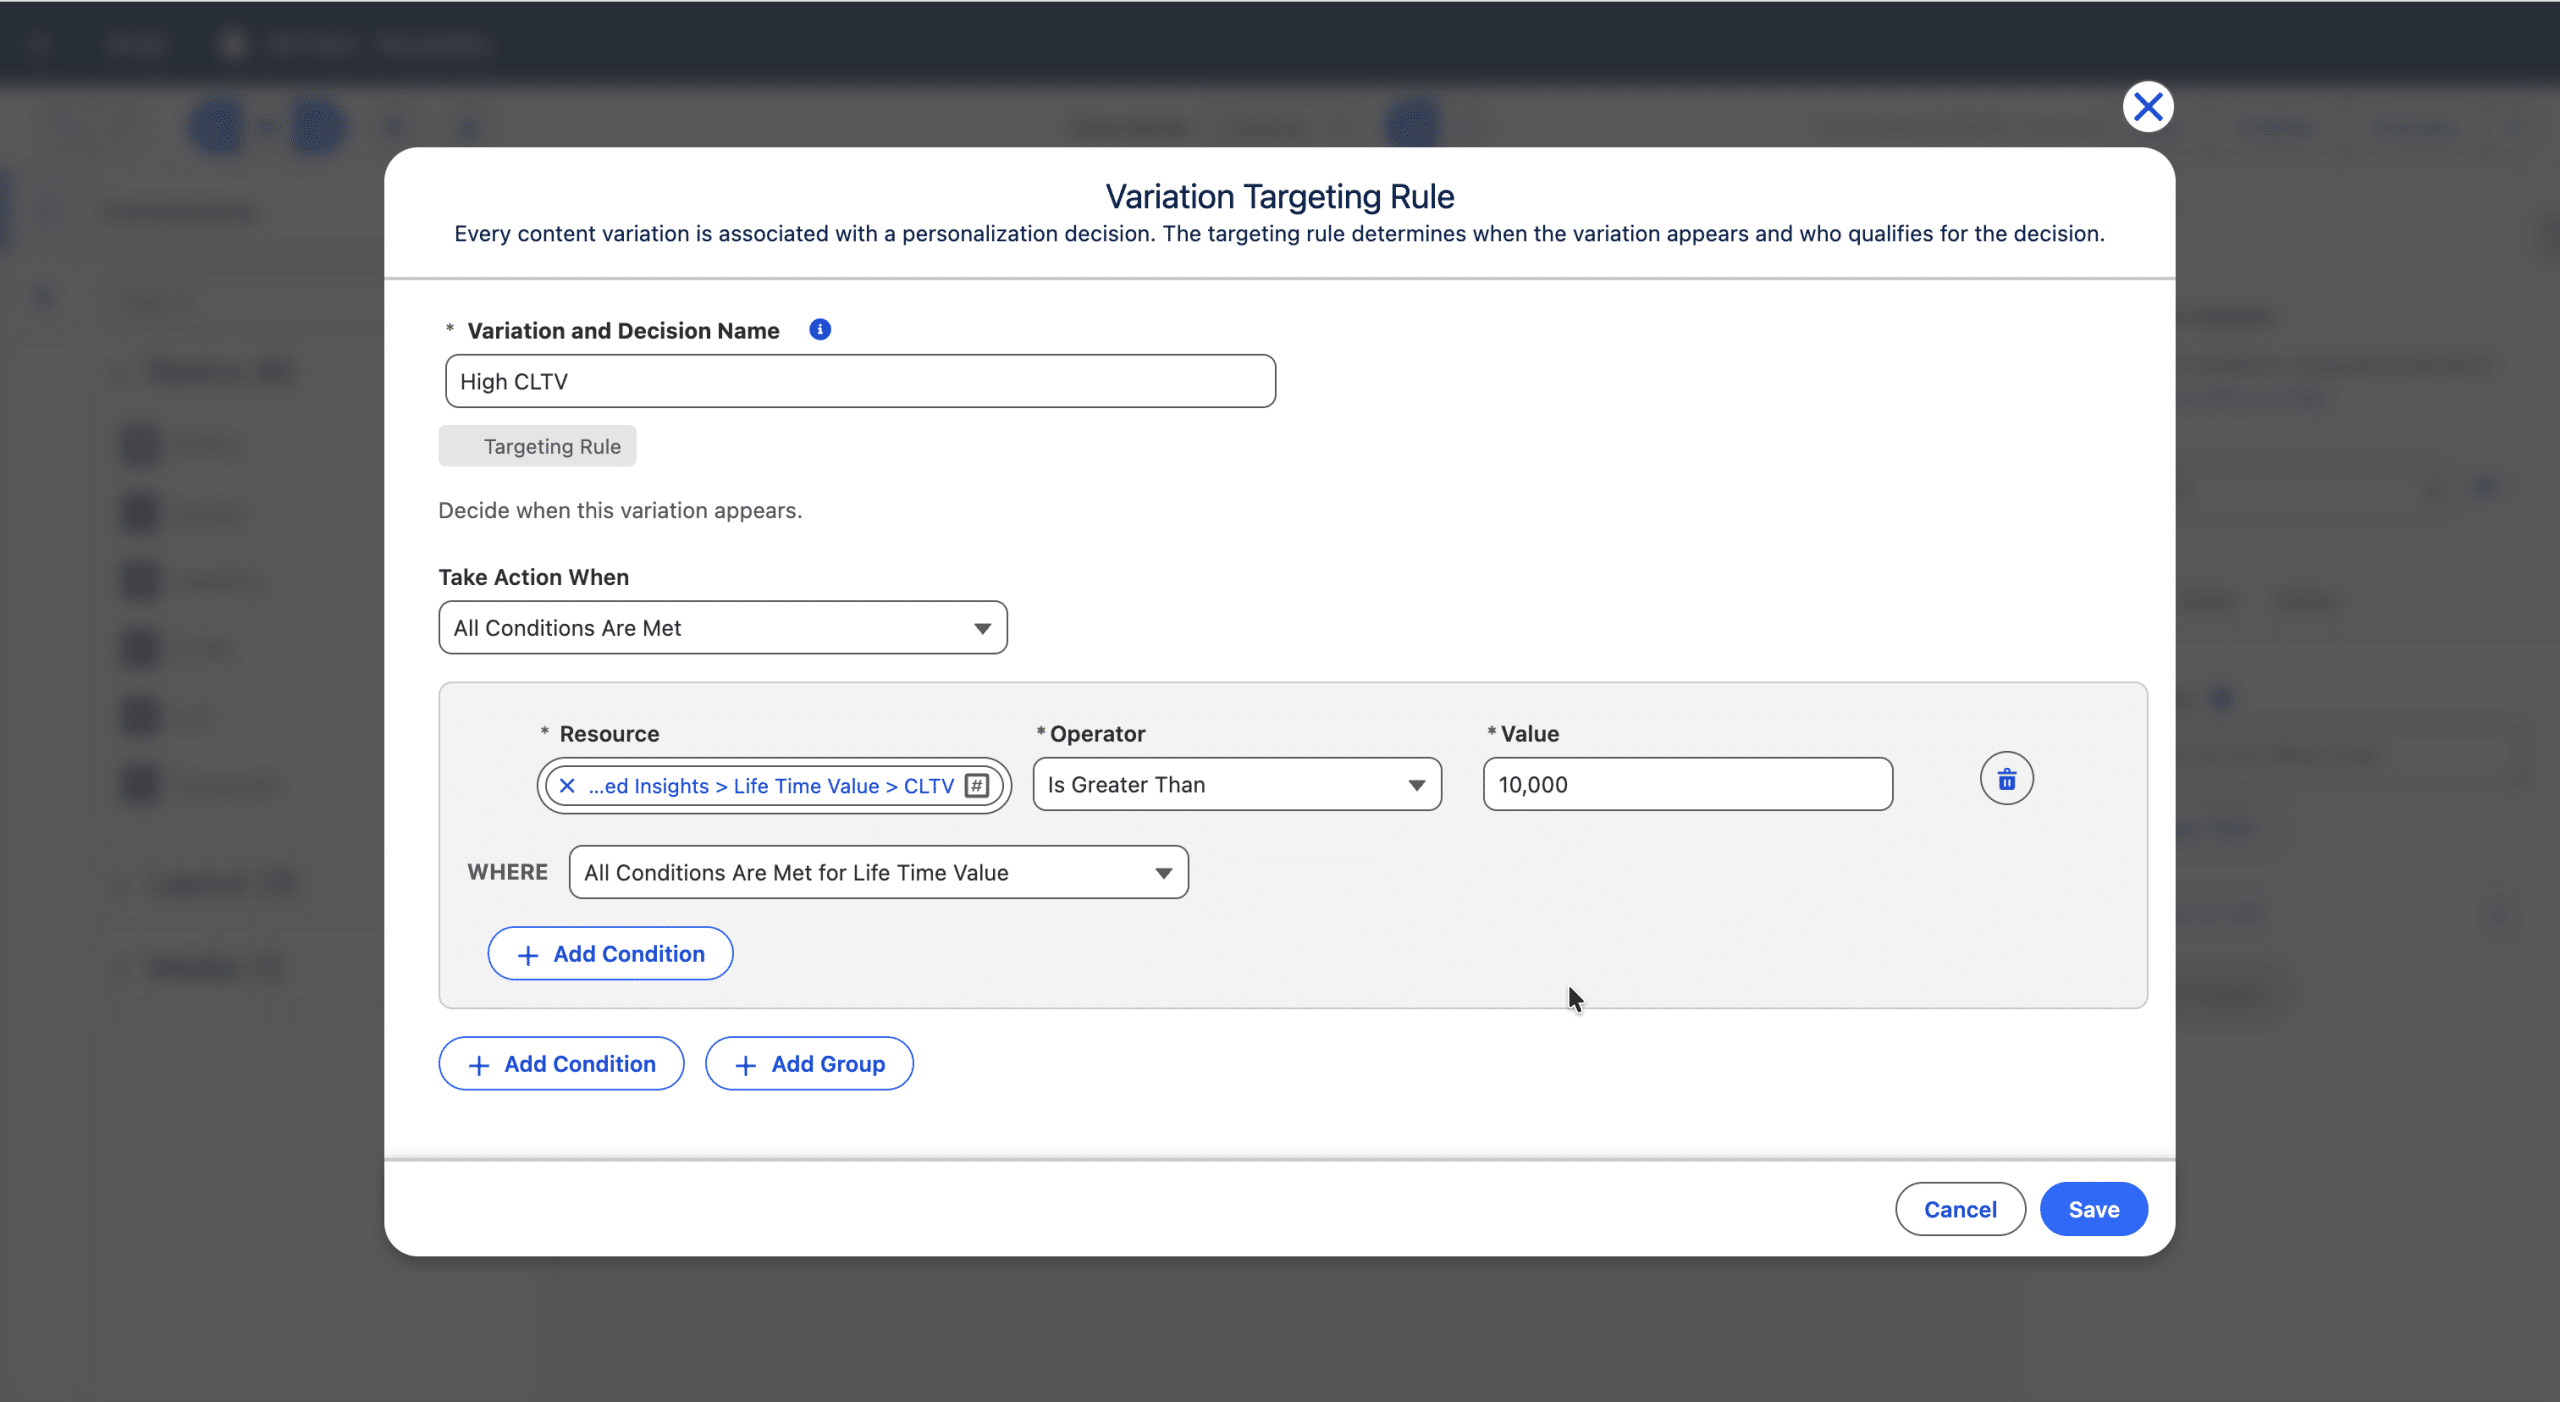
We select customers with a CLTV higher than $10,000 in our example. Save. Again, the new Variation is selected and its content is copied from the default Variation, that we can adjust to our VIP audience.
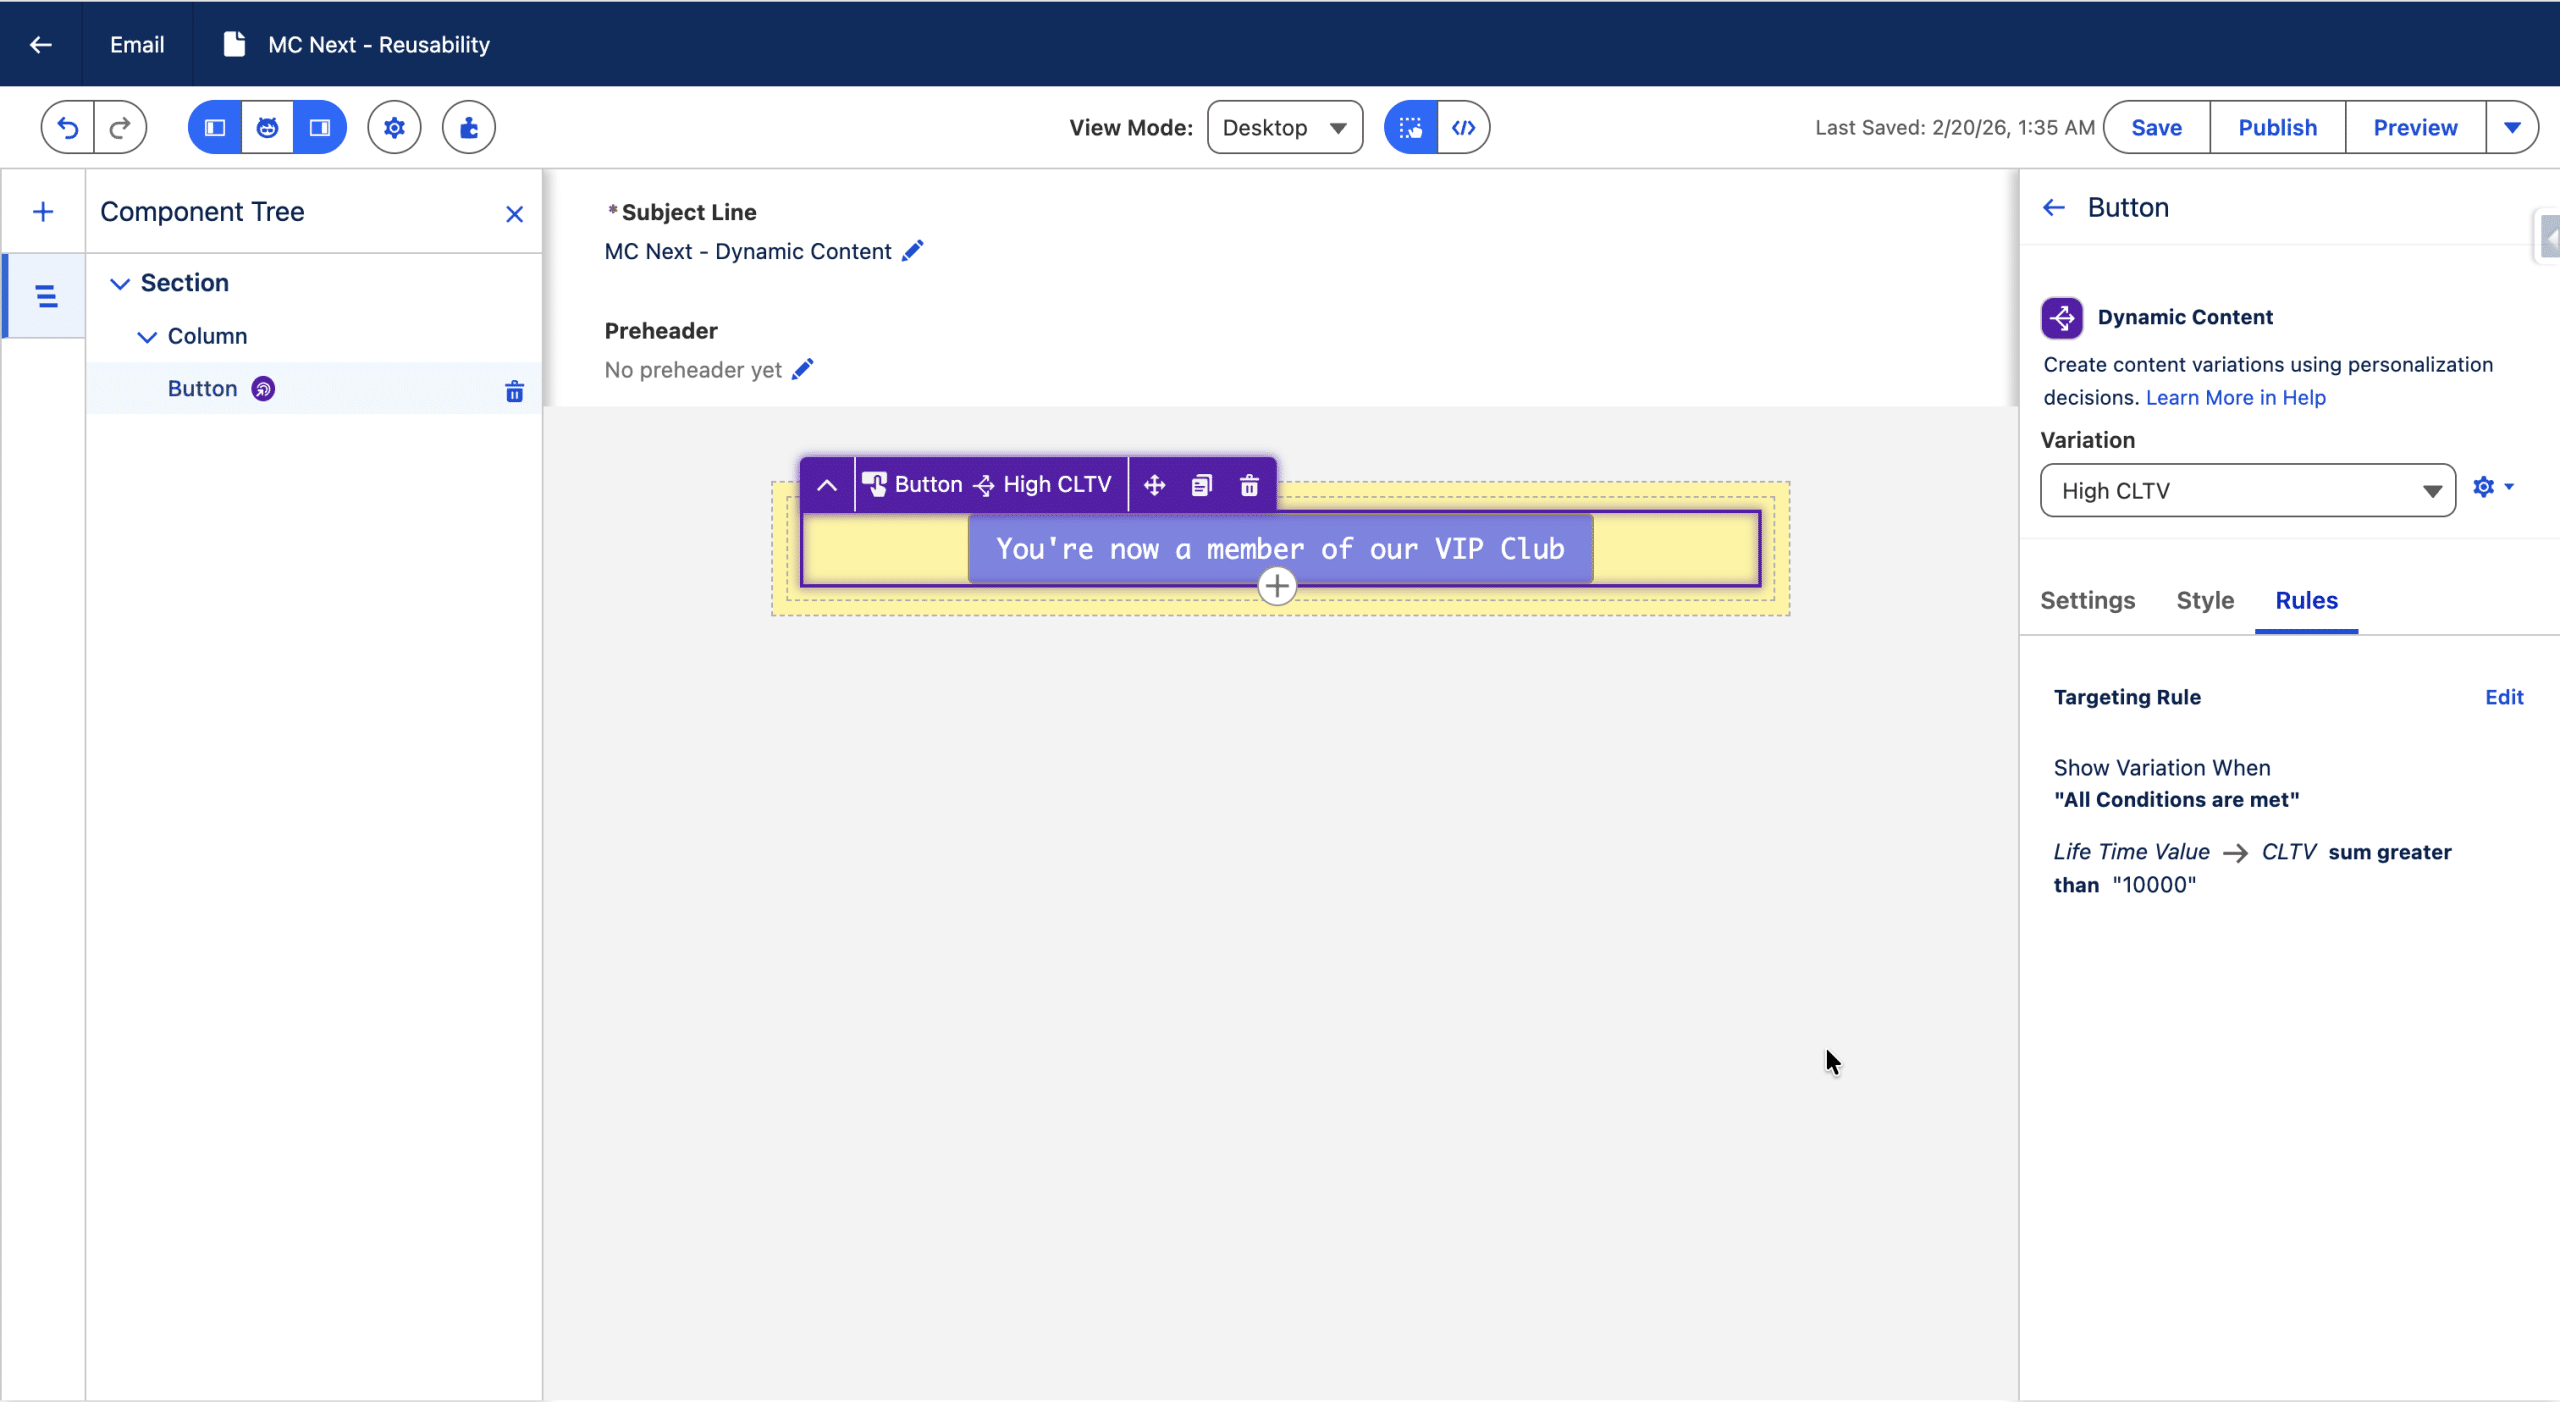
Our button has now a default Variation and 2 Rule-based Variations. We can preview and edit each Variation by selecting its name in the dropdown. This allows us to change the settings of the Button for a given Variation (color, text, etc.) and the Targeting Rule.
Finally, we need to ensure that our Targeting Rules are evaluated in the correct order, and we’ll change the default name of the Personalization Point. For this, we click the “Edit Property” item in the dropdown.
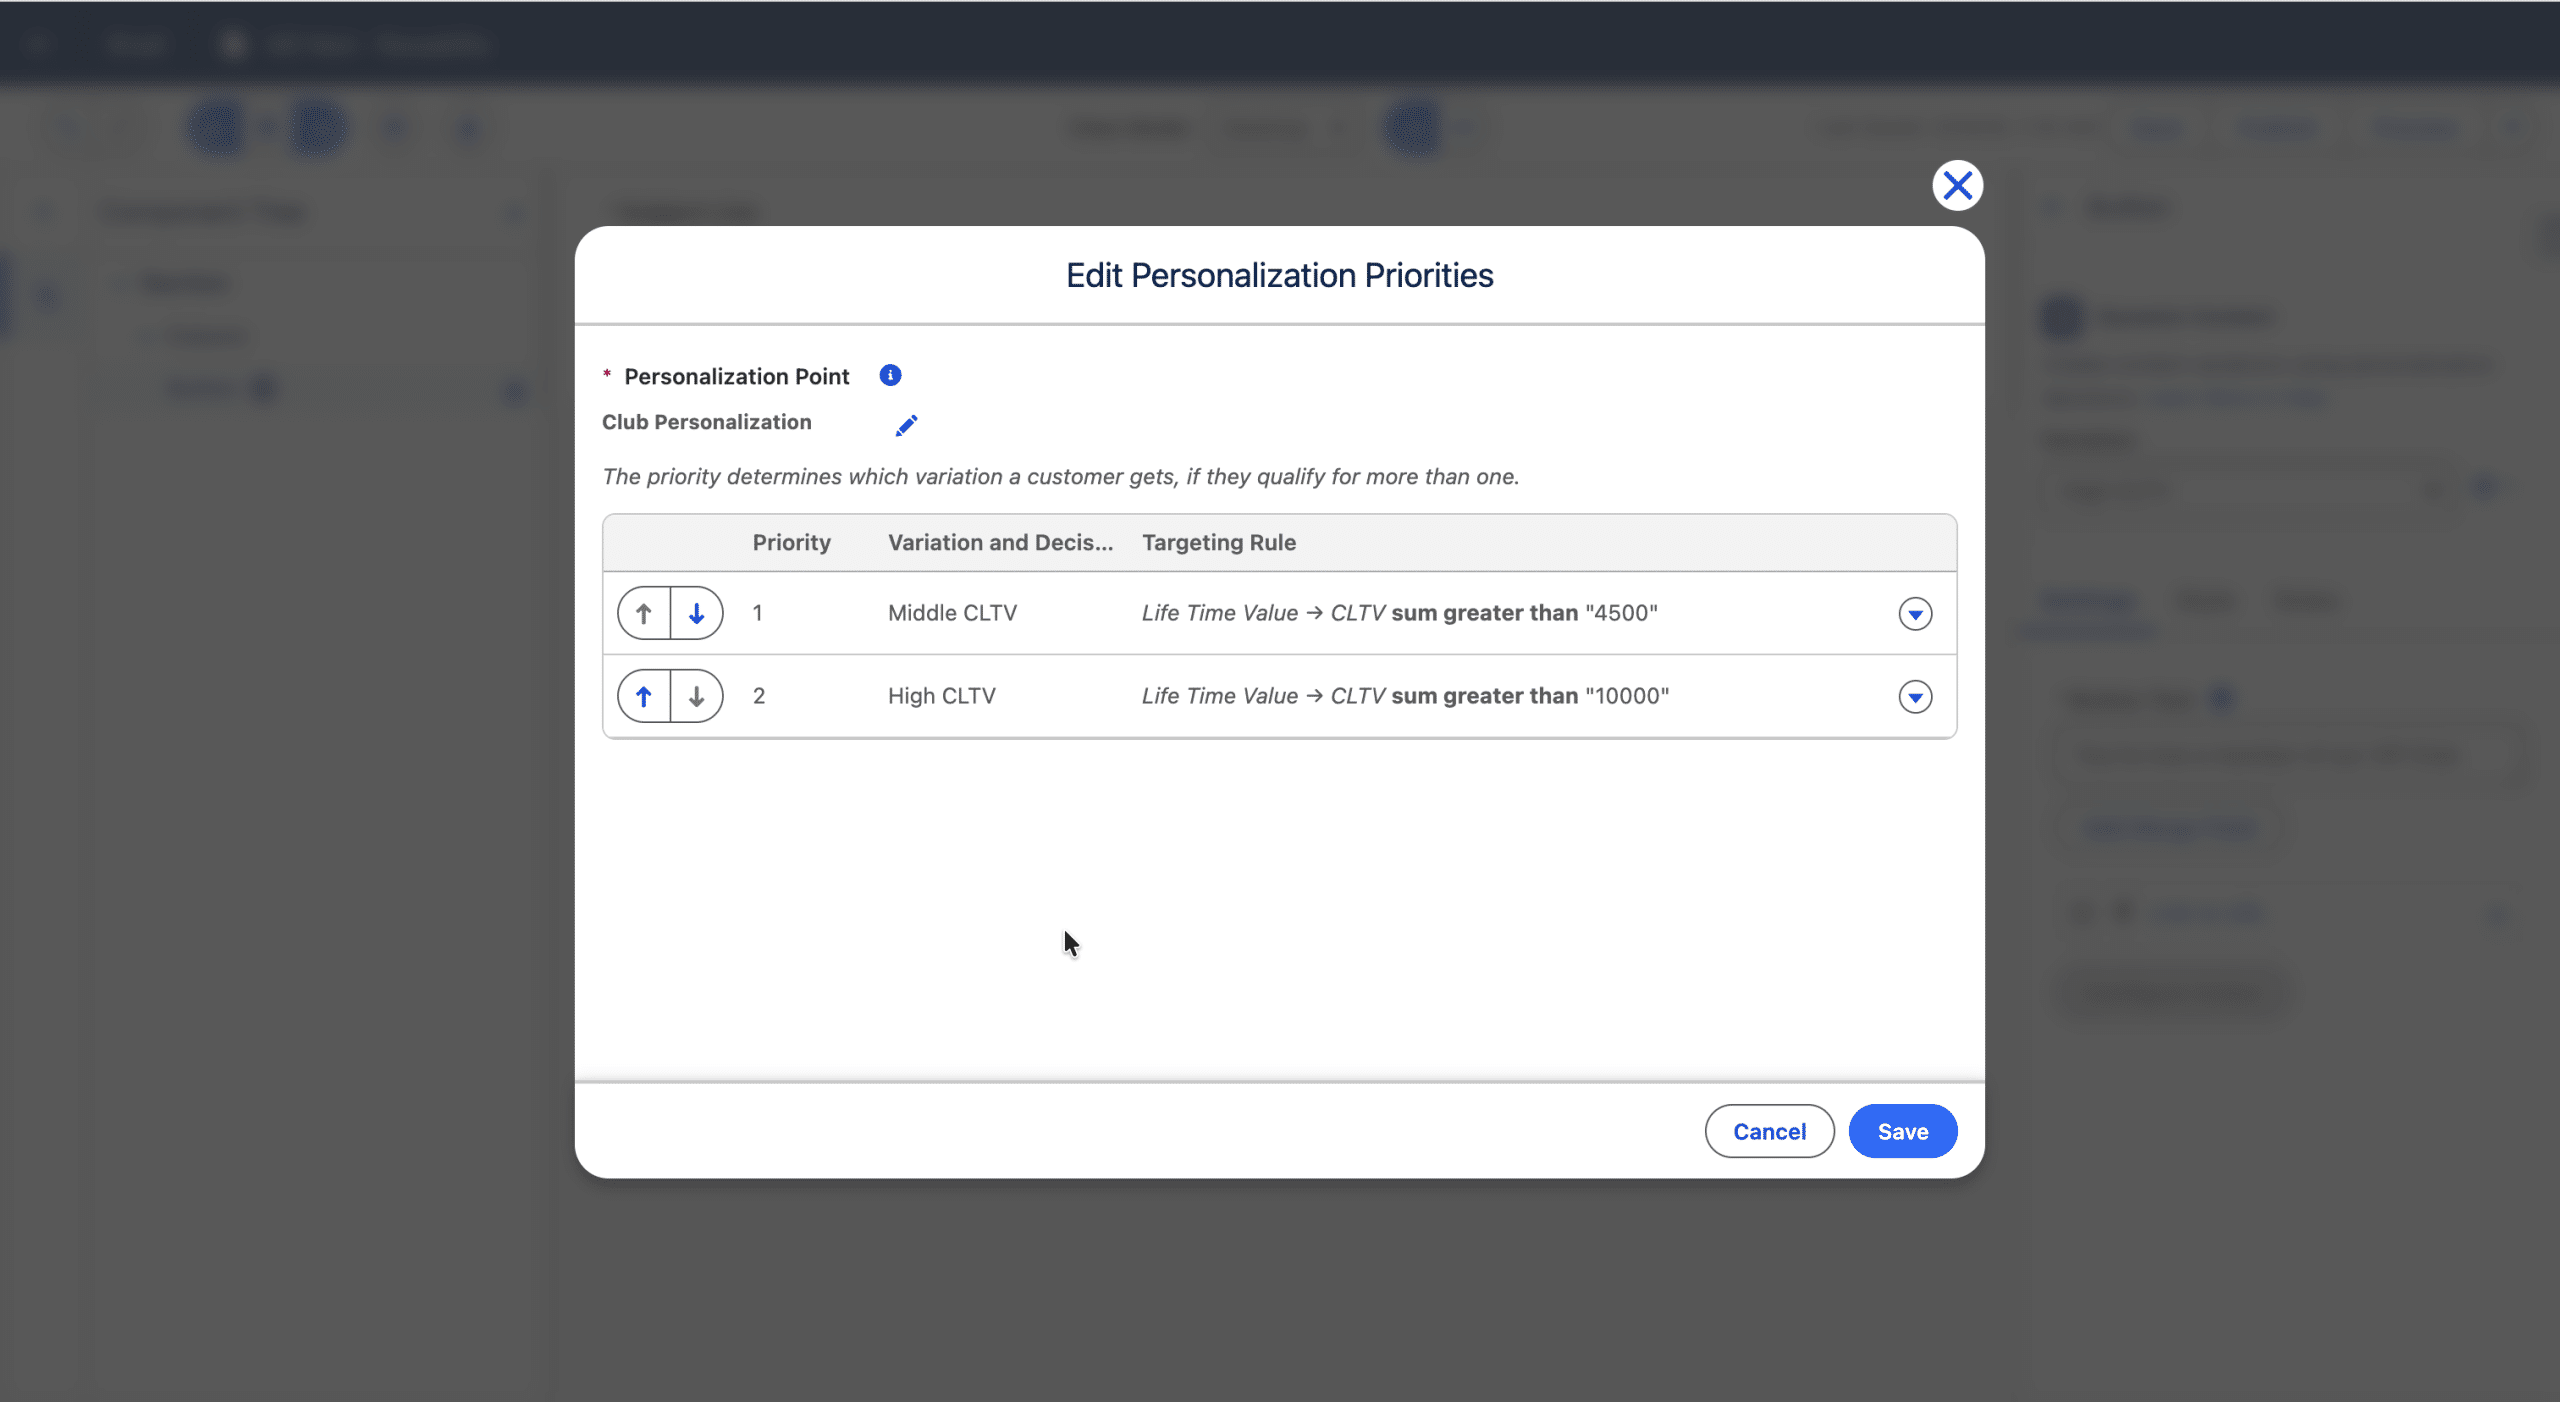
We changed the name of this Personalisation Point to something explicit (Club Personalization in our example), and check that the Targeting Rule Priority is correct (we could reorder the rules from there if needed).
Now is a perfect time to use the Preview feature to ensure the Button displays the correct Variation by testing the rendering for some recipients.
(Re)use a Personalisation point
A single email can have up to 25 Personalization Points and each component can have 15 variations. Within an Email, a Personalization Point can be reused, so that one or more component can benefit from the already defined Targeting Rules.
Let’s reuse our Personalization Point to create Variations of the Subject Line (but any Component except a Repeater can be used, even a Content Block). First, we define its default value, and start the process starts as previously, by clicking “+New Variation”.
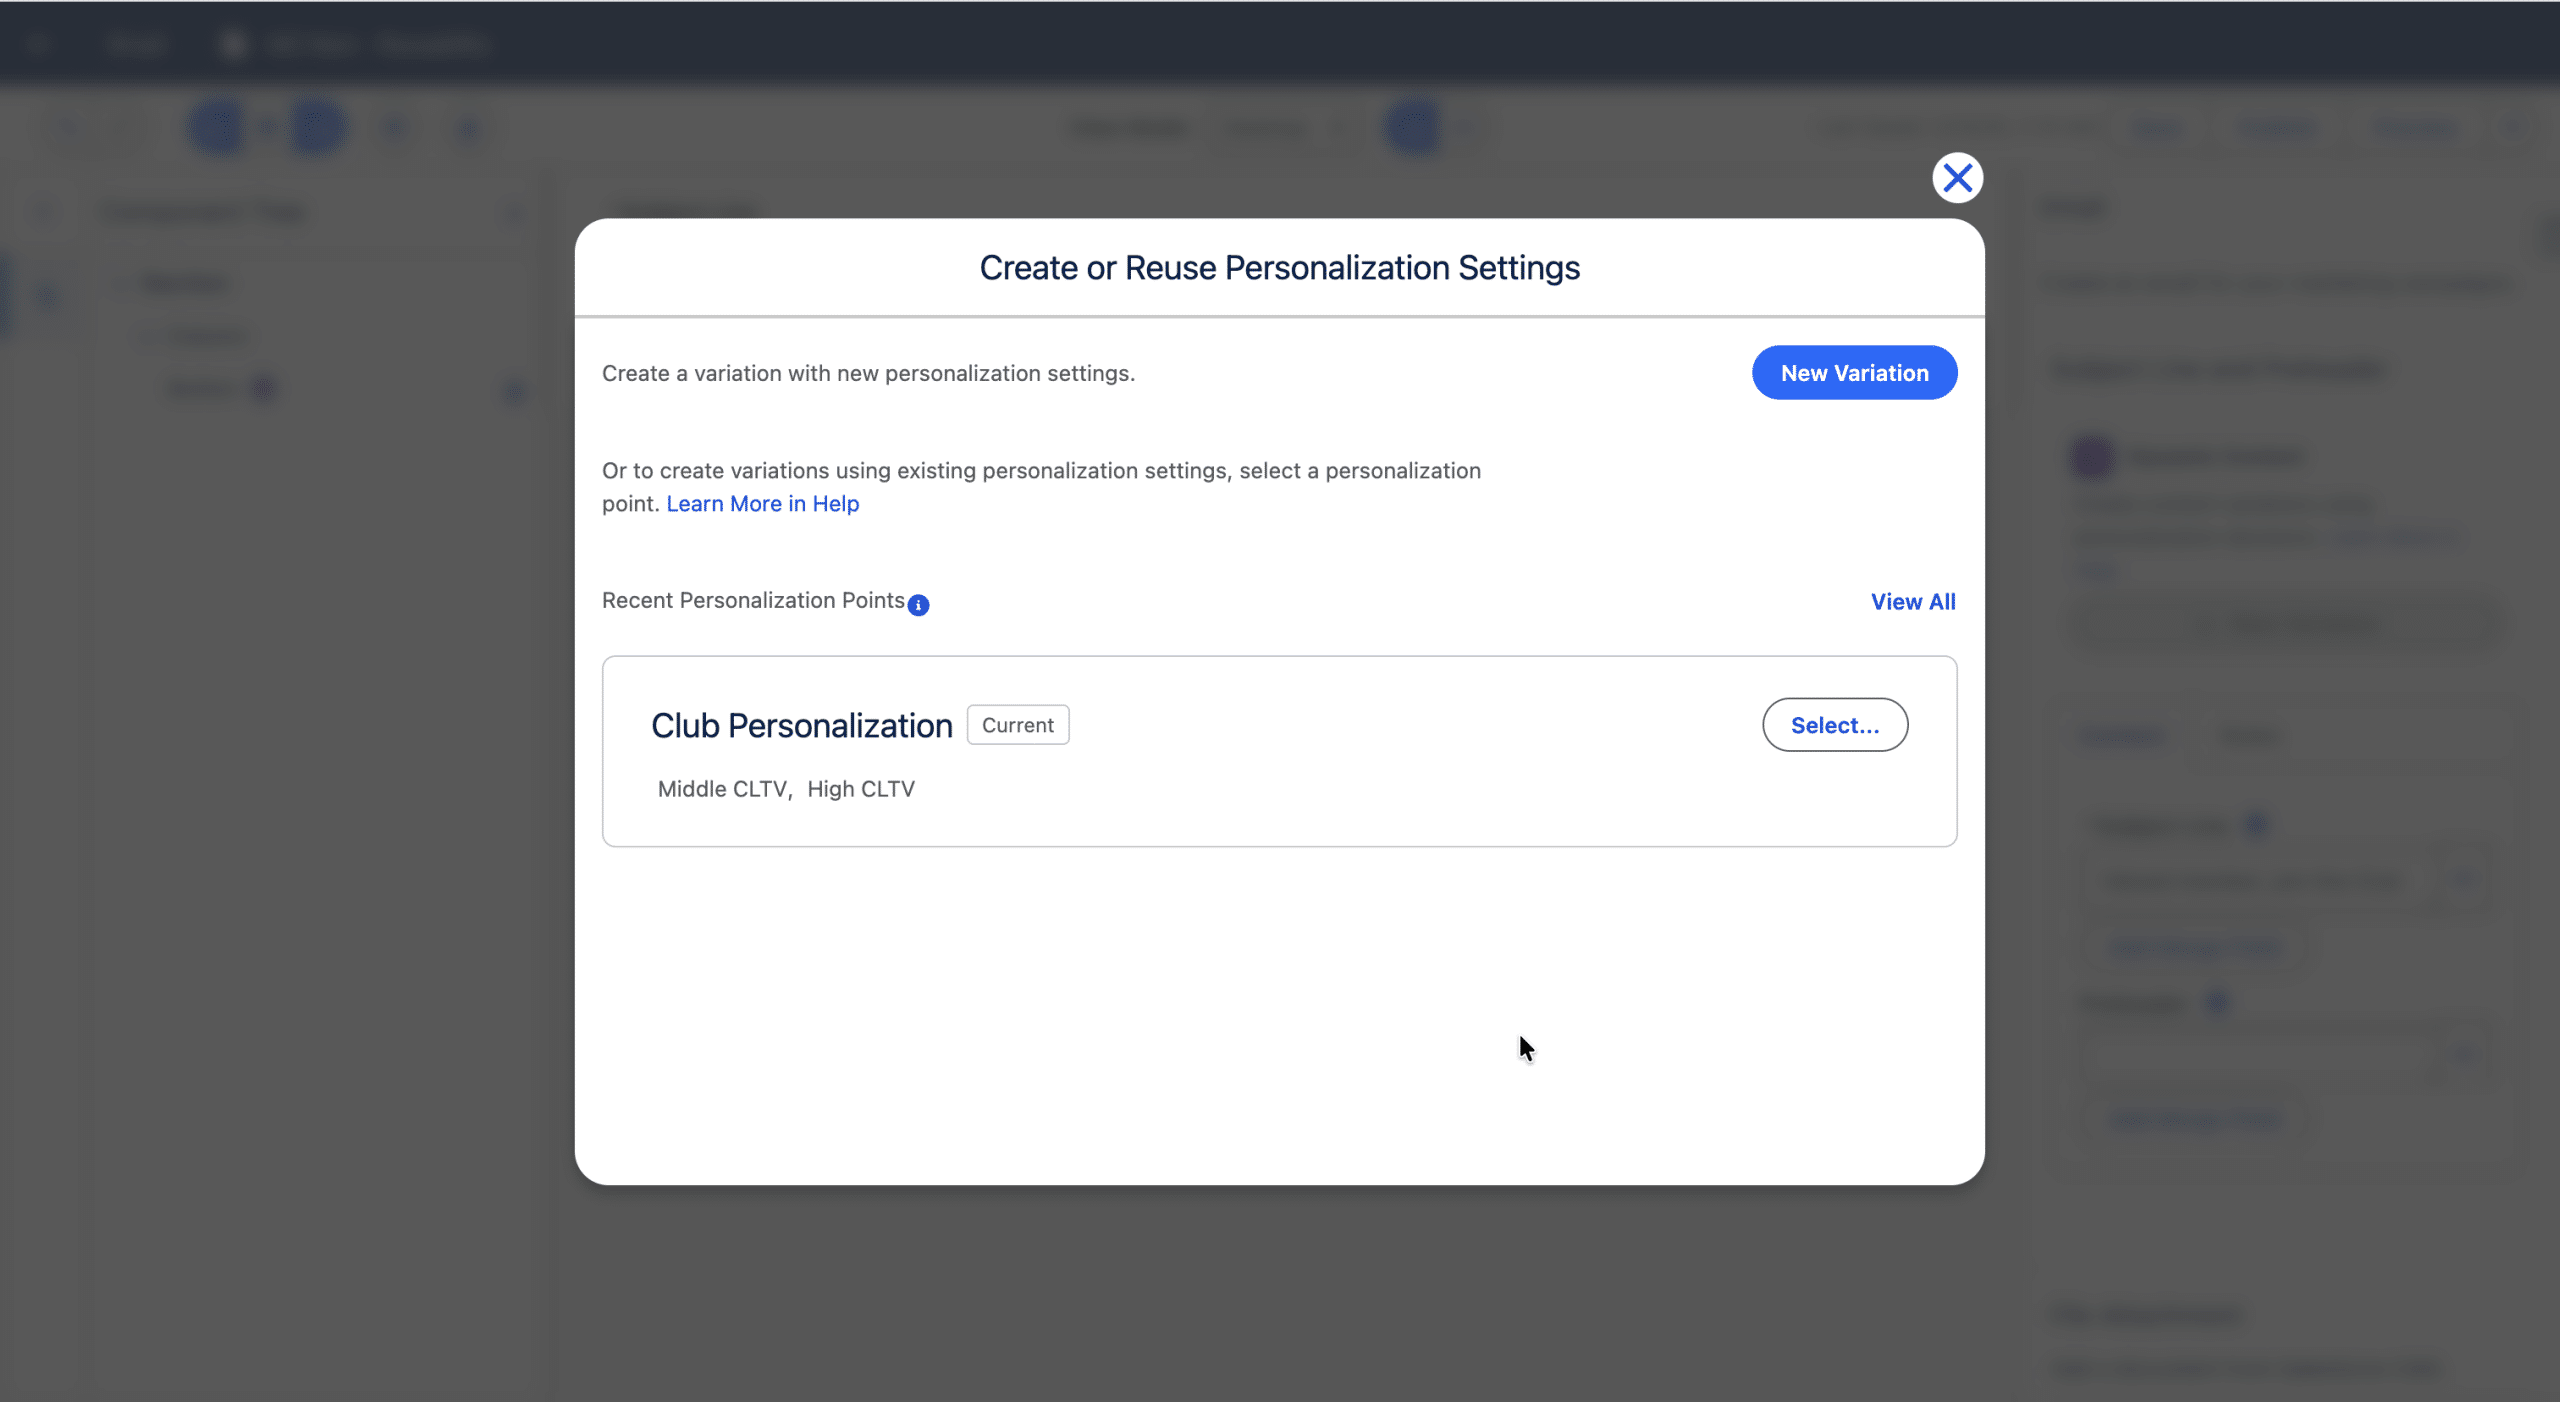
We see our previous Personalization Point (with the name we gave it, and its associated Personalization Decisions). We Select it.
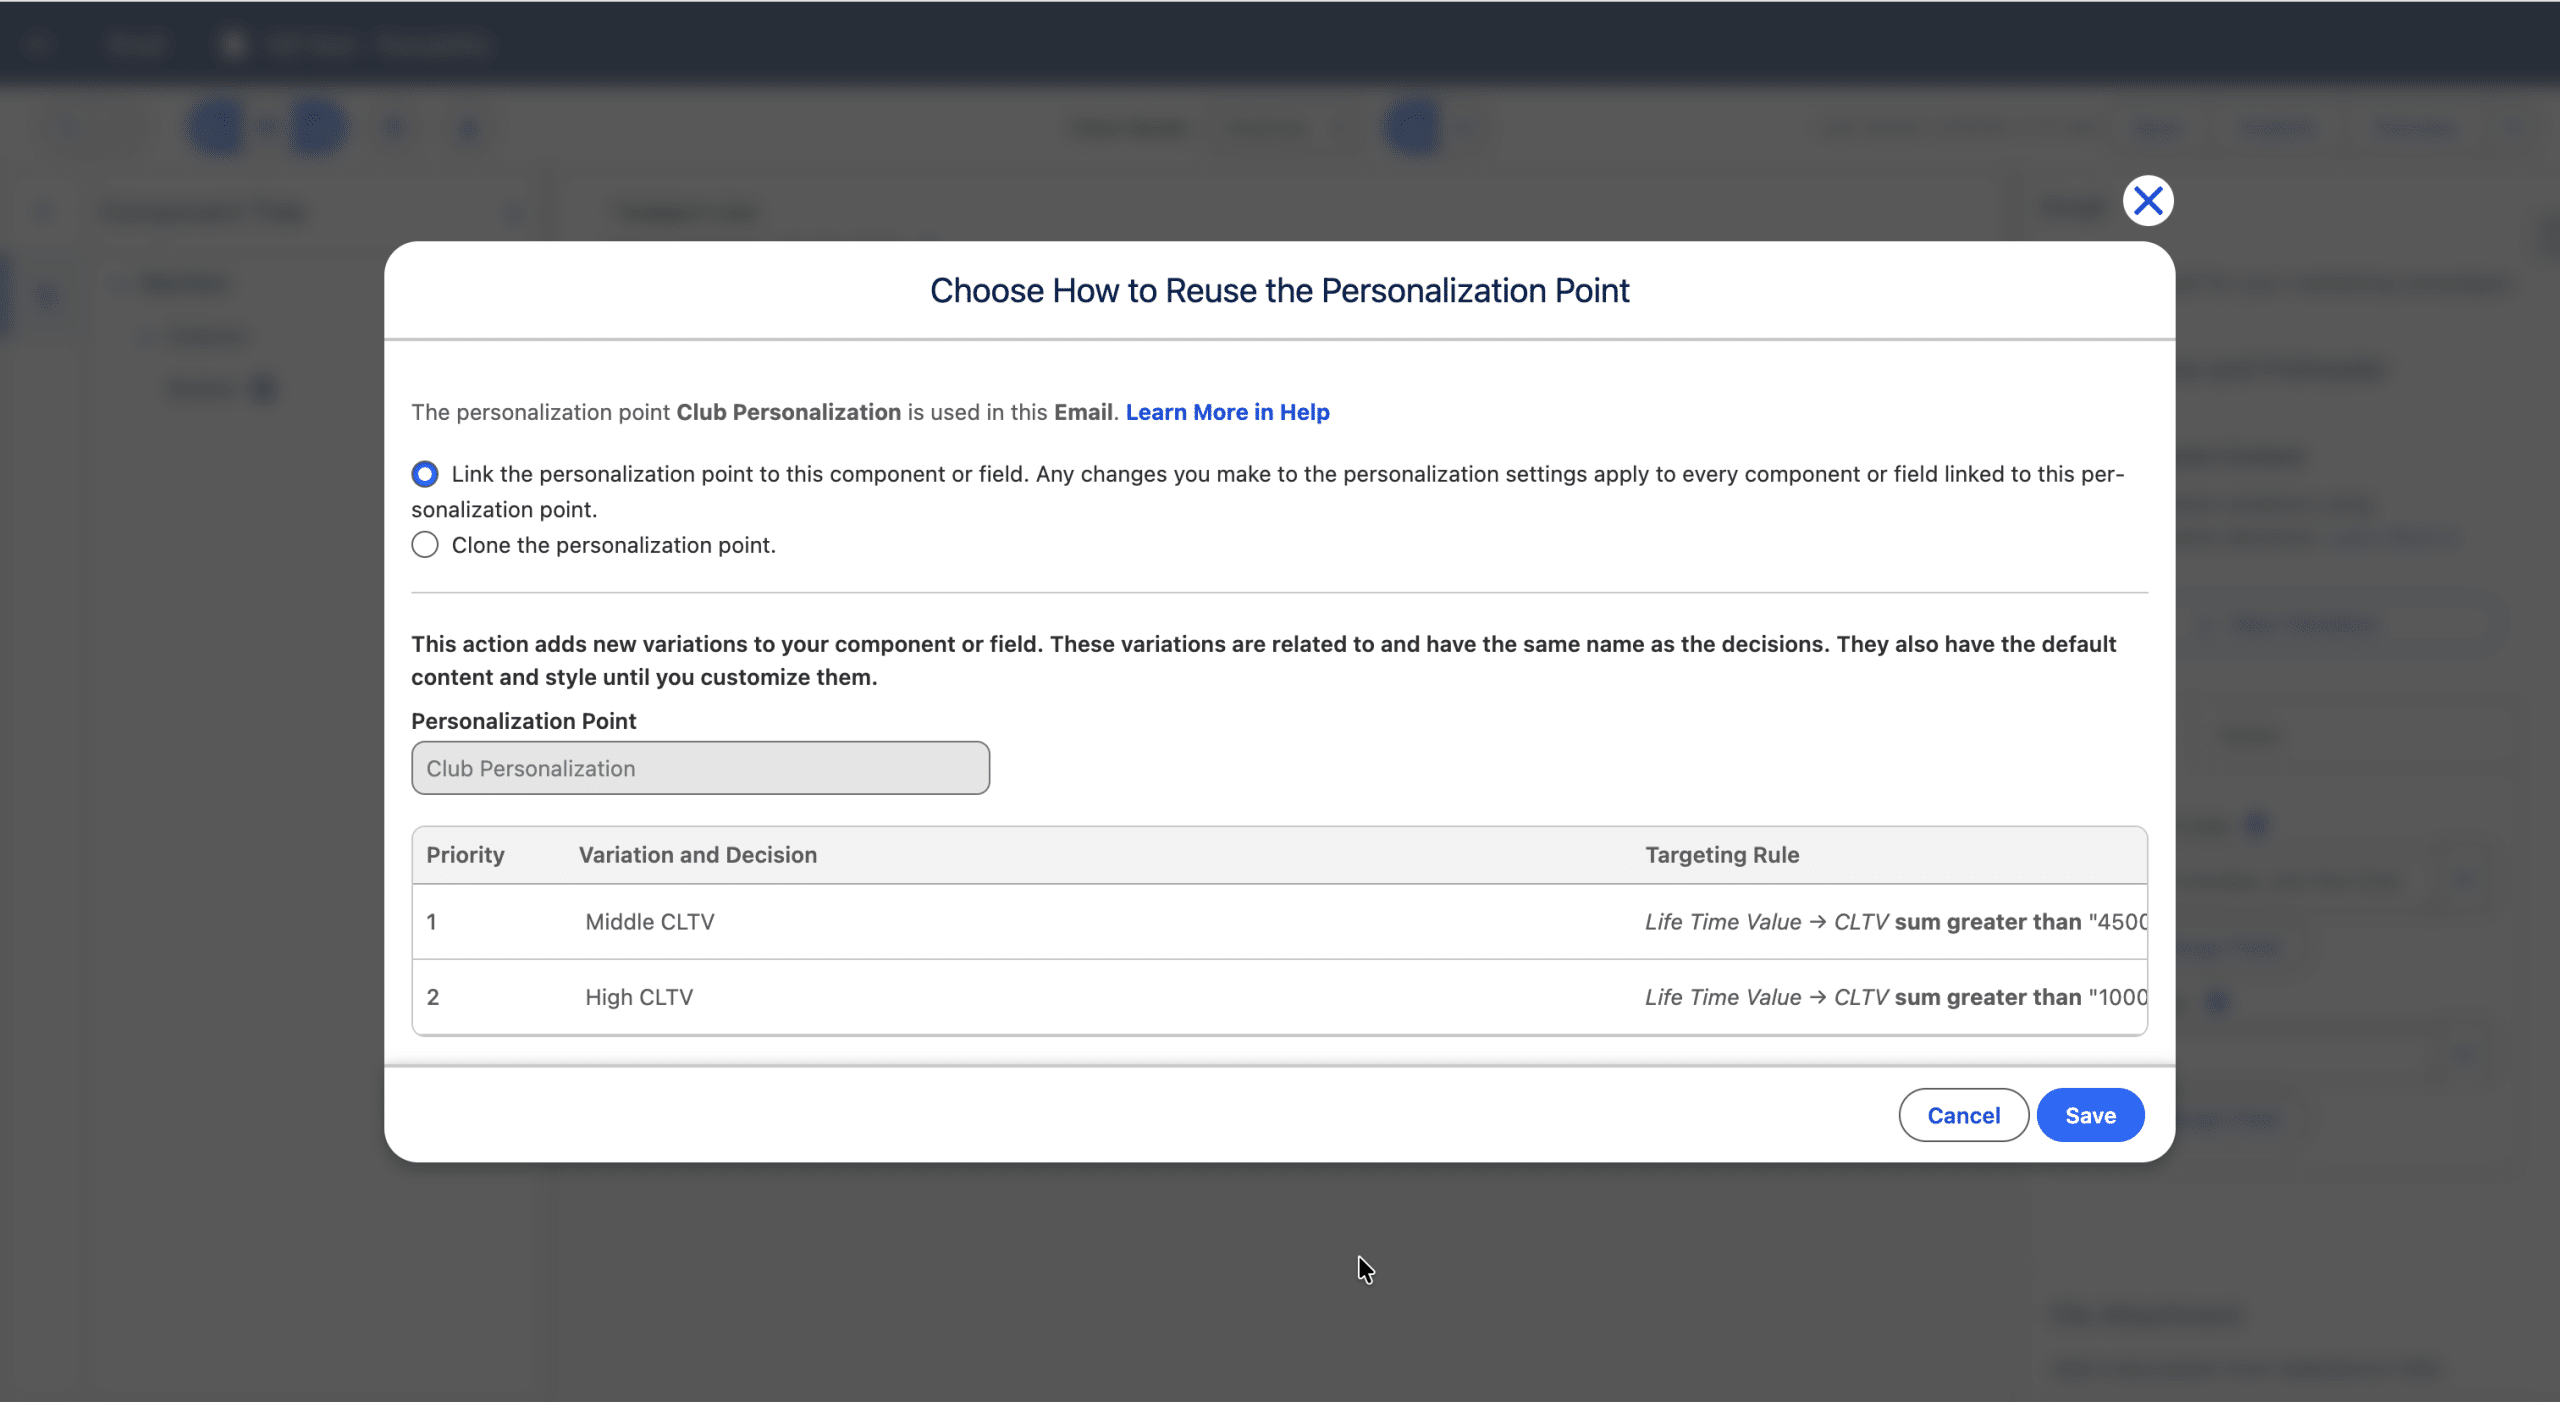
We’ll keep the first option, linking the existing Personalisation Point to our current component, the Subject Line. This is a best practice, since we then still have only one, common Personalization Point, so, if we want to change it we just change it once for all linked Components. Also, as we have 25 Personalisation Points per email, using the linking option instead of the cloning one, counts for one only. Save.
Reusable Visual Identity with MC Next «Brands»
In Marketing Cloud Next’s CMS, you can create one or more Brand: a style Container that can be applied to several asset type, including the Emails.How to create a Brand
Brands are stored in the CMS, so you can create one from there.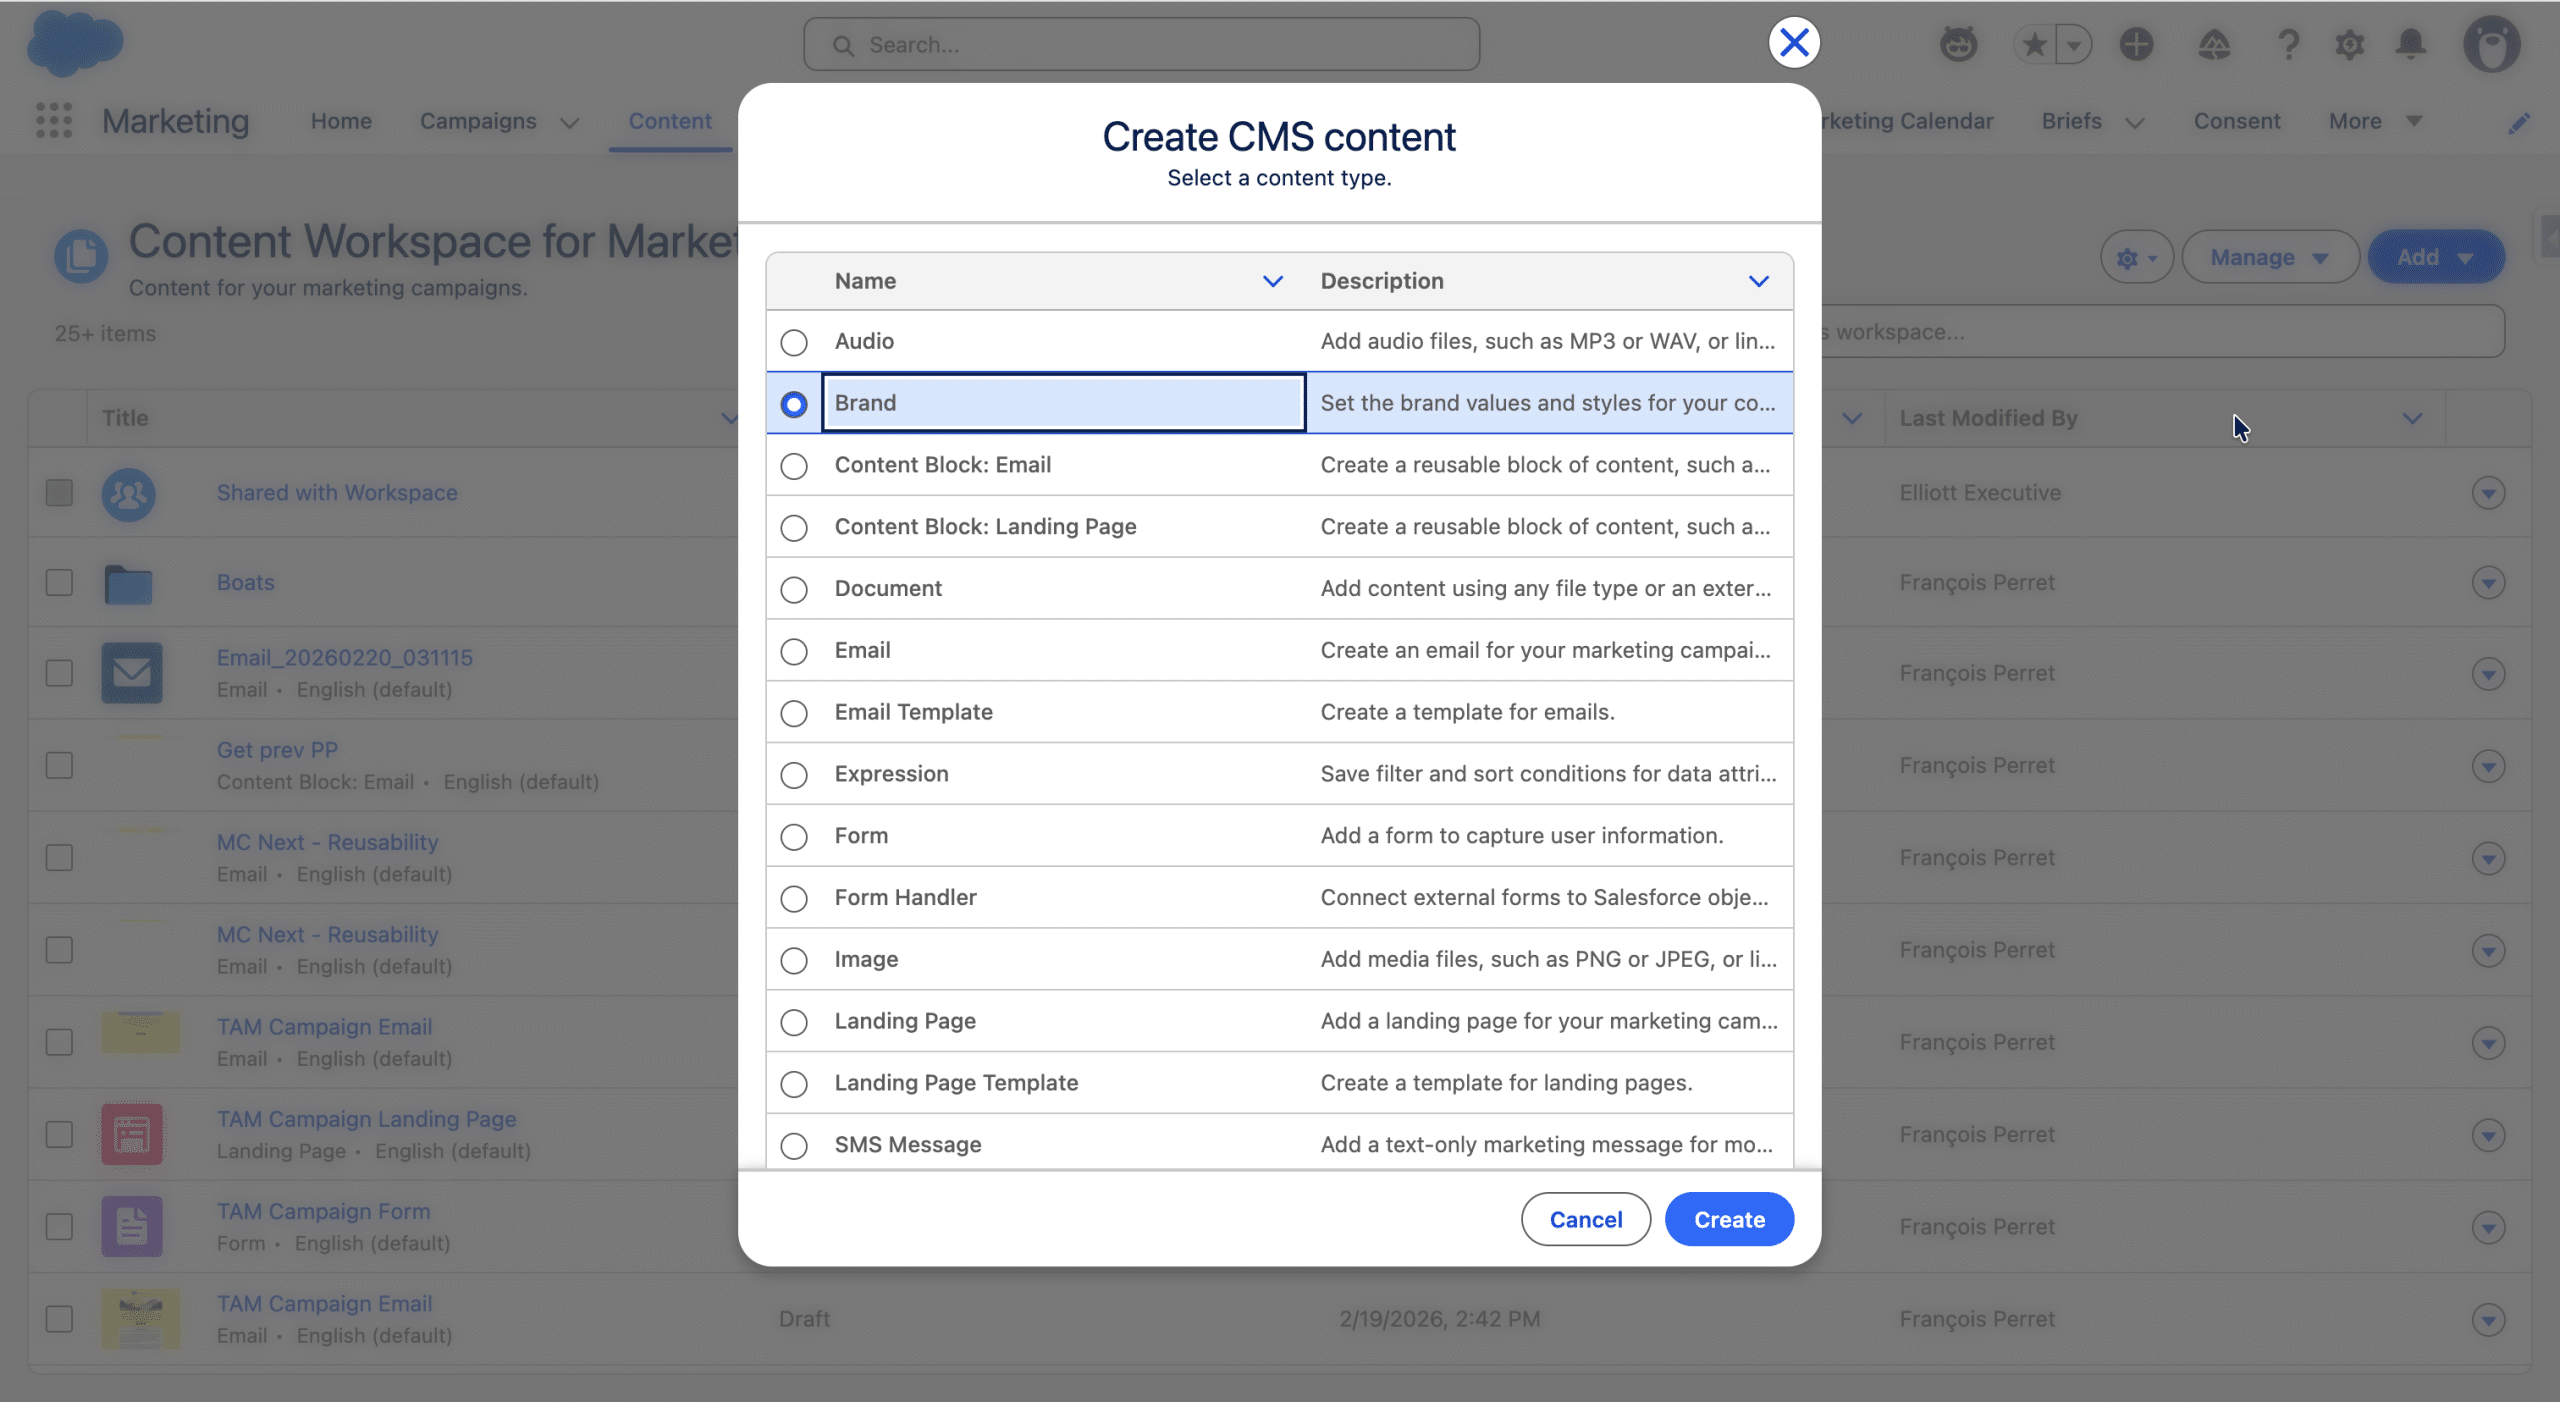
Once created, you give it a name, select a tone, and define the colors, typography, button types, margin and paddings and borders. On the right side of the Brand editor, you see the visual result of your changes. Once you’re satisfied, Save it.
(Re)Use a Brand
You can define a default Brand for your CMS, so that it is applied by default to every new Email (see recipe #4 in Unlocking your CMS), either created from the CMS, buy the Campaing Creation Agent or by the Flow templates in a Campaign. You can change, define or remove the Brand used in an Email anytime.
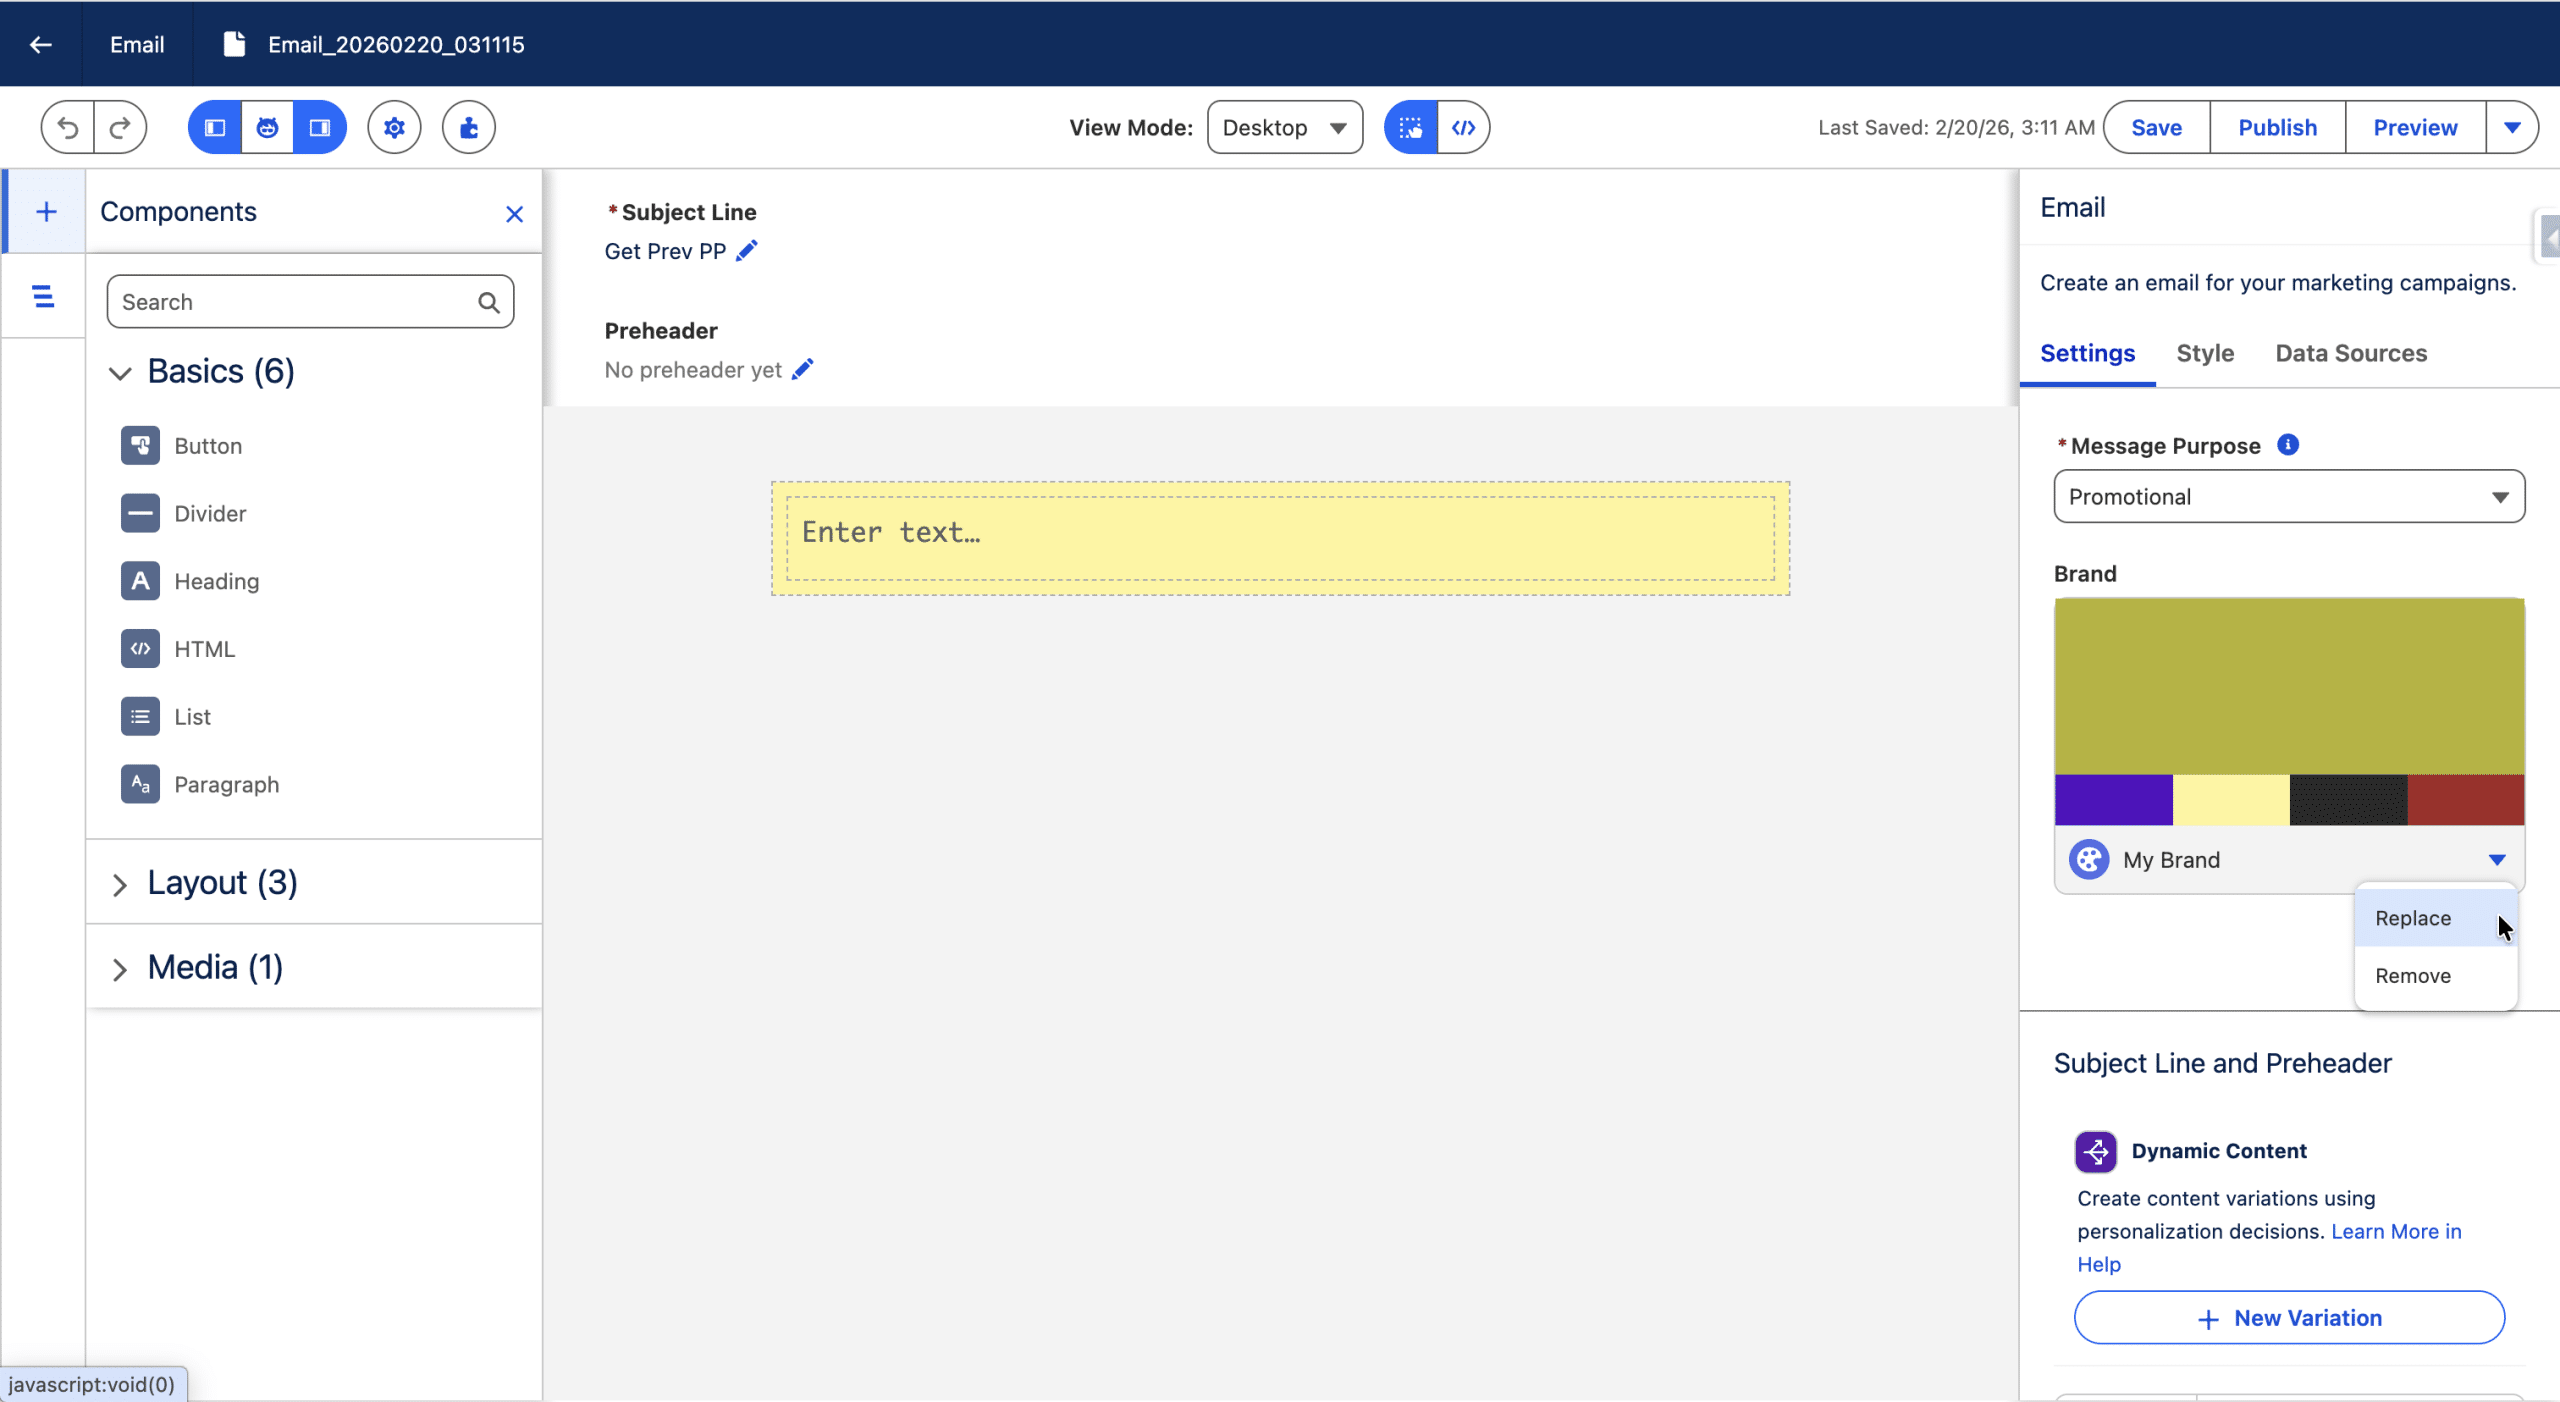
When a Brand is applied, every Component is applied the default set of styles of the Brand, and you can switch to another set of style (a set of styles defines the typography, color, spacings, etc.).
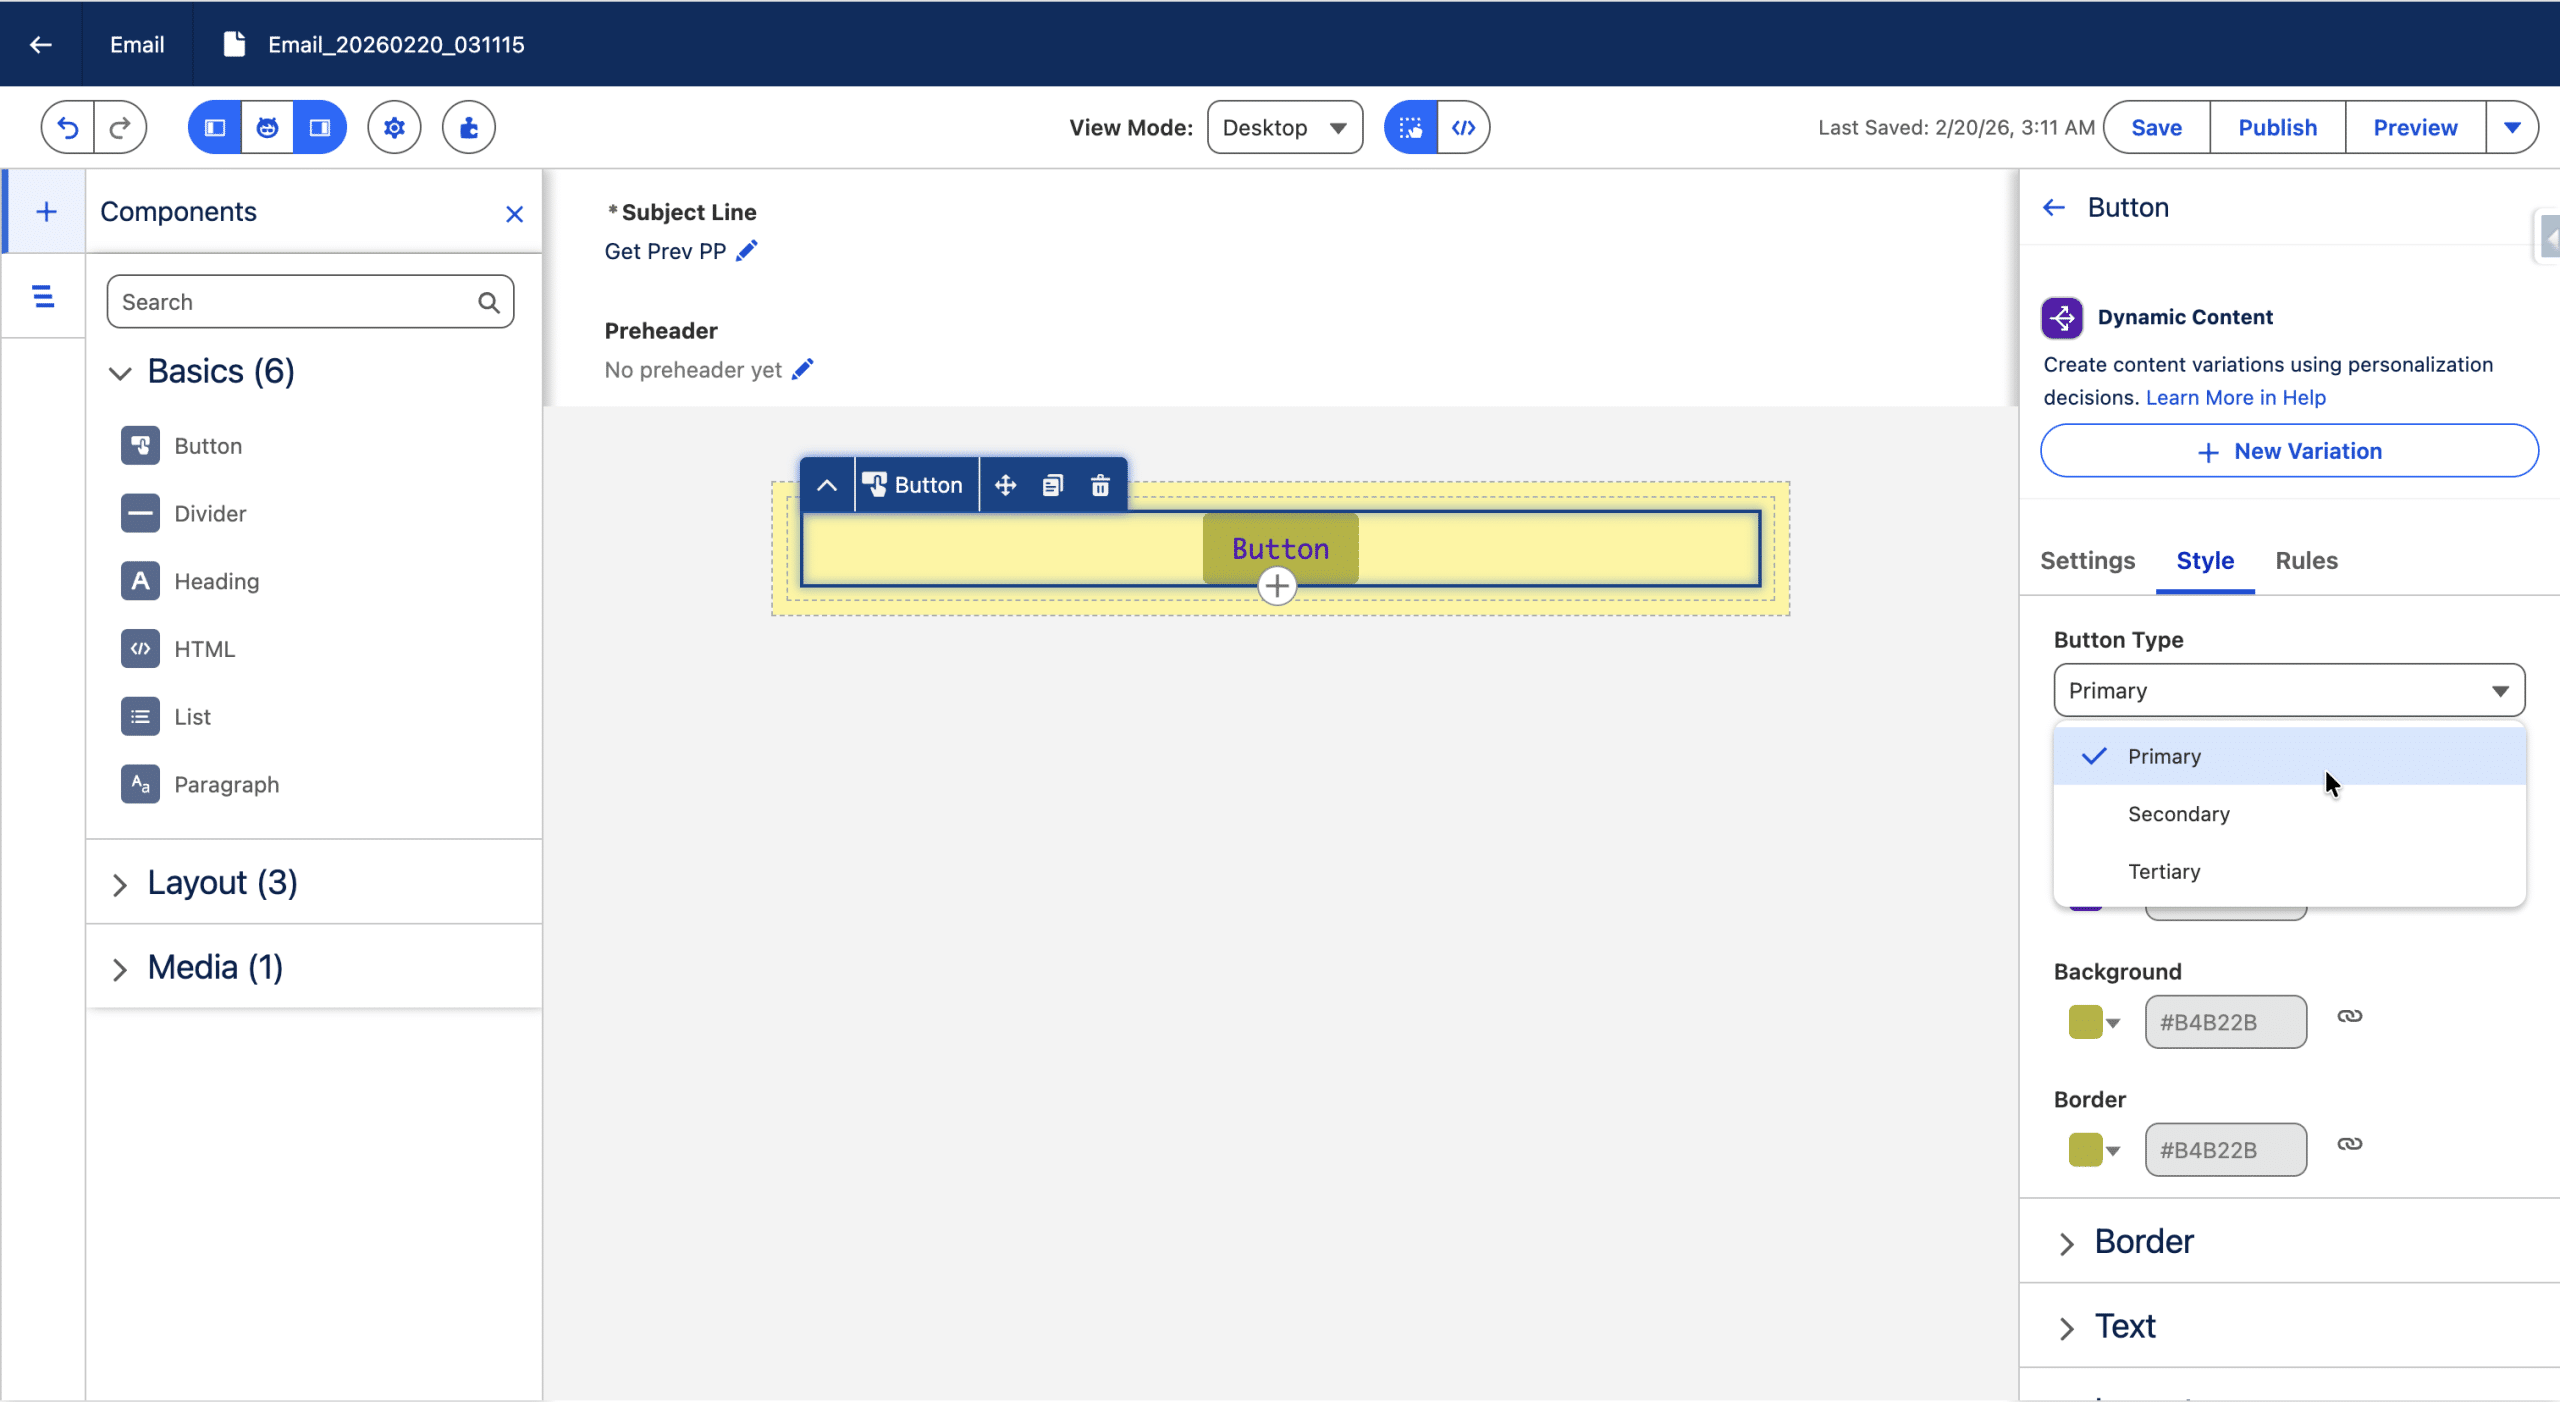
For example, a Button as three predefined set of styles (Primary, Secondary, Tertiary), and a Heading component has 7 set of styles. Even though a Component is applied a set of styles defined in the Brand, you can style unlink a property from the Brand, to define a custome look and feel. This can be done using the custom set of styles (inheriting the defaults properties of the Brand) or directly from a predefined set of styles.
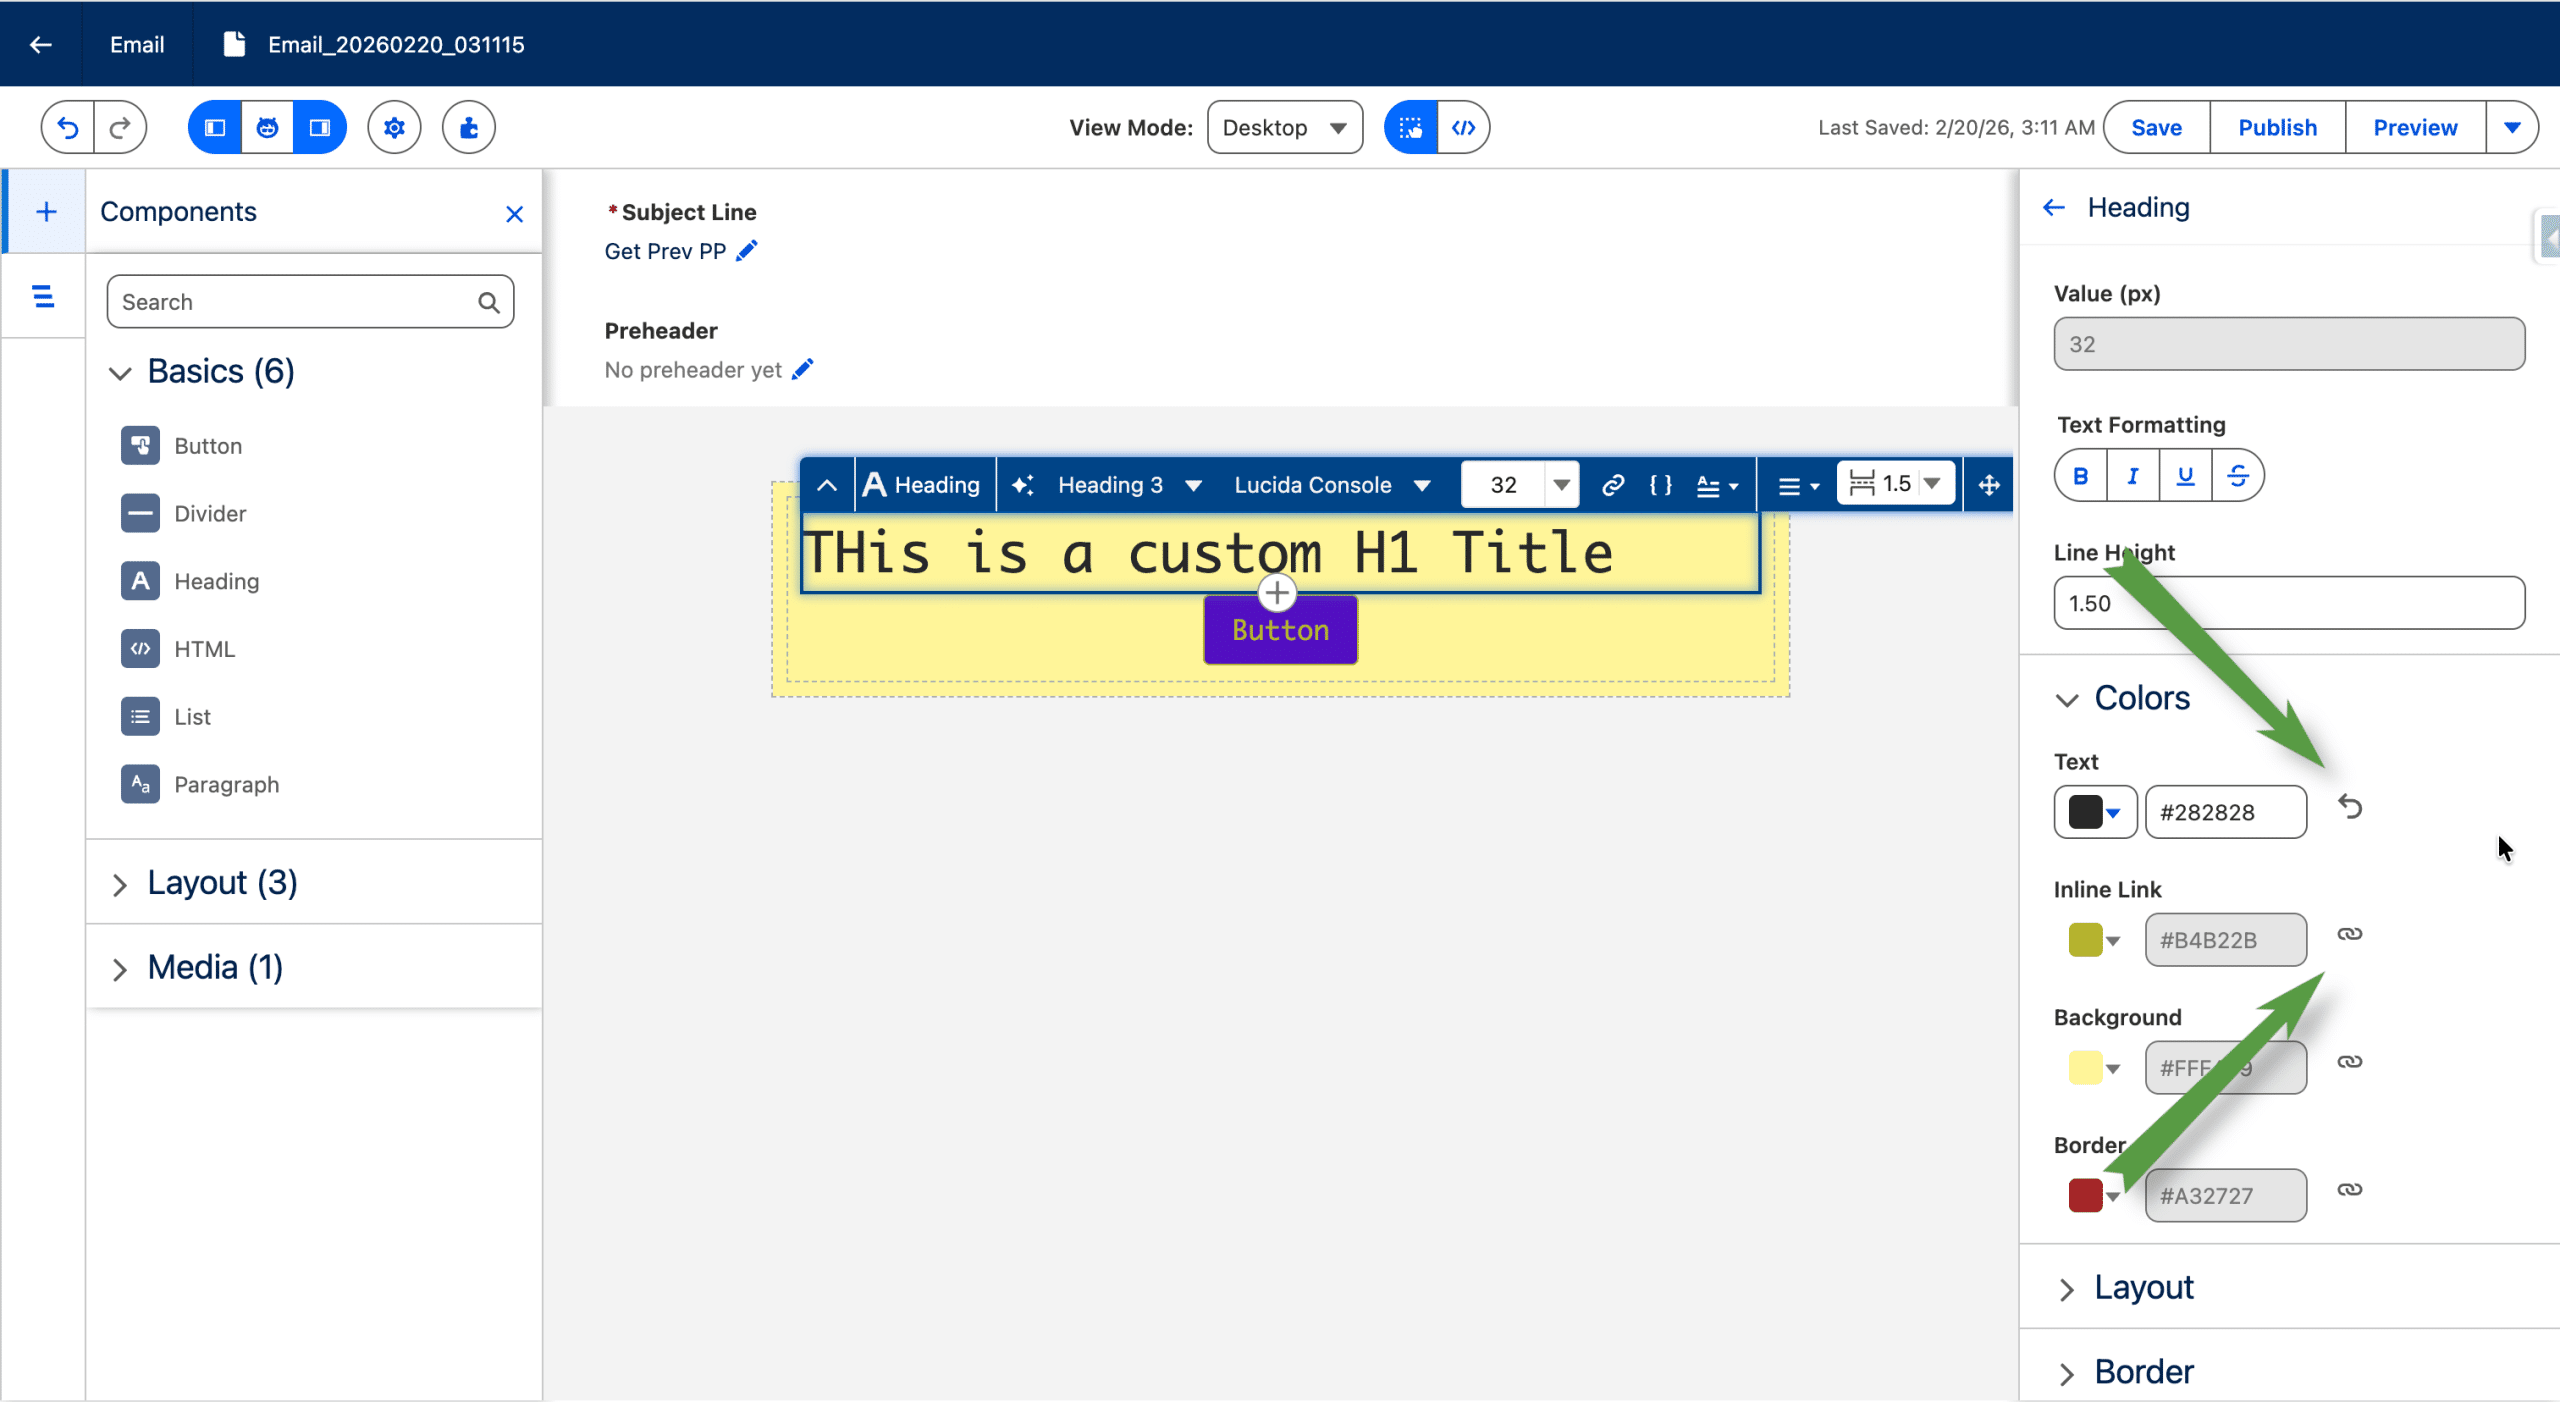
In the example below, the heading is applied a predefined set of styles, but for this specific heading, the color is redefined, the other ones are unchangesd (chain sign).
On property of an Email that can’t be defined in a Brand is the overall background of an image. That’s one of the reason an Email Template comes handy.
«Email Templates»: The Modular Foundation of Reusability in Marketing Cloud Next
Email Templates are starting points, with predefined components and Brand already defined.
How to create an Email Template
You create an Email Template from the CMS, as it where they are stored.
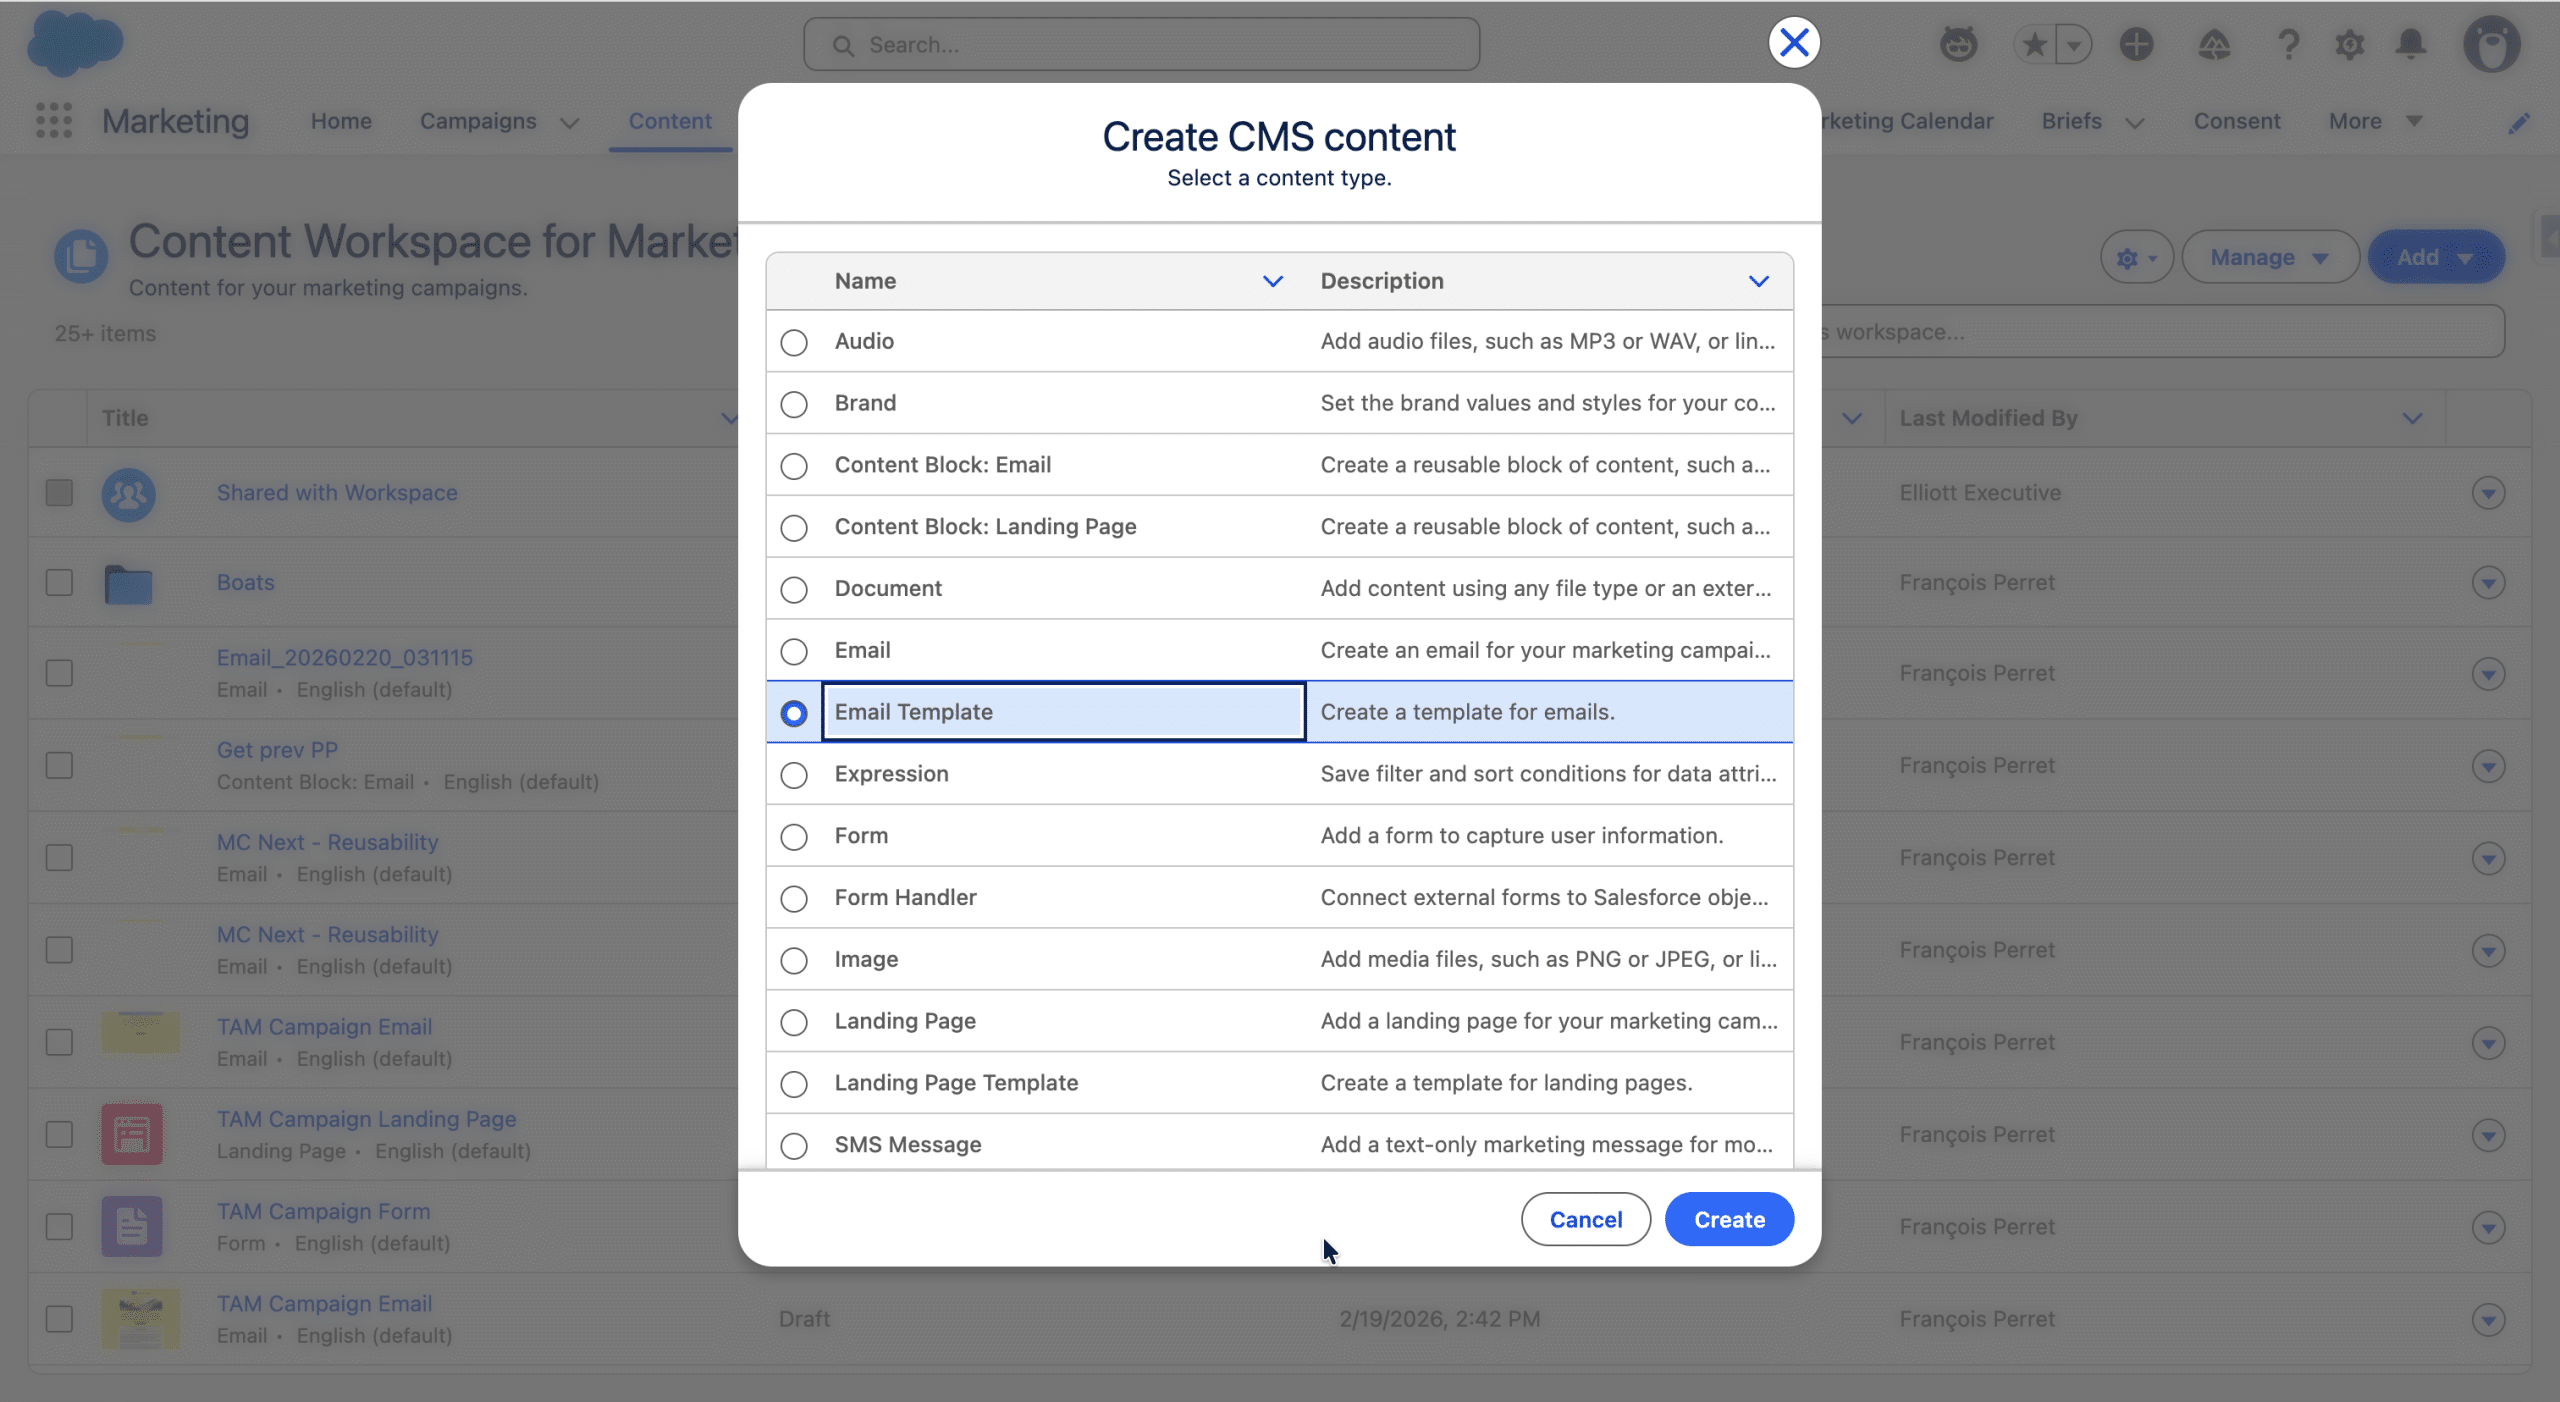
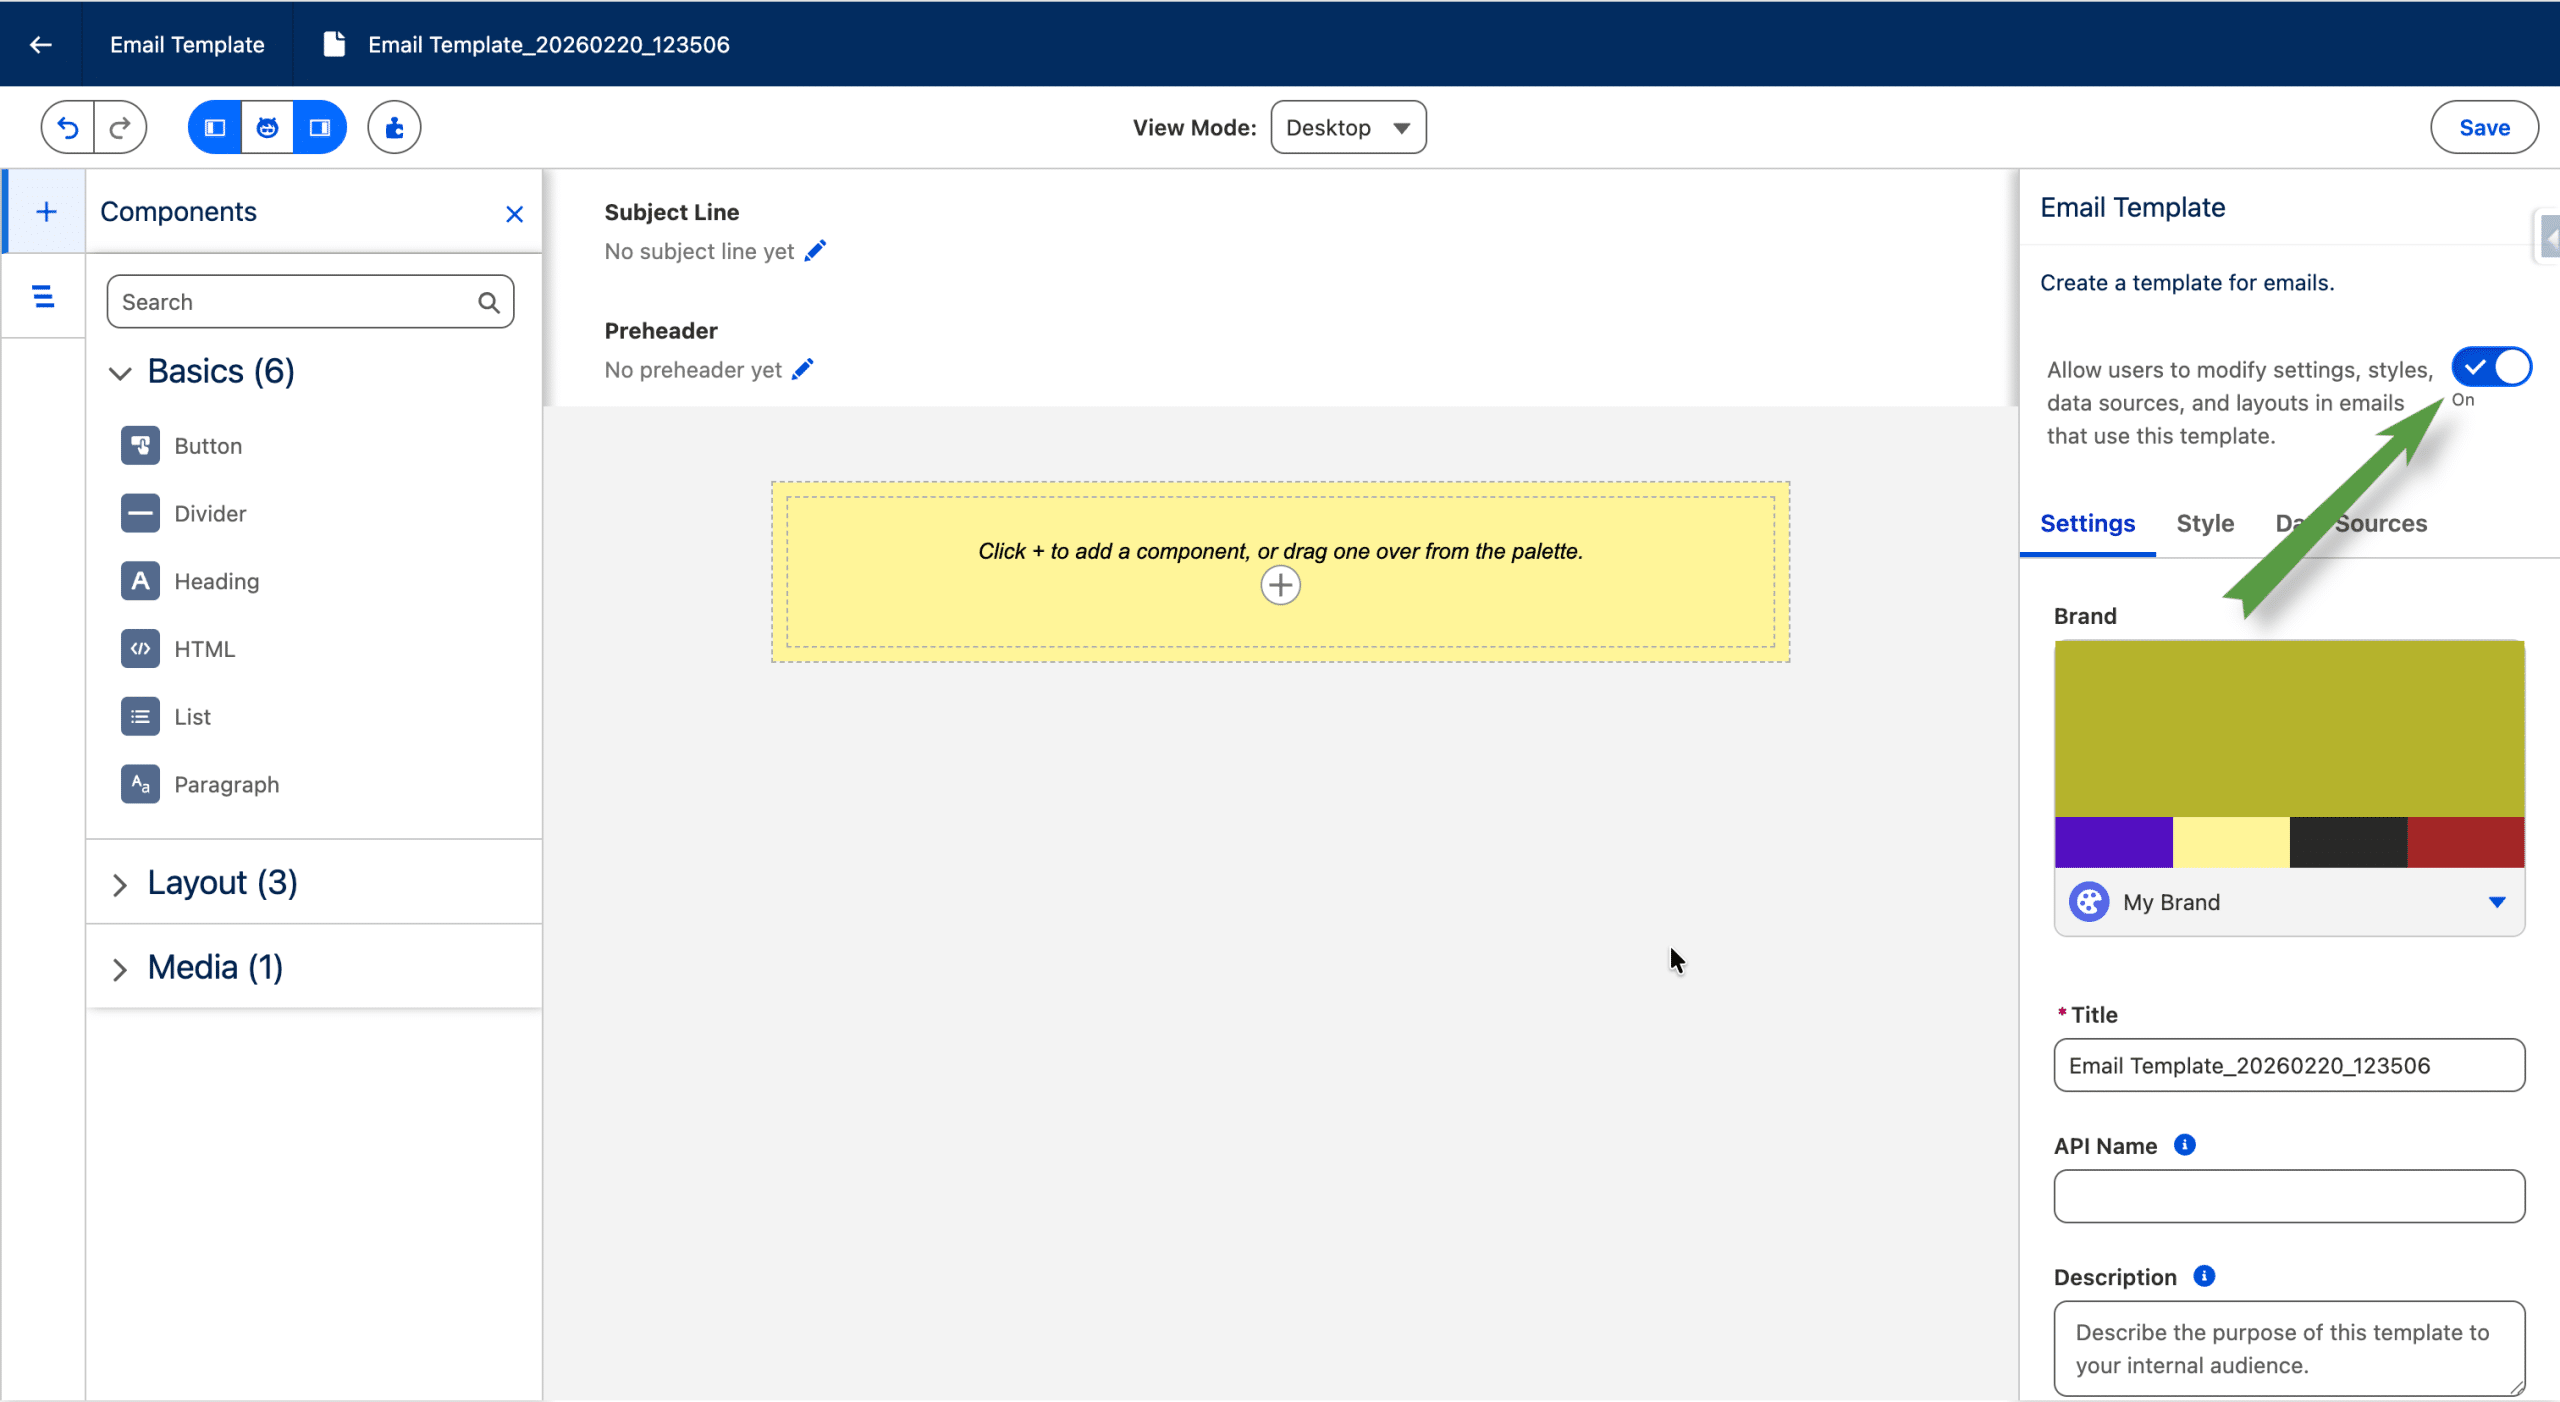
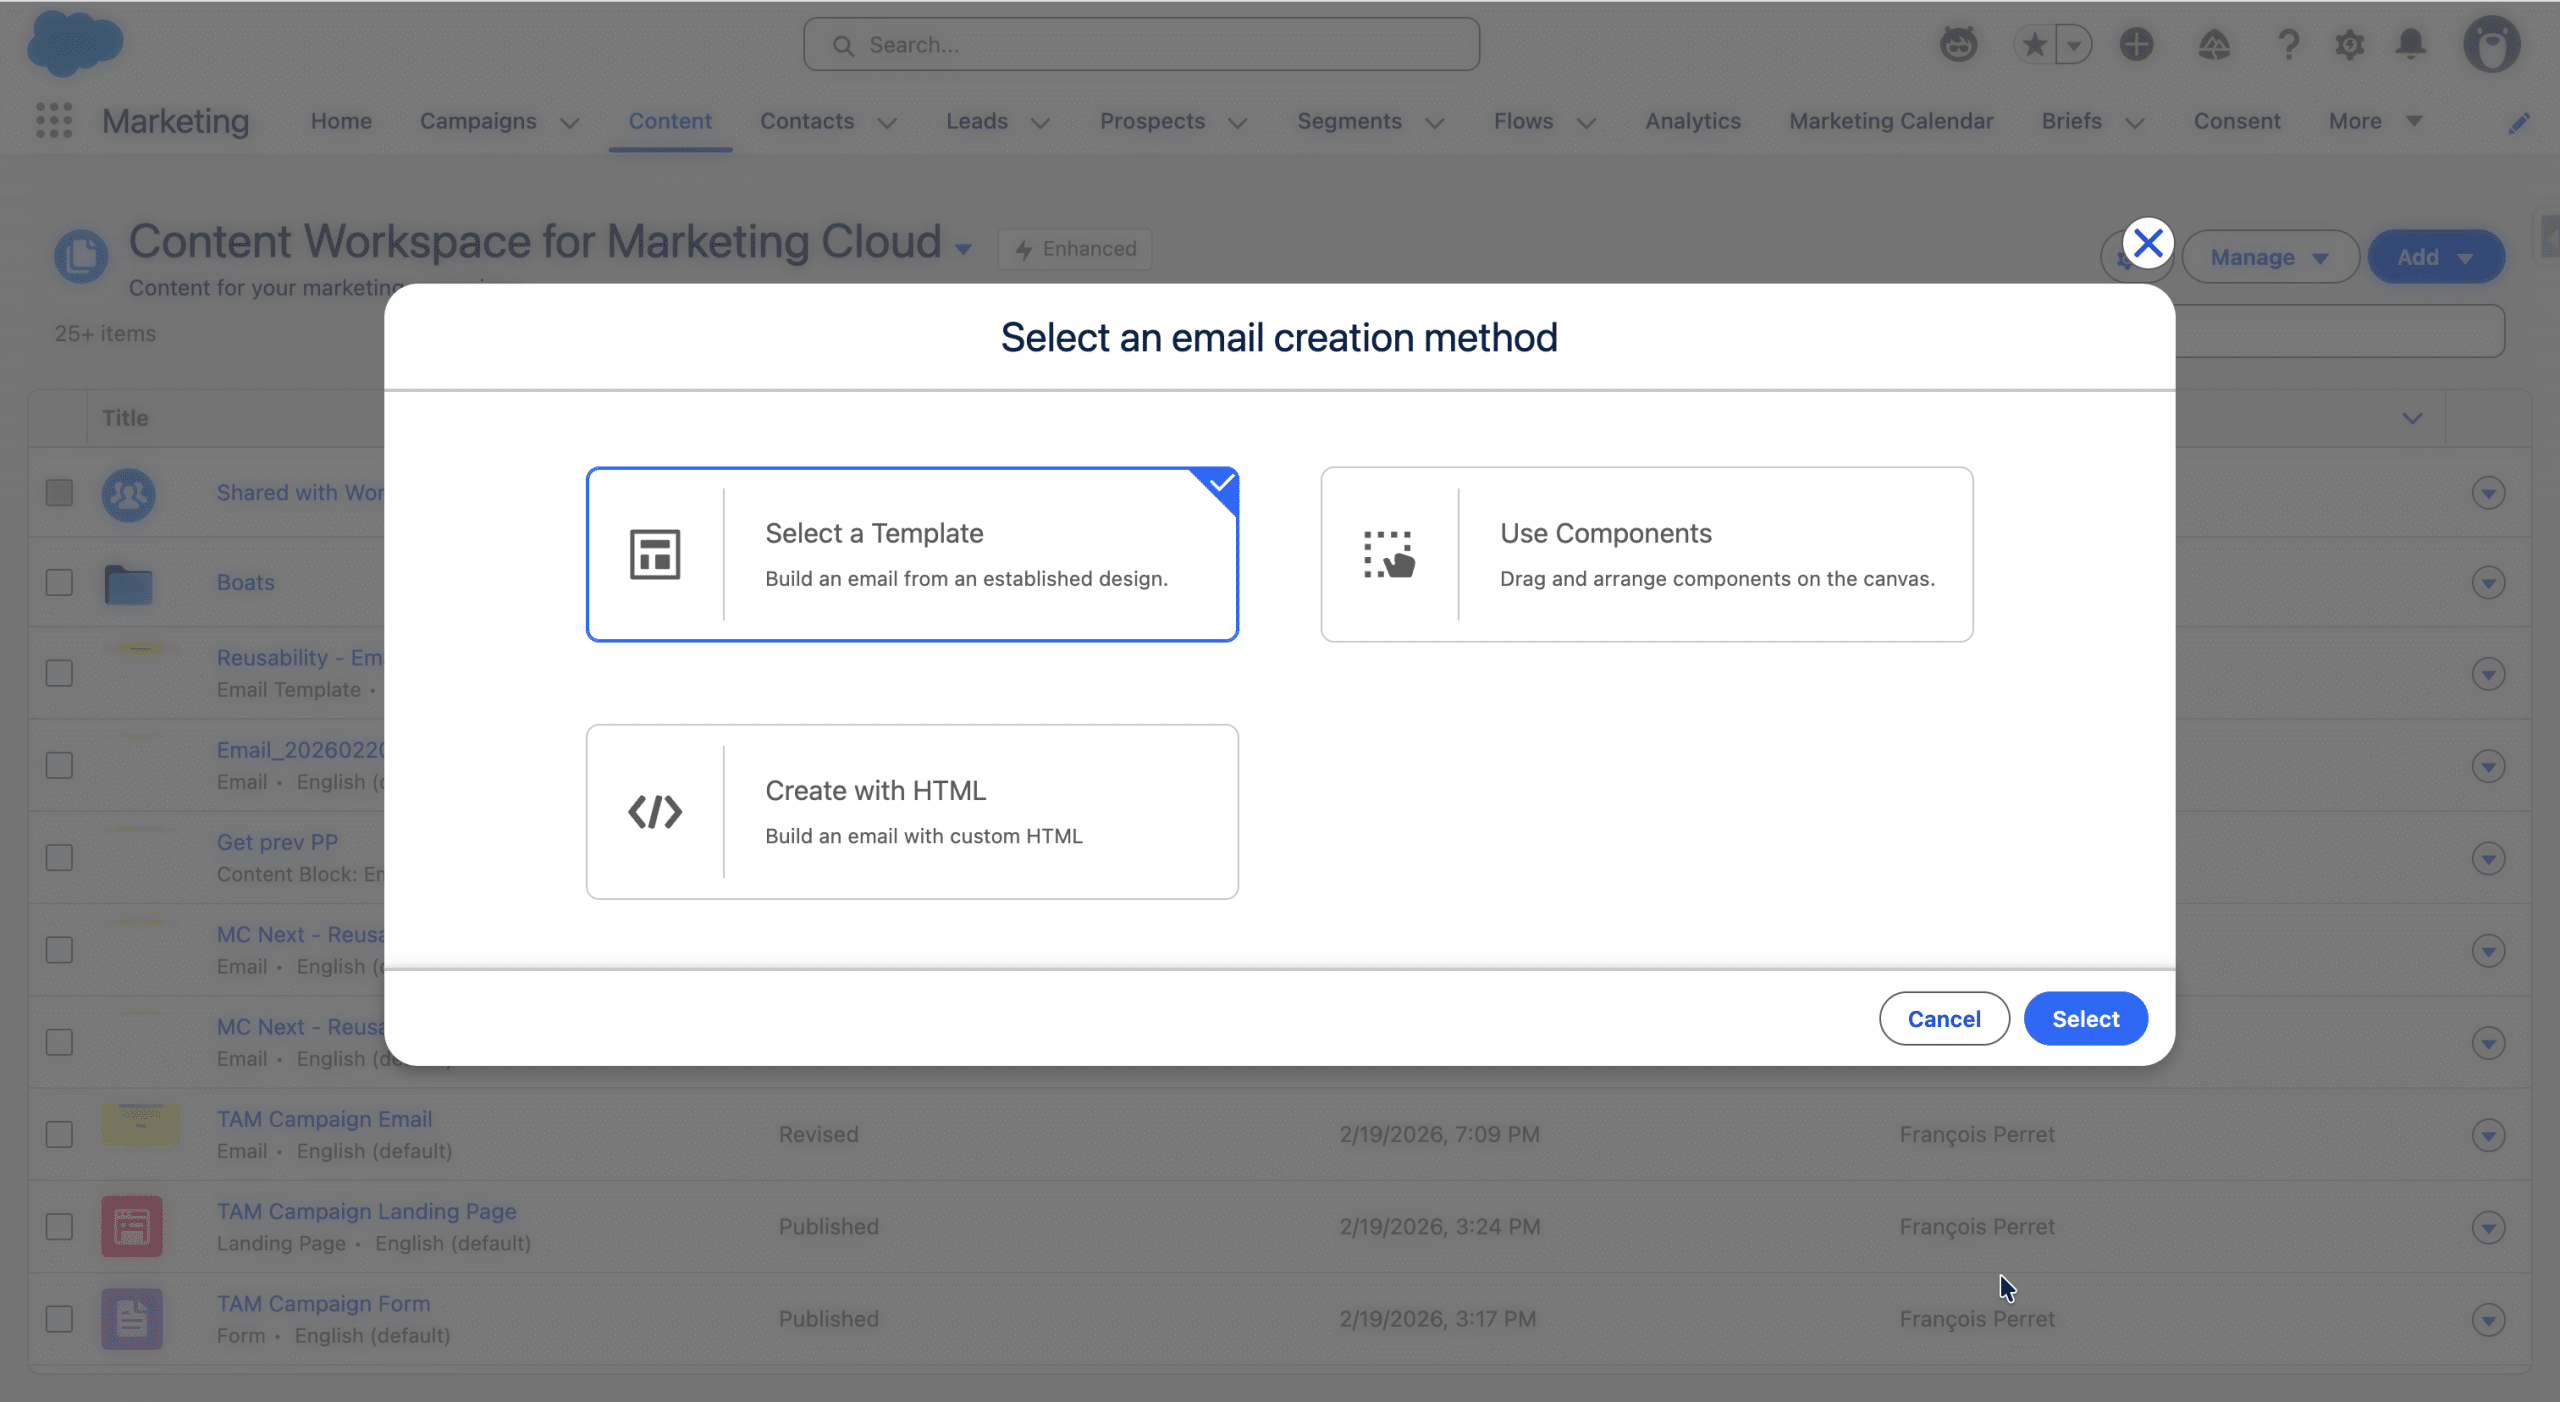
You can create an Email Template from scratch (Use Components) of from another Email Template (Select a Template). You cannt create an email template with HTML code from another platform, but this option is available whe creating a regular Email (or converting one). The default Brand is applied by default and you can opt in to block style editing in the Emails created out of that Email Template.
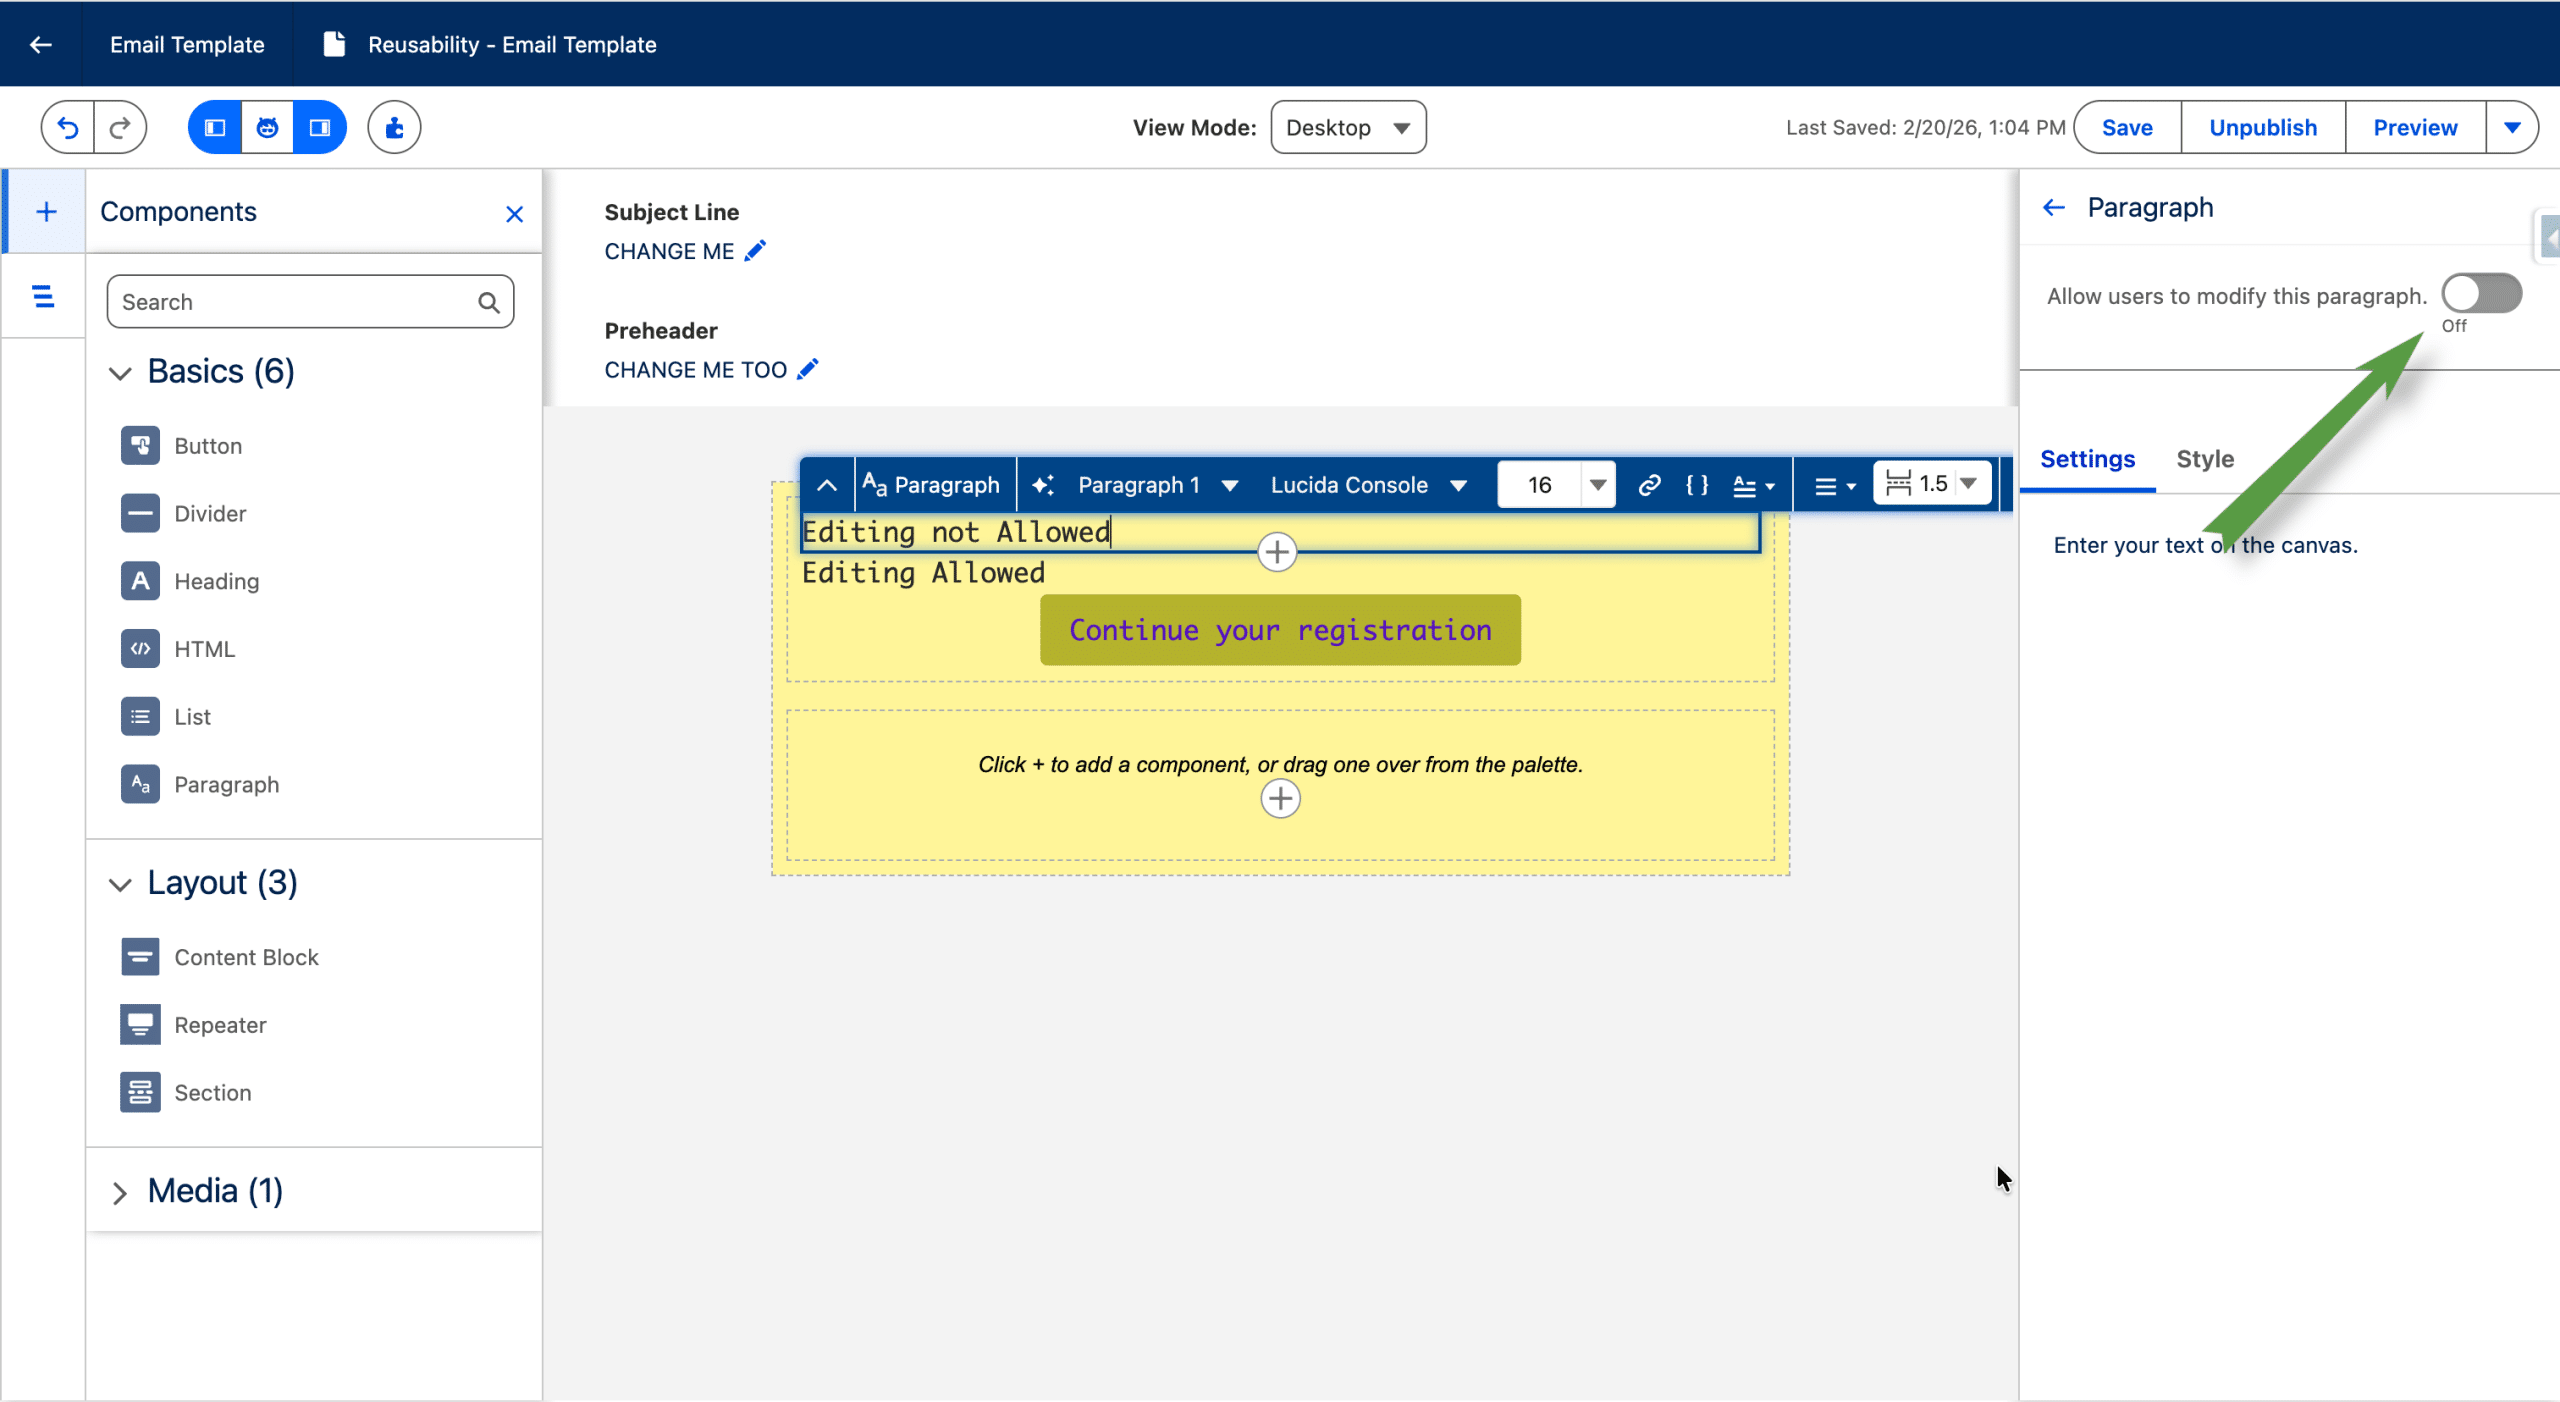
You can also prevent the content of a given component to be edited in an Email created out of that Email Template.
Note that Variations, that we discussed previously in this article are not available in Email Templates.
(Re)use an Email Template
Once you have created and published your Email Template (and you can create multiple ones), you can pick it in the CMS as a starting point for a new Email. This is true for Emails created from the CMS, Emails generated using the Campaing Creation Agent of by the Flow templates in a Campaign use an internal template that cannot be edited.
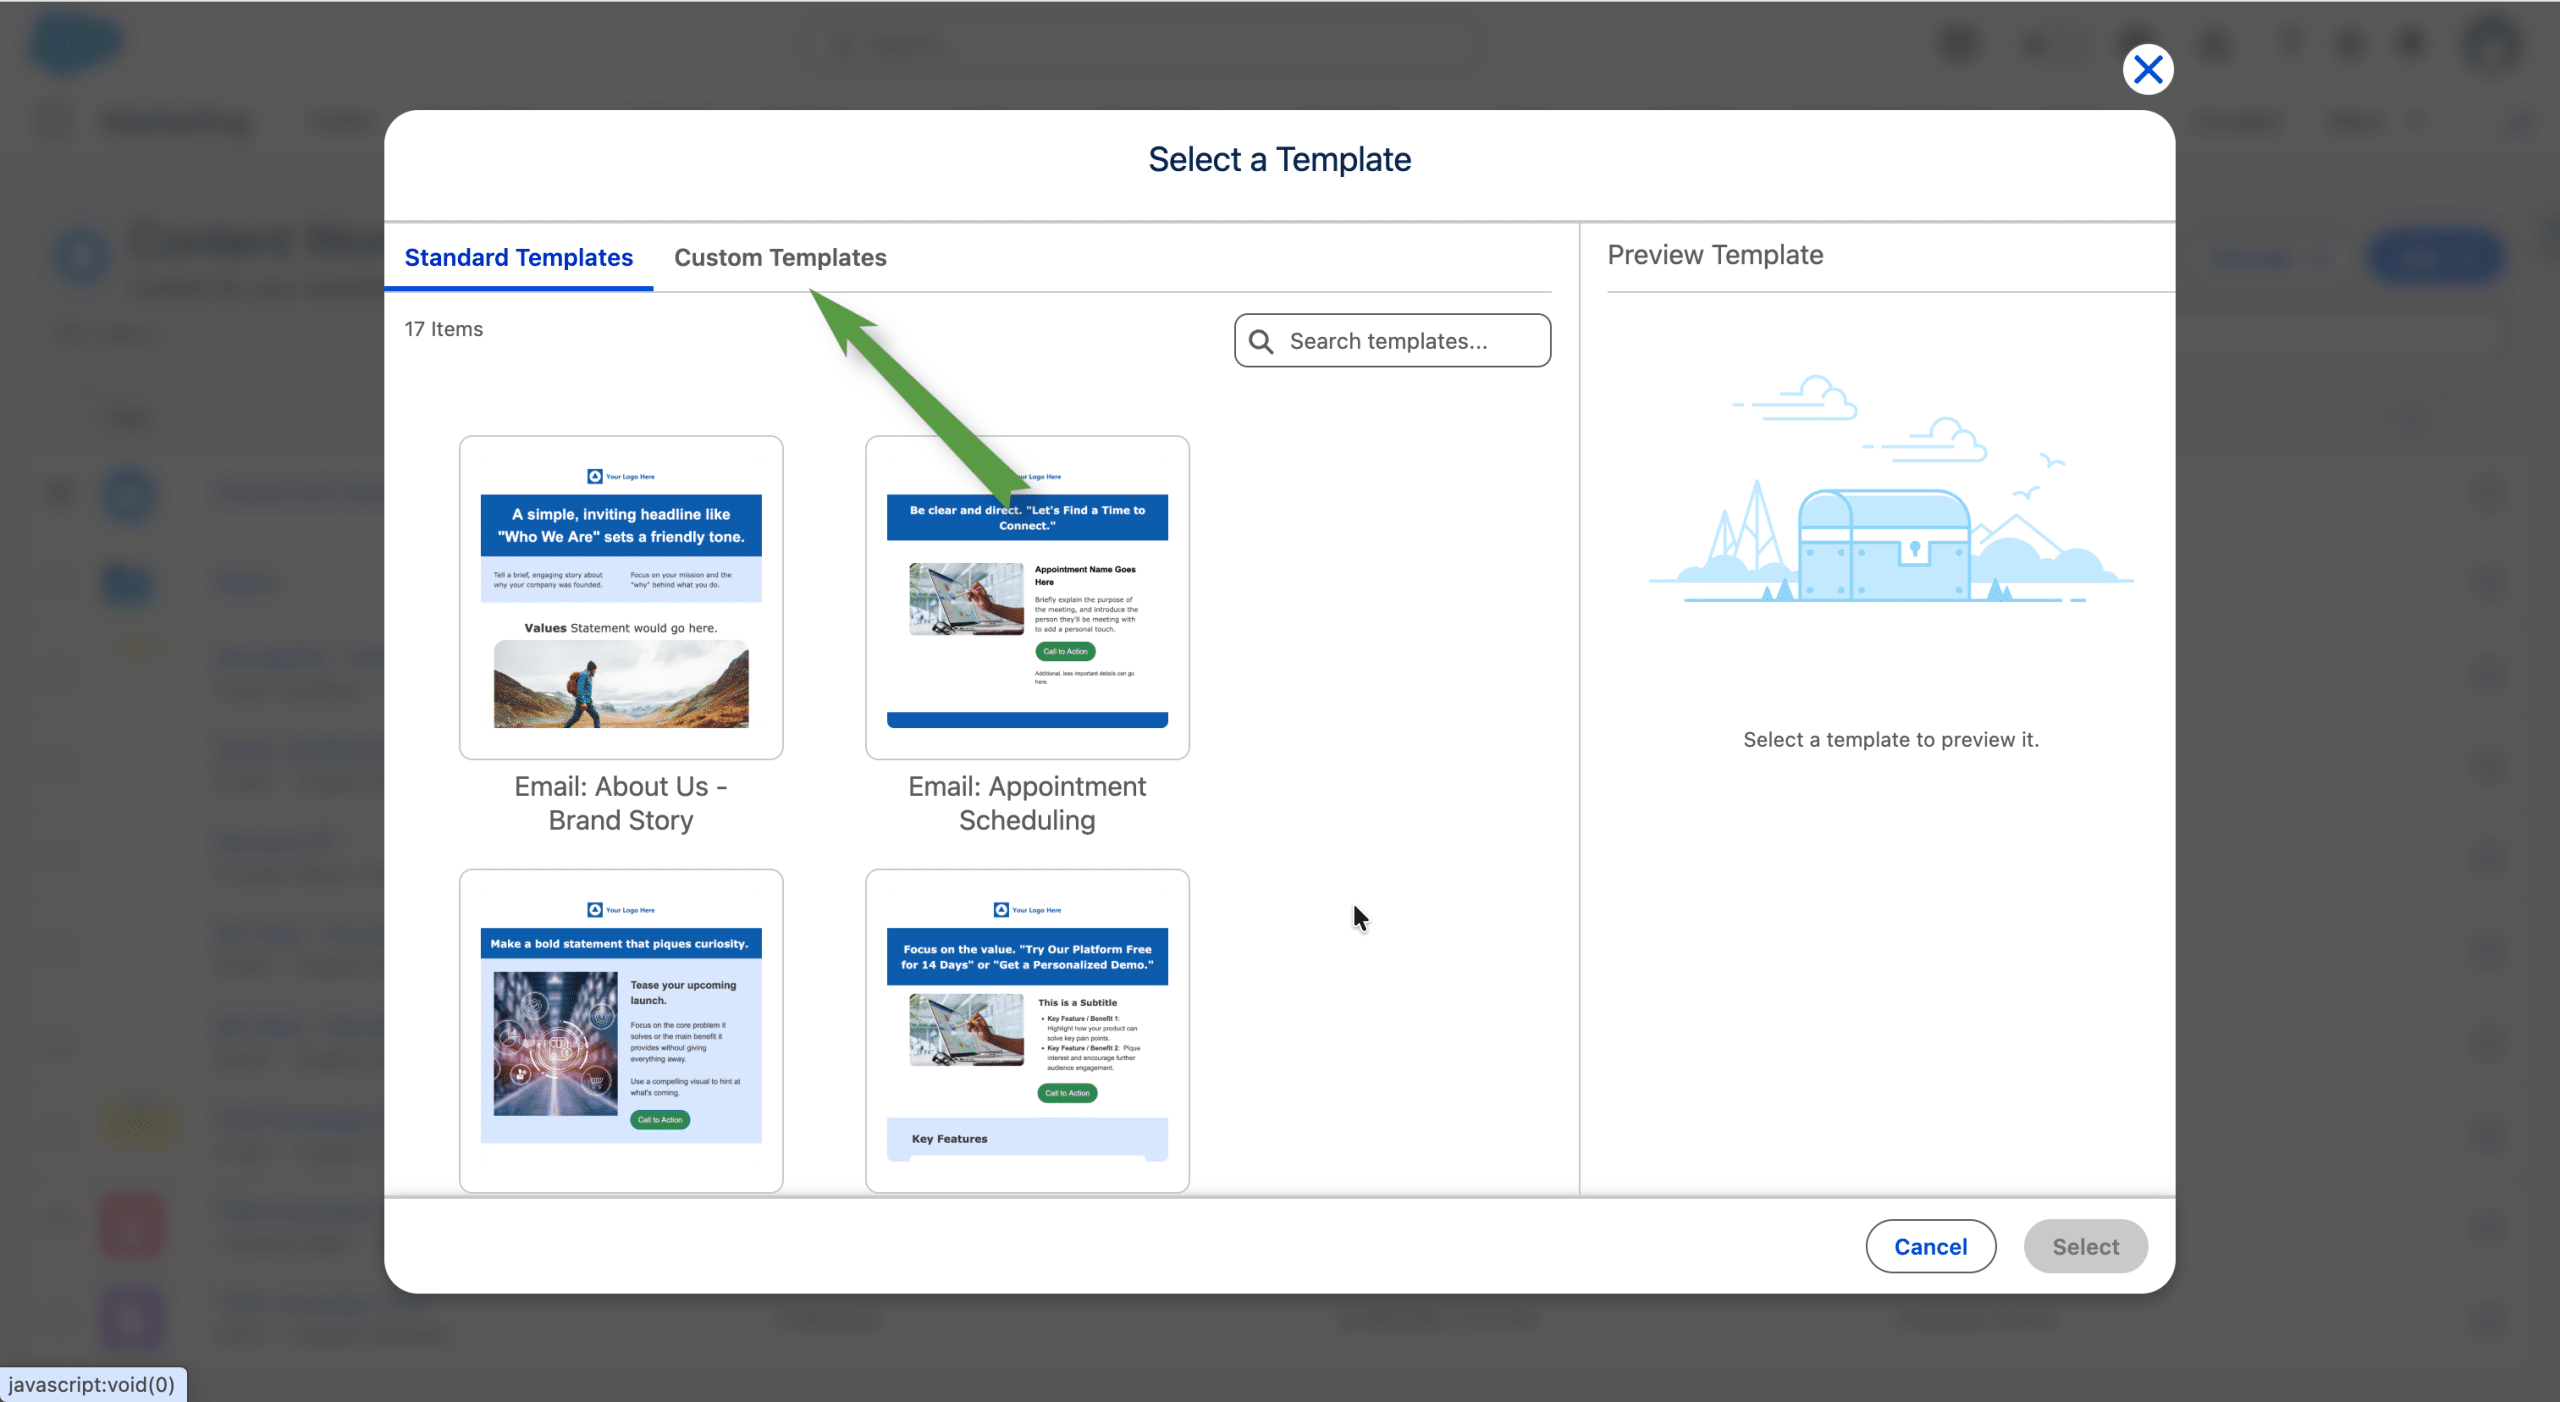
Since Spring ’26, Agentforce Marketing makes a gallery of Email Templates available. To find an Email Template that we created, we switch to Custom Templates.
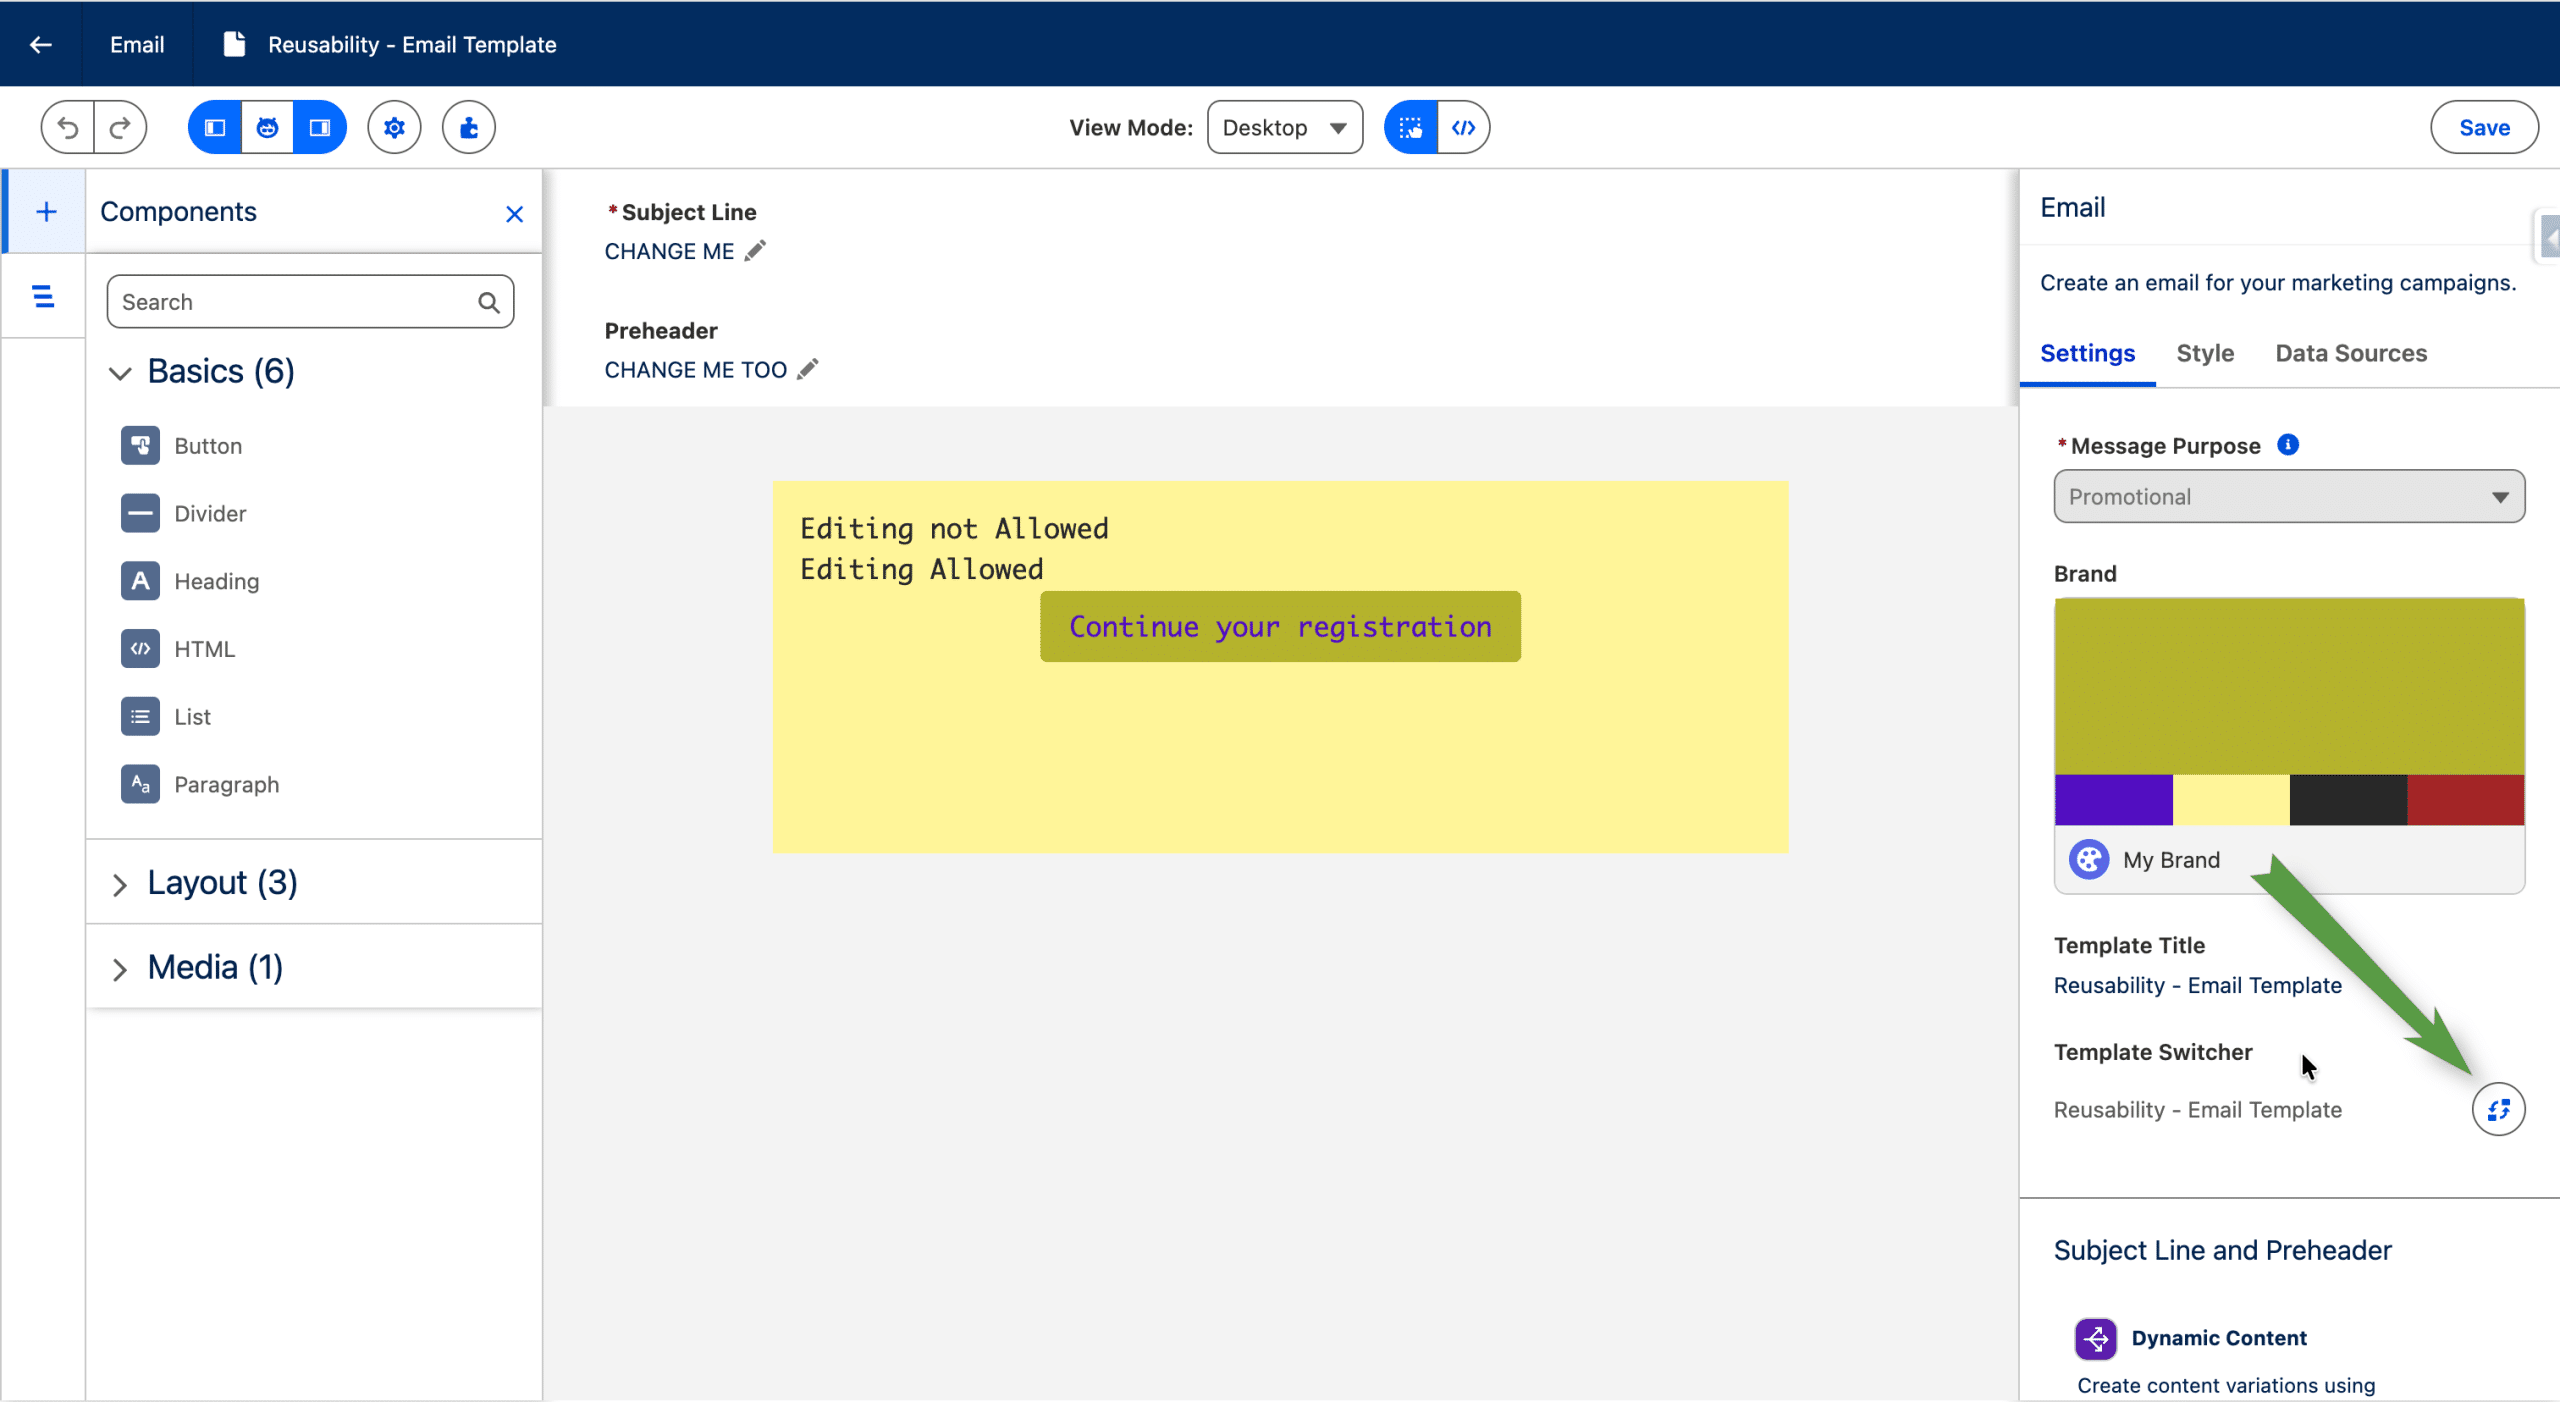
Once we have selected the Email Template, the Email is created by copying the components and styles of the Email Template. The changes we can make on the new Email depend on the Email Template options to block the style edition globally or not, and to lock or not a component for content editing. The Email Template is a starting point, which means that if we change and publish it after it was used for in an Email, the content changes won’t be reflected in the new Email. We can also change the Email Template used, using the Template Switcher (note that all edits made to the email content will be erased).
Final Thoughts on Reusability in Agentforce Marketing
We explored the different techniques, as it pertains to Email creation, to streamline your process, by creating a feature once and reusing it everywhere.
The real value comes when you mix this different technique, for example by embedding a Content Block in an Email Template, or using an Expression in Subject Line.