As it pertains to personalization, a very handy way of passing information from the Flow to the Email is made possible via an Apex Class Data Provider introduced in Spring ’26 (don’t worry, you don’t need any developer skills to use this as the Apex Class is essentially an interface holding the parameters you want to pass). This type of personalization does not require a Unified Individual nor a Data Graph to be created and we’ll use this with the new event above. It can also be used with Engagement Signals or Segment Triggered Flows.
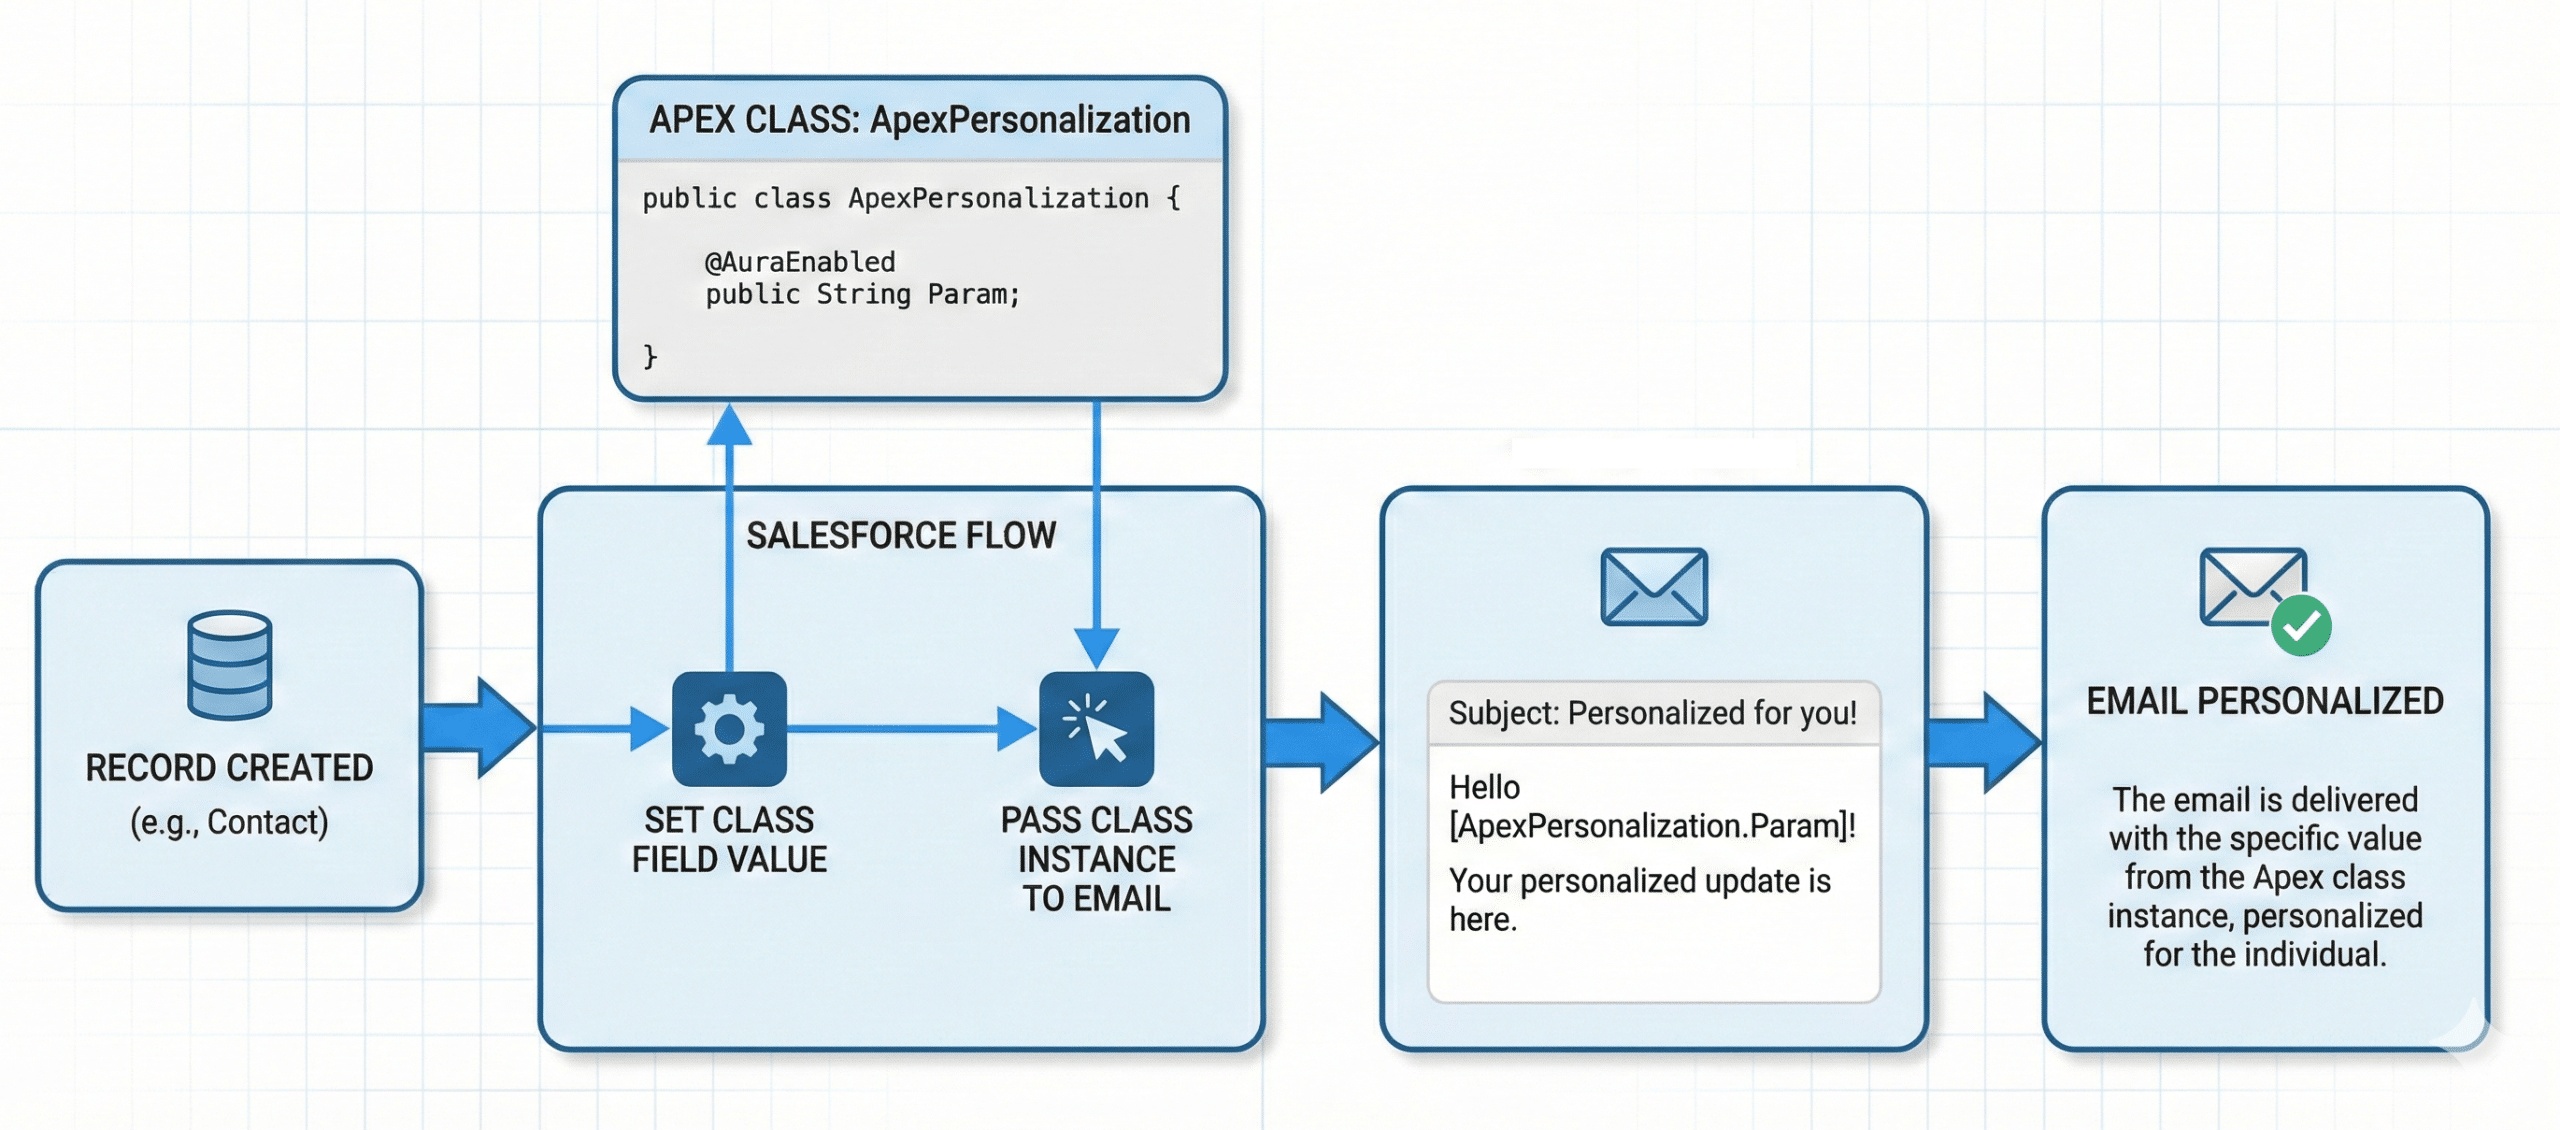
Our use case in this article is very simple, we’ll send a personalized welcome email whenever a Lead is created (not just by submitting a Lead, which a Form Triggered Flow could already handle, but when manually created of imported as well).
Personalizing the welcome Email using an Apex Cloud Data Provider
Defining the Apex Class
First, we’ll need to define which informations are needed to personalize the Email. The release notes, in Personalize Email Messages with Advanced Data Sources state “complex, structured data, such as entire order collections” can be used, but to introduce the feature, we’ll simply use the following simple parameters: First Name and assigned Sales Rep.
We create the Apex Class in Setup > Custom Code > Apex Class > New (or in Sandbox and then promote it in production). In the Apex editor, we paste the following code:
					public class WelcomePersonalization {

    @AuraEnabled
    public String FirstName;

    @AuraEnabled
    public String SalesRep;

}
Save. The annotation “AuraEnabled” is mandatory for each paramater you want to make available in the Email Builder, and at least one parameter must have it for the Class to be presented in the Builder. Of course, you can add other fields or use other names.
Adding an Apex Class Provider to the Email
In the Email Builder, in the Data Source tab, +Add, next to Manage Data Sources.
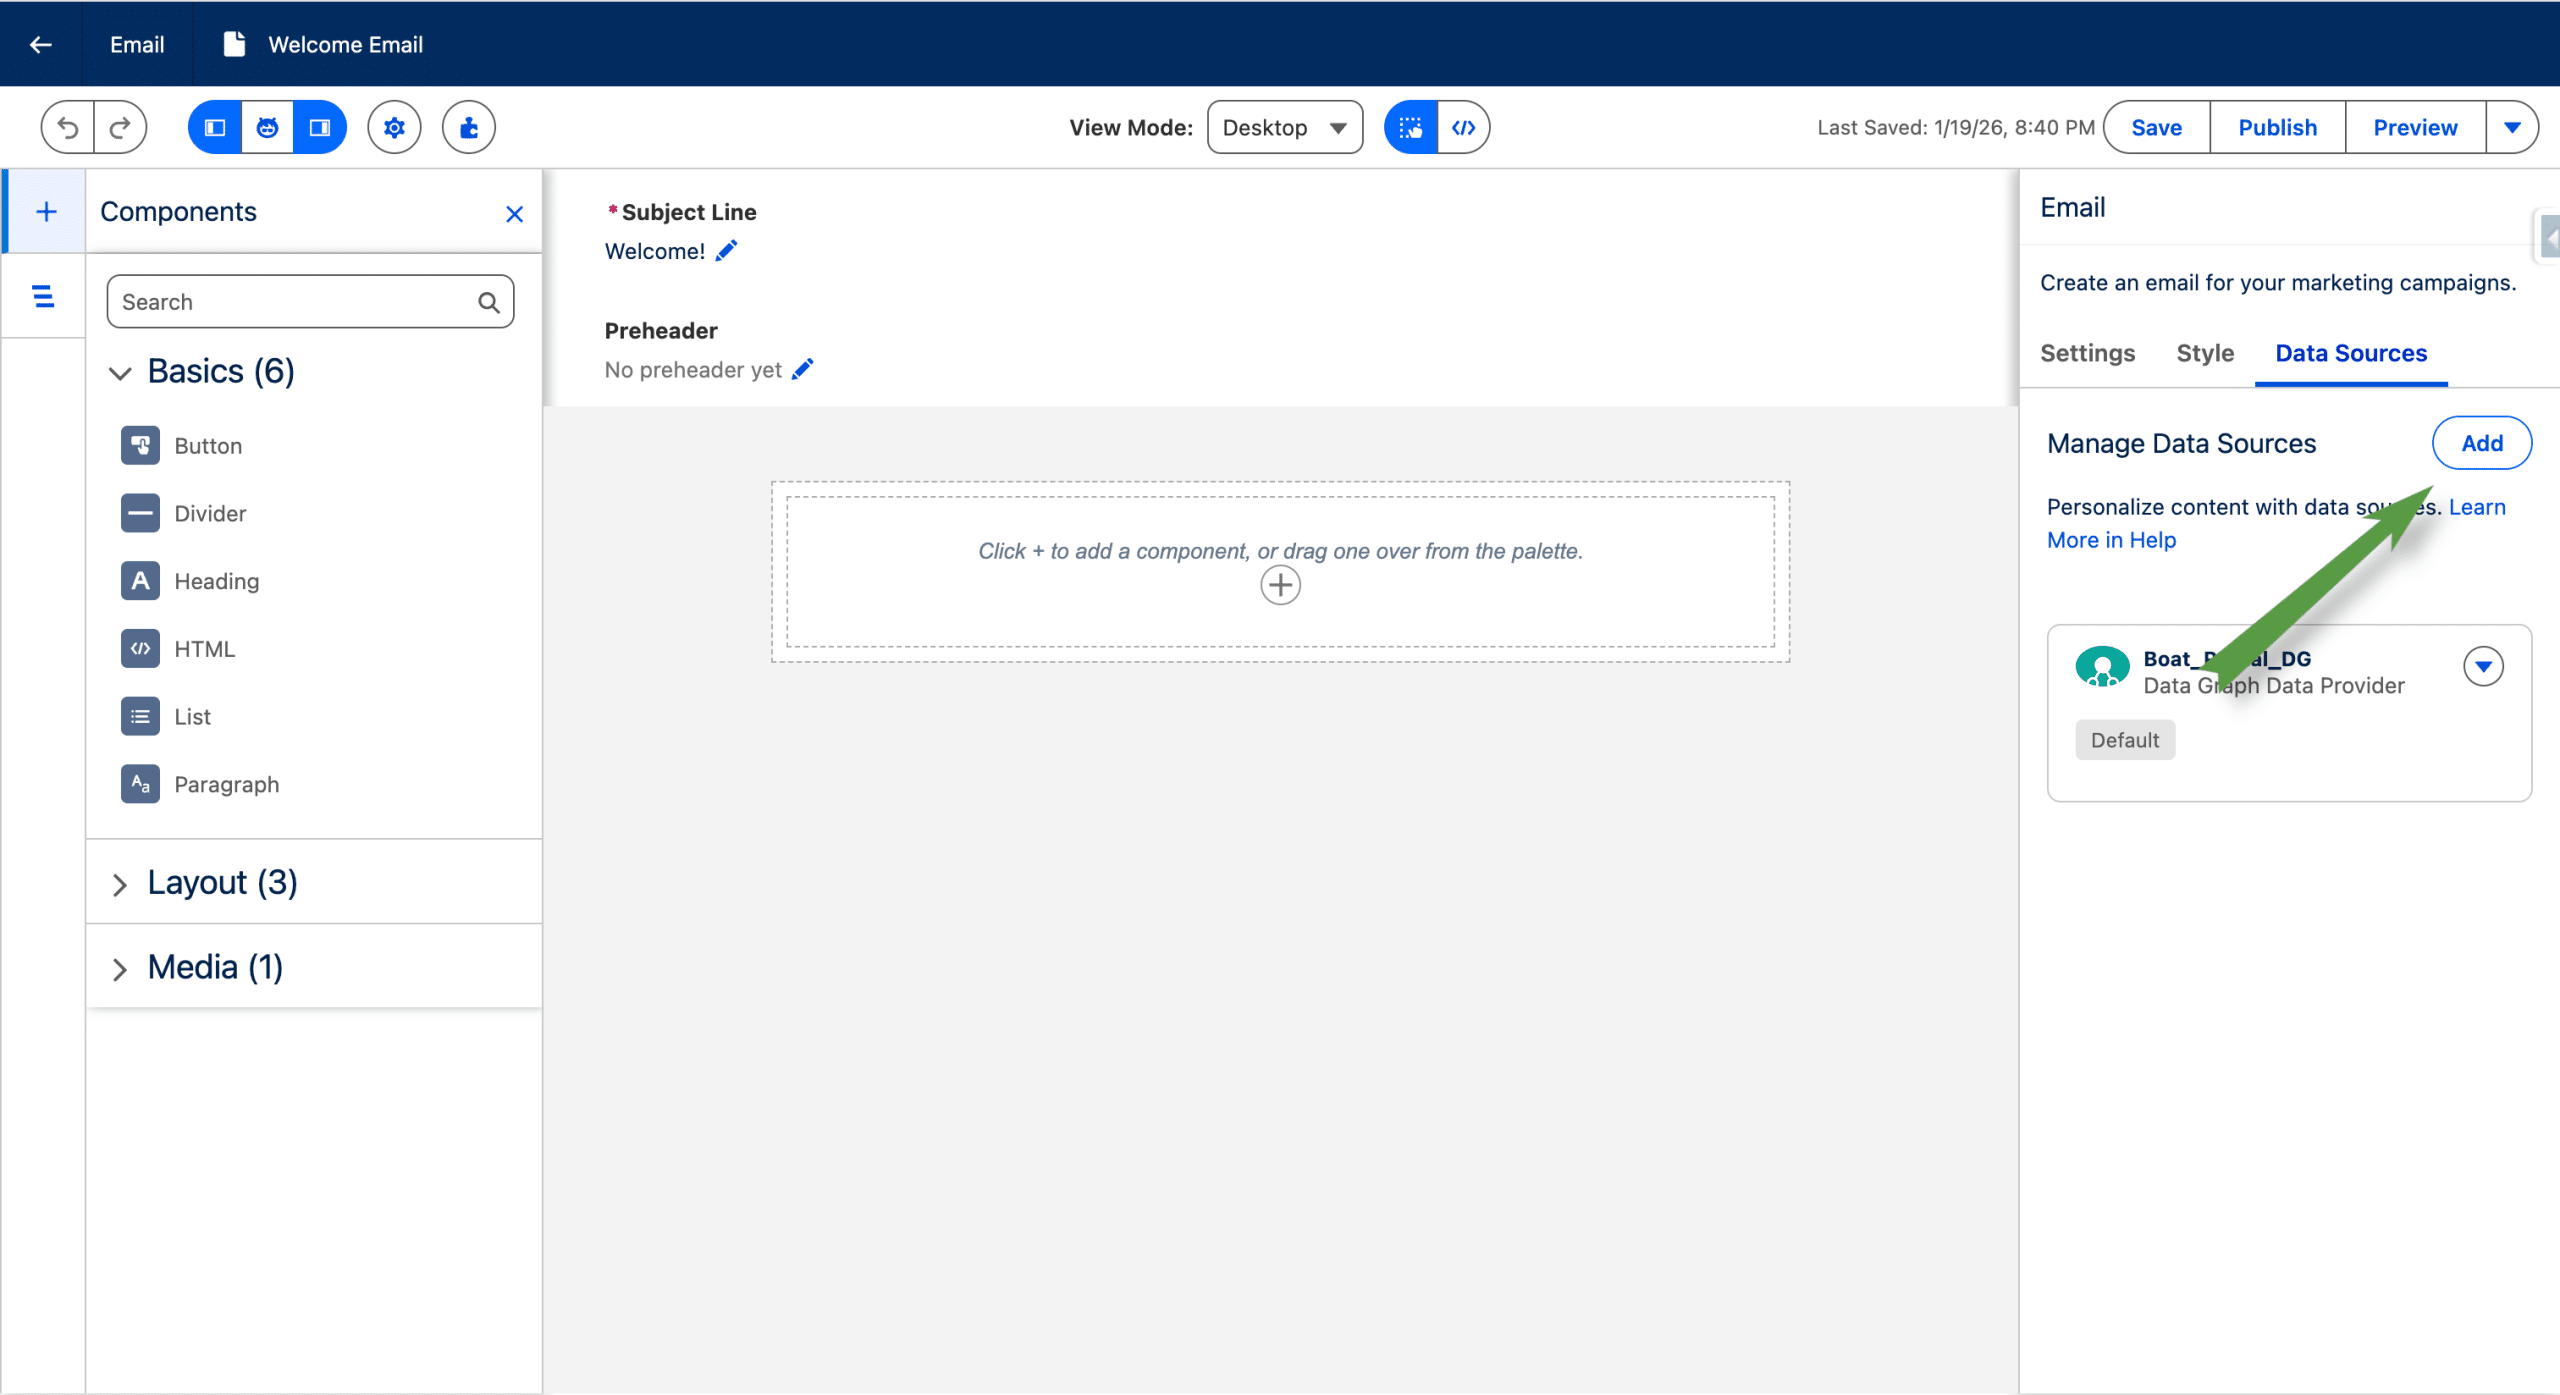
Then input a name and select Apex Class Data Provider in Type. In Apex Class, select the name of the class we created above.
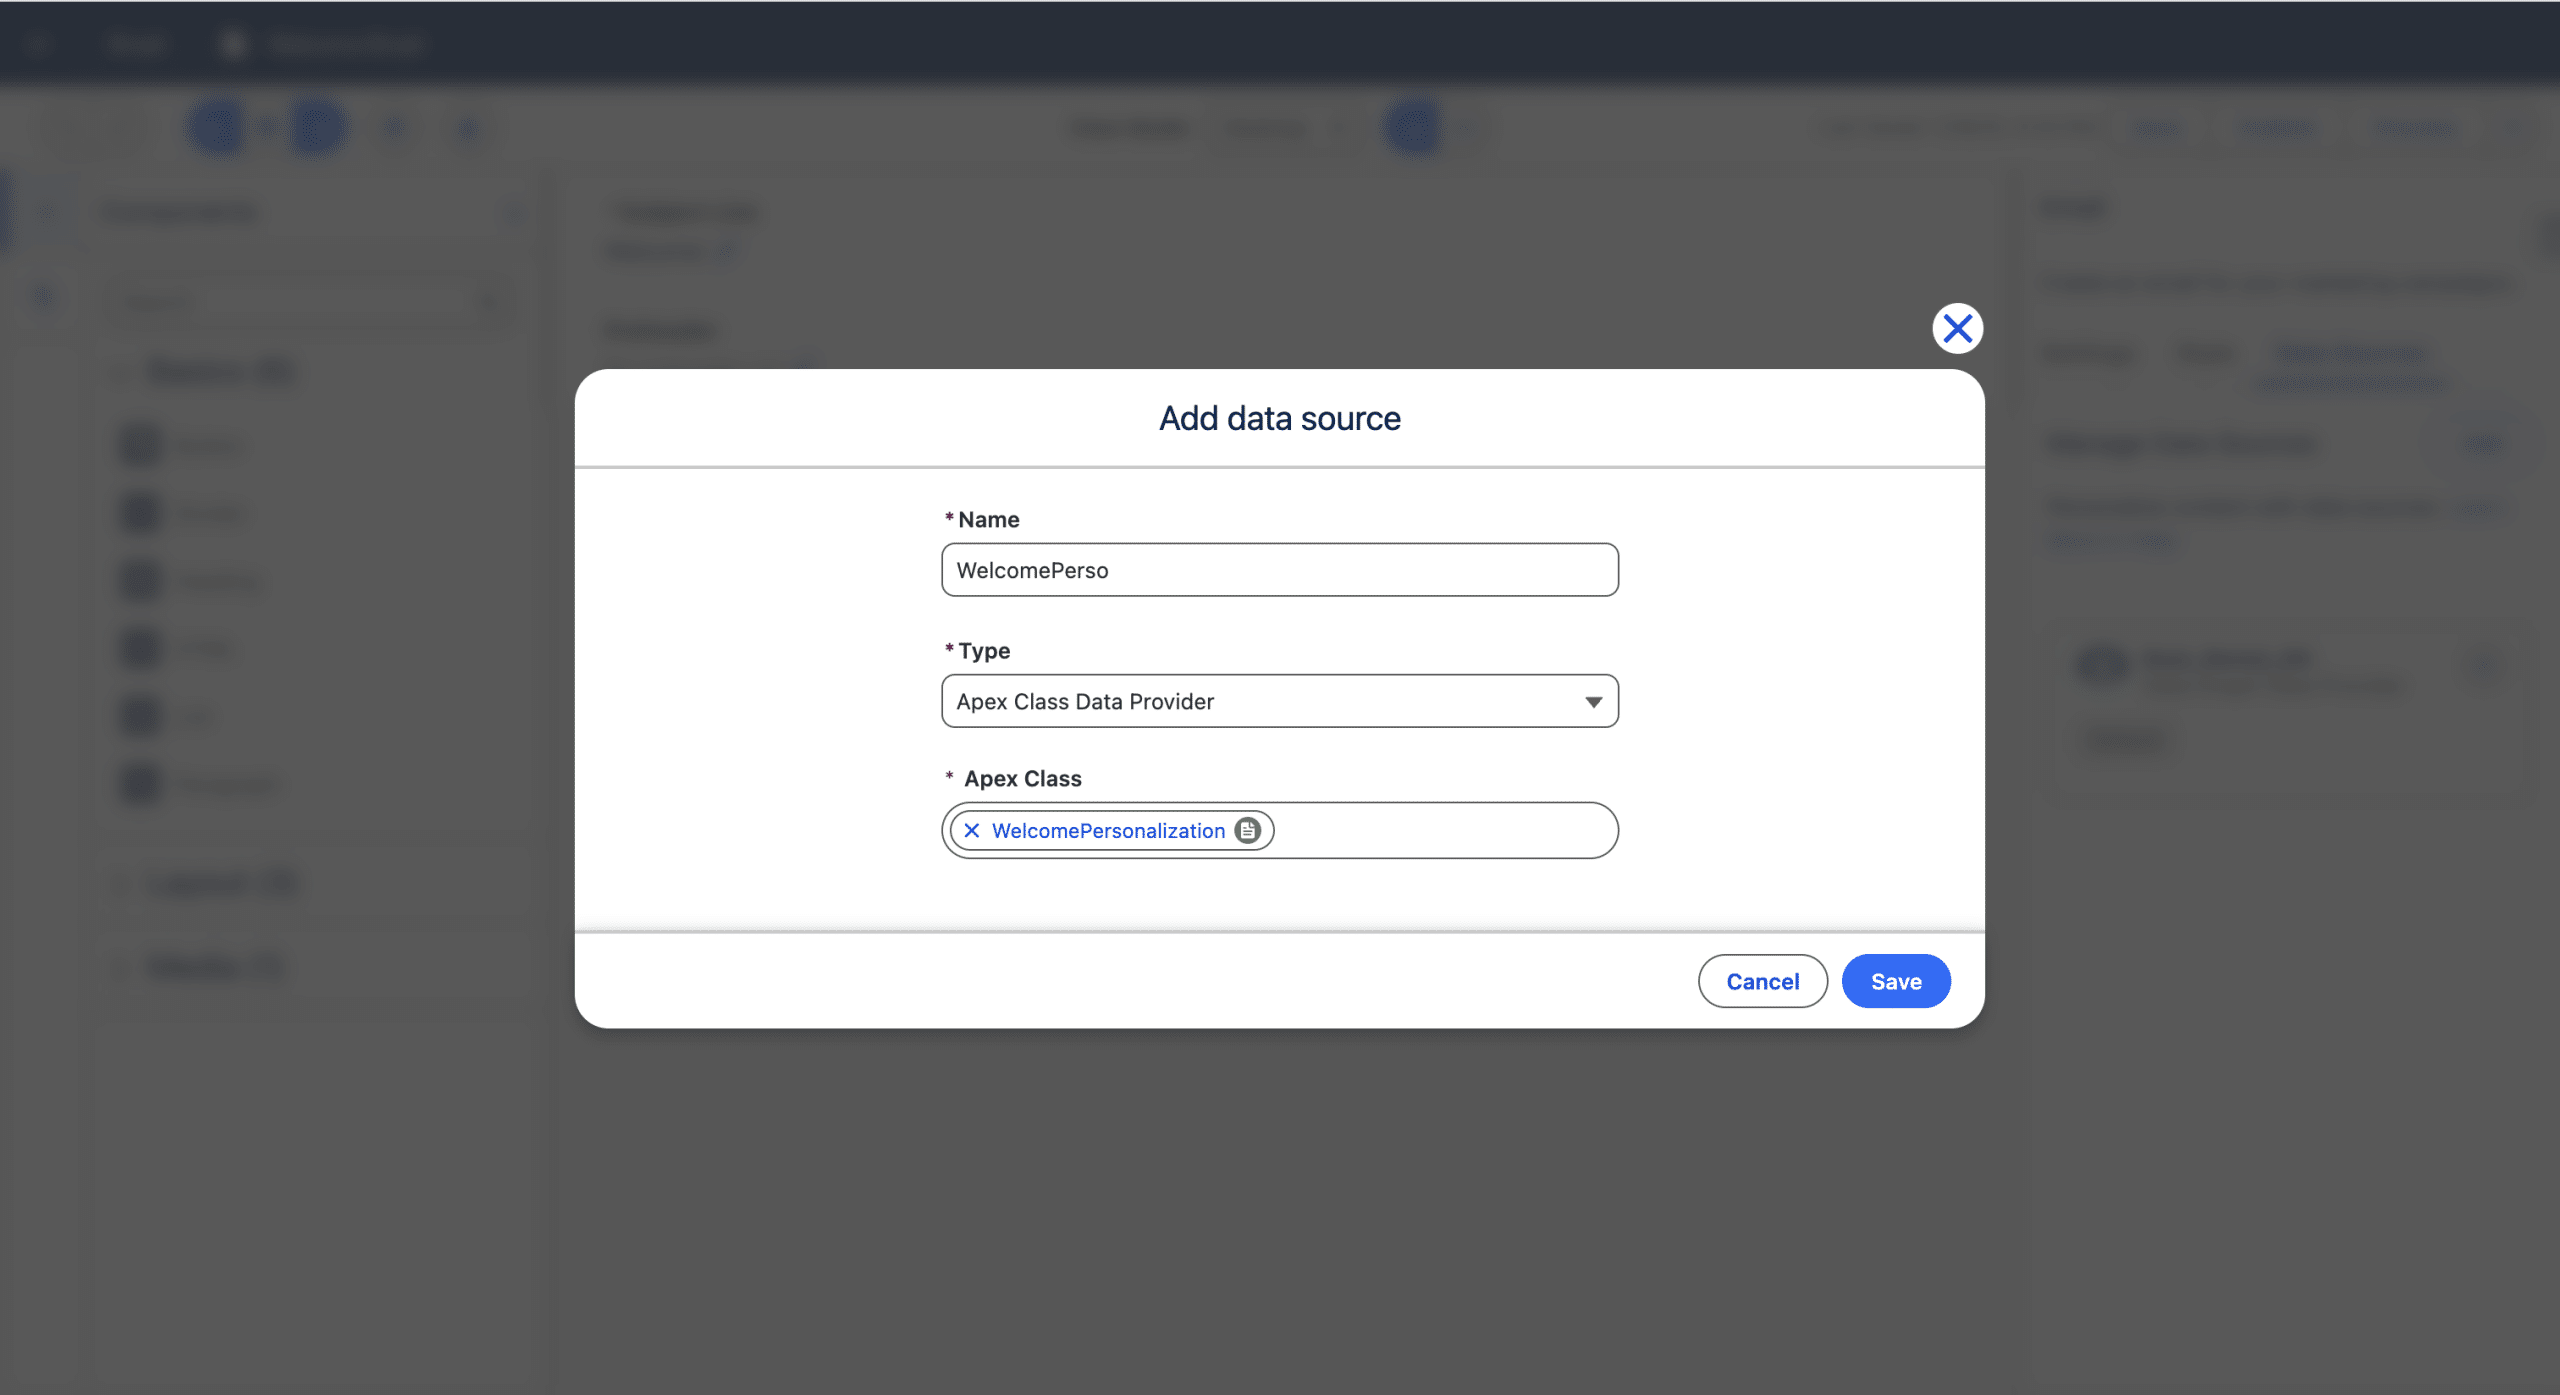
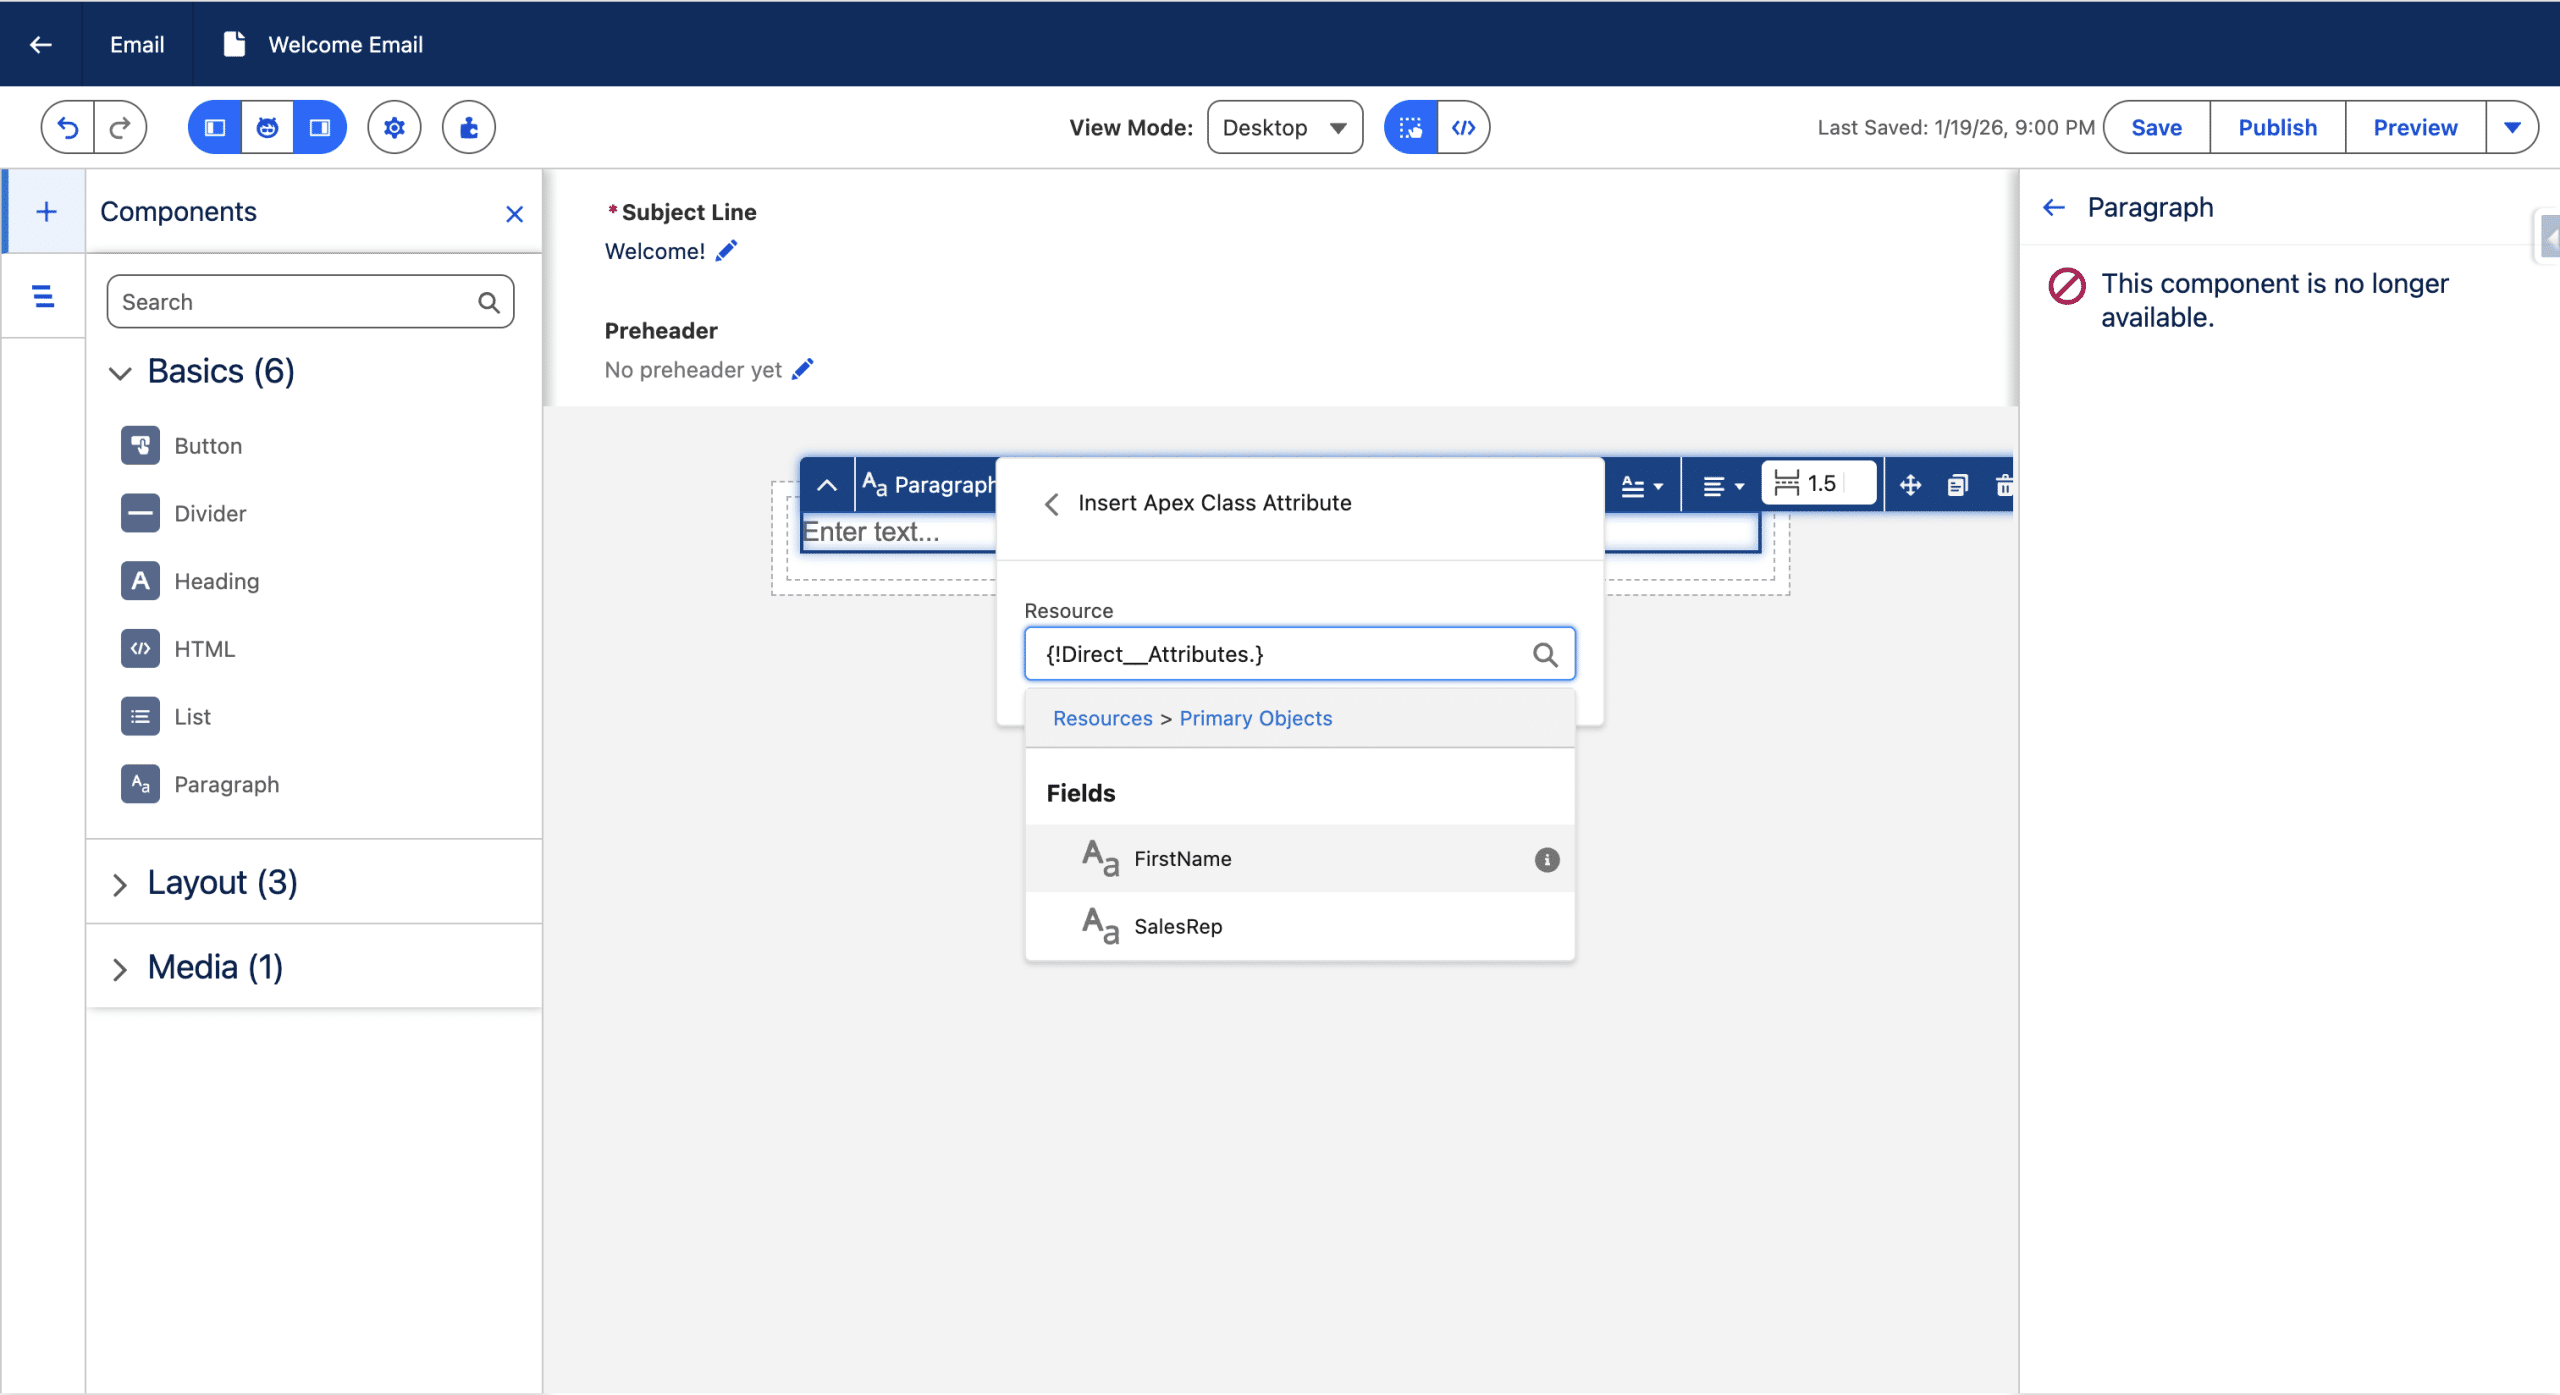
+Save. We can now use the fields from the Class, as we used to with a regular Data Graph. For example, when adding a Merge Field, we select Apex Class Data Provider, then Primary Objects under Apex Class Objects and finally, the Field we are interested in.
Once the Email is personalized using our new source, we Save it and Publish it, so we can use it in the Flow.
Passing data from an Automation Event triggered Flow to our messages
Setup > Flows > +New Flow. Then select Automation Event Triggered Flow.
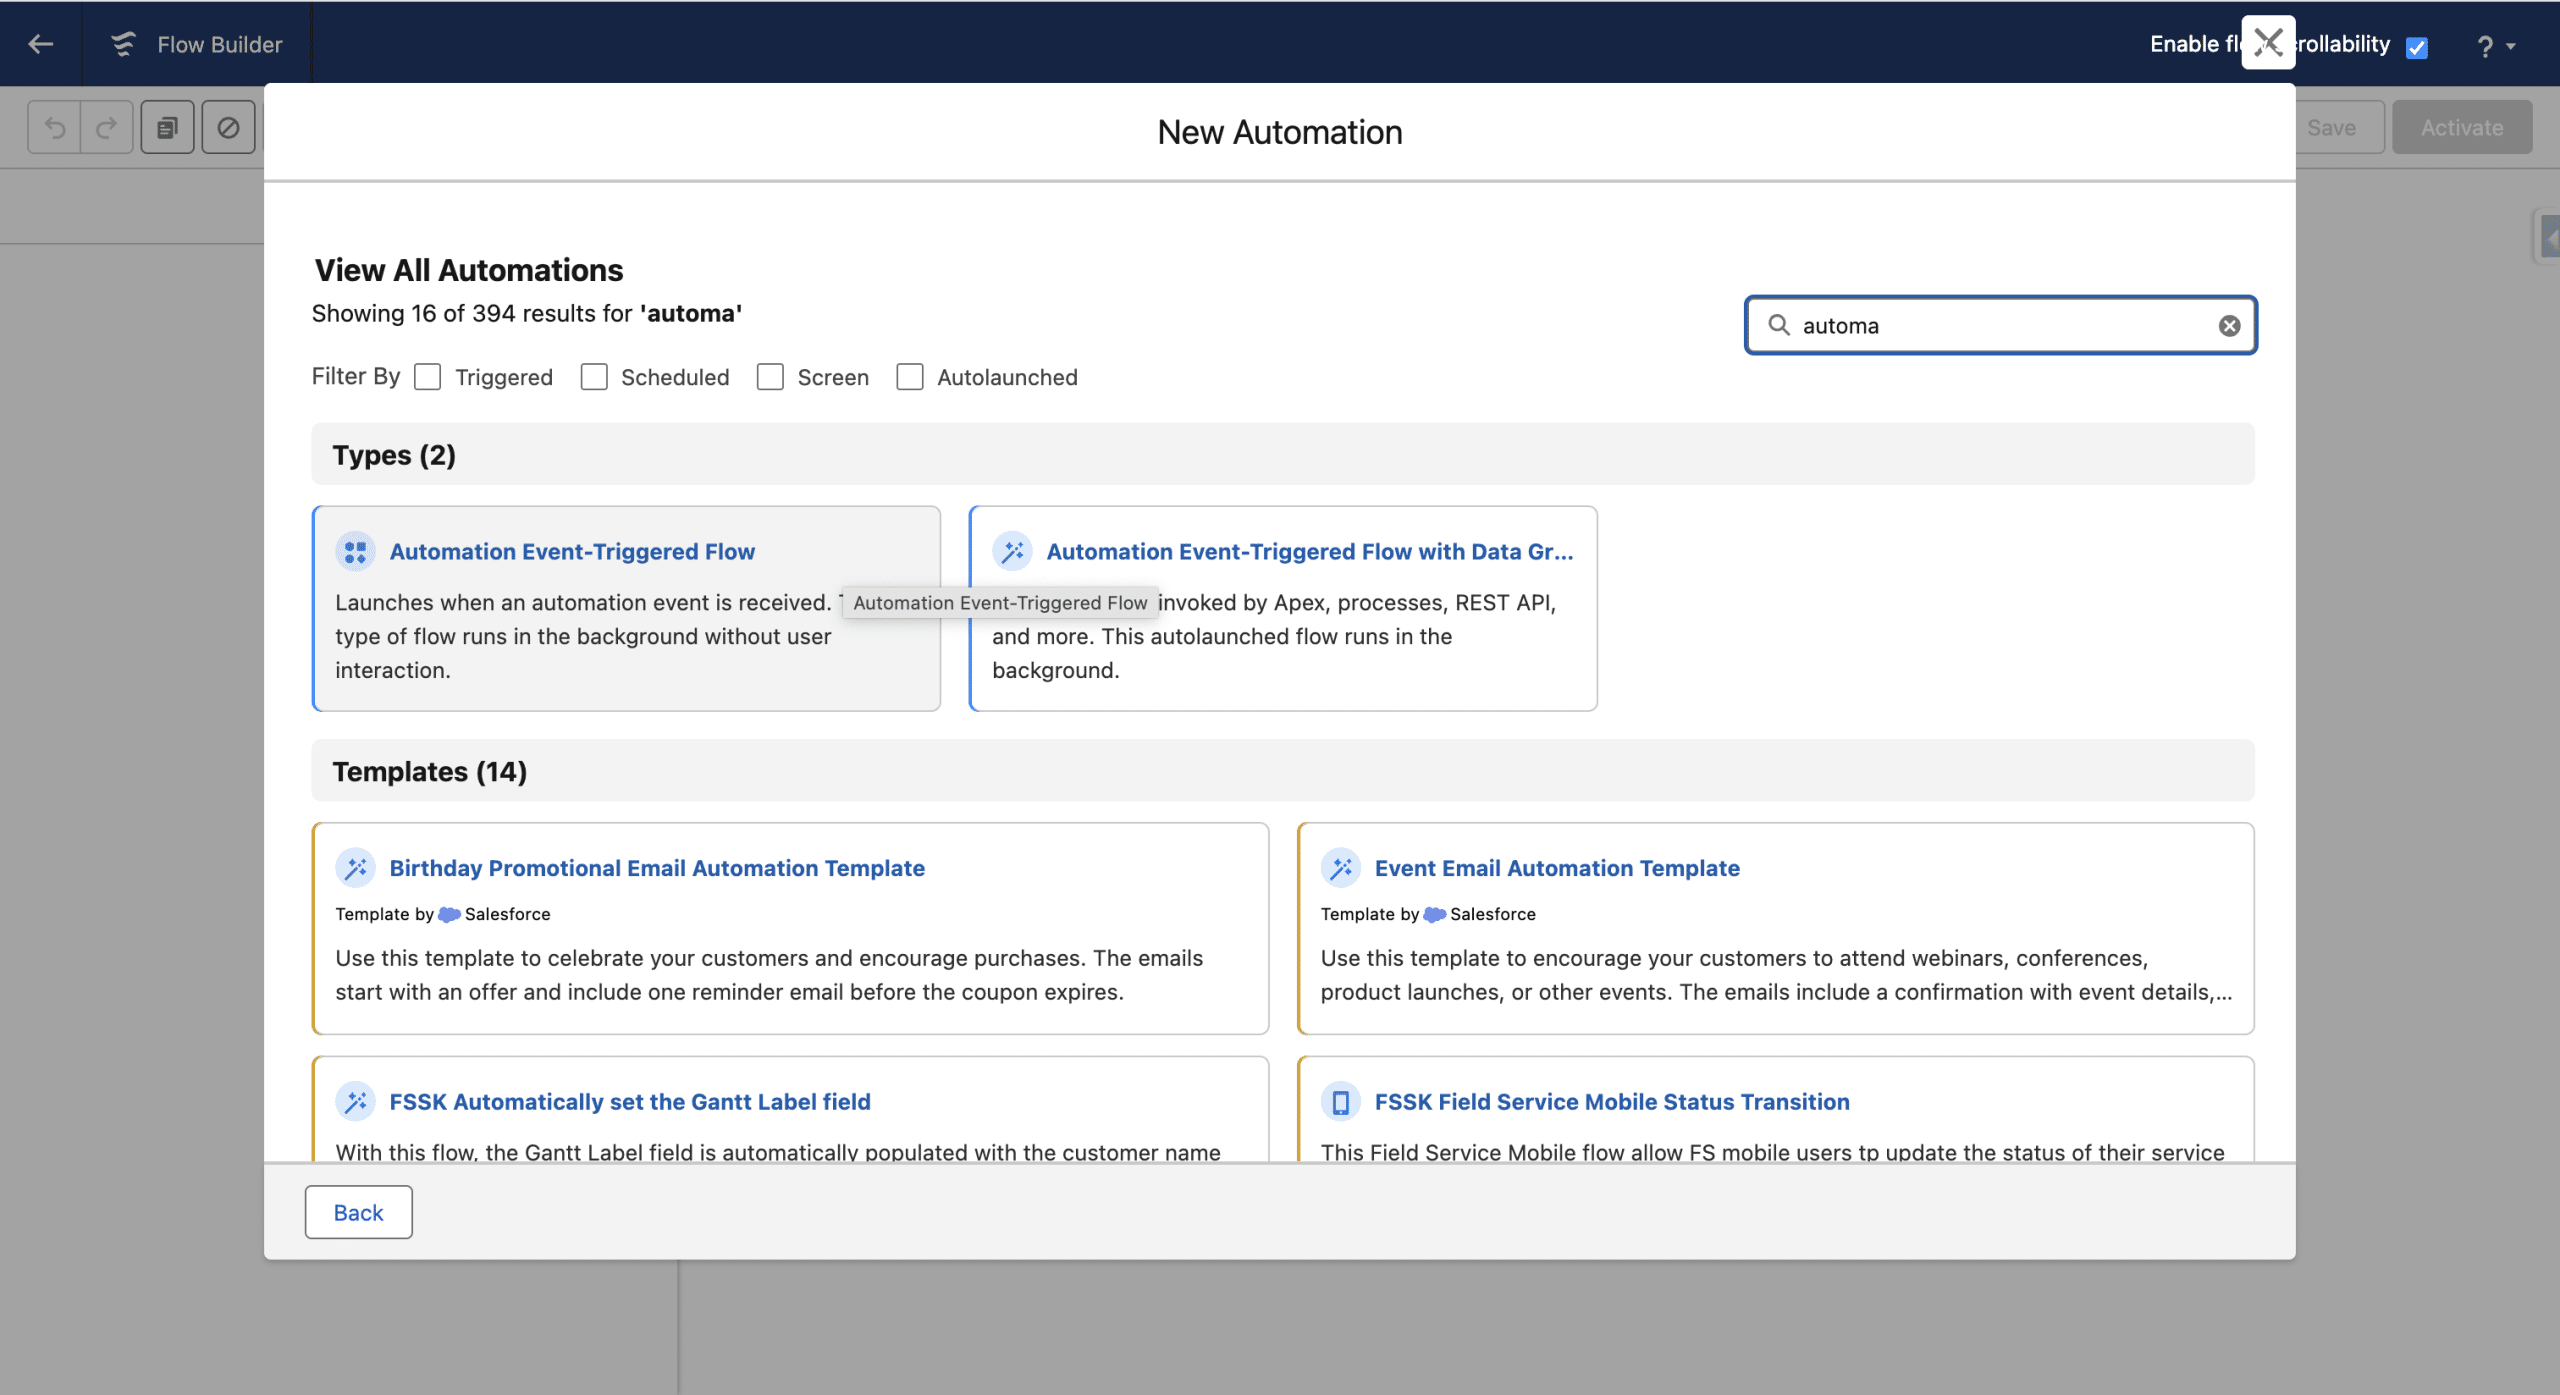
We leave the Data Space as-is and we do not specify a Data Graph. Next.
Choosing Prospect, Lead, Contact or Related Record Change Event
Then +Select Event. We select the Prospect, Lead, Contact or Related Record Change Event Event Library.
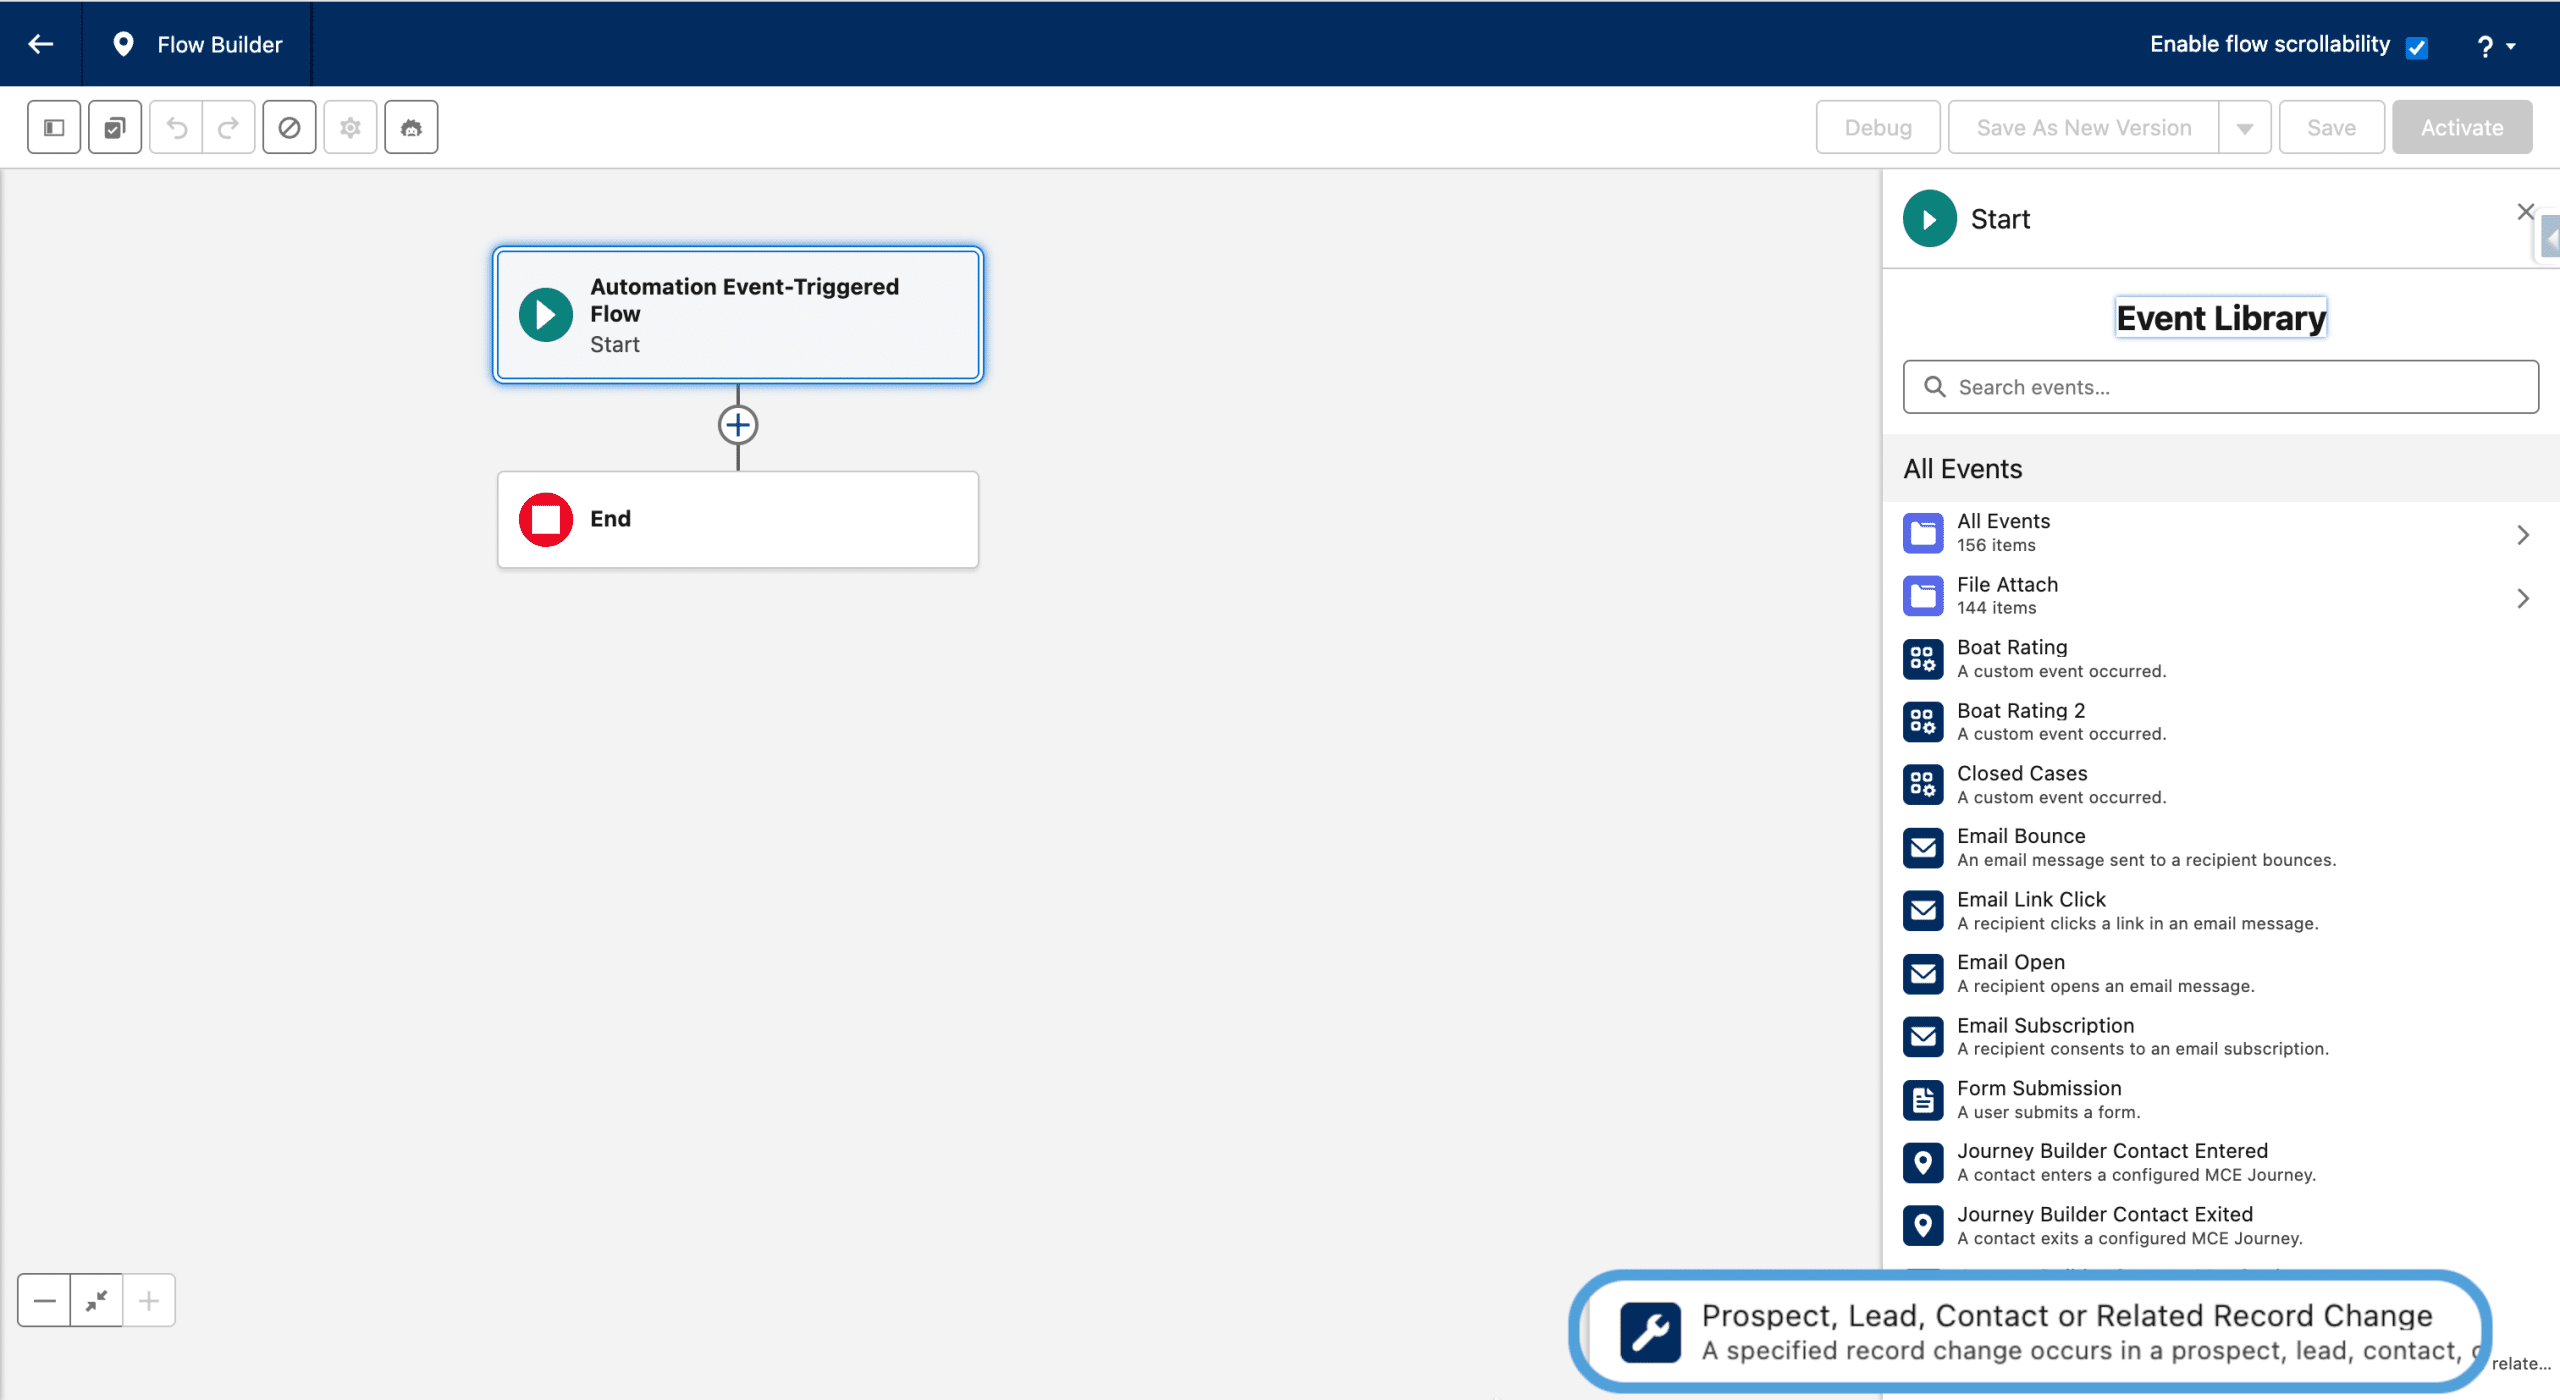
For the Object we’ll use the Lead object and let “Trigger the Flow When” to the default value (A record is created). For “Condition Requirements”, we select None (if you leave the default, you’ll get an error “The element has an invalid reference to “Lead.” : The field “” for the object “Lead” doesn’t exist.”). Adjust to your needs.

Note, if you select an Object that is not a Lead, Contact or Prospect, but with a relationship to one of these objects (a Case for example), you’ll need to specify the joining Field (Contact id for the Case example) as well.
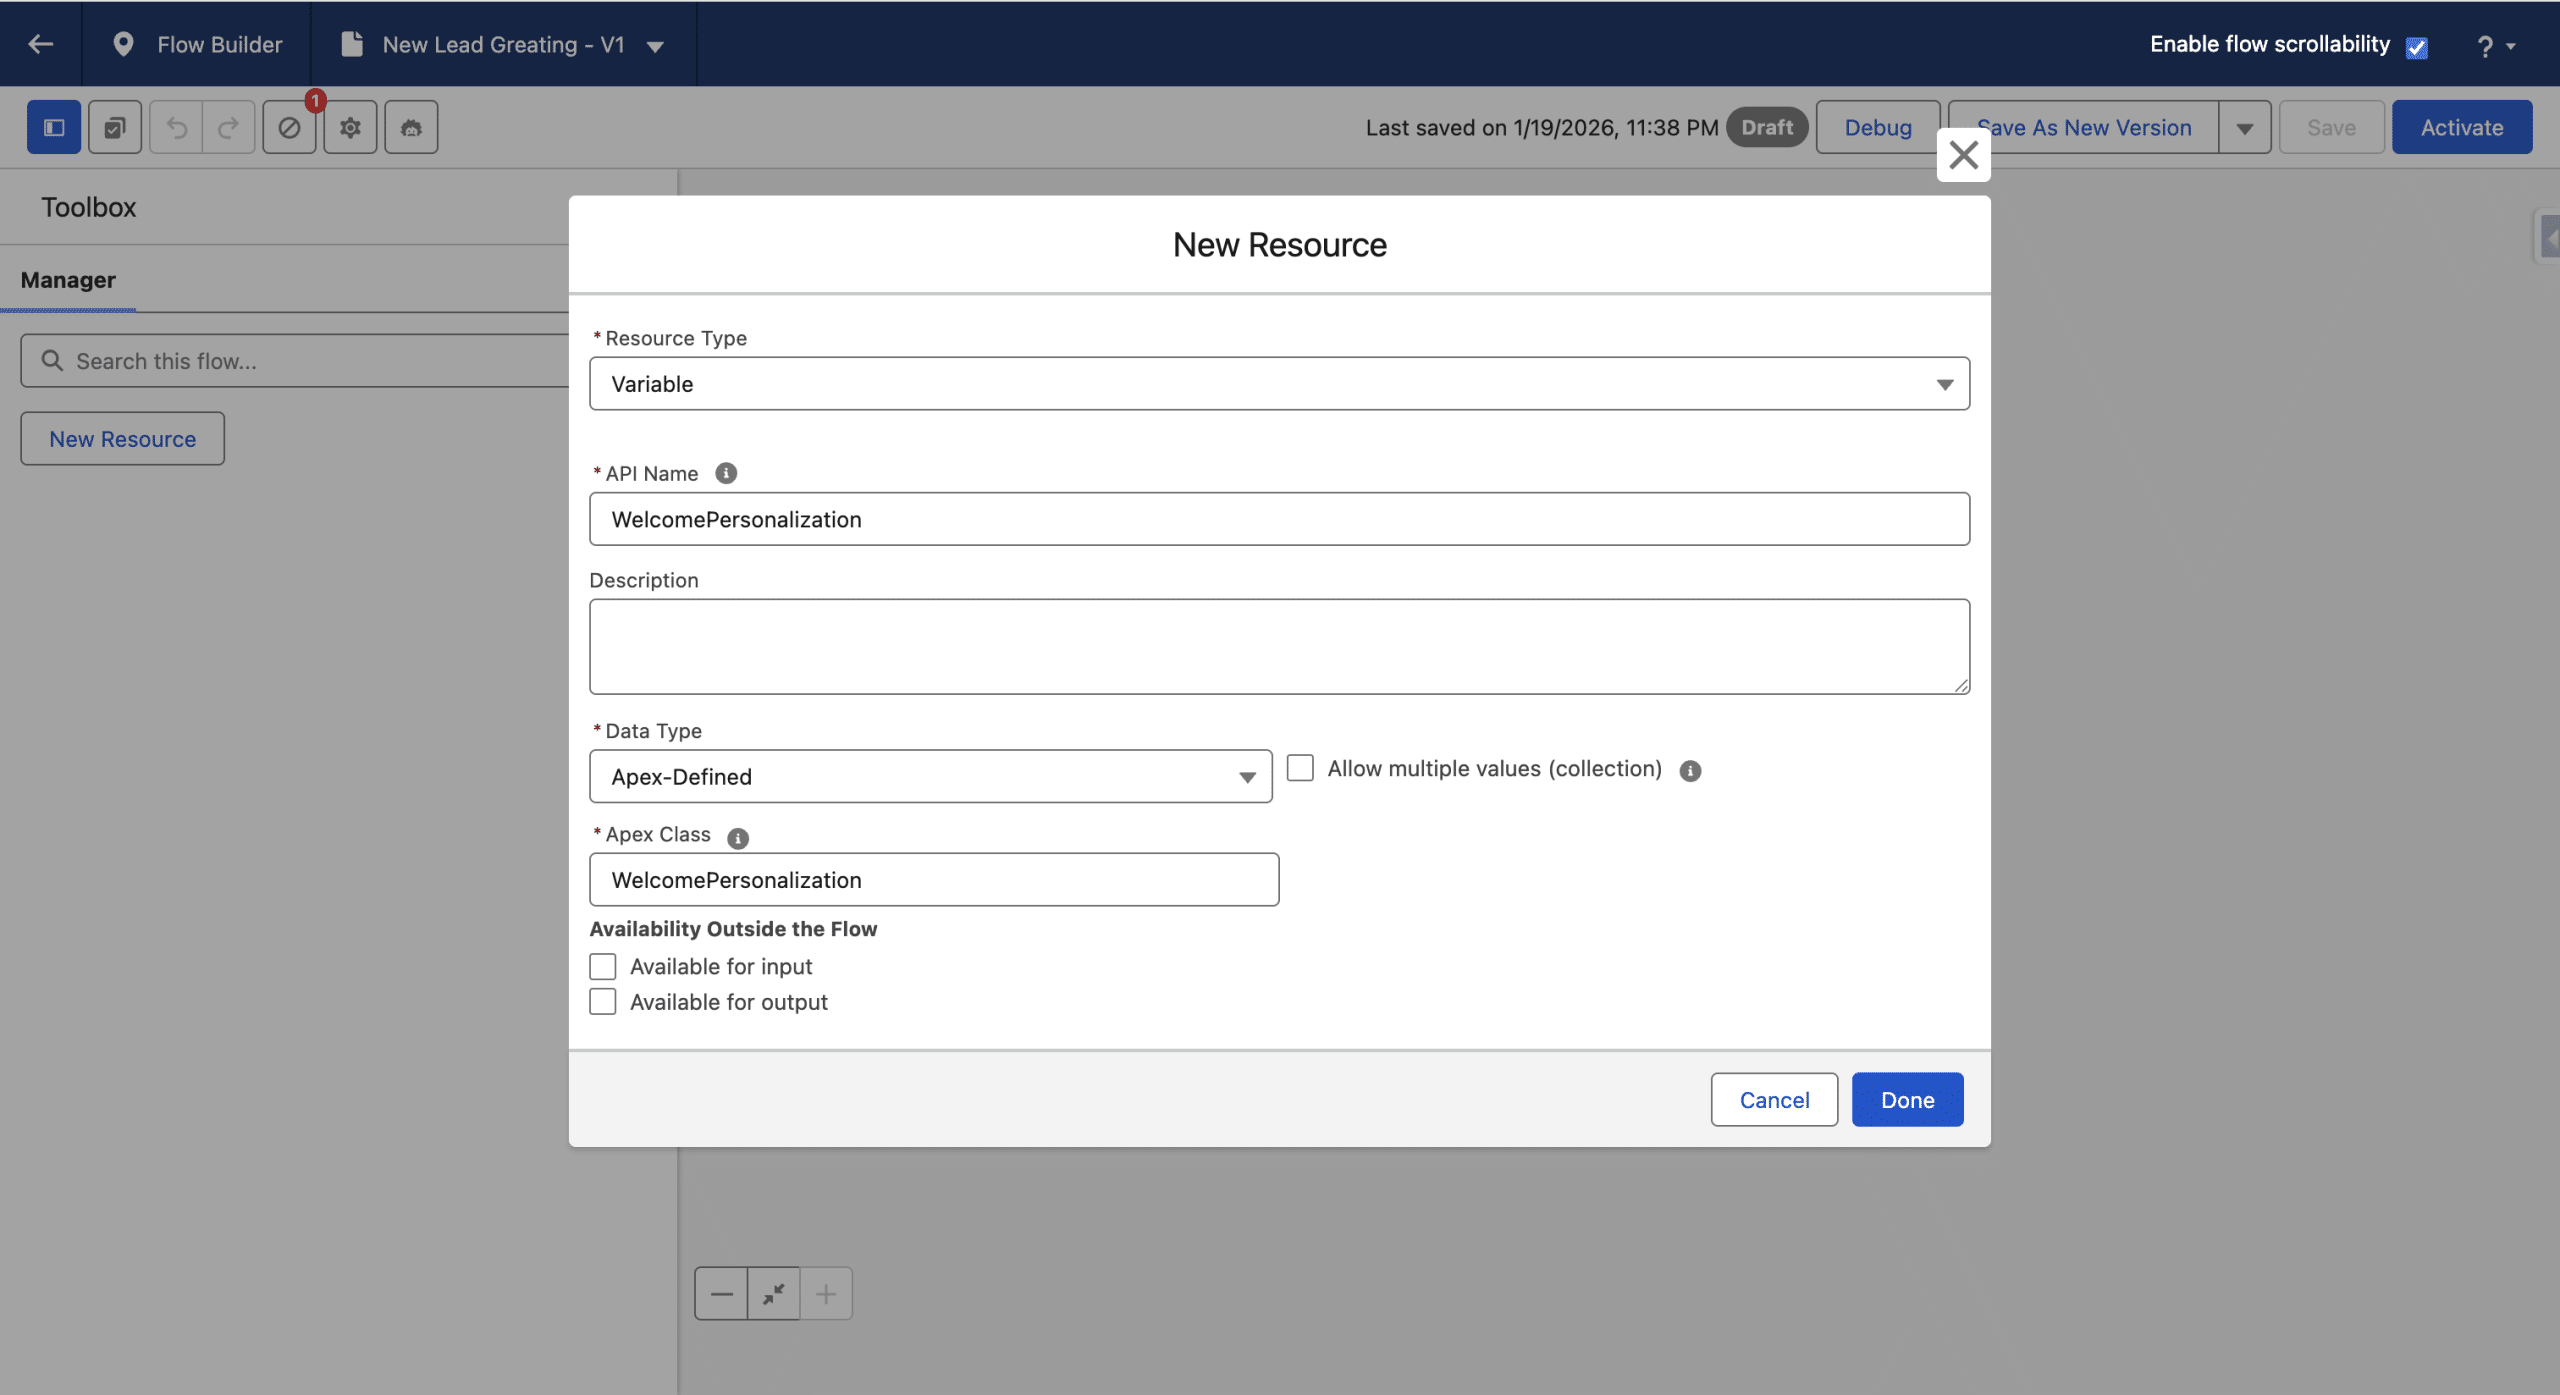
Defining an Apex Defined Variable
For the Flow to pass an instance of the Apex Class that the Email will use (WelcomePersonalization here), the Flow must declare a Variable using that Apex Class. Otherwise, you’ll get the error: “We couldn’t find the Apex class on the content in the flow. Add a flow variable that uses the Apex class.”. This is the way the Flow passes it to the Email.
In the Ressources left panel, +New Ressources. We’ll create a Variable Ressource Type, give it a name, select Apex-defined for the Data Type and finally select our Apex class.
Assigning the Apex Variable
So far, we’ve defined the Variable, the Flow will pass it to the Email, but we also need to set the values of the Fields in our Apex Class (FirstName and SalesRep). So, before we add the Send Email Message to the Flow we add a Assignment Element.
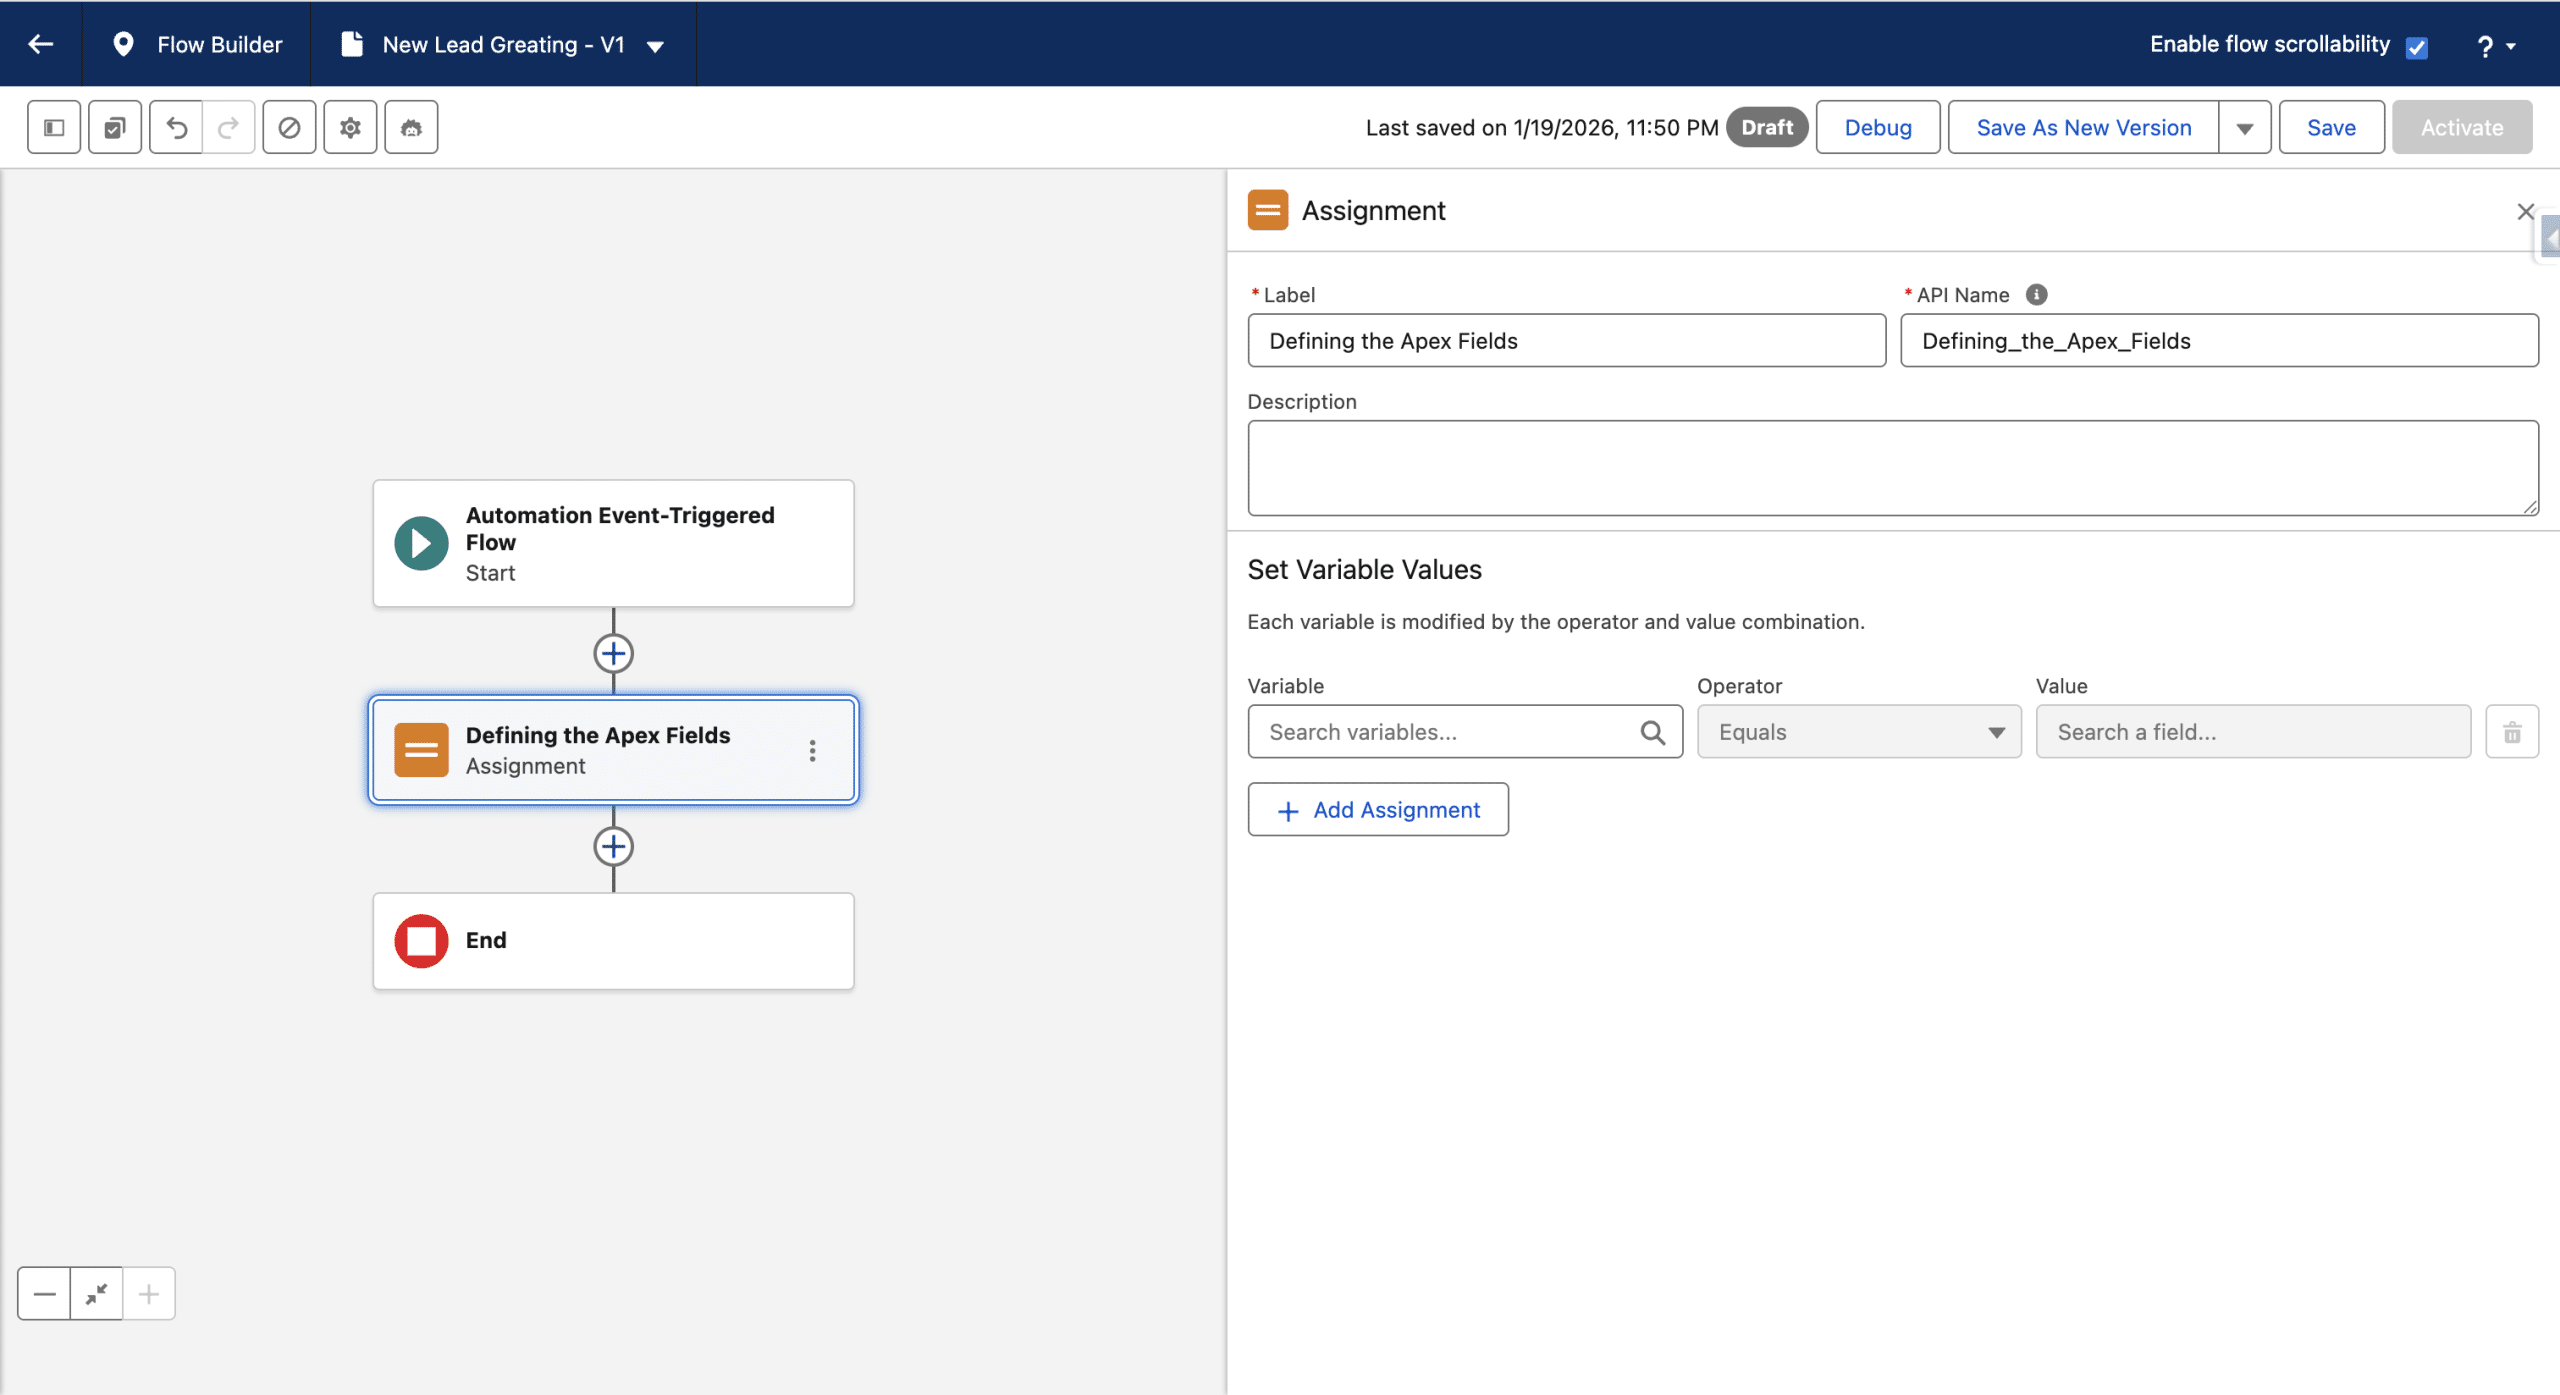
In “Search Variable”, we’ll select the Apex-Defined Variable we created and then the First Name for the Variable. For the Value, we’ll use Lead under Object (this is a reference to the triggering record, available since we used the Prospect, Lead, Contact or Related Record Change Event Event).
+Add Assignment to define the SalesRep field. We’ll set it to the OwnerId.
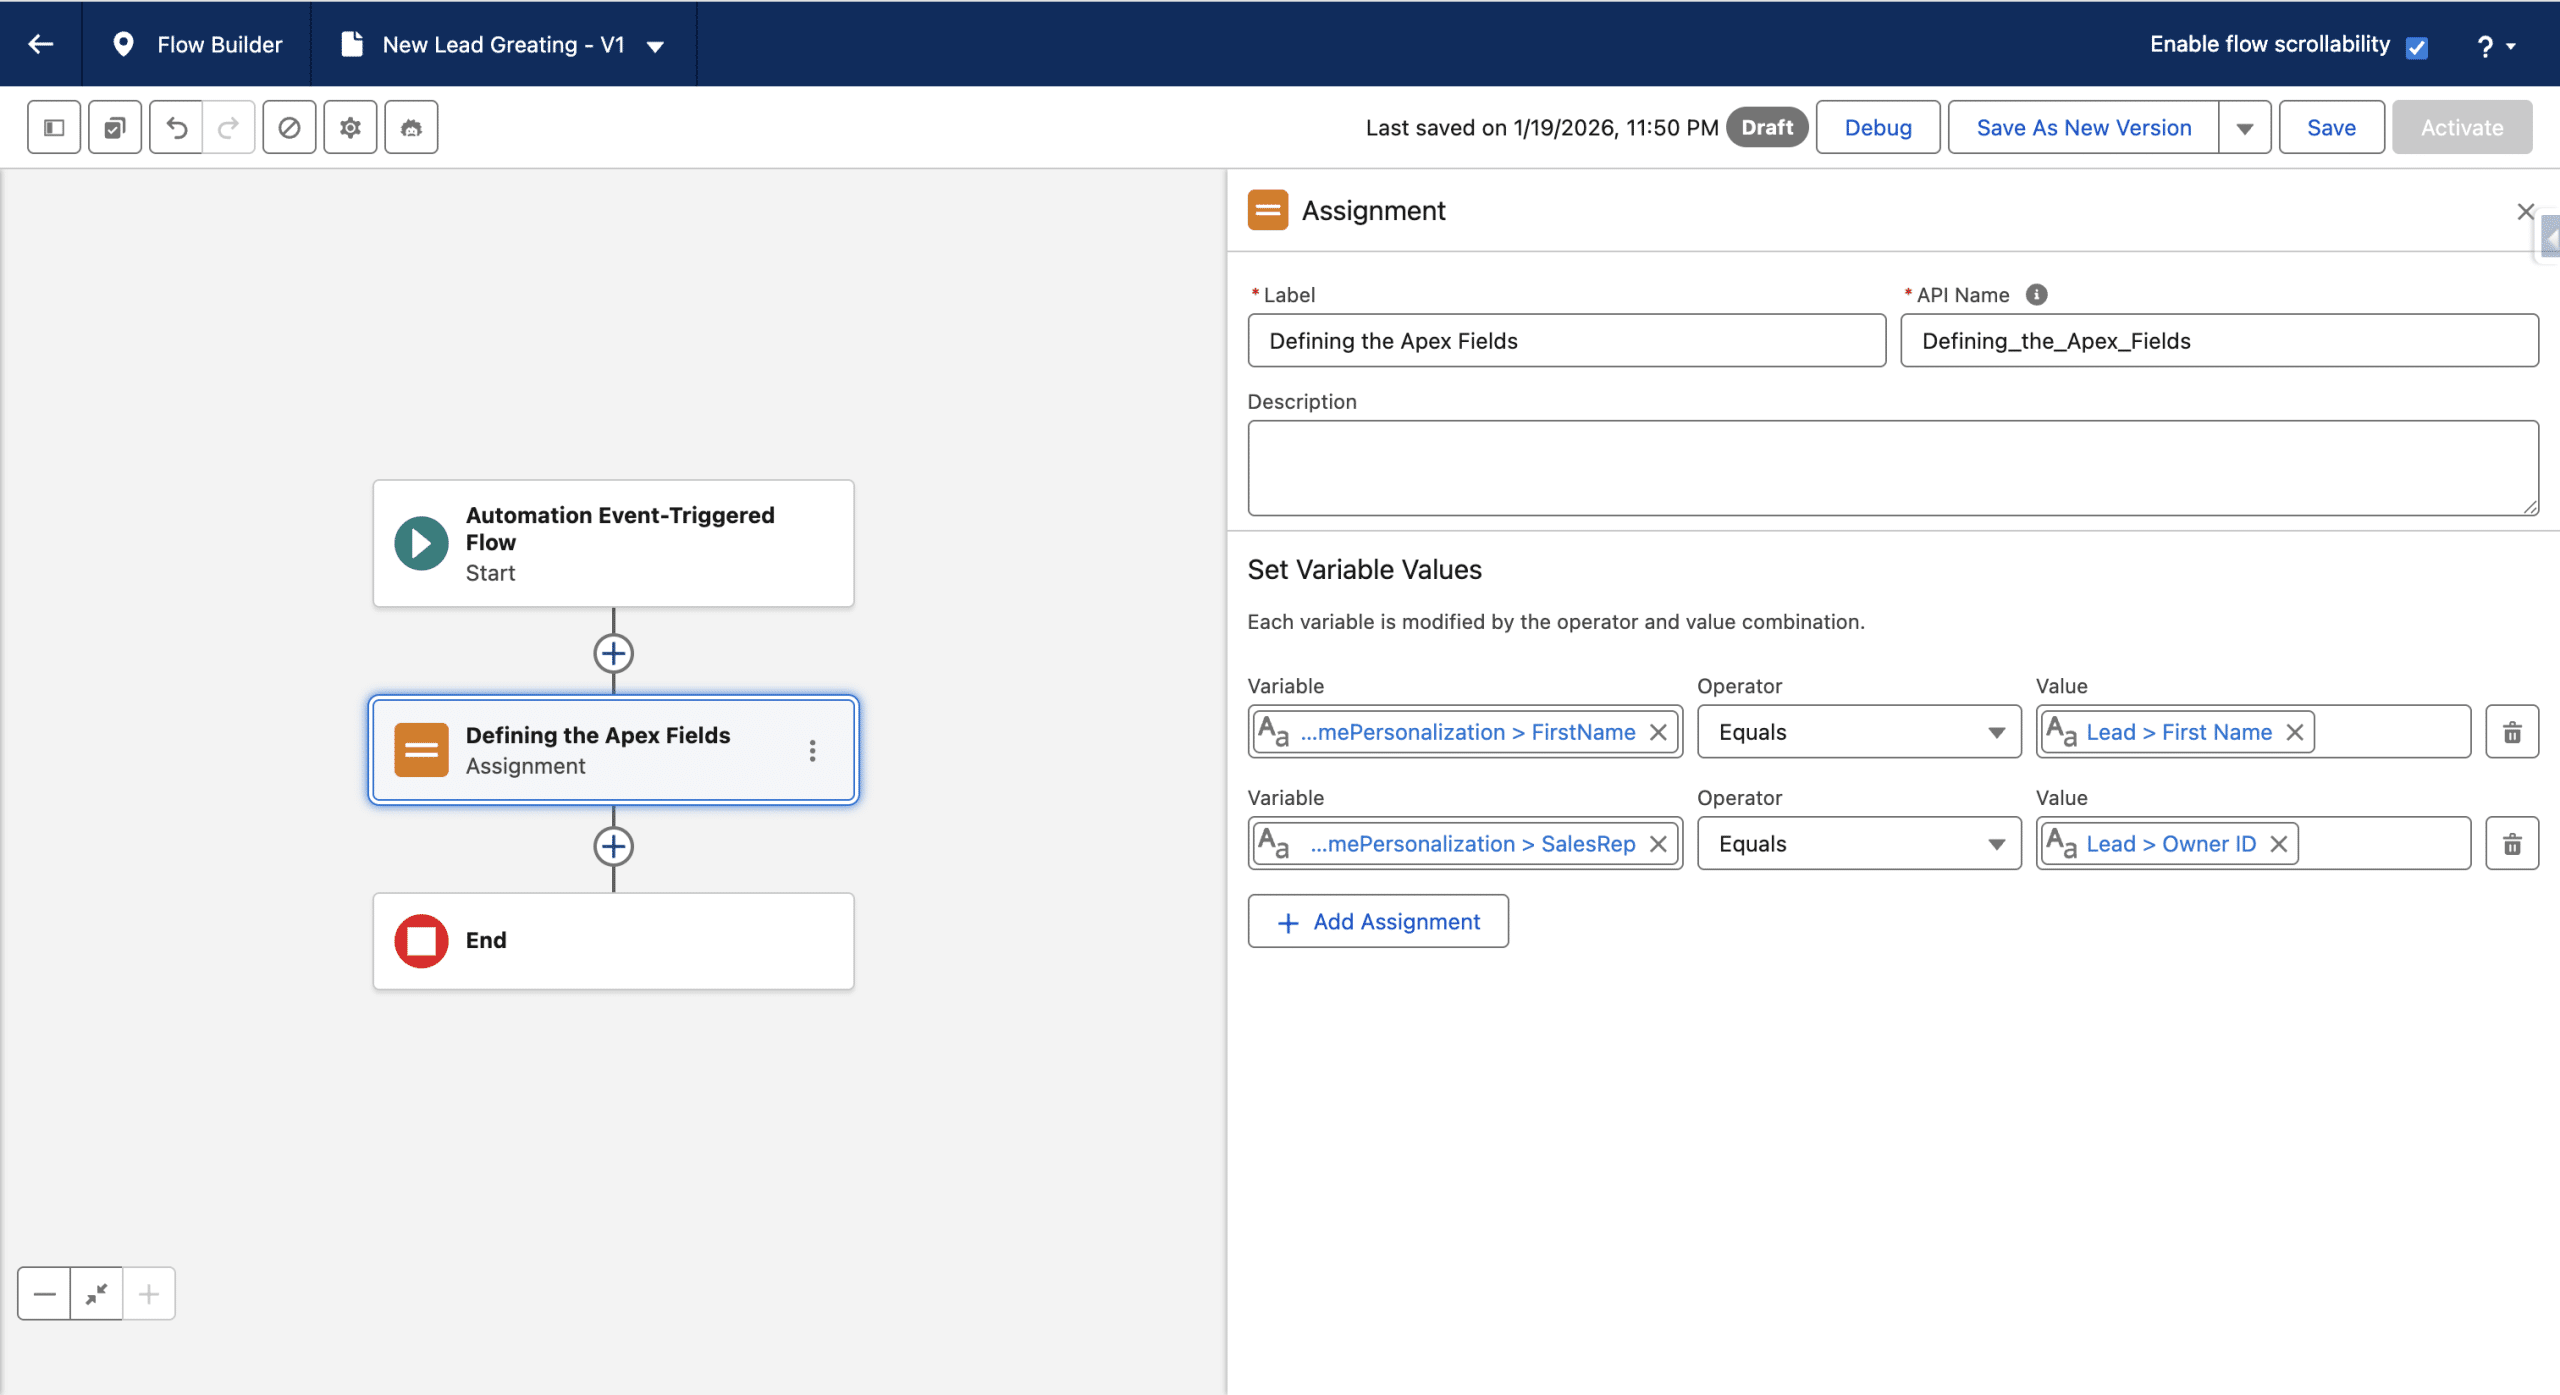
We can now add the Send Email Message after the Assignment element. We’ll use a Transactional email. To use the email we defined previously (the one using our Apex Class) we define the Sender. We can then we Activate the Flow.
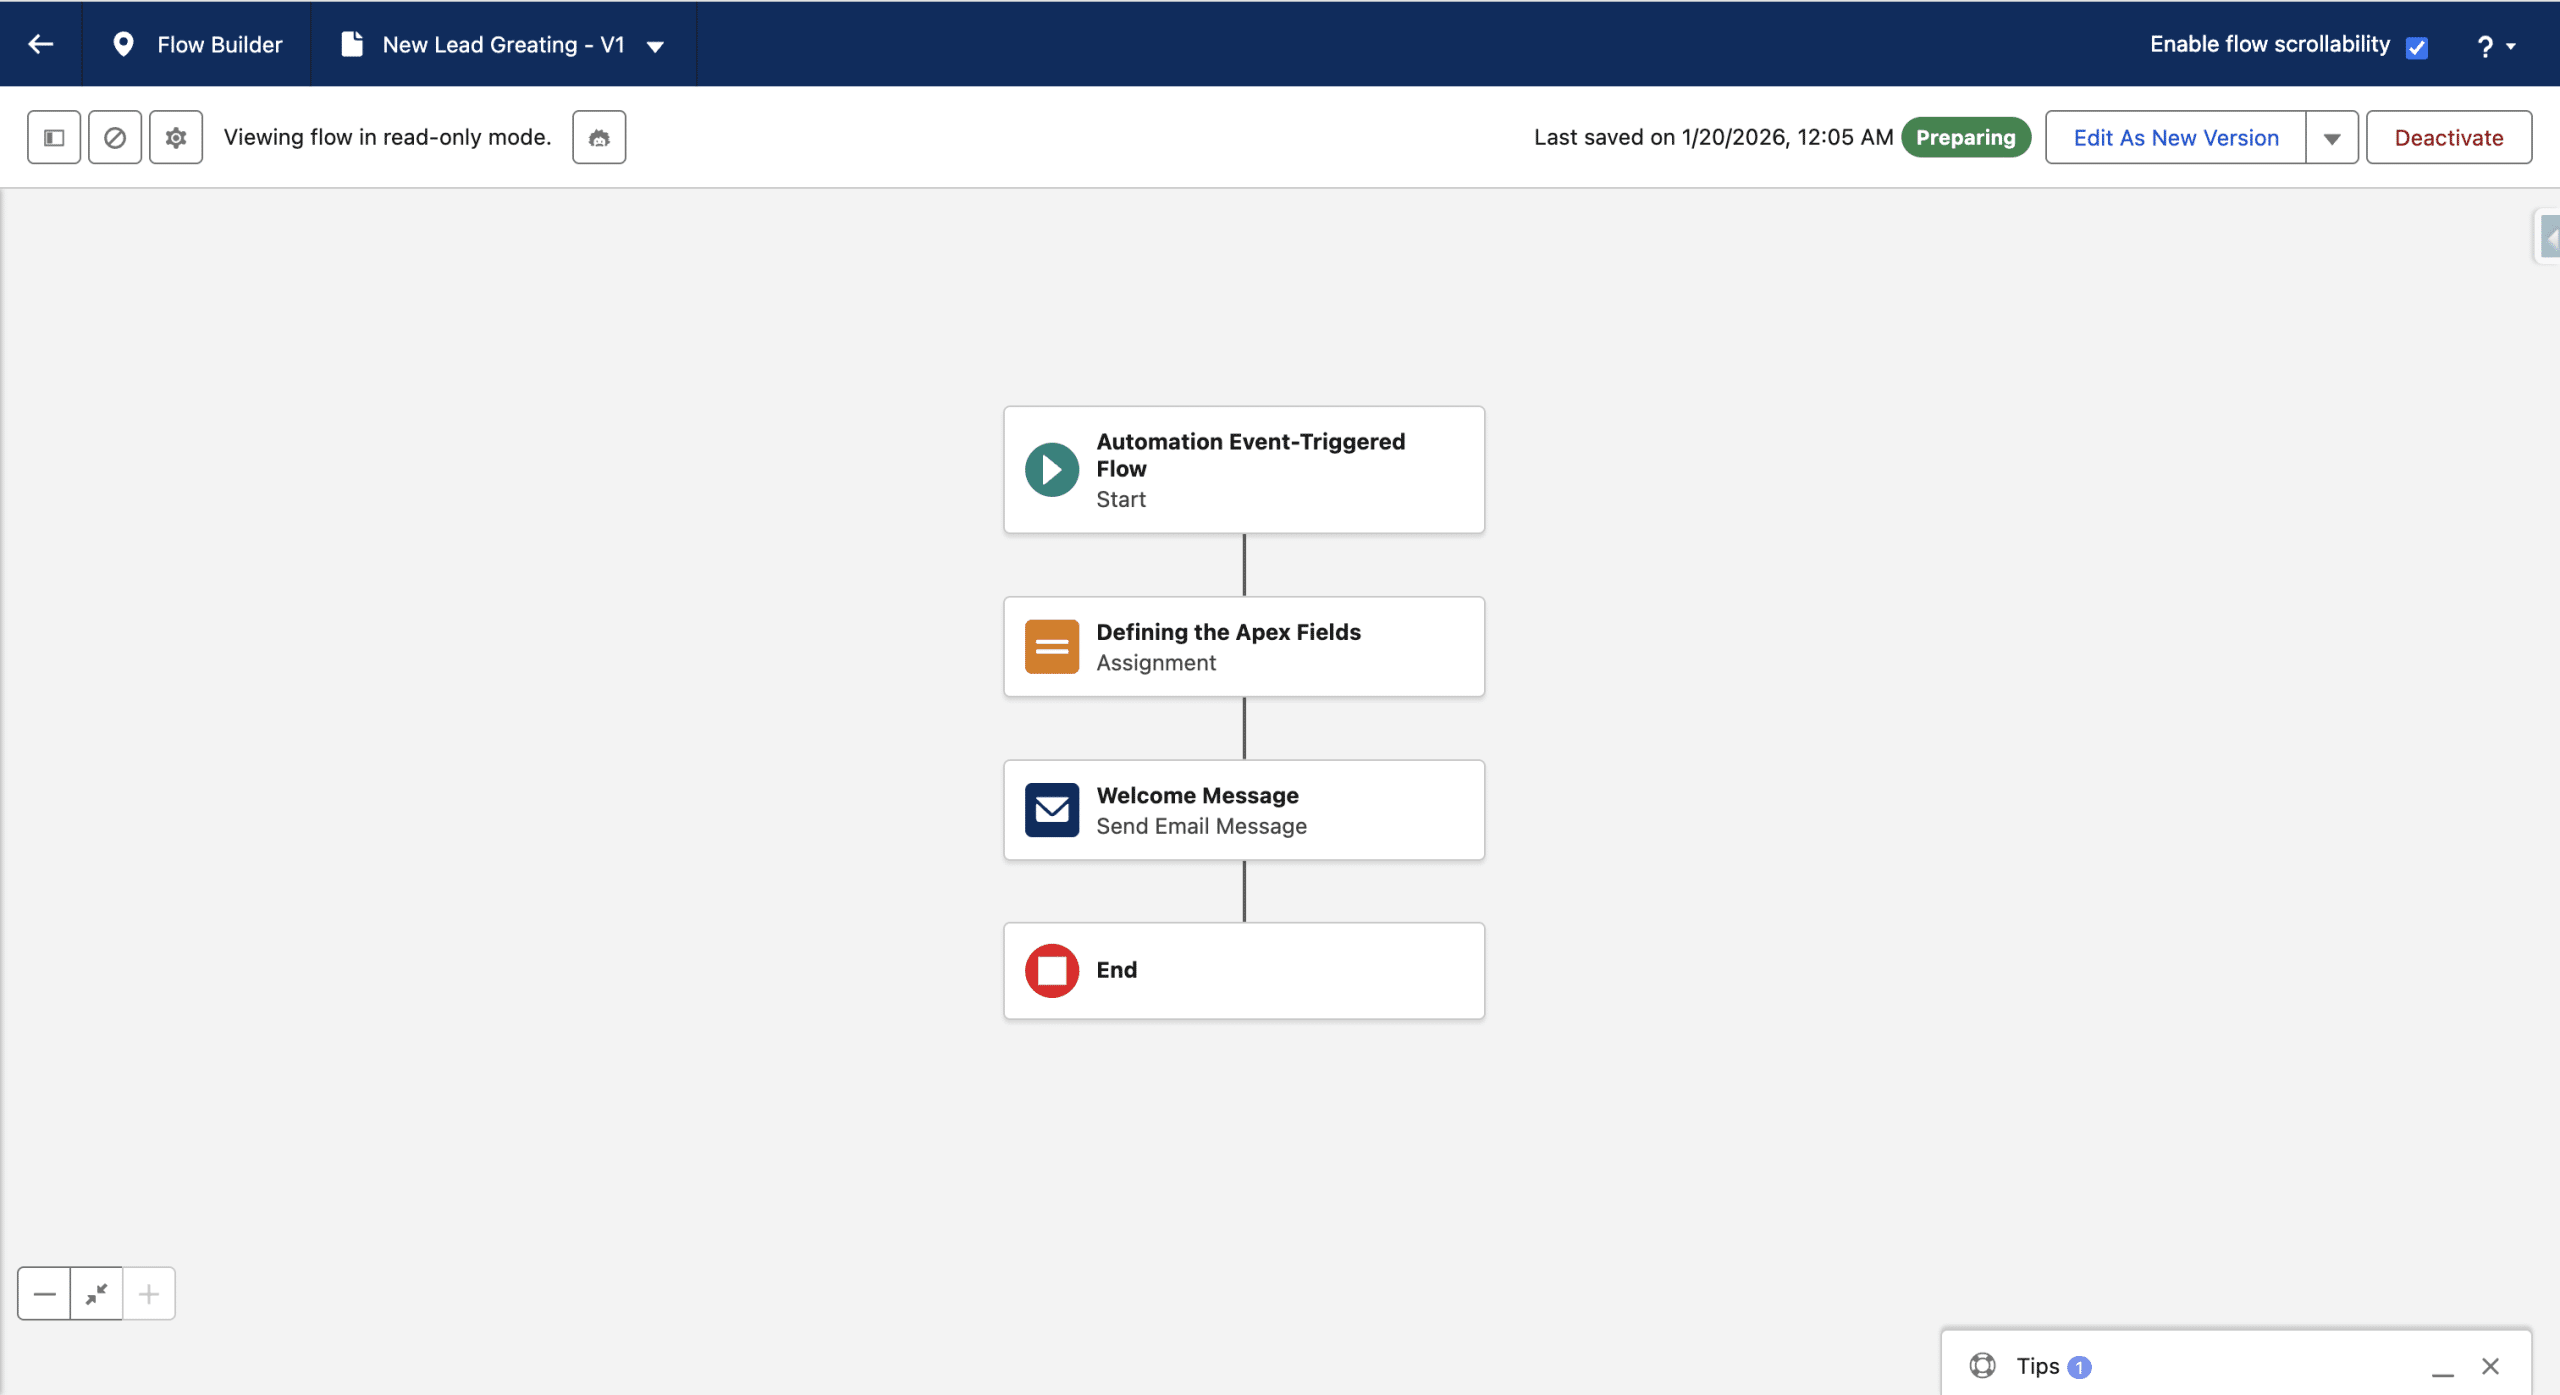
In our tests, the Flow is activated and working, but keeps the status Preparing. When a new a Lead is created, a personalized email is sent, using the values defined in the Flow and passed to the Email thanks to our Apex class.
Final Thoughts
Even though this is not really a real-time feature, it takes only several seconds in our tests for the personalized email to be sent.
Creating an Apex class is straightforward, and a class can be reused in mutiple emails and multiple Flows.
As the values passed to the Email are assigned from the Flow, we could get those values from other objects using one or more Get Record elements in the Flow and store them in a list field in the Class (a list of commands for example), which coud then feed a Repeater (such Apex Fields are then referenced as Related, as opposed to Primary like the one we used).
We did not declare a constructor in the class, relying on the default one, but data preparation could be done there if needed.