Whether you are new to Salesforce campaigns or have used them for years, they are the foundational object for building and running your marketing campaigns, and have received an even bigger role in Marketing Cloud Next. They’re where you plan, execute and measure your outcomes as well as adding leads and contacts as campaign members to not only track their touchpoints, but also create segments and build reports.
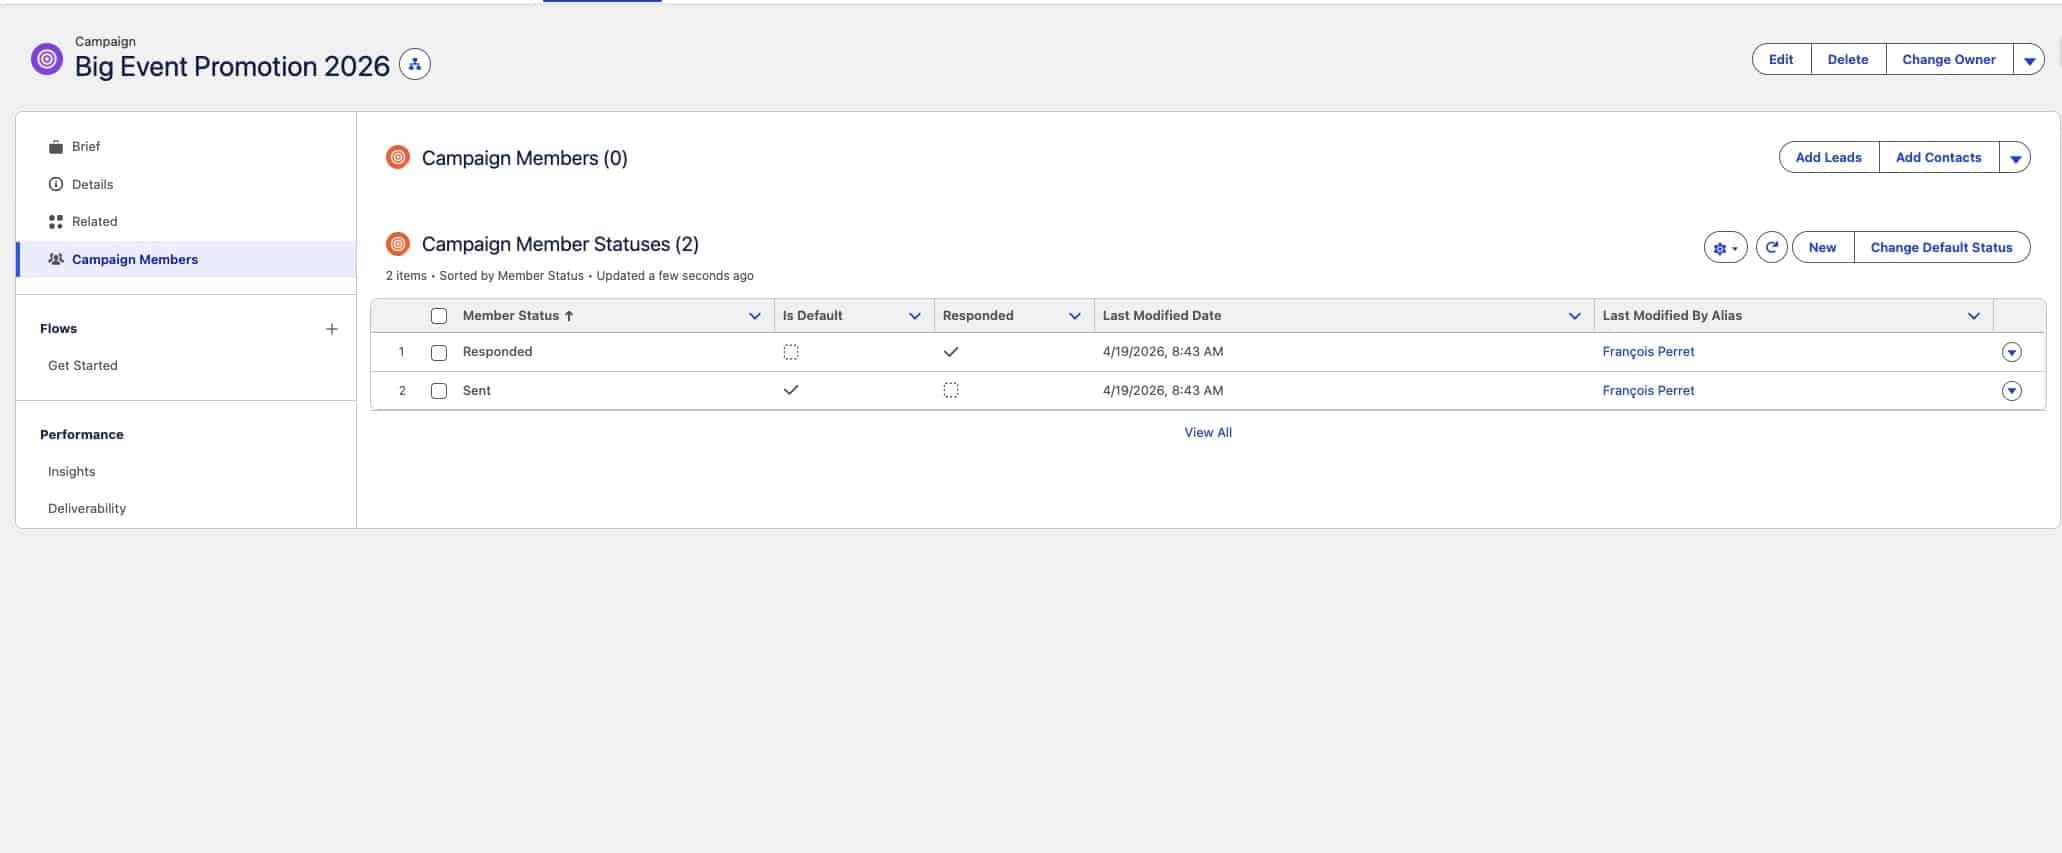
Out of the box, though, Salesforce gives every campaign only two member statuses: Sent and Responded. Sent is the default status every member picks up when they’re added to the campaign. Responded is the one flagged as “Responded = true” – the status a record moves to once they’ve engaged in some meaningful way: opened or clicked an email, registered for an event, downloaded a whitepaper, to name a few.
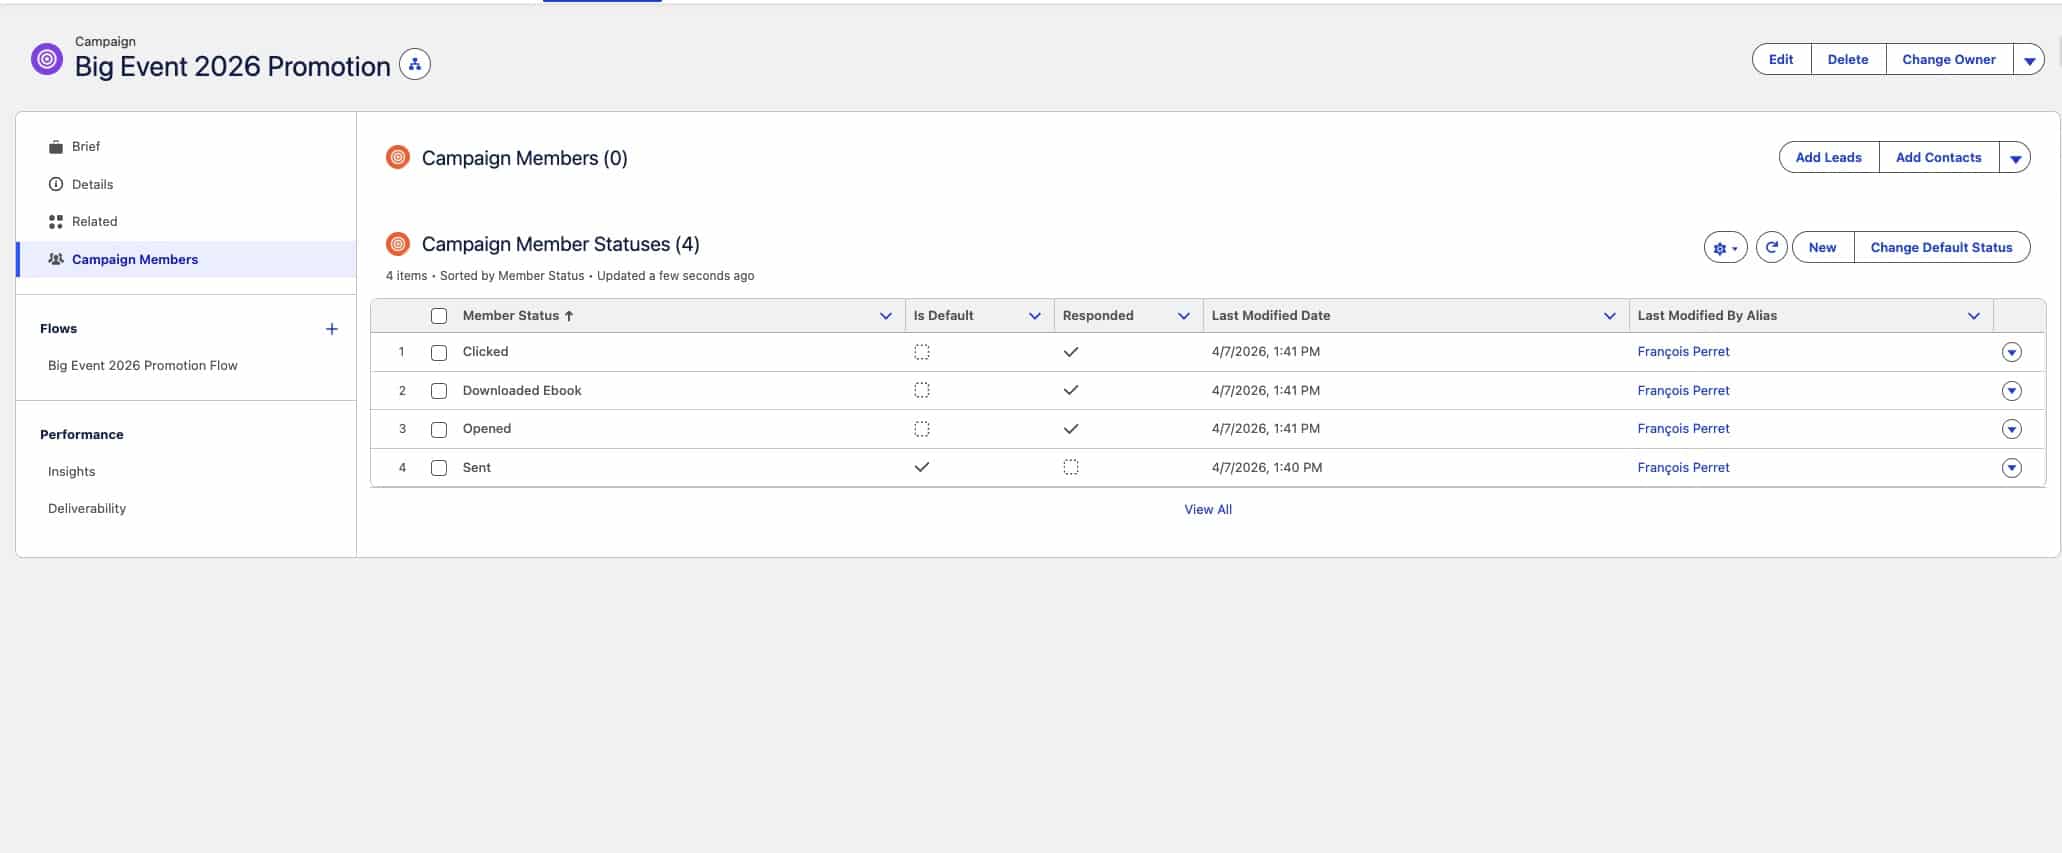
That’s fine as a starting point. But in practice, a campaign’s member statuses should reflect what the campaign actually does. An email campaign probably wants something like Sent → Opened → Clicked → Downloaded Whitepaper. A webinar or event needs Invited → Registered → Attended → No Show → Viewed Recording. The defaults don’t capture any of that, which means every new campaign is a small piece of manual setup before it’s actually useful.
So the question is: how helpful would it be if this setup just happened on its own? If you chose Campaign Type = Webinar, and the right member statuses appeared automatically? And one level better: what if you could hand that to your campaign creation agent, include the type in your brief, and let the agent take care of the rest?
That’s what this article walks through. A step-by-step setup for enhancing the campaign creation agent so it reads the campaign type from your brief and configures the member statuses for you. Follow along.
How Agent Actions and Flows Fit Together
Before we build, a quick orientation, as the pieces make a lot more sense once you see how they connect.
Every skillset you teach your agent is a topic made up of instructions and actions that depend on each other. Actions are where the agent actually does something to your data such as create, update or delete. This can happen via a flow, an Apex class, or something similar. For this example, we’ll use a flow.
Agents can only call autolaunched flows. These flows don’t have a screen; they’re fed by input variables and return output variables. The agent collects those input variables from its conversation with you, and the instructions you write tell the agent which flow to call and what to put into each variable. Once you see that pattern, most of Agentforce becomes easy to understand: instructions decide when and why, actions (flows) decide what.
That’s the full picture. Now for the build.
Step 1: Create an autolaunched flow and configure your campaign types and member statuses
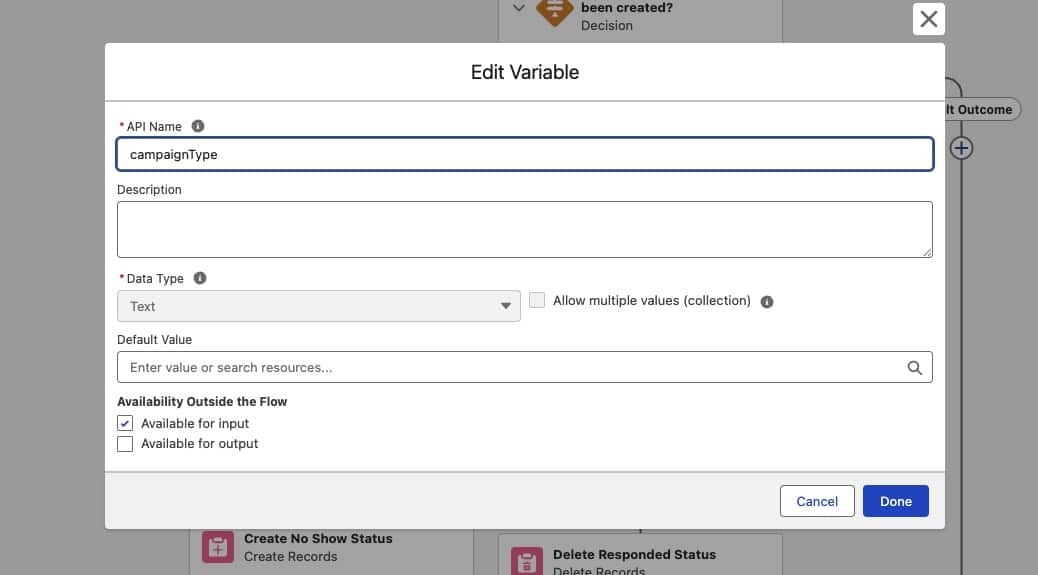
Go to Setup > Flows > New Flow > Autolaunched Flow (No Trigger). From here you click on the half crossed square icon in the very top left corner and click on New Resource:- Resource Type: Variable
- API Name: campaignType
- Data Type: Text
- Leave Allow multiple values unchecked
- Available for input – checked
- Click Done.
- Resource Type: Variable
- API Name: recordId
- Data Type: Text
- Leave Allow multiple values unchecked
- Available for input – checked
- Click Done.
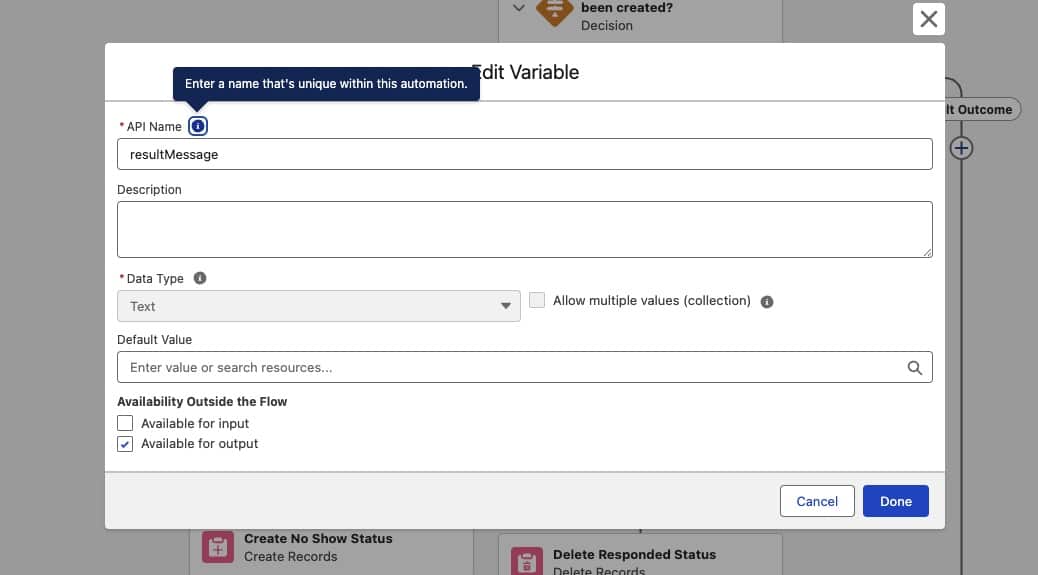
- Resource Type: Variable
- API Name: resultMessage
- Data Type: Text
- Leave Allow multiple values unchecked
- Available for output – checked
- Click Done.

As soon as the agent has both input variables, it calls the flow which is driven by the instructions you’ll add in Step 3. Inside the flow, three things happen:
- Update Record. The flow uses recordId to find the campaign, and writes campaignType into the Type field on that campaign.
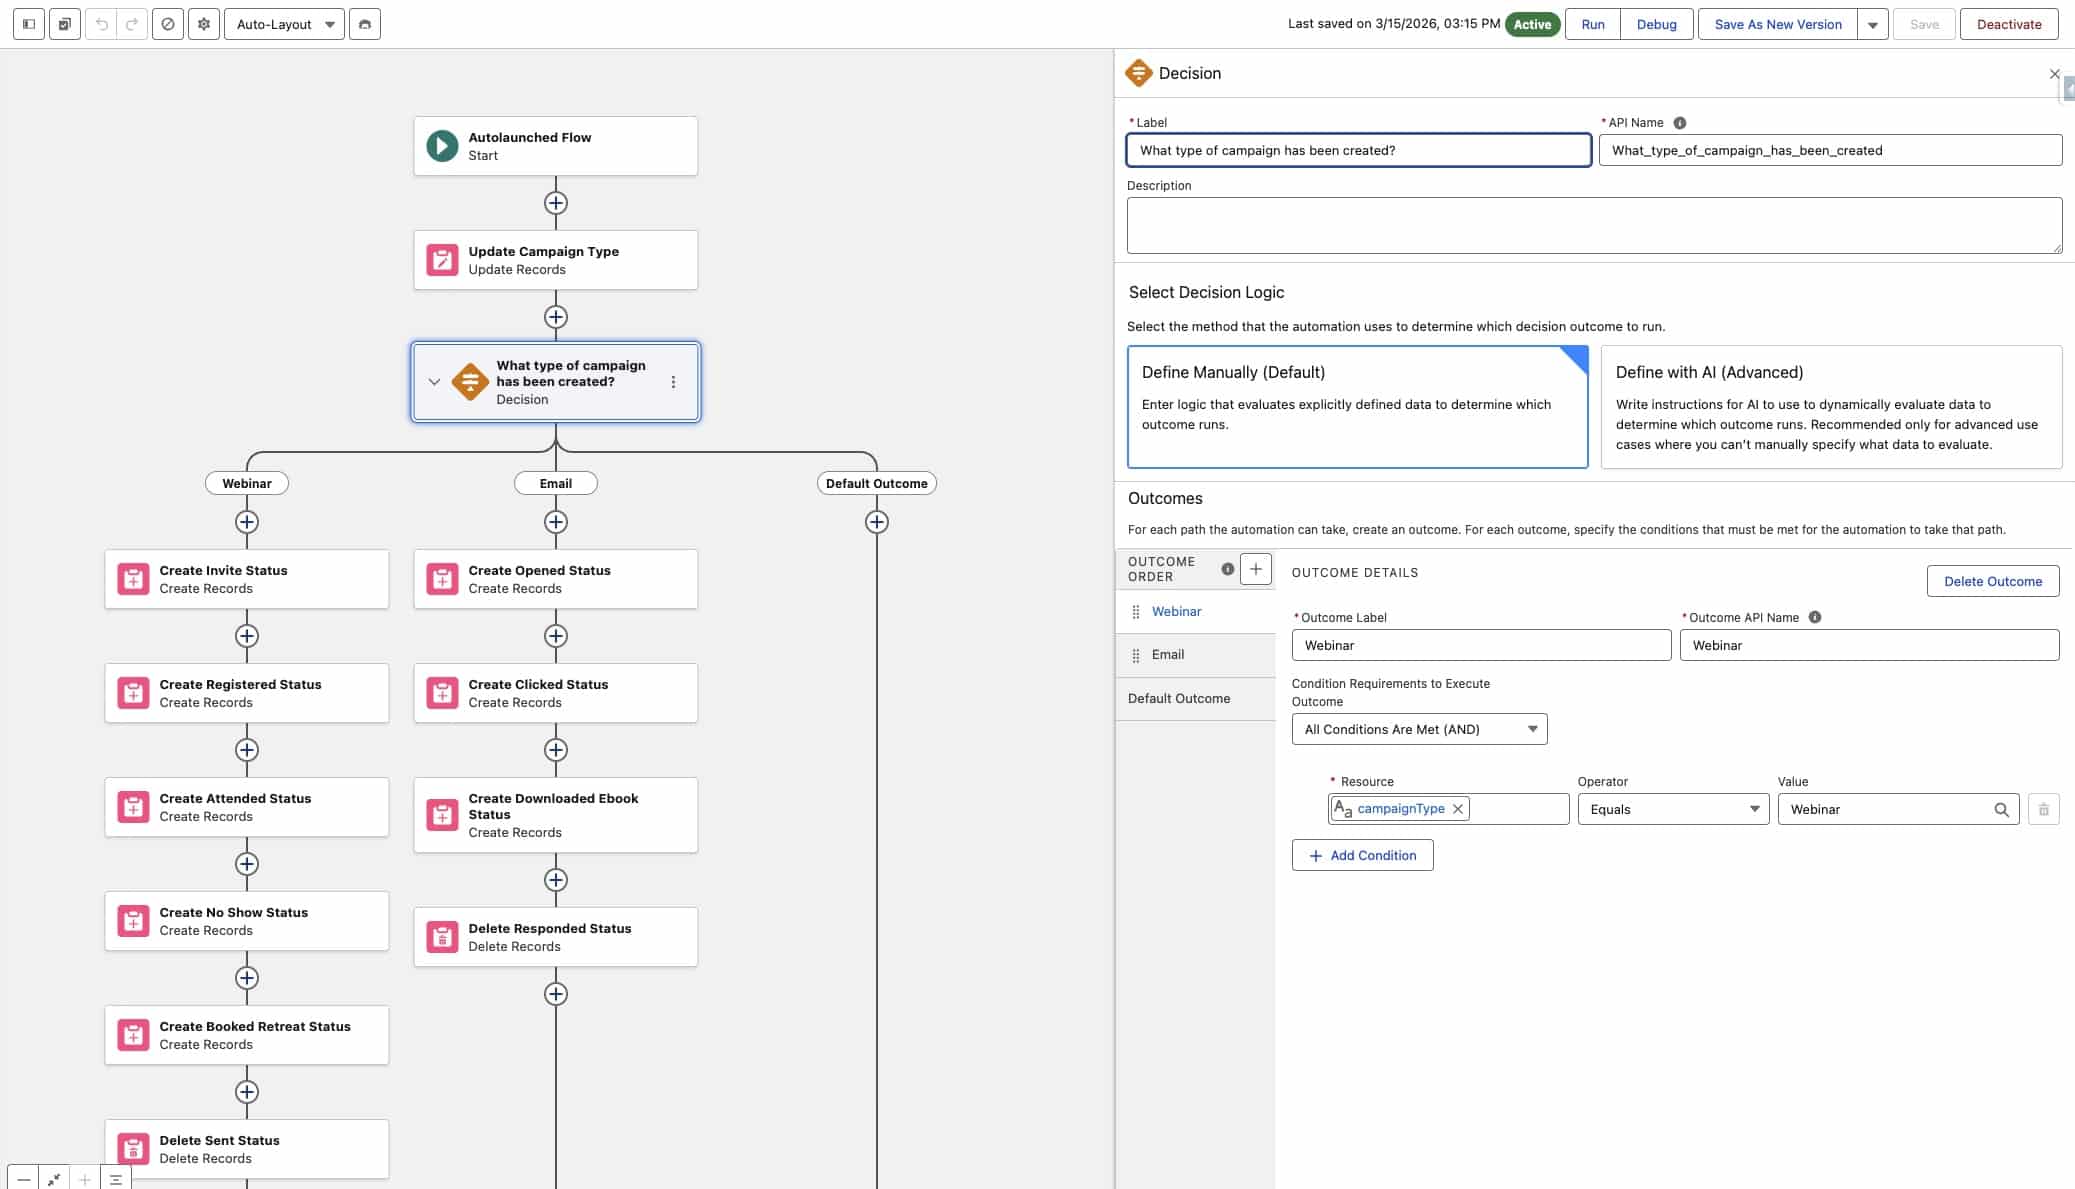
- Decision. The flow then checks what value ended up in the Type field — Webinar, Email, whatever you passed in — and branches. In my example here I’ve configured two types, Webinar and Email, but you can add as many as you want. Each branch leads to its own set of member status records.
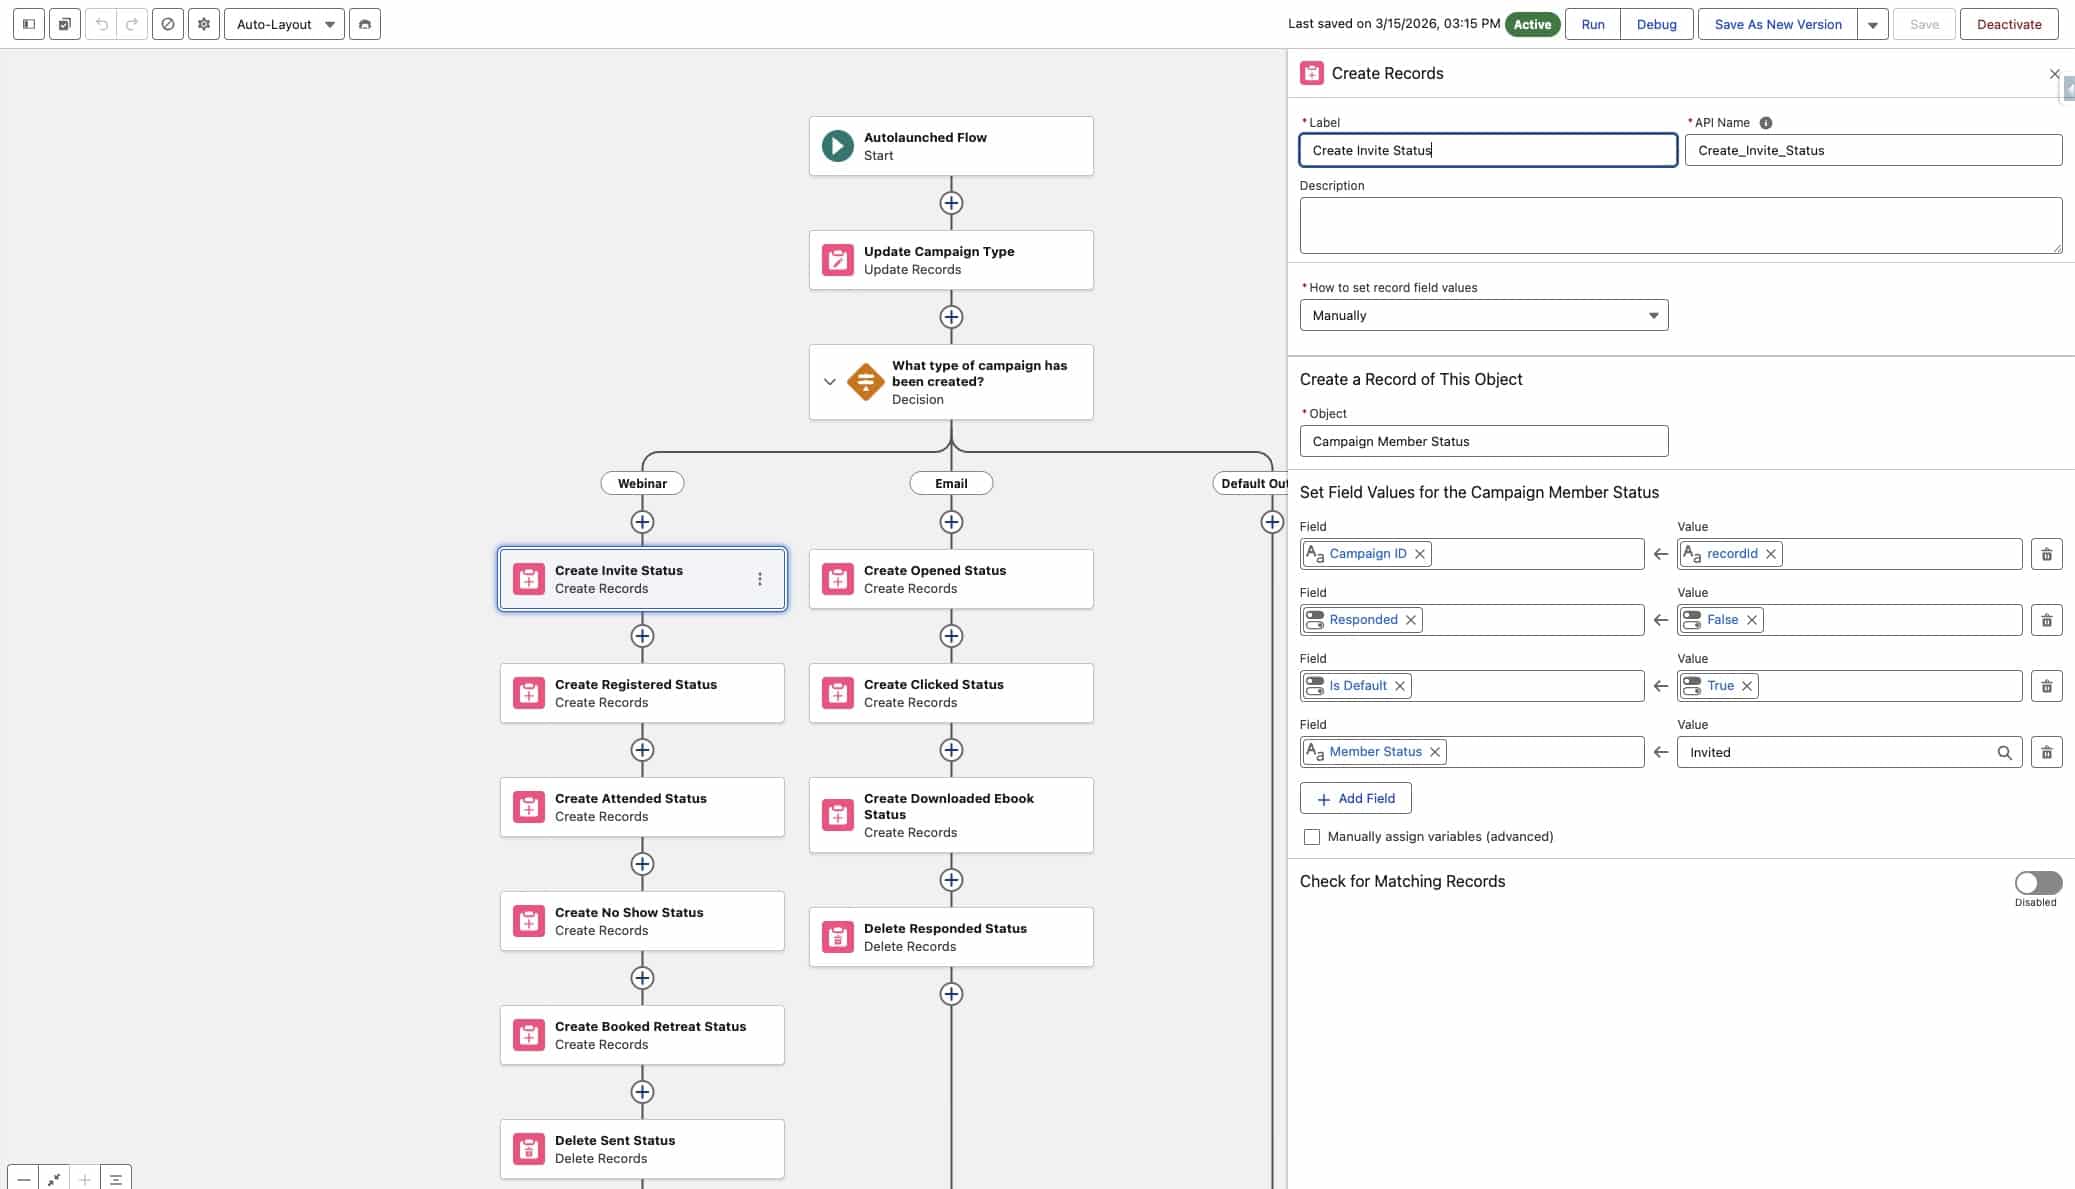
- Create Records. On the Webinar branch, for example, we create the member status records by setting:
- the Campaign ID to the recordId we captured at the start,
- whether the status is a Default or Responded status (that’s the checkbox logic Salesforce uses), and
- the name of the status itself (Invited, Registered, Attended, No Show, Viewed Recording).
Don’t forget to activate the flow once you’ve finished building.

Step 2: Create an Agent Action form the autolaunched flow
Go to Setup > Agentforce Assets > Actions tab > New Agent Action.
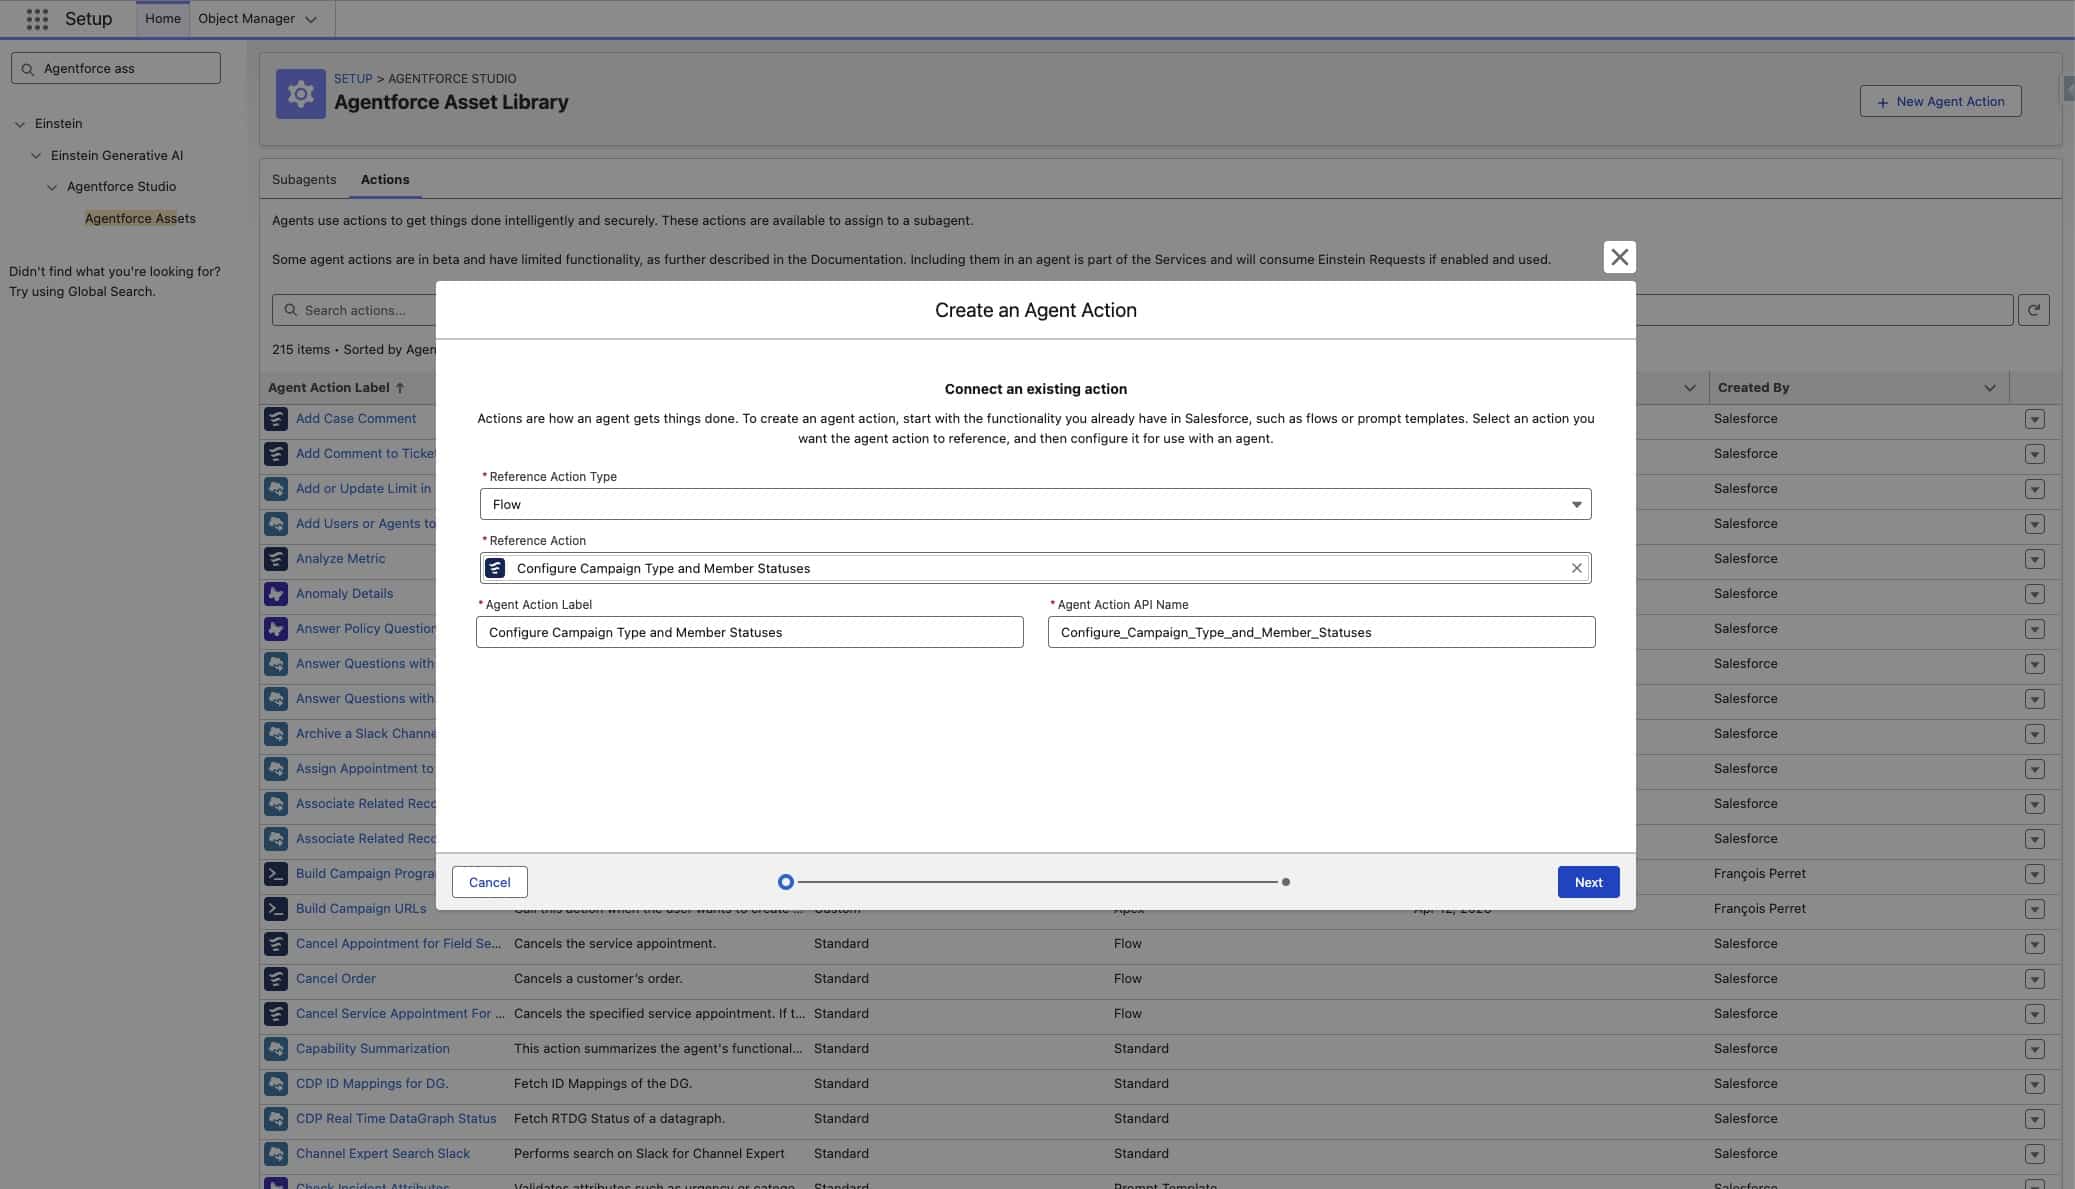
Step 2a: Reference the flow
Set the Reference Action Type to Flow, and in the Reference Action field, look up the flow you just built and select it.
Step 2b: Describe the action and its variables
You’ll now see the action configuration screen. This is where you give the agent enough context to use the action well. There are three things to fill in carefully:
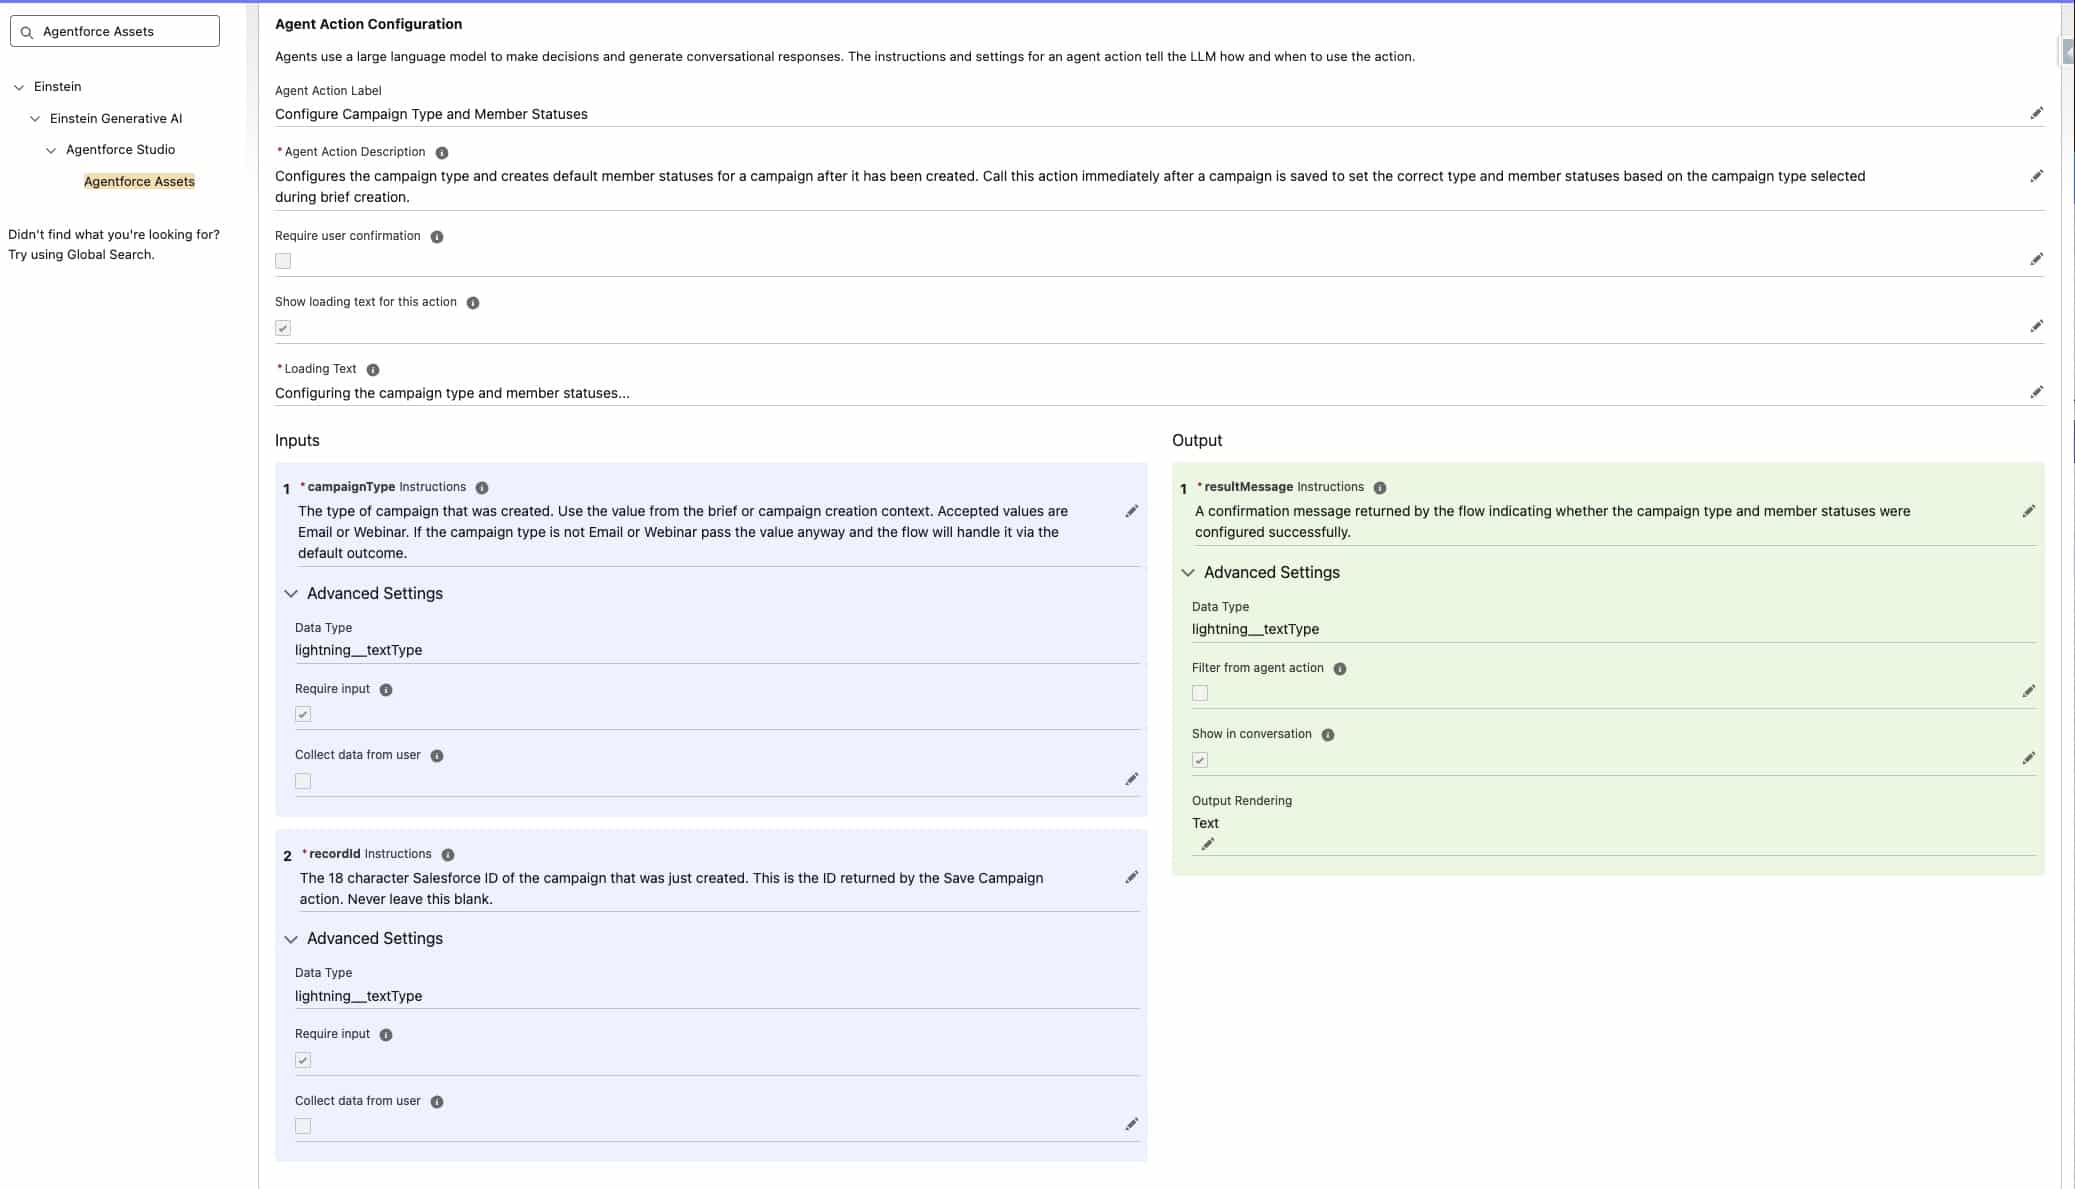
- Overall agent description: what this action does, in plain language. One or two sentences is enough. You can copy this: “Configures the campaign type and creates default member statuses for a campaign after it has been created. Call this action immediately after a campaign is saved to set the correct type and member statuses based on the campaign type selected during brief creation.”
- Loading text: what the agent says to you while the action is running (something like “Configuring campaign type and member statuses…”). you can copy this: “Configuring the campaign type and member statuses…”
- Variable descriptions: on the left, in the blue section, you’ll see the two input variables (campaignType, recordId). On the right, in the green section, the output variable (resultMessage). Each one needs a description so the agent knows what to put in and what to expect out.
- campaignType description: “The type of campaign that was created. Use the value from the brief or campaign creation context. Accepted values are Email or Webinar. If the campaign type is not Email or Webinar pass the value anyway and the flow will handle it via the default outcome.”
- recordId description: “The 18 character Salesforce ID of the campaign that was just created. This is the ID returned by the Save Campaign action. Never leave this blank.”
- resultMessage description: “A confirmation message returned by the flow indicating whether the campaign type and member statuses were configured successfully.”
The variable descriptions matter more than people realise. They’re how the agent decides what counts as a valid campaignType or how to source a recordId. Write them as if you’re briefing a new colleague. See below for the complete setup and text.
Step 3: Add instructions and the action to the Campaign Planning topic
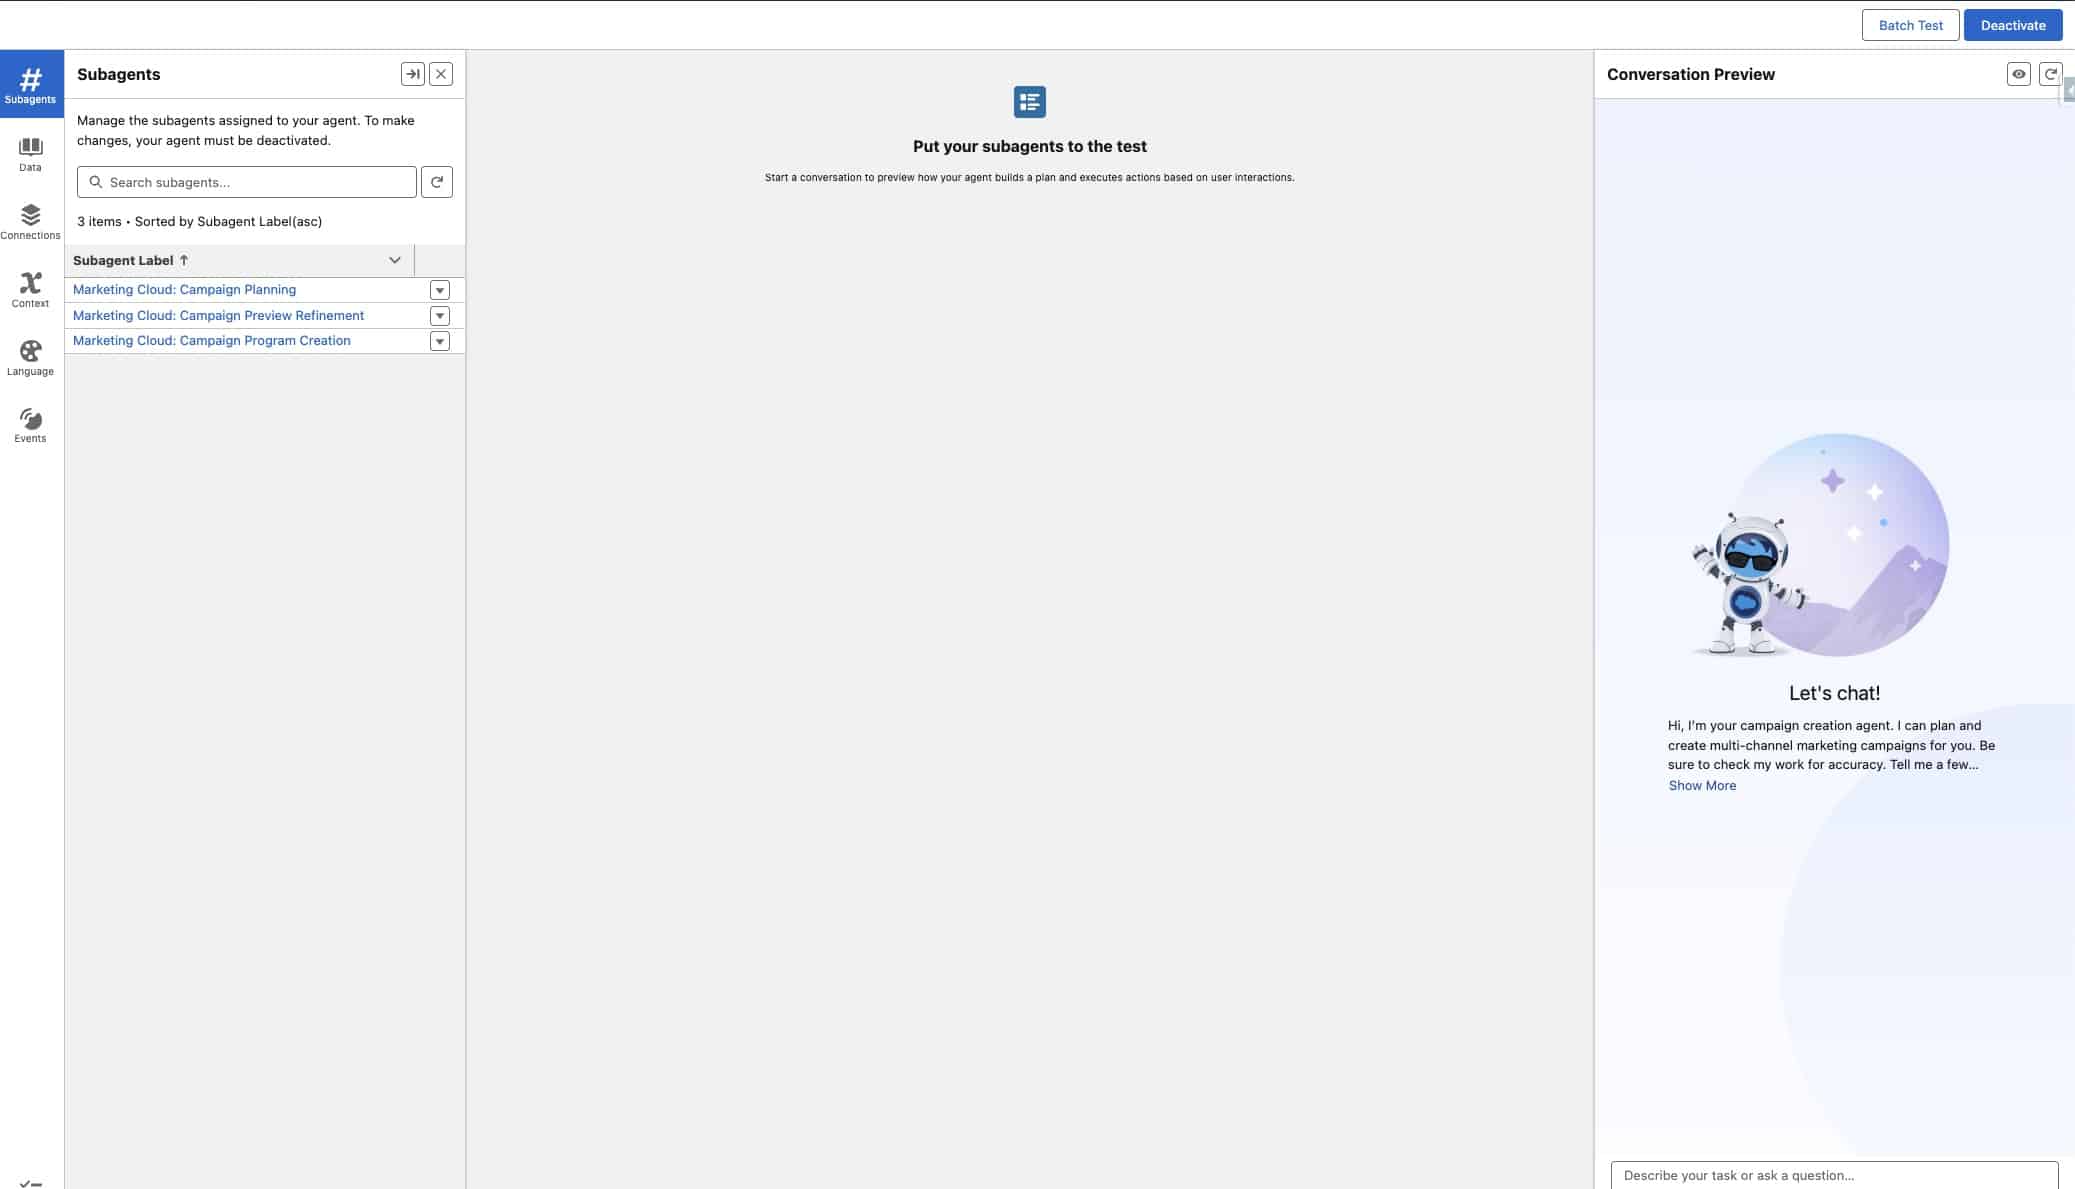
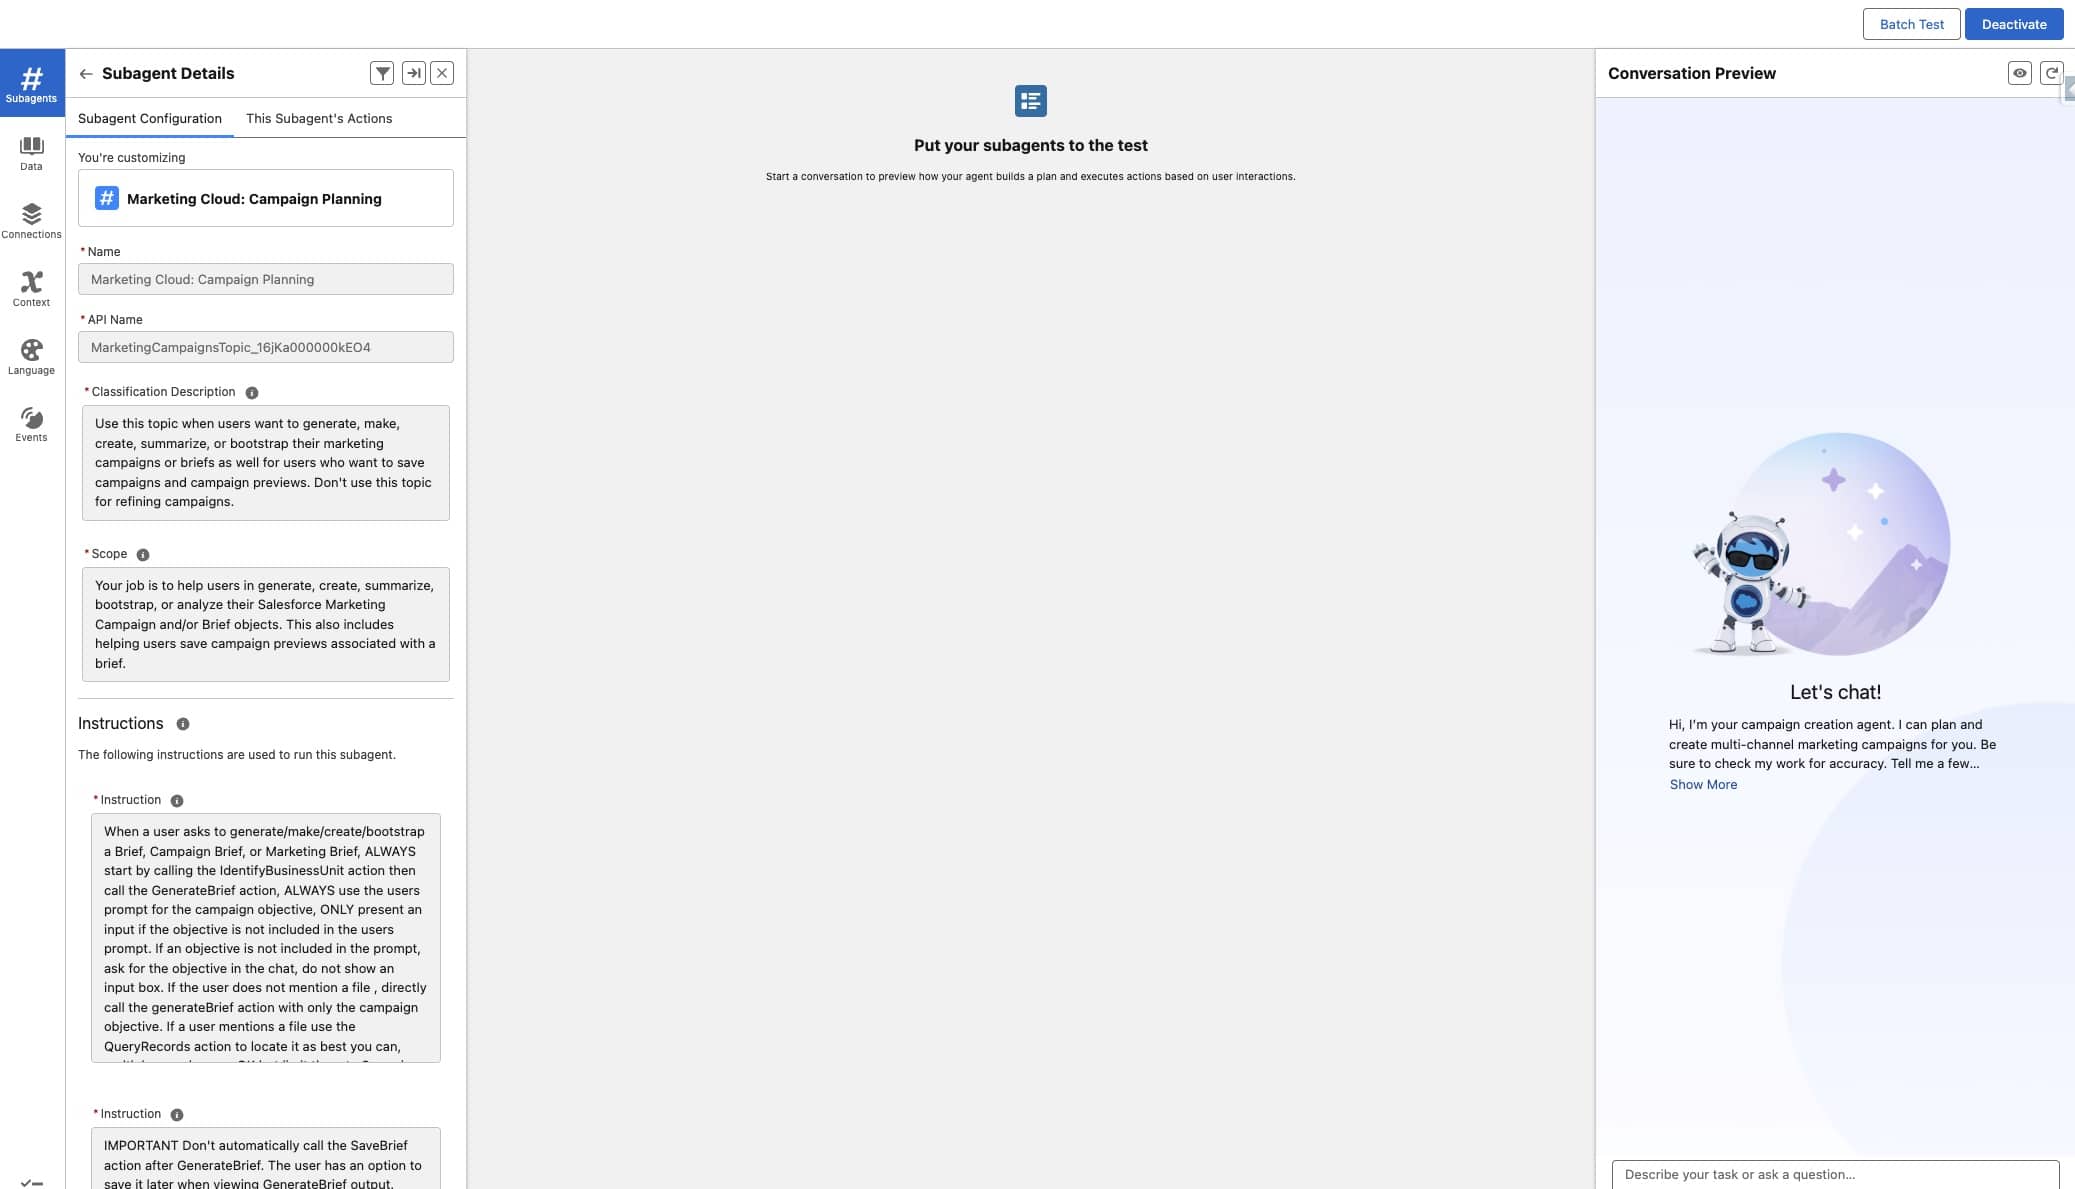
Go to Setup > Search for Agentforce Agents > Open your Campaign Creation agent and deactivate it, you can’t edit topics on an active agent. Then click into the topic Marketing Cloud: Campaign Planning.
Under the Subagent Configuration section, scroll to the bottom of the instructions.
A tip while you’re there: read the existing instructions and the actions already attached to this topic. It’s the fastest way to understand how Agentforce works. You will find adding actions, topics and instructions much easier after understanding this.
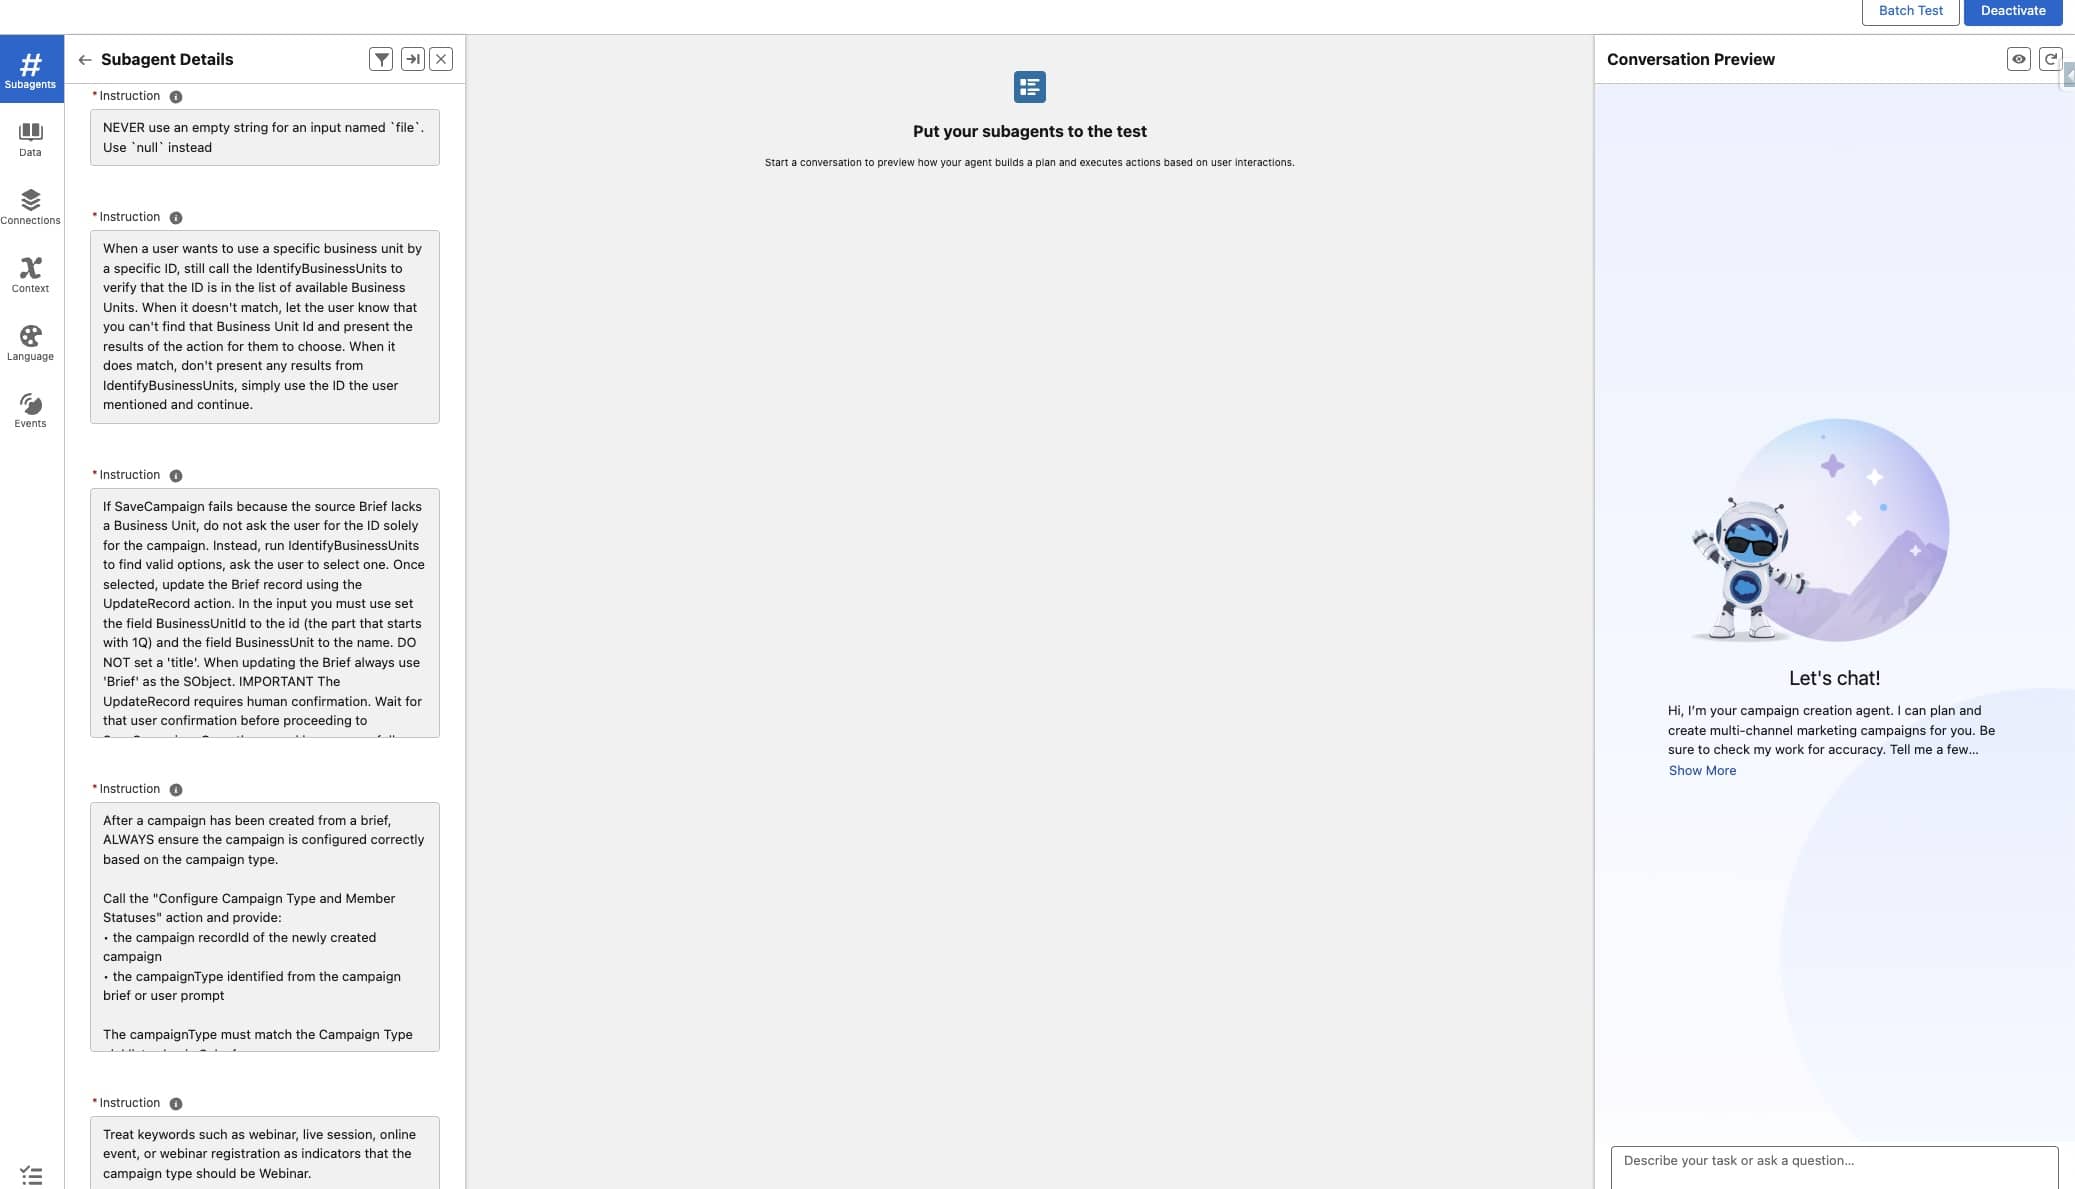
At the bottom of the instructions, add two more:
Instruction 1:
					After a campaign has been created from a brief, ALWAYS ensure the campaign
is configured correctly based on the campaign type.

Call the "Configure Campaign Type and Member Statuses" action and provide:

the campaign recordId of the newly created campaign
the campaignType identified from the campaign brief or user prompt

The campaignType must match the Campaign Type picklist value in Salesforce.

Examples of campaignType values include: Webinar, Email

The flow will update the Campaign Type and automatically create or update
the appropriate Campaign Member Statuses for that campaign type.
Instruction 2:
					Treat keywords such as webinar, live session, online event, or
webinar registration as indicators that the campaign type should be Webinar.
If your flow supports more campaign types, extend these instructions with equivalent keyword guidance for each type. The rule of thumb is the same one that applies to prompting any LLM: the more context you give, the better it performs. Think of it as briefing a capable colleague who has no access to your assumptions.
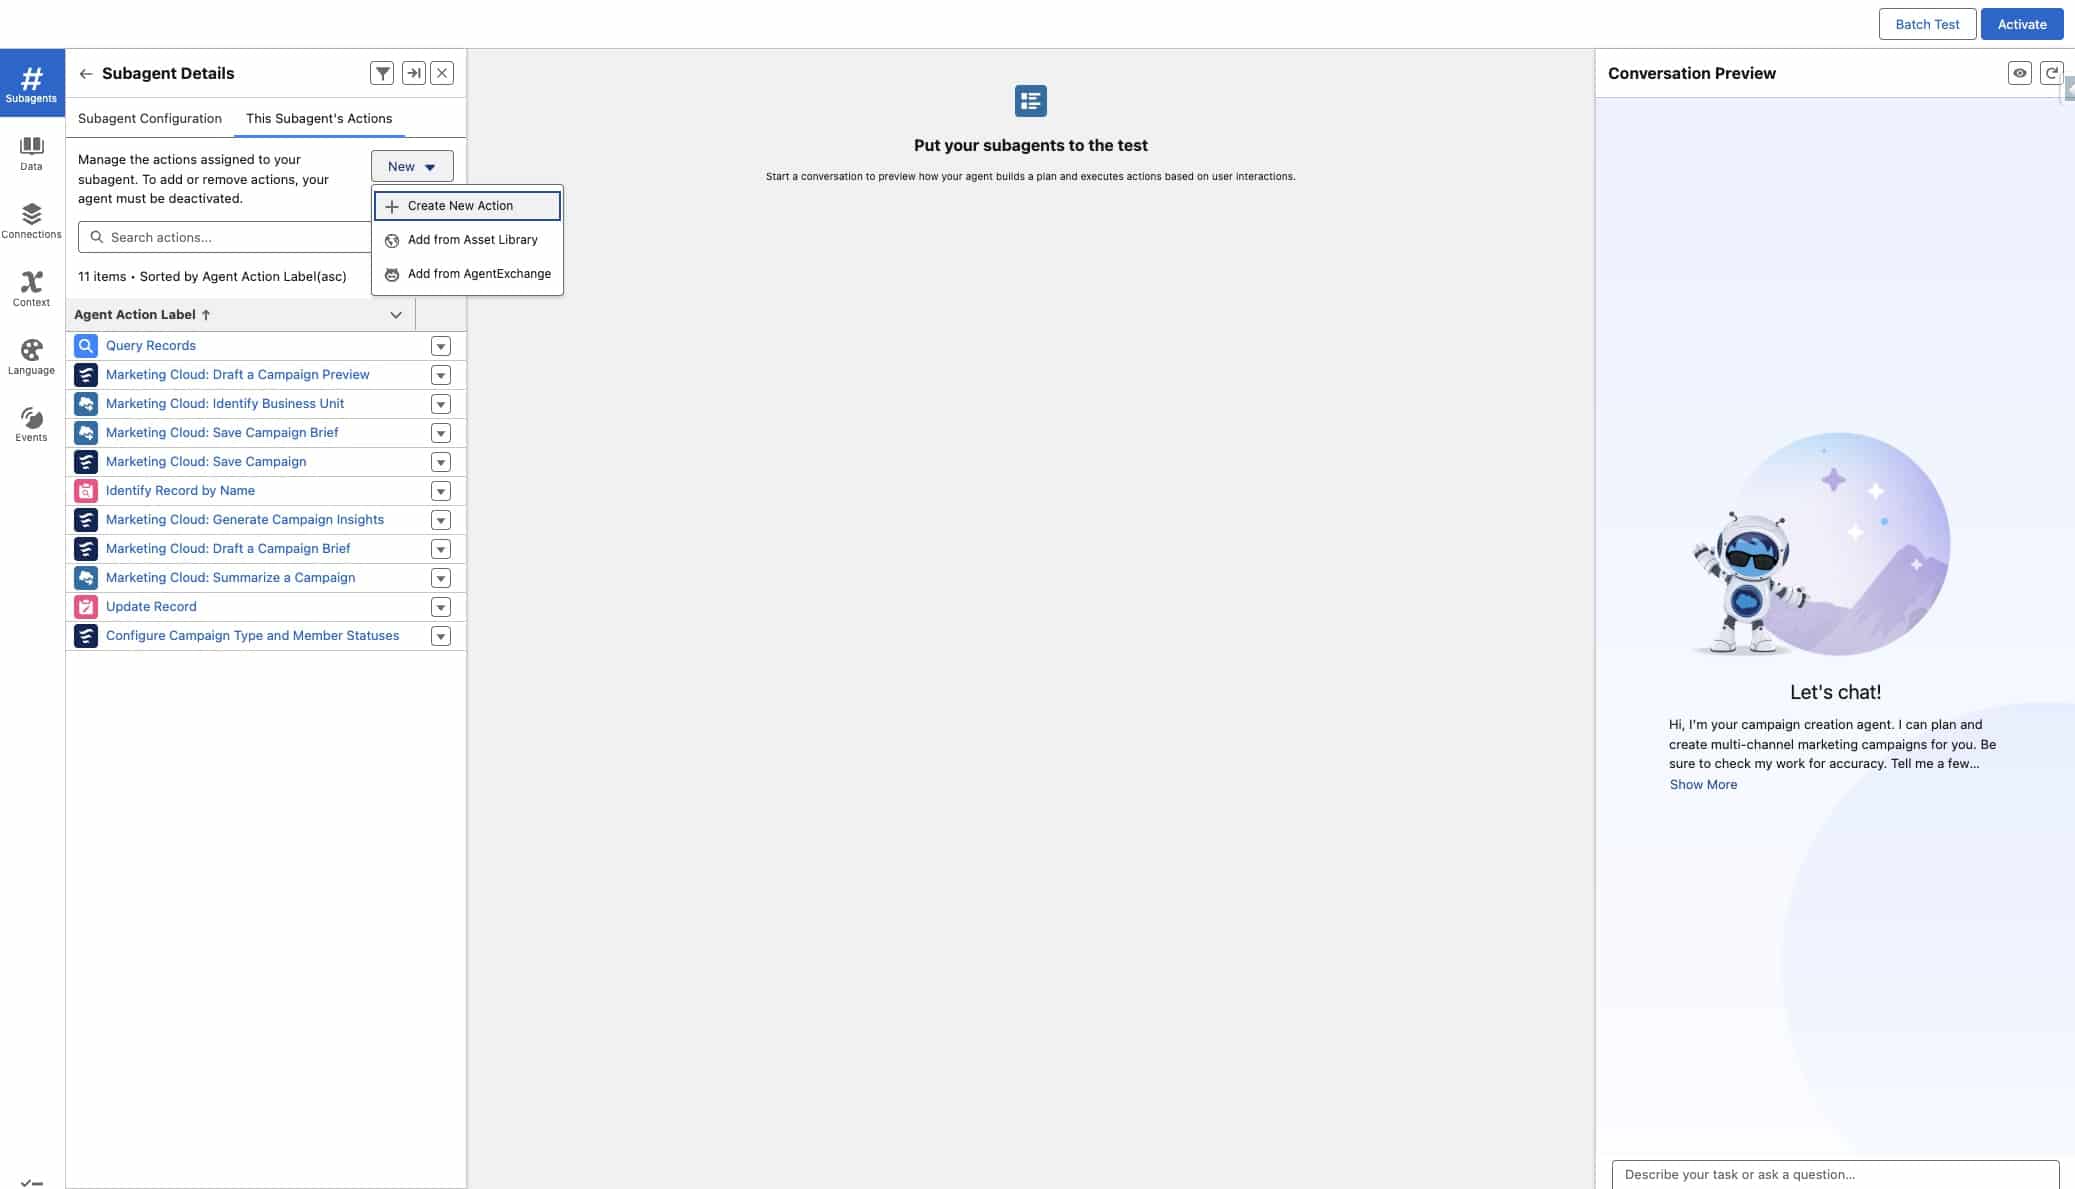
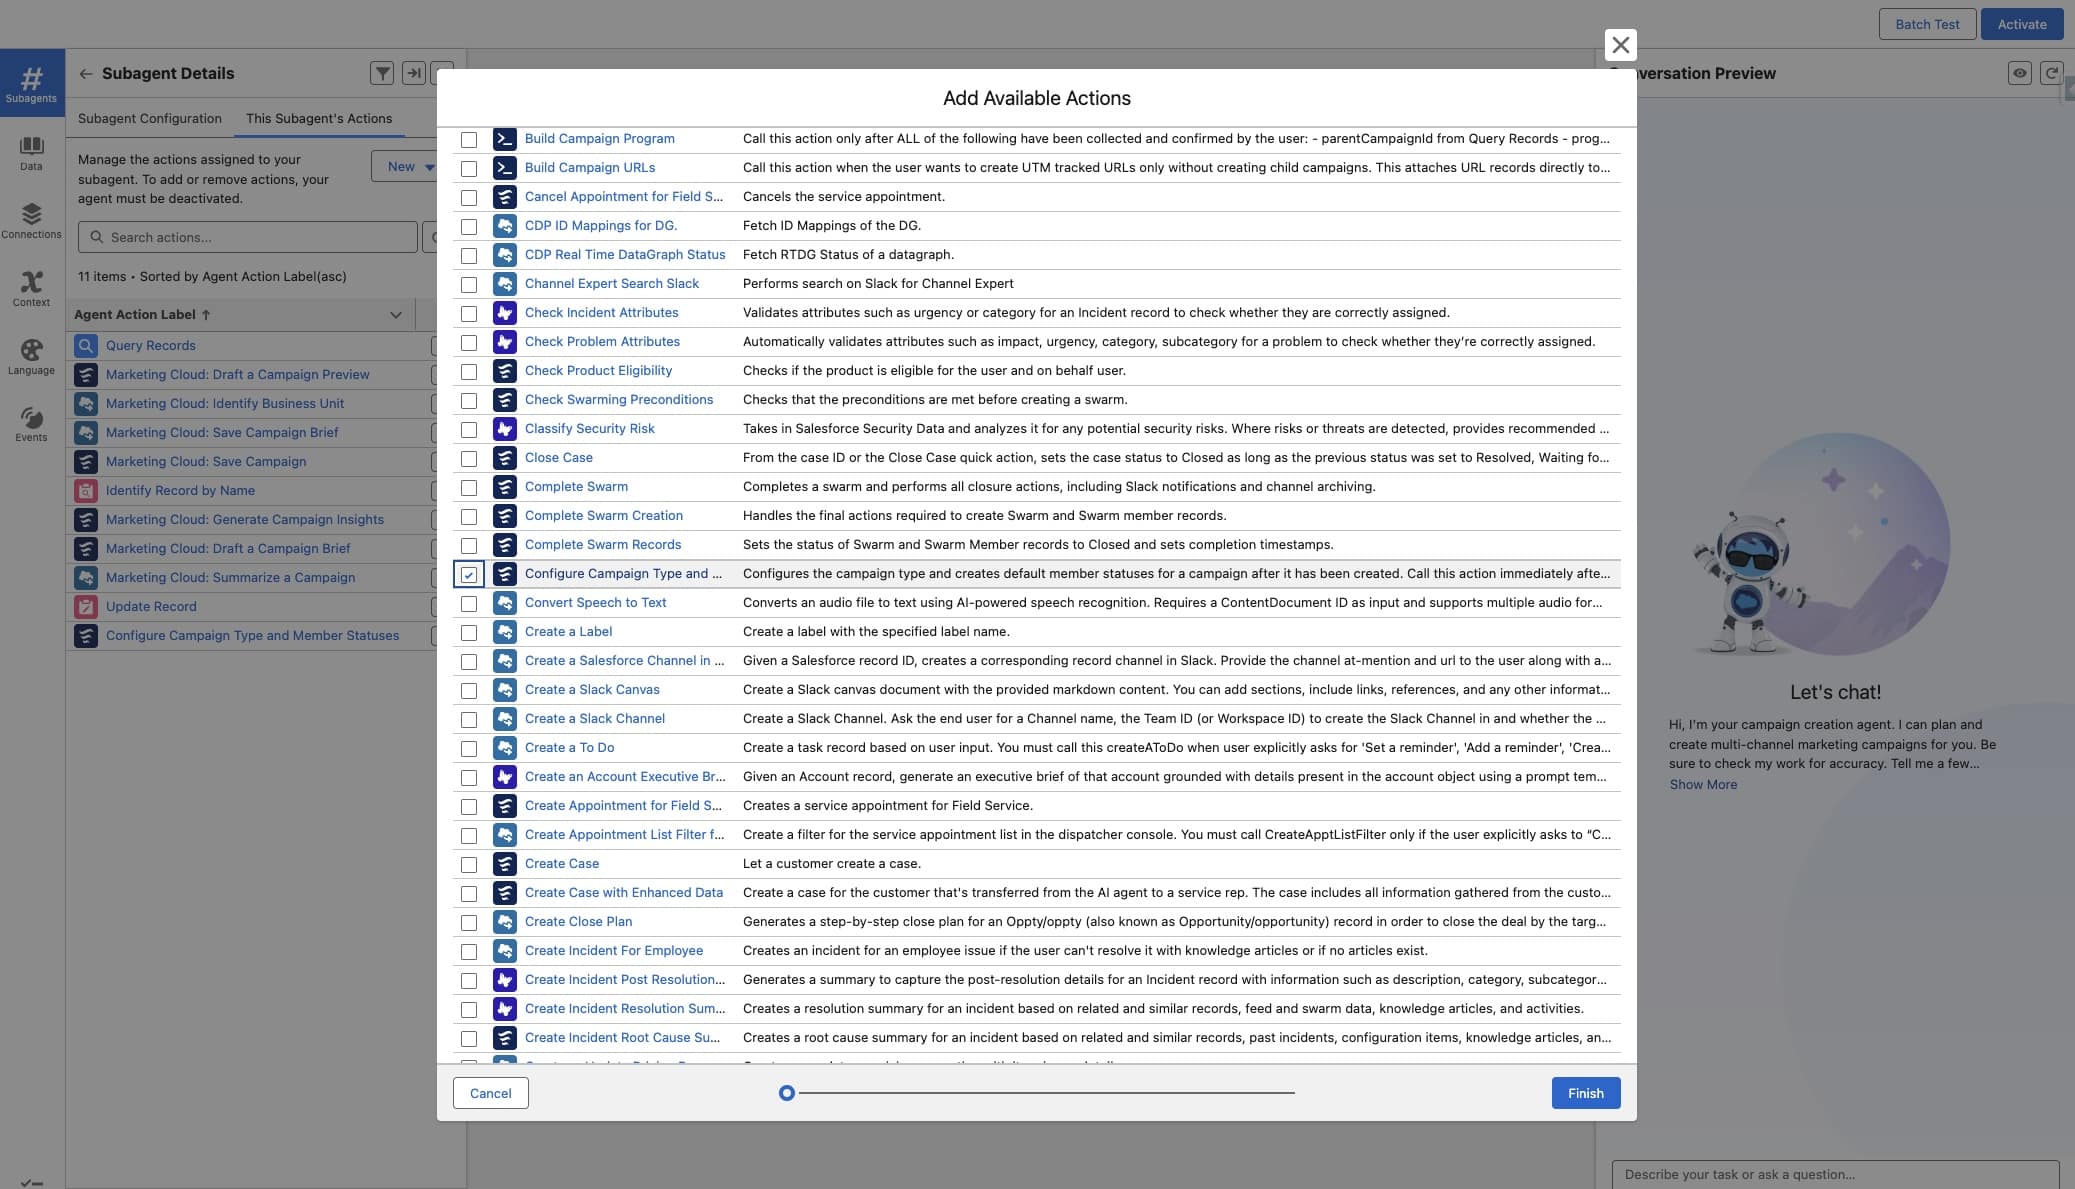
Step 4: Attach the action to the topic
Still inside the Campaign Planning topic, go to This Subagent’s Actions and click New > Add from Asset Library. Find the flow action you created in Step 2 — Configure Campaign Type and Member Status — and add it in.
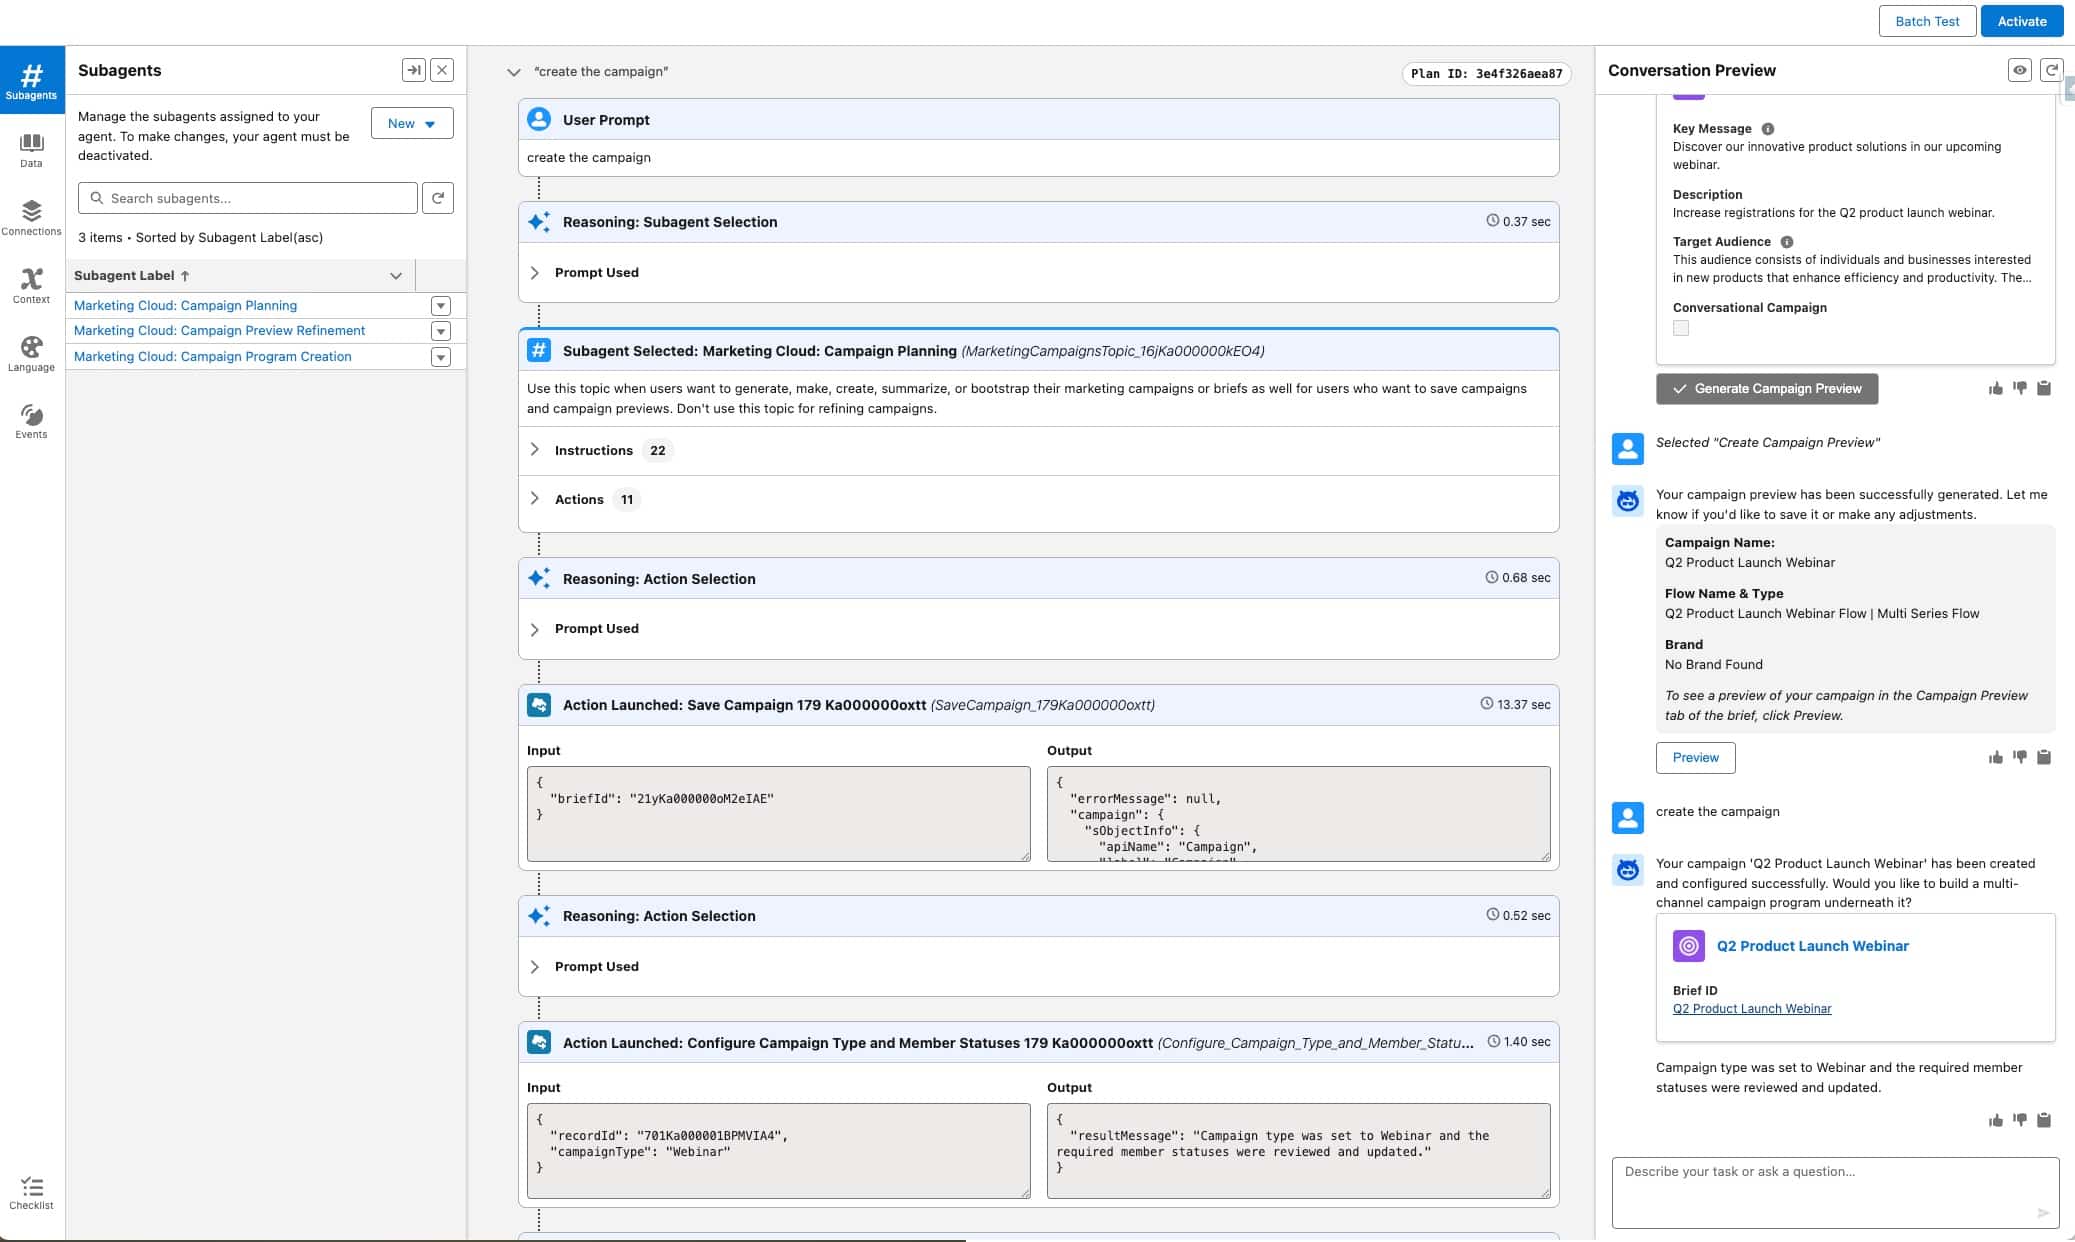
Step 5: Test, then reactivate. That’s the build. Time to see it work.
Create a campaign from a brief, something like “Create a webinar campaign brief for our Q2 product launch, registration open until 30 April”, and watch what the agent does. The test environment shows you, in the middle console, exactly which instructions and actions Agentforce is calling at each step. That panel is where you troubleshoot: if the agent skips the action, your instructions probably need a sharper keyword; if the flow errors, your variables or decision logic need a look. You can see in the screenshot below how the agent called the ‘Configure Campaign Type and Member Statuses Action” and confirmed that my campaign was configured as a Type Webinar.
Once you’re happy with the behaviour, don’t forget to reactivate the agent.
Final Thoughts
The point of this build isn’t really about member statuses. It’s about what happens once you start recognising the small, repetitive setup tasks you do on every new campaign; and teaching your agent to do them for you.
The campaign creation agent we installed out of the box is a starting point. The value comes from extending it with the patterns that are specific to how you run campaigns: the types you actually use, the status language your team agrees on, the conventions your reporting depends on. Every one of those is a small flow-and-instruction pair away from being automatic.
A few things I’d keep in mind as you go further:
- Start with the automations you already do manually. If you’re reaching for the same setup every time, that’s a candidate. If you’re not sure whether to automate it, you probably don’t do it often enough to bother.
- Write your instructions like you’re briefing a colleague. Vague instructions produce vague behaviour. Specific keywords, examples, and edge cases are what make the difference between an agent that works 60% of the time and one you actually trust.
- Test with real briefs, not clean ones. Your actual campaign briefs are messier than the test prompt you’ll be tempted to write. Use the messy ones; that’s where the agent’s reasoning gets stretched.
If you extend the flow with more campaign types, or wire in something adjacent (default campaign owners, naming conventions, reporting folders), I’d love to hear what you built.
Drop it in the Slack community or tag me on LinkedIn – the best ideas in this space are still being shared between practitioners, not written into the docs.
Happy Building!