Over the last few weeks, we’ve discussed how to set up multiple Agents that are quite helpful when it comes to Marketing:
Today, I would like to share with you how you can set up and make use of the Lead Nurturing Agent. Read along for a step by step guide on how to set this up, or see a Lead Nurturing Agent (triggered by an Inbound Lead Generation) Agent in motion.
Step by Step Guide To Set Up the Agentforce Lead Nurturing Agent
1- Activate Agentforce for Sales
In Setup, search for Agentforce for Sales and click on Lead Nurturing. Make sure that Agentforce is activated, if not follow the instructions to turn it on. Scroll down to Lead Nurturing.
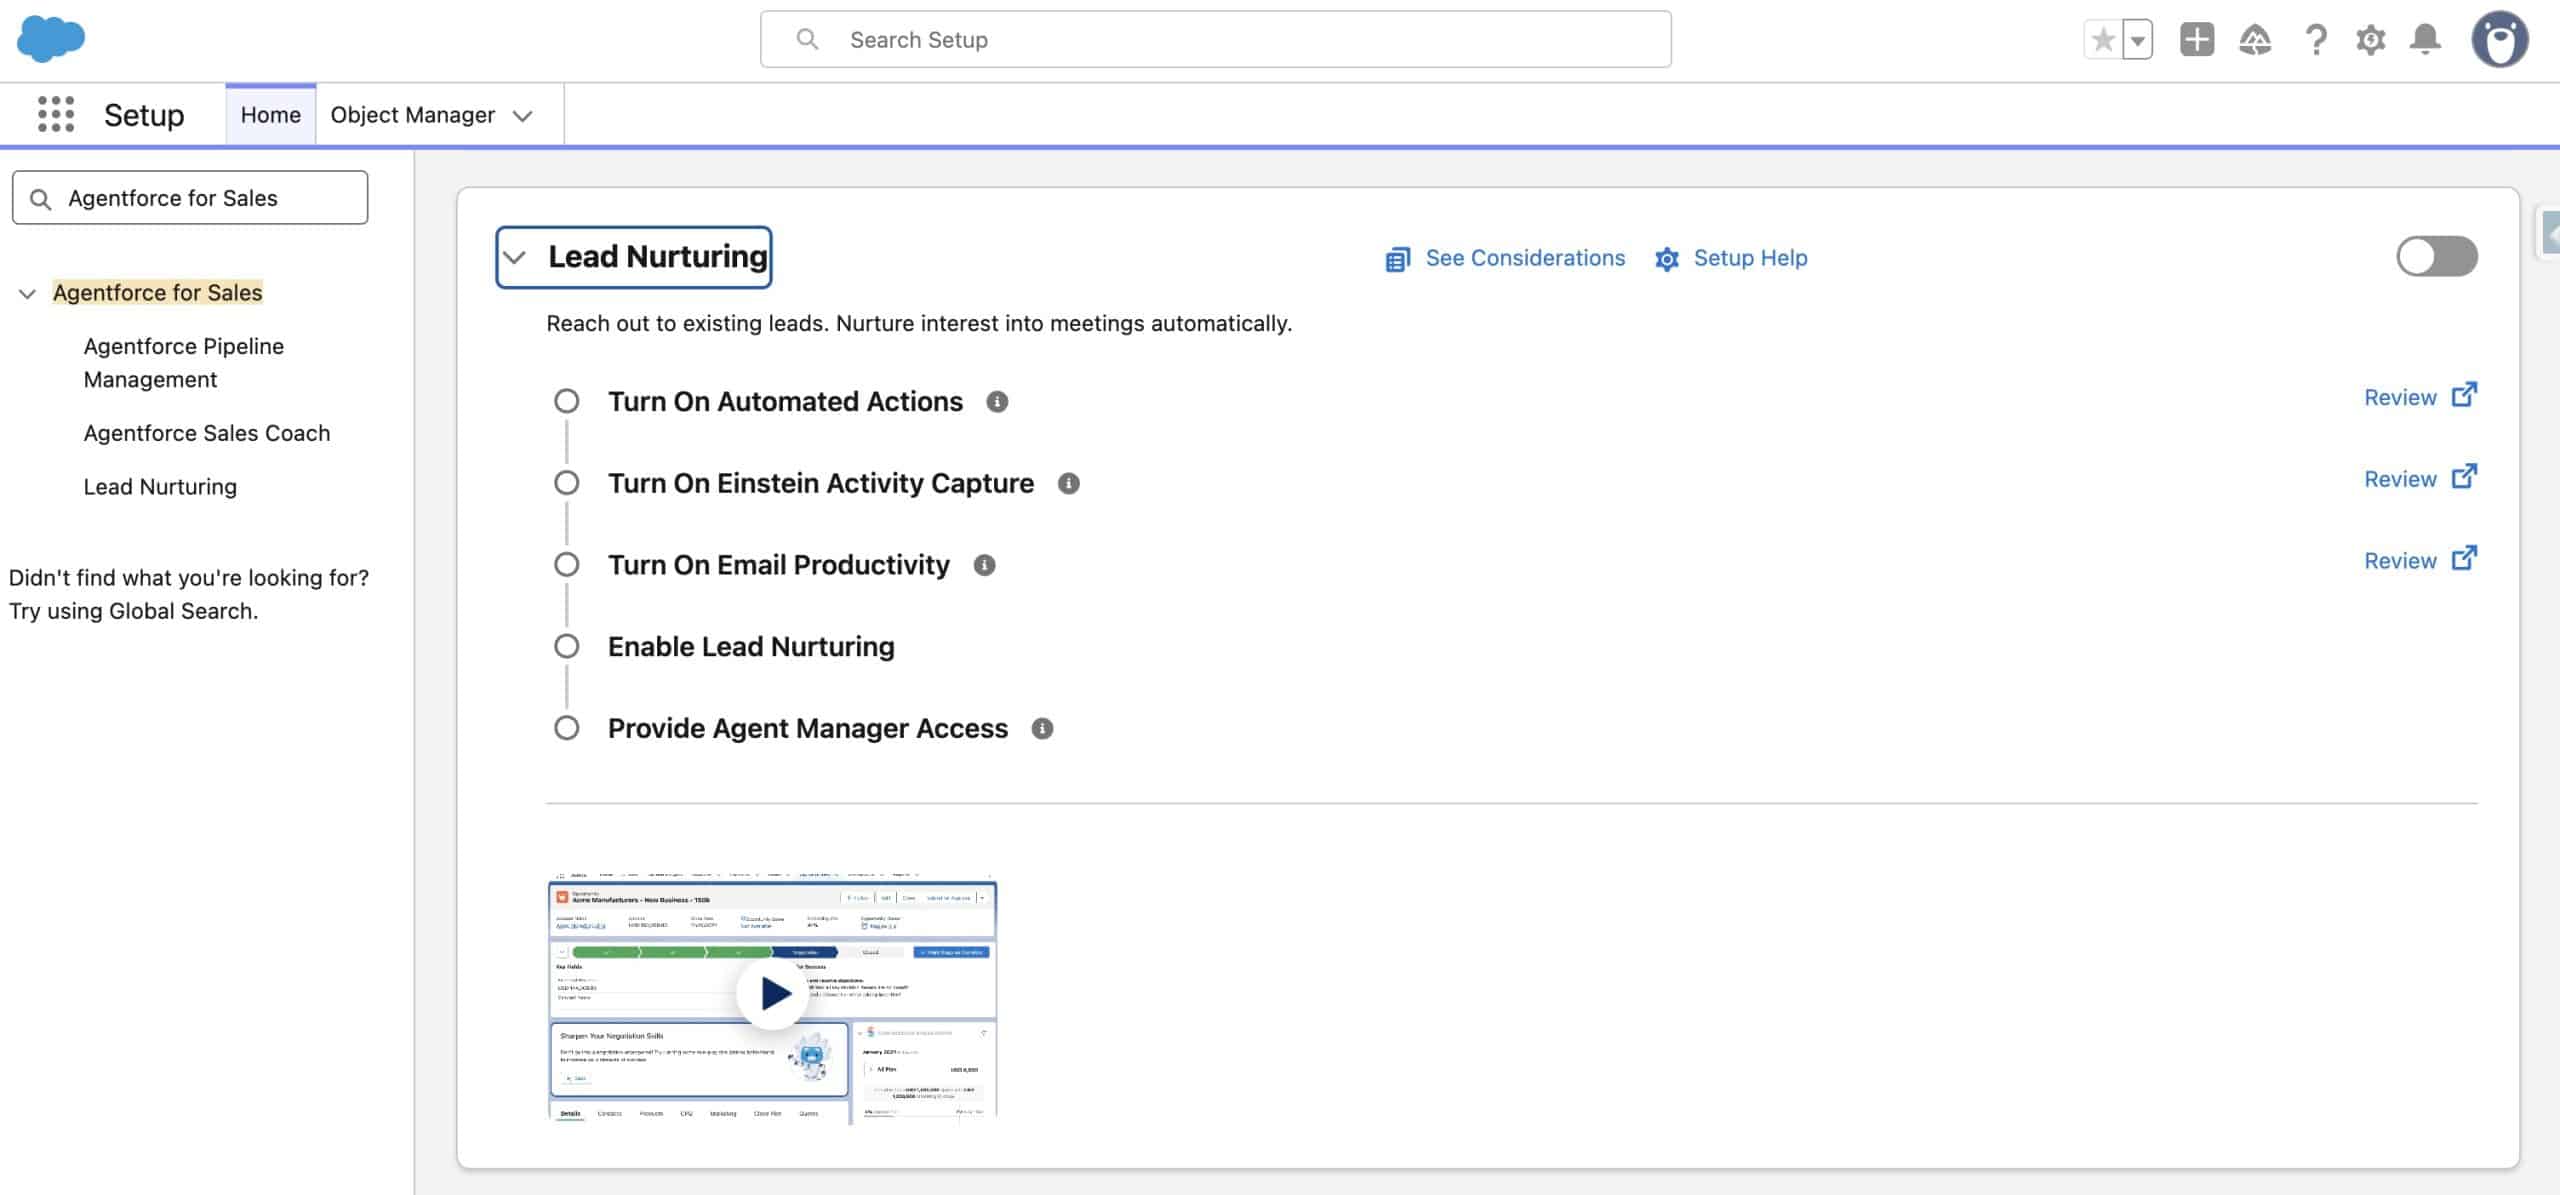
Click on the Toggle on the right to activate Lead Nurturing and click Confirm after reading the Disclaimer about AI. It will take a few minutes before the toggle will be turned on.
2- Optinally give your Sales Users access to the Agent
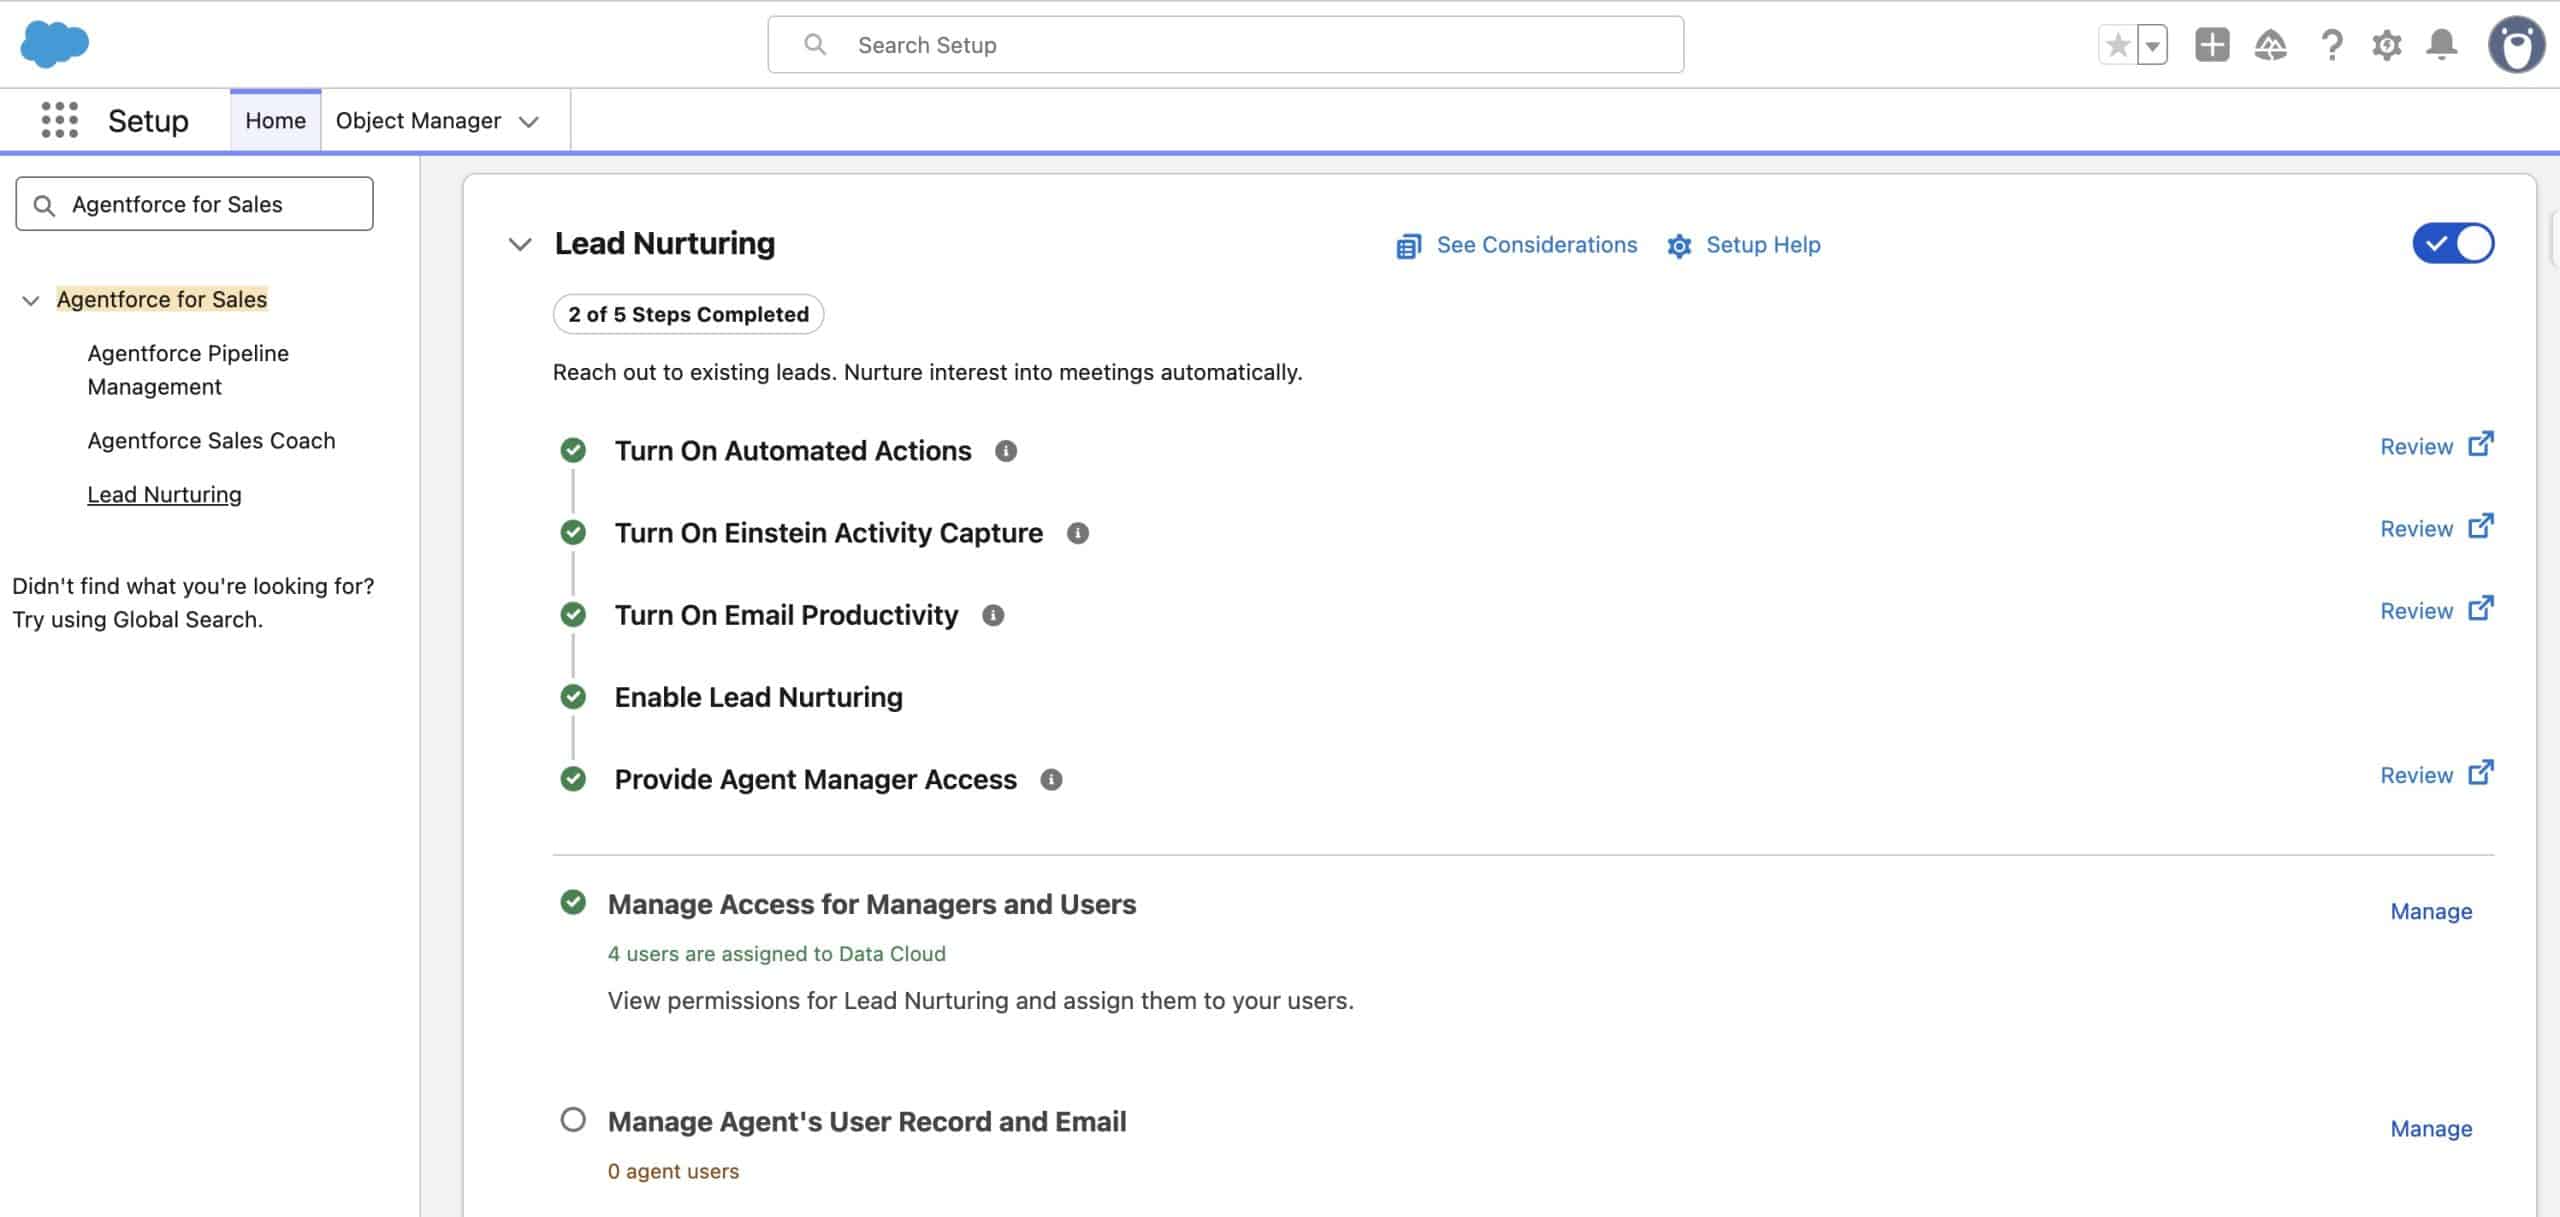
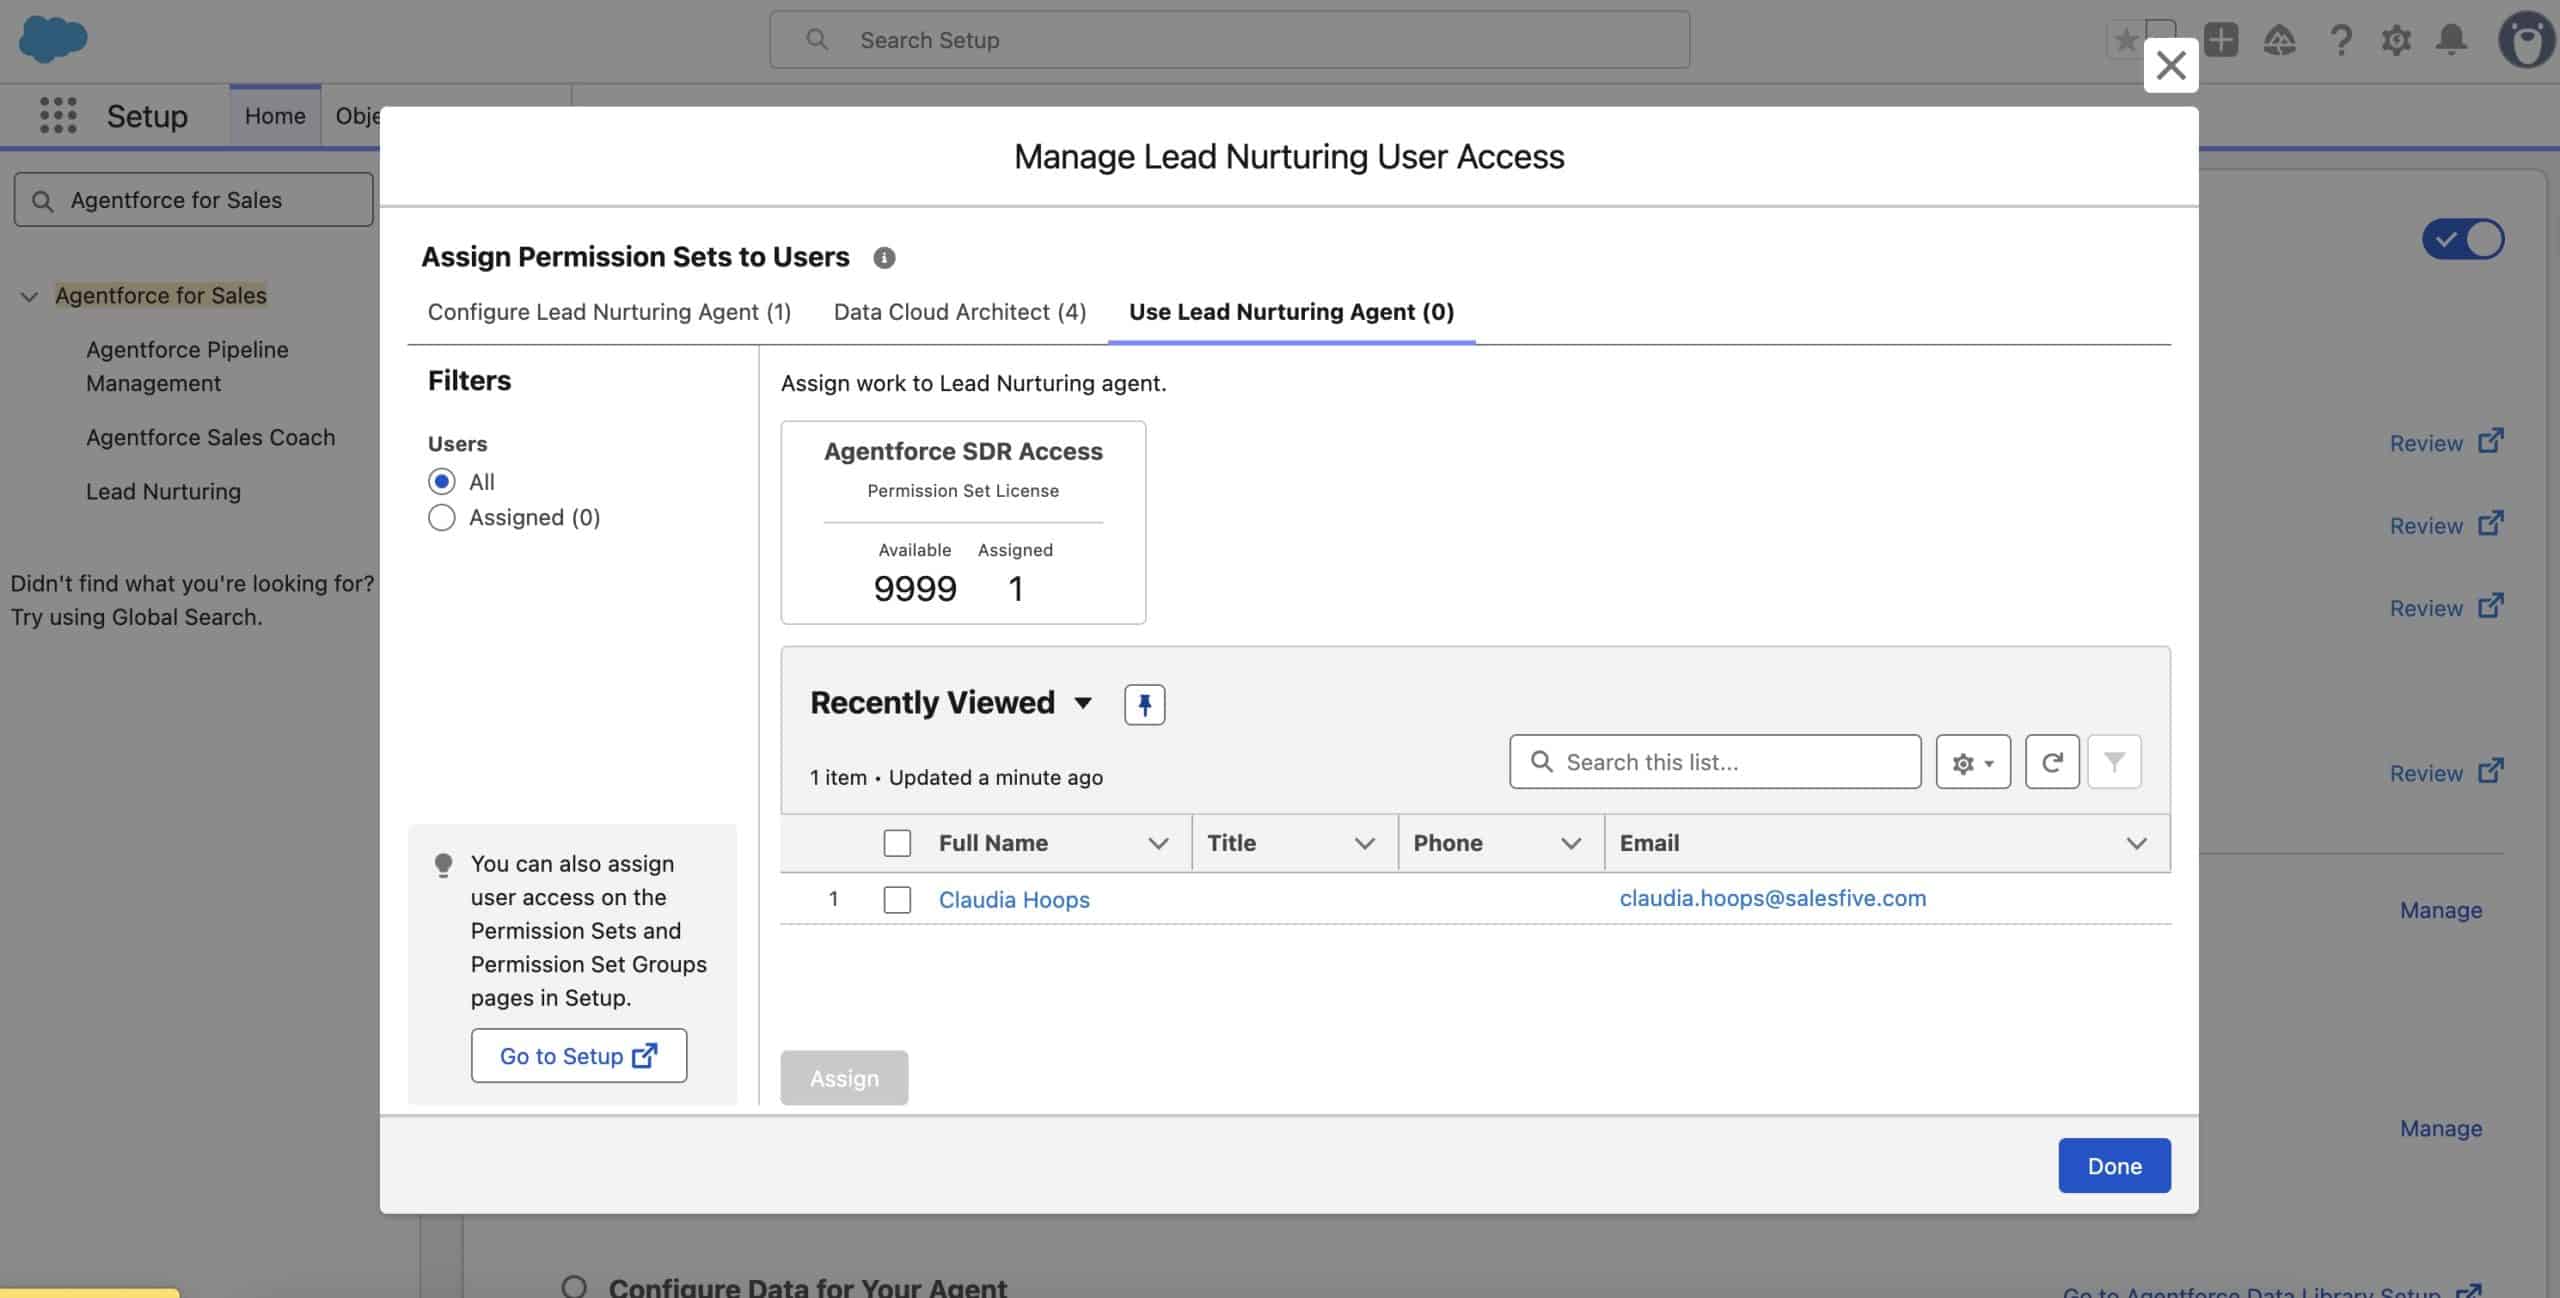
By clicking on ‘Manage‘ on the next step ‘Manage Access for Managers and Users‘ you can assign the ‘Use Lead Nurturing Agent‘ Permission Set to your Sales team for every team member that should get access to the agent.
3- Create an Agent’s User
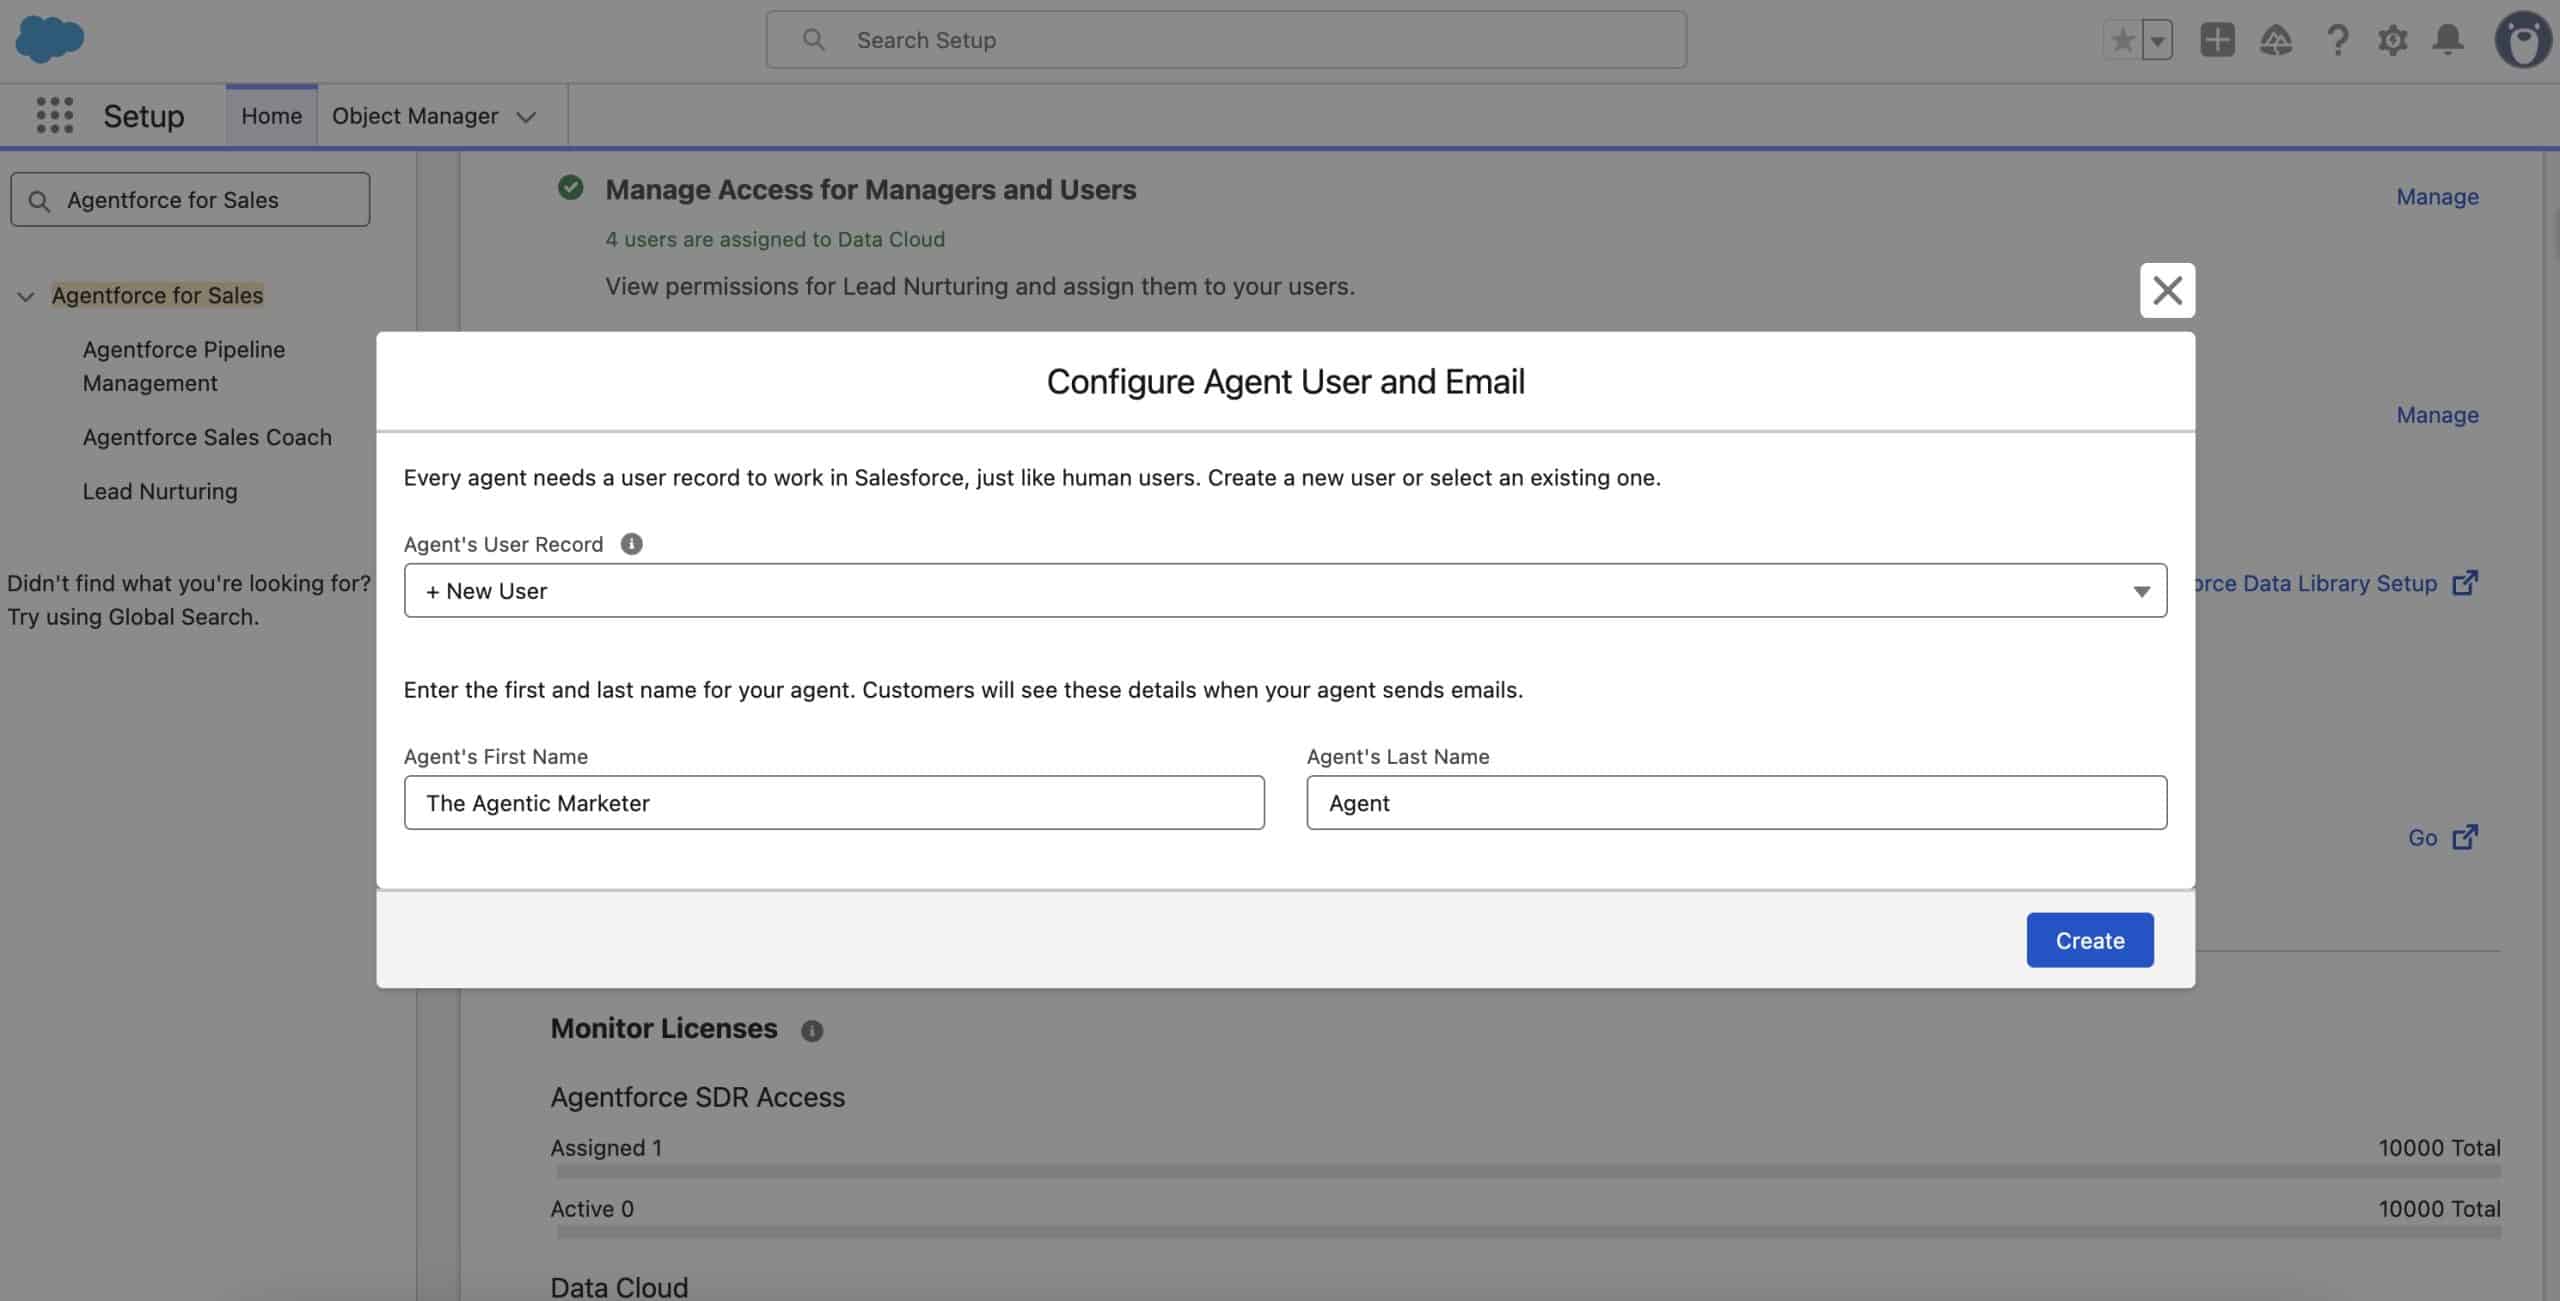
Similar to the Inbound Lead Generation Agent, this Agent also needs an own user in your Salesforce org – after all your Agent belongs to your workforce like any other team member. We will create a new user, by clicking ‘Manage’, next to ‘Manage Agent’s User Record And Email’. In the following pop up click on ‘+New User’, provide a First and Last Name, and click ‘Create‘. It may take several minutes until the new user is created.
4- Add an Inbox to your Agent user
Once your Agent user is created, click ‘Next‘, that will open a new Pop-Up window to connect an Email Account to your Agent’s user that will be used to send out the Lead Nurturing emails.
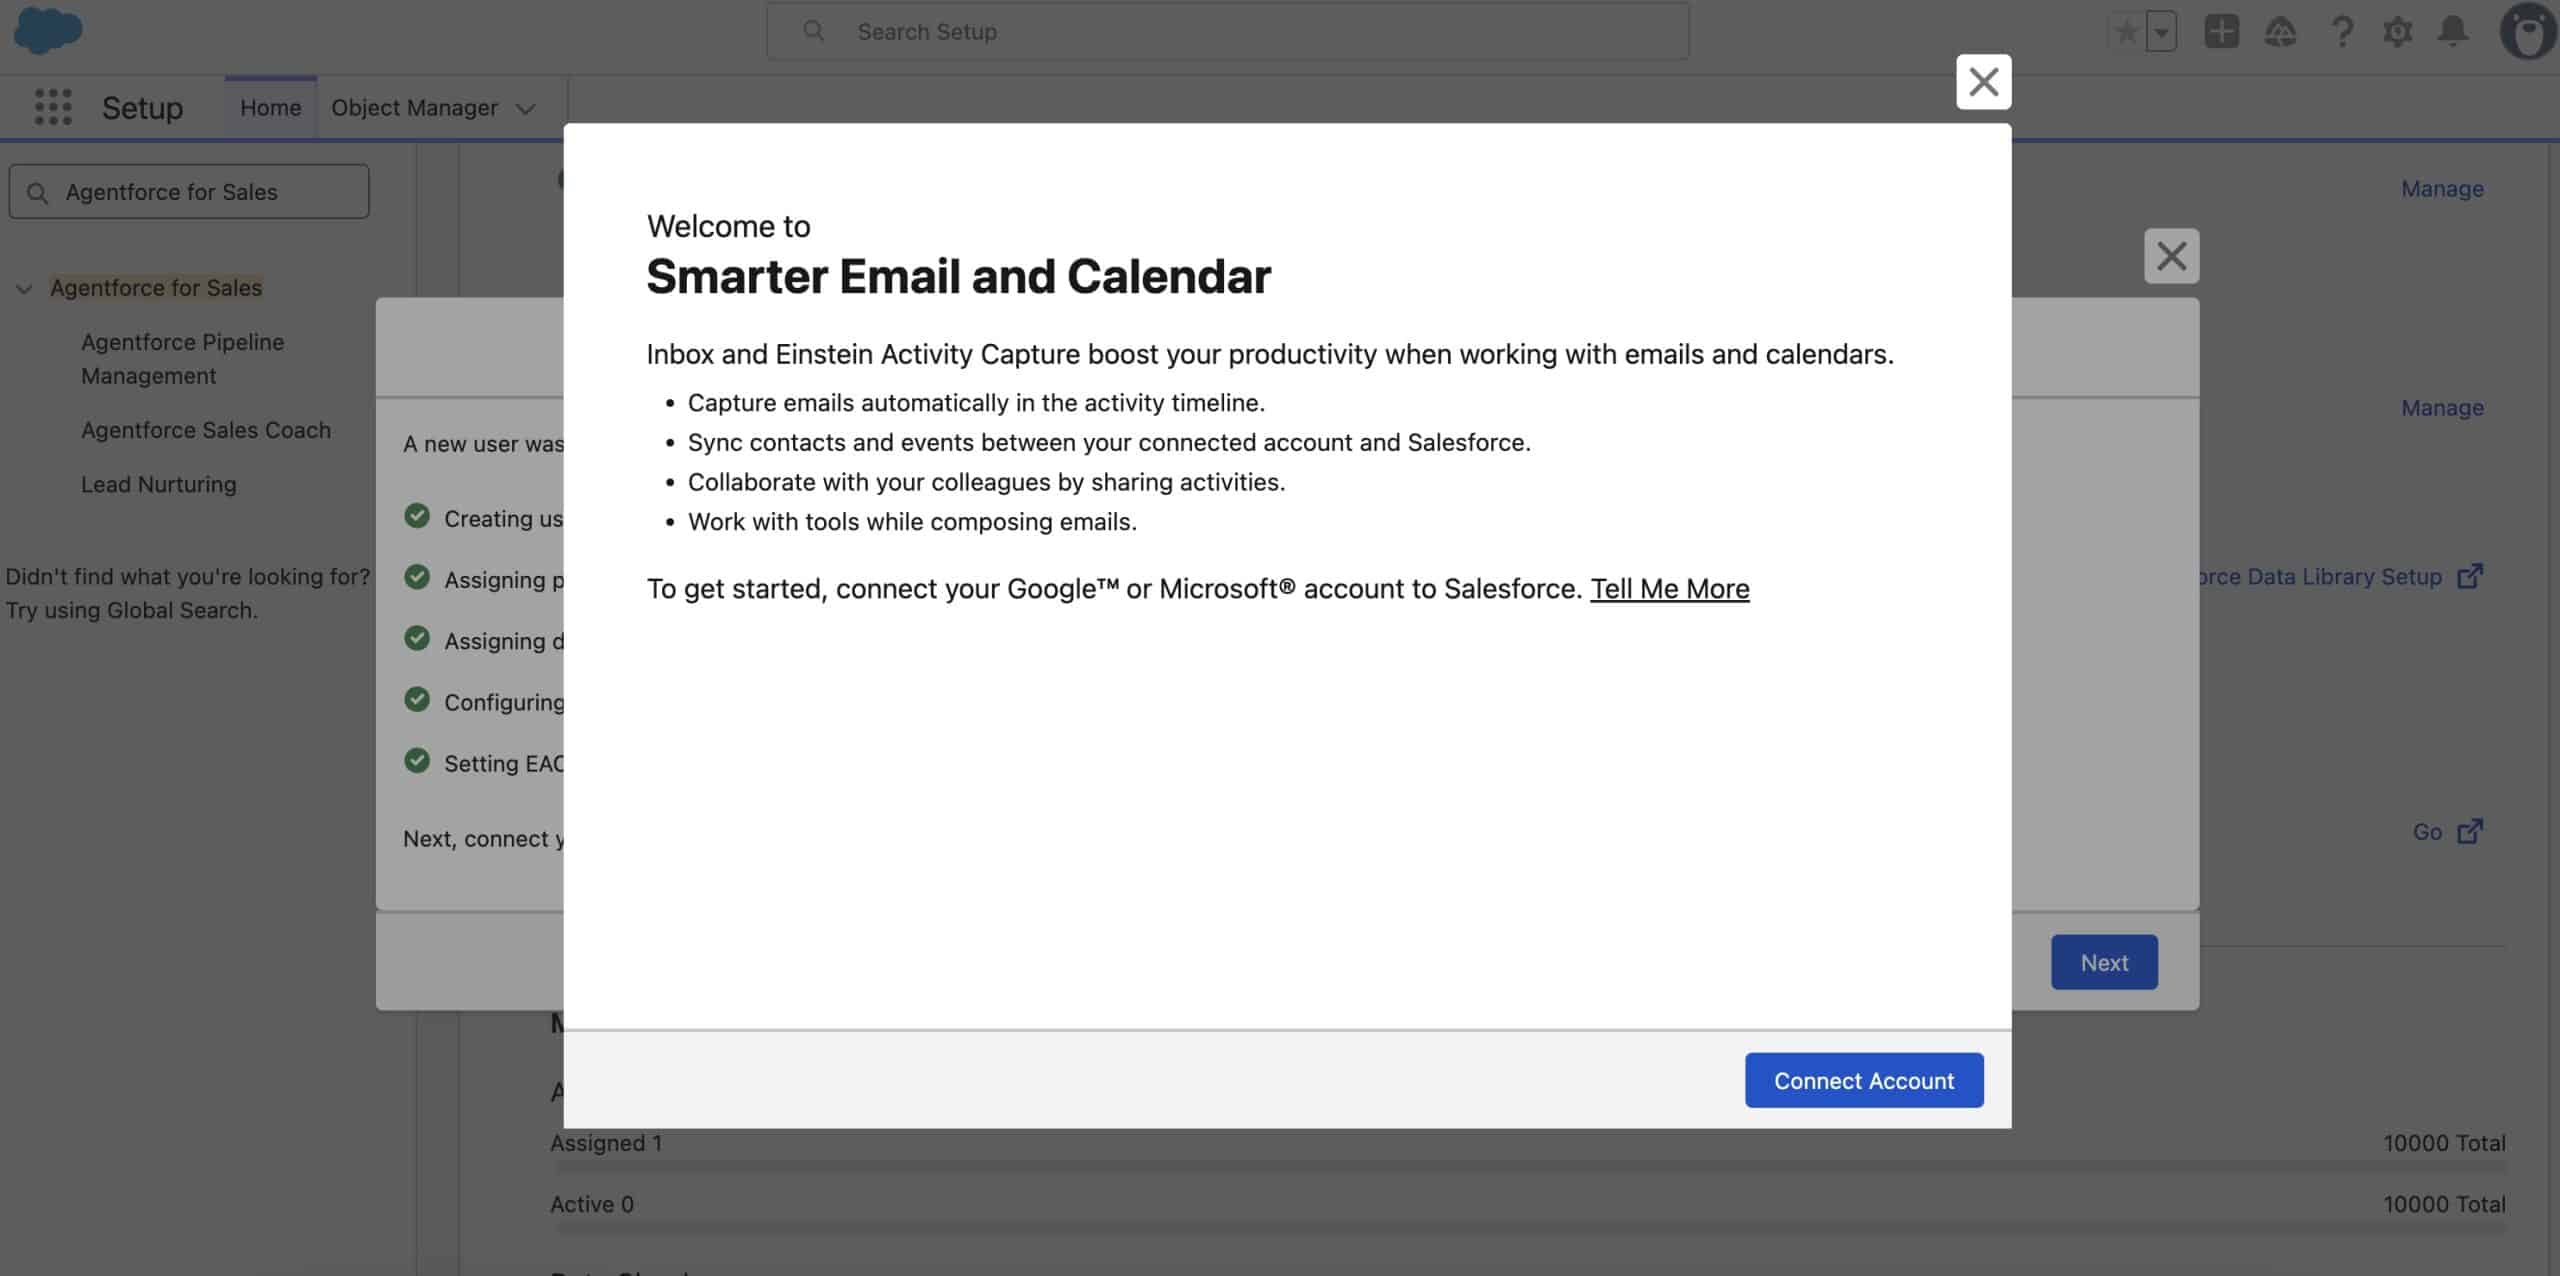
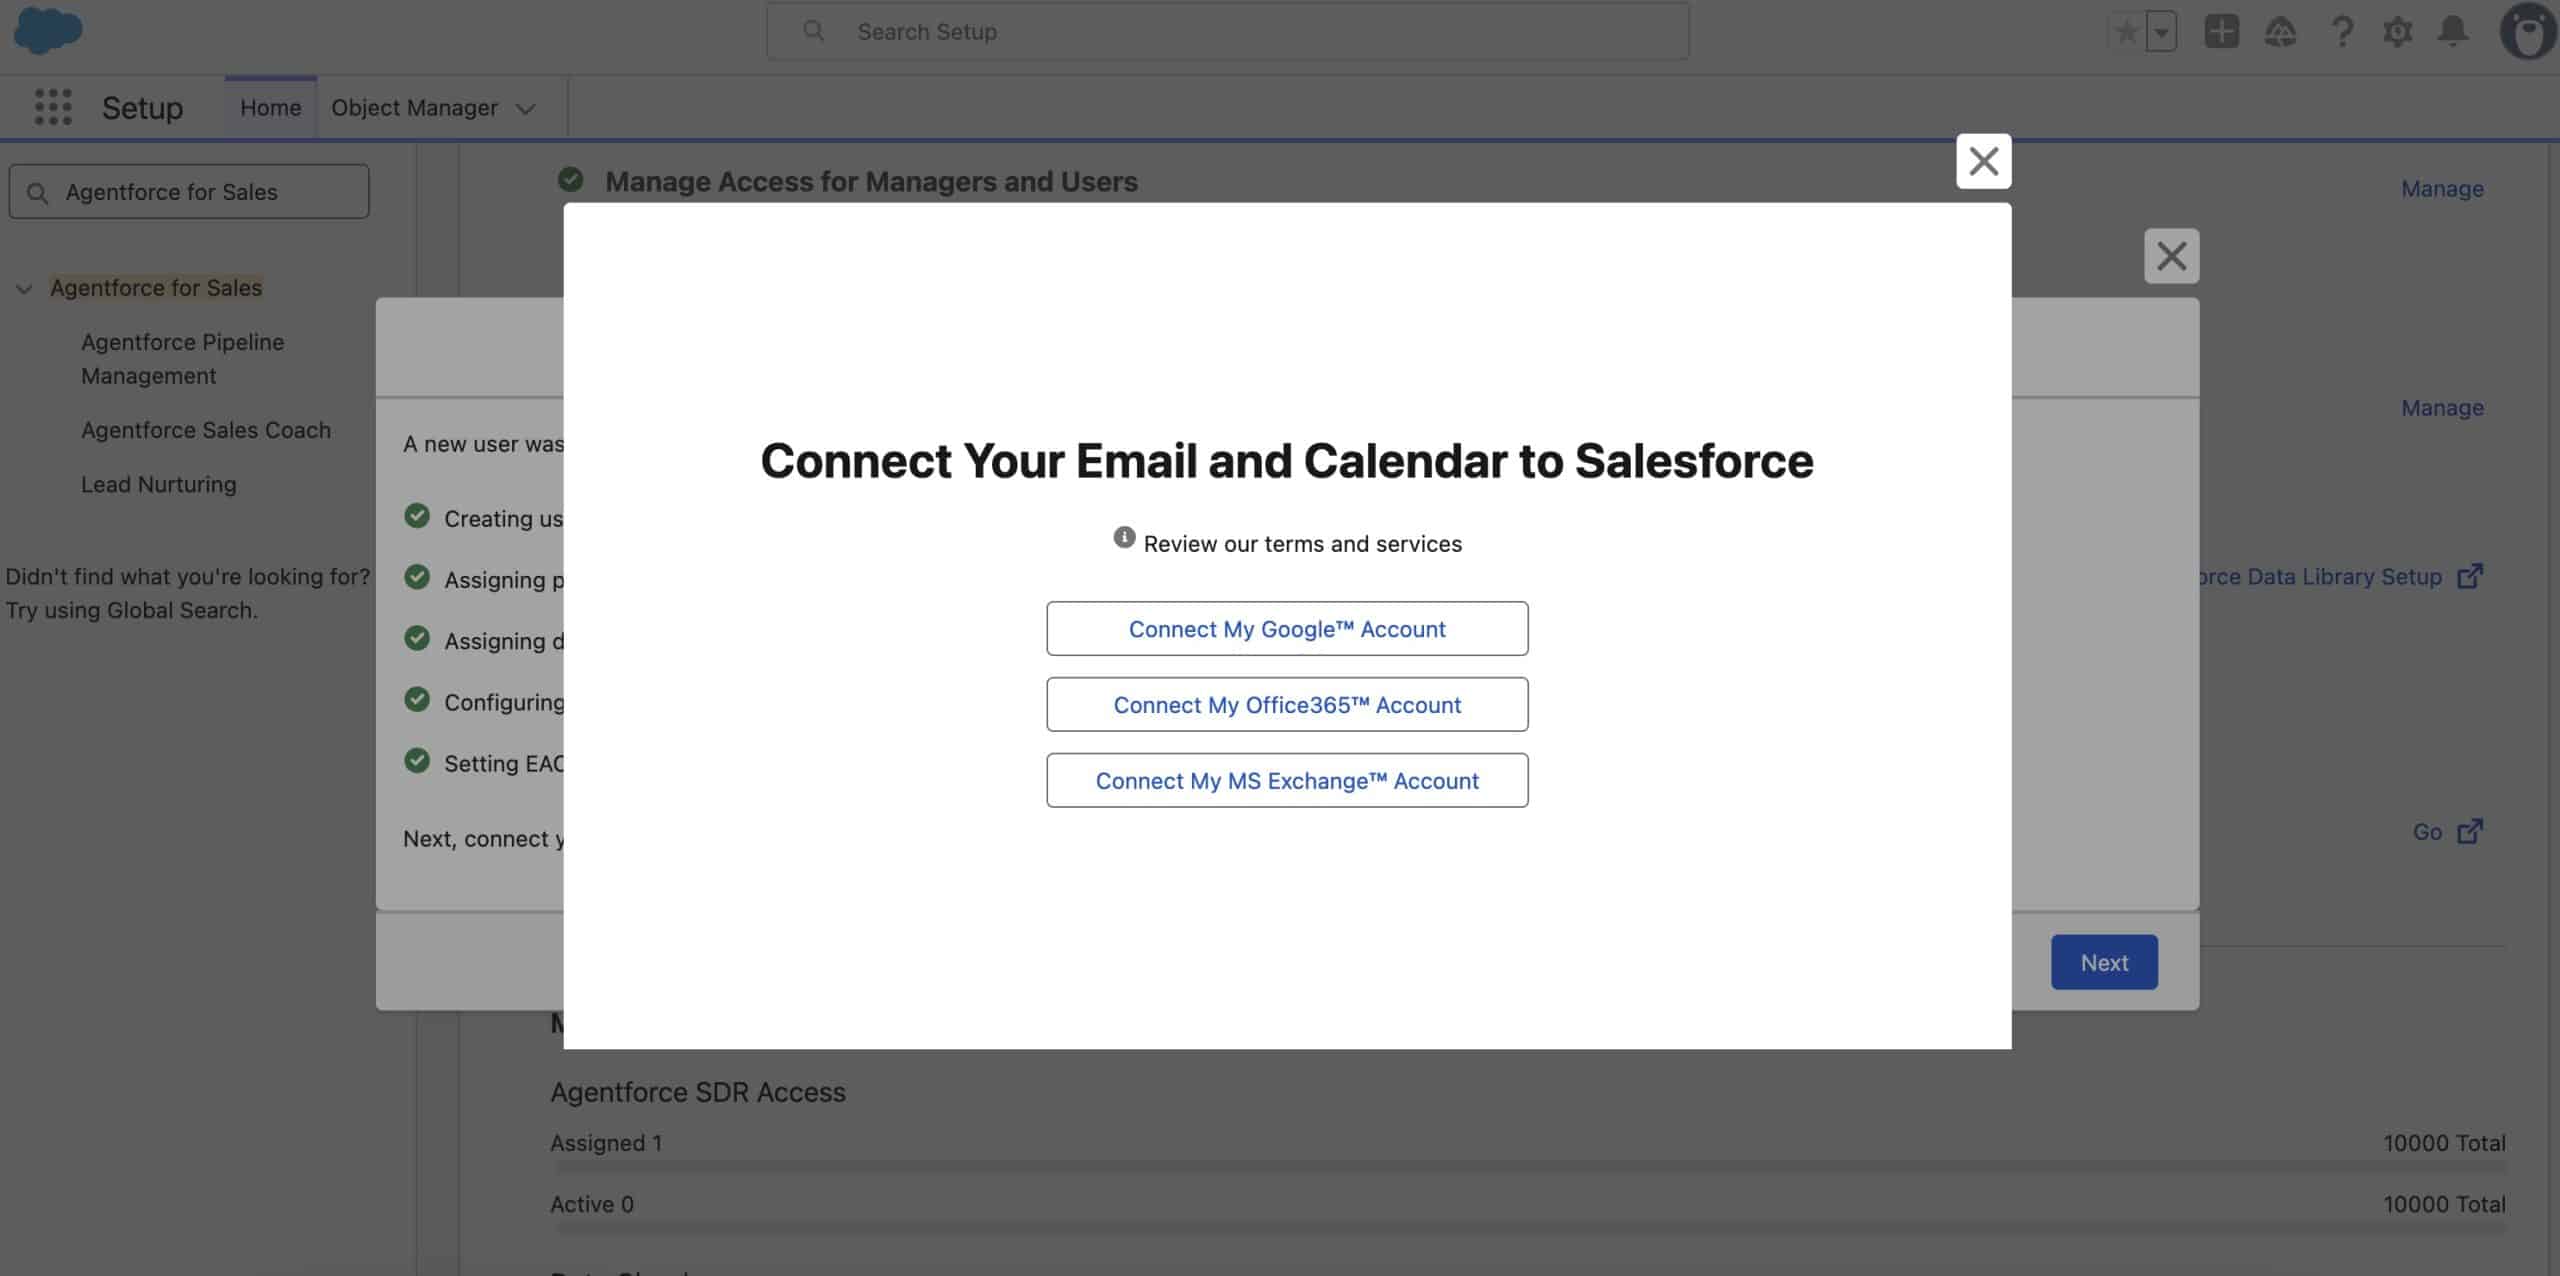
Click on ‘Connect Account‘ and read the ‘Terms for Sharing Emails and Events‘ in the next window, tick the box that you have read the Terms and understood them and click ‘Next‘. You will now see a Pop-Up asking you to connect your Email and Calendar to Salesforce. Pick one and follow the prompts to connect that Email Account and grant Salesforce access. This links the automatically enabled Salesforce Inbox user to the external Email and Calendar account the Agent will use to send and receive messages and create calendar appointments.
In the case that this step doesn’t connect Salesforce Inbox to your Account, you want to navigate to your Avatar, click on Settings – Email & Calendar Accounts and ensure that your Account is connected there.
5- Configure Data for Your Agent
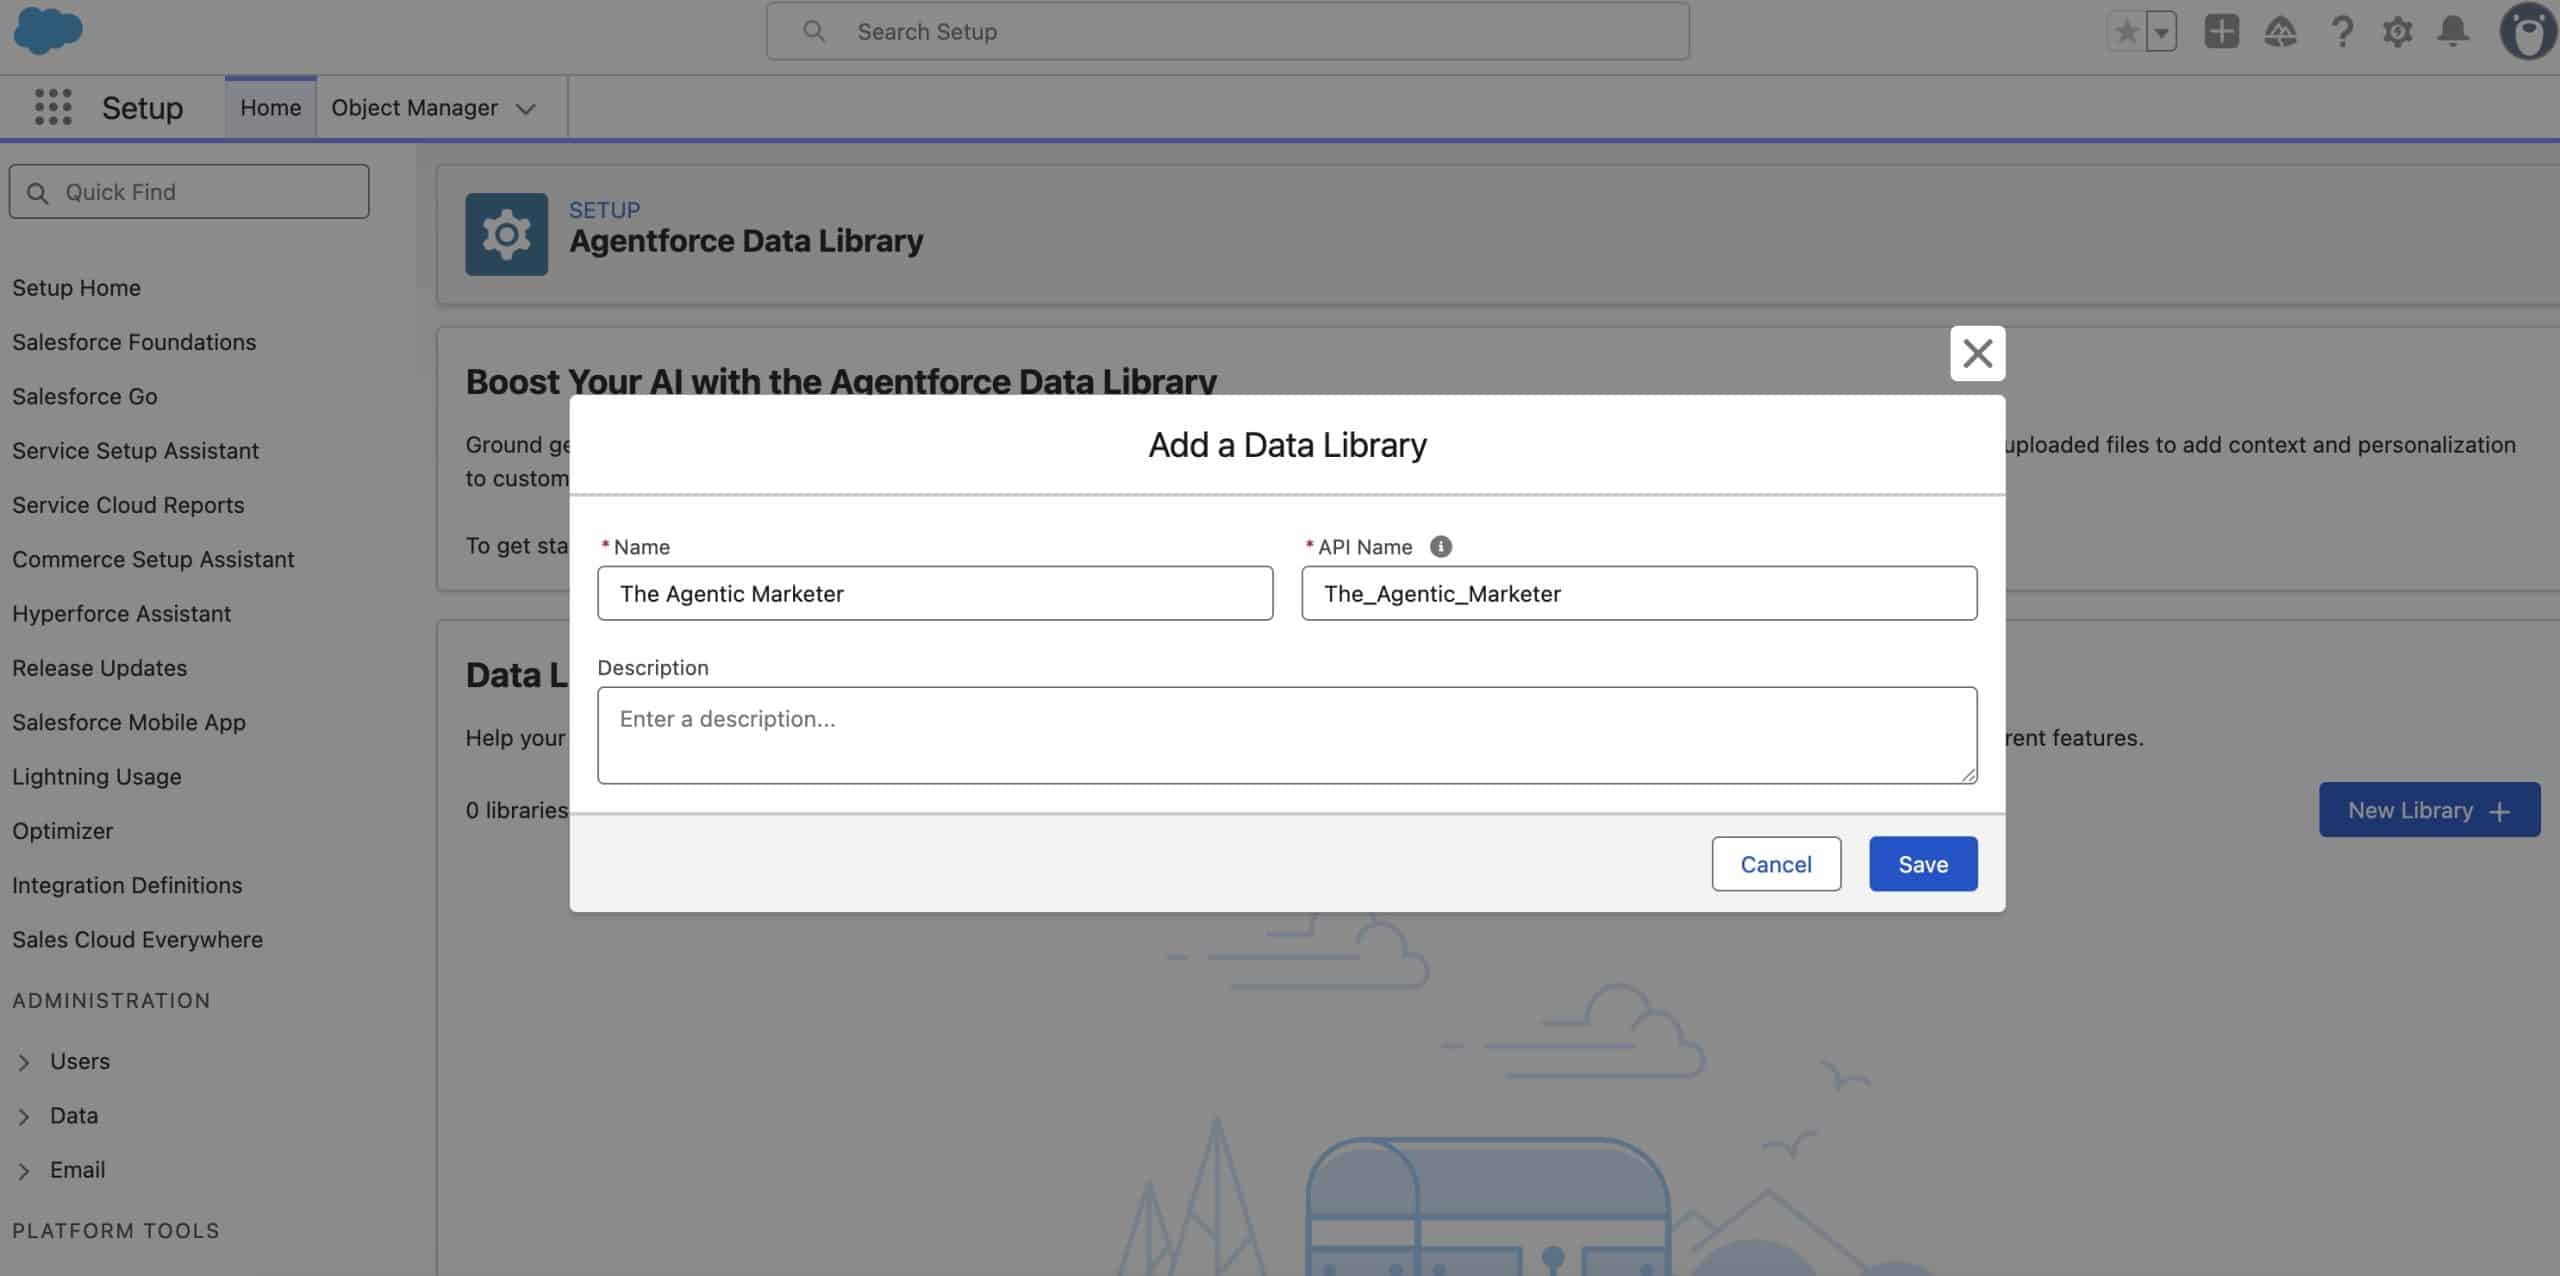
In this step, you can predefine the information and knowledge your Agent can later use in their outreach or nudge Emails. By clicking on ‘Go to Agentforce Data Library Setup‘, you can first create a new library by giving it a name and then choose between 4 different types:
- Knowledge
- Files
- Web
- Custom Retriever
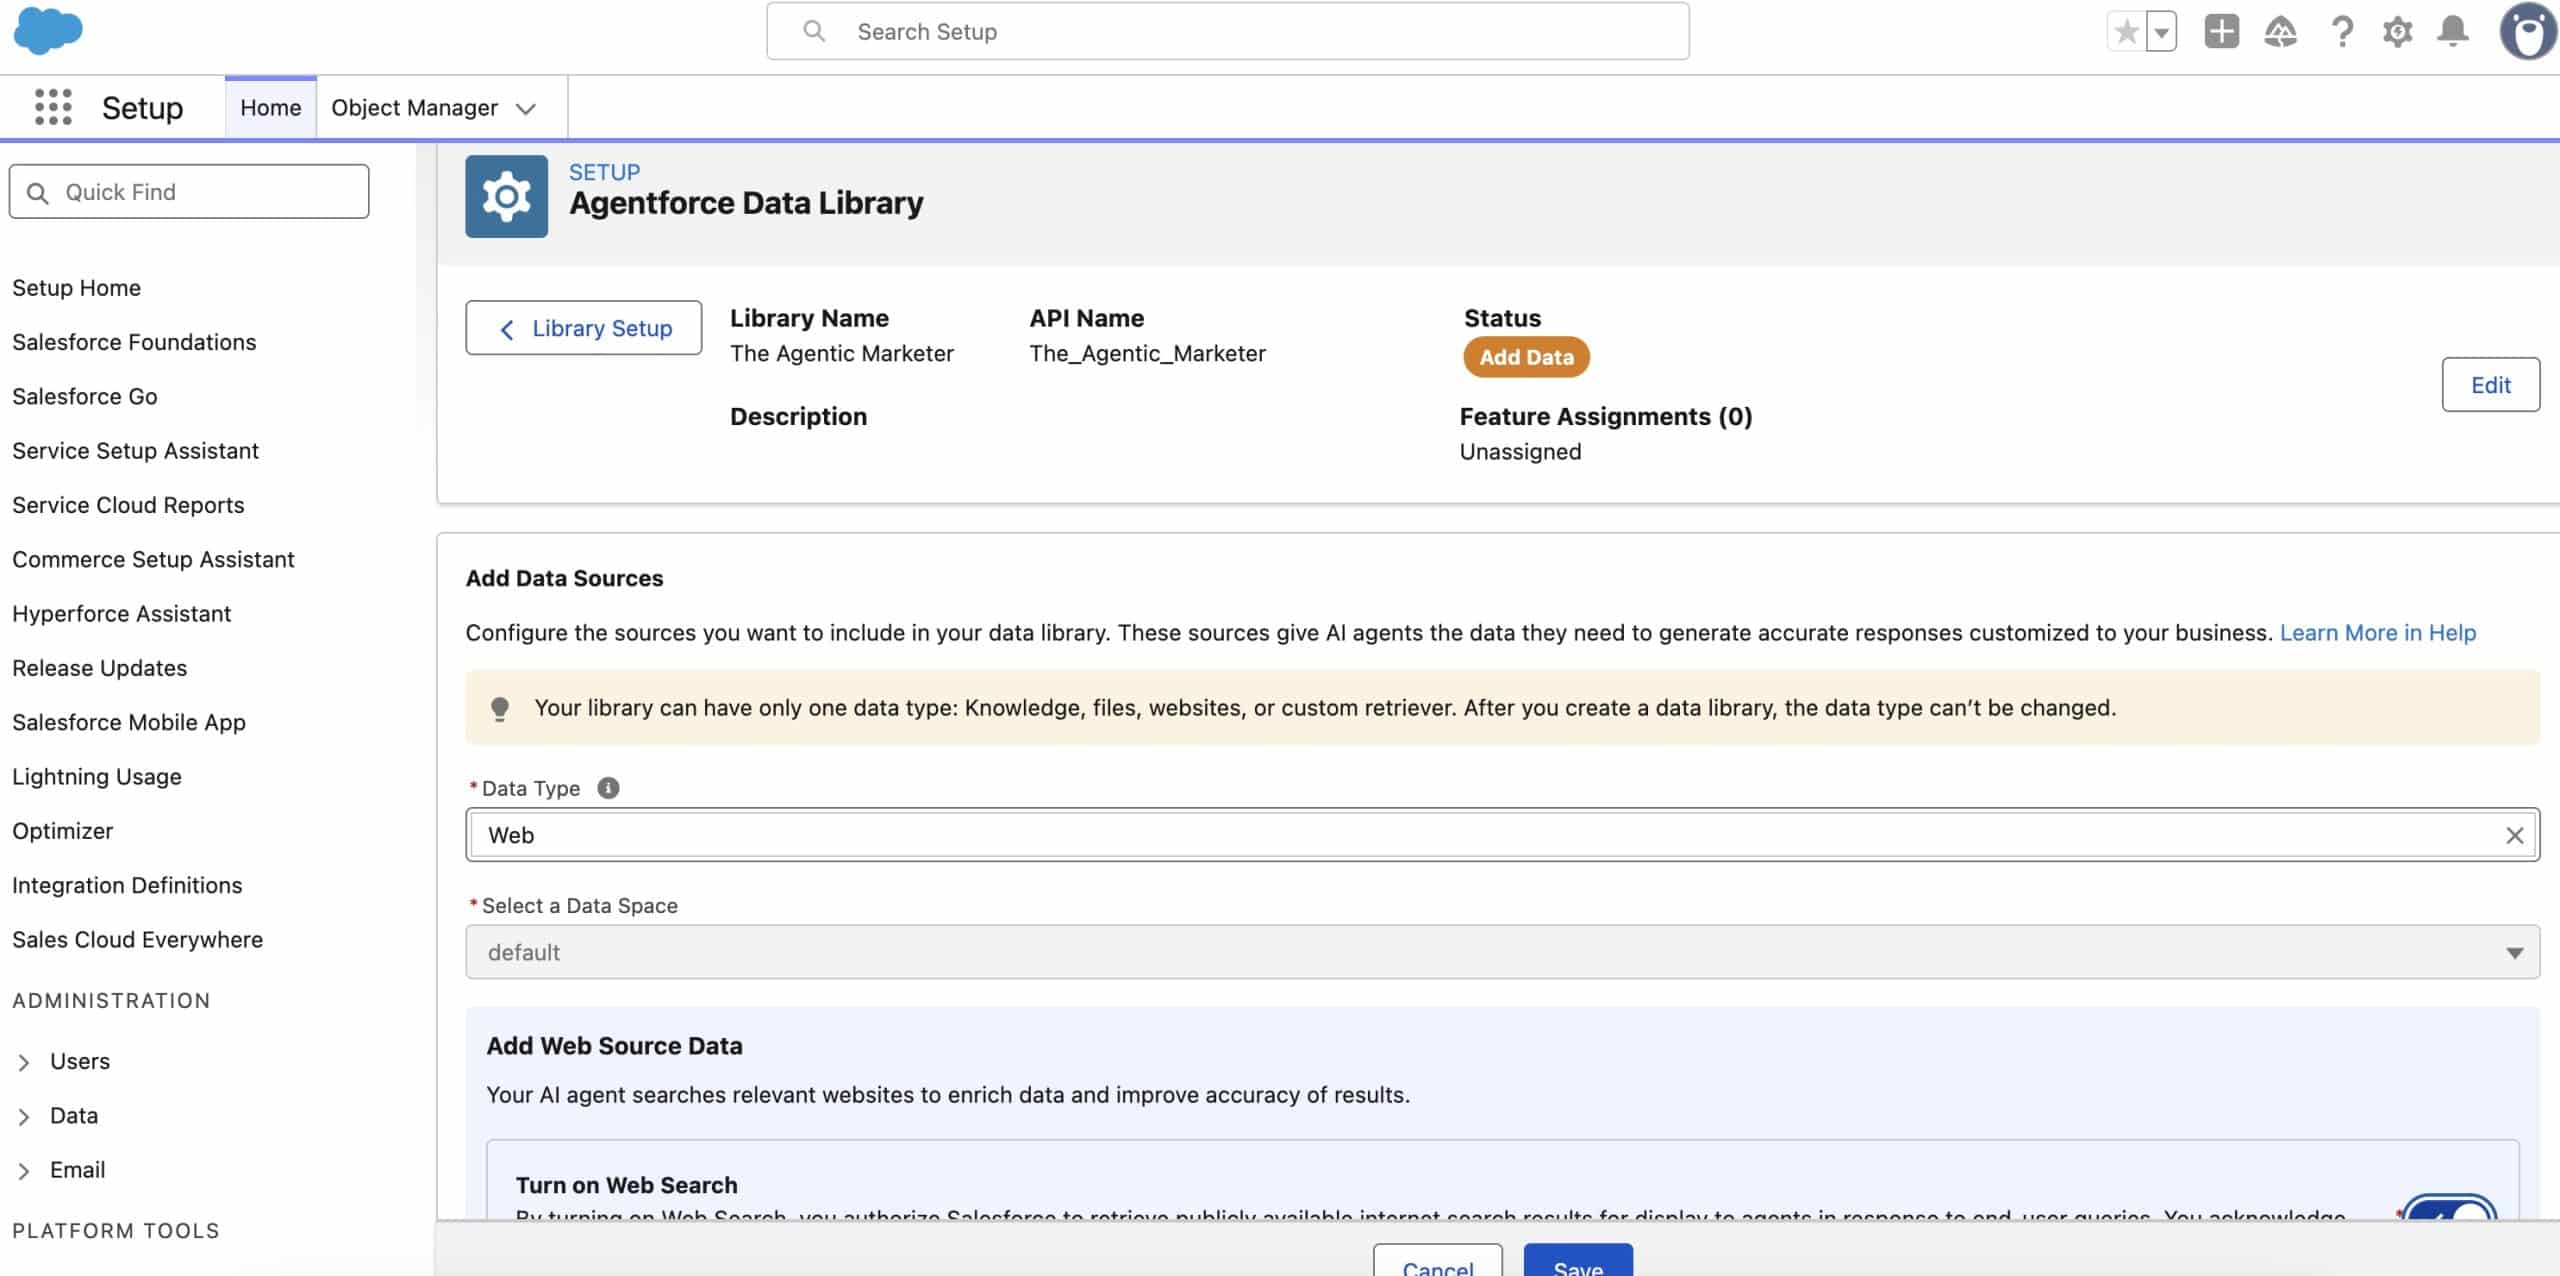
You would set up your library based on the information you have available, i.e. global web search or uploaded files and we will need this again later in the Agent Setup Wizard. We are adding Global Web Search to our Agent.

6- Build and Manage Agent Wizard
We are almost done. The last step now is to click on ‘Go‘ on the ‘Build and Manage Agent‘ step to launch the ‘Build and Manage Agent Wizard‘ to configure our Agent when they should start, how often they should reach out and so on. By clicking on ‘Go’ we land on the page below. Click on ‘Let’s Get Started’.

6.1- Getting Started
On the following page, choose the ‘Lead Nurturing‘ template and click ‘Continue‘. The User Record should already exist, so just define the Agent’s Internal Name, your Company Name, the default Language (you can add more later in Agentforce Builder), and a short Company Description. Then click ‘Save and Continue’.

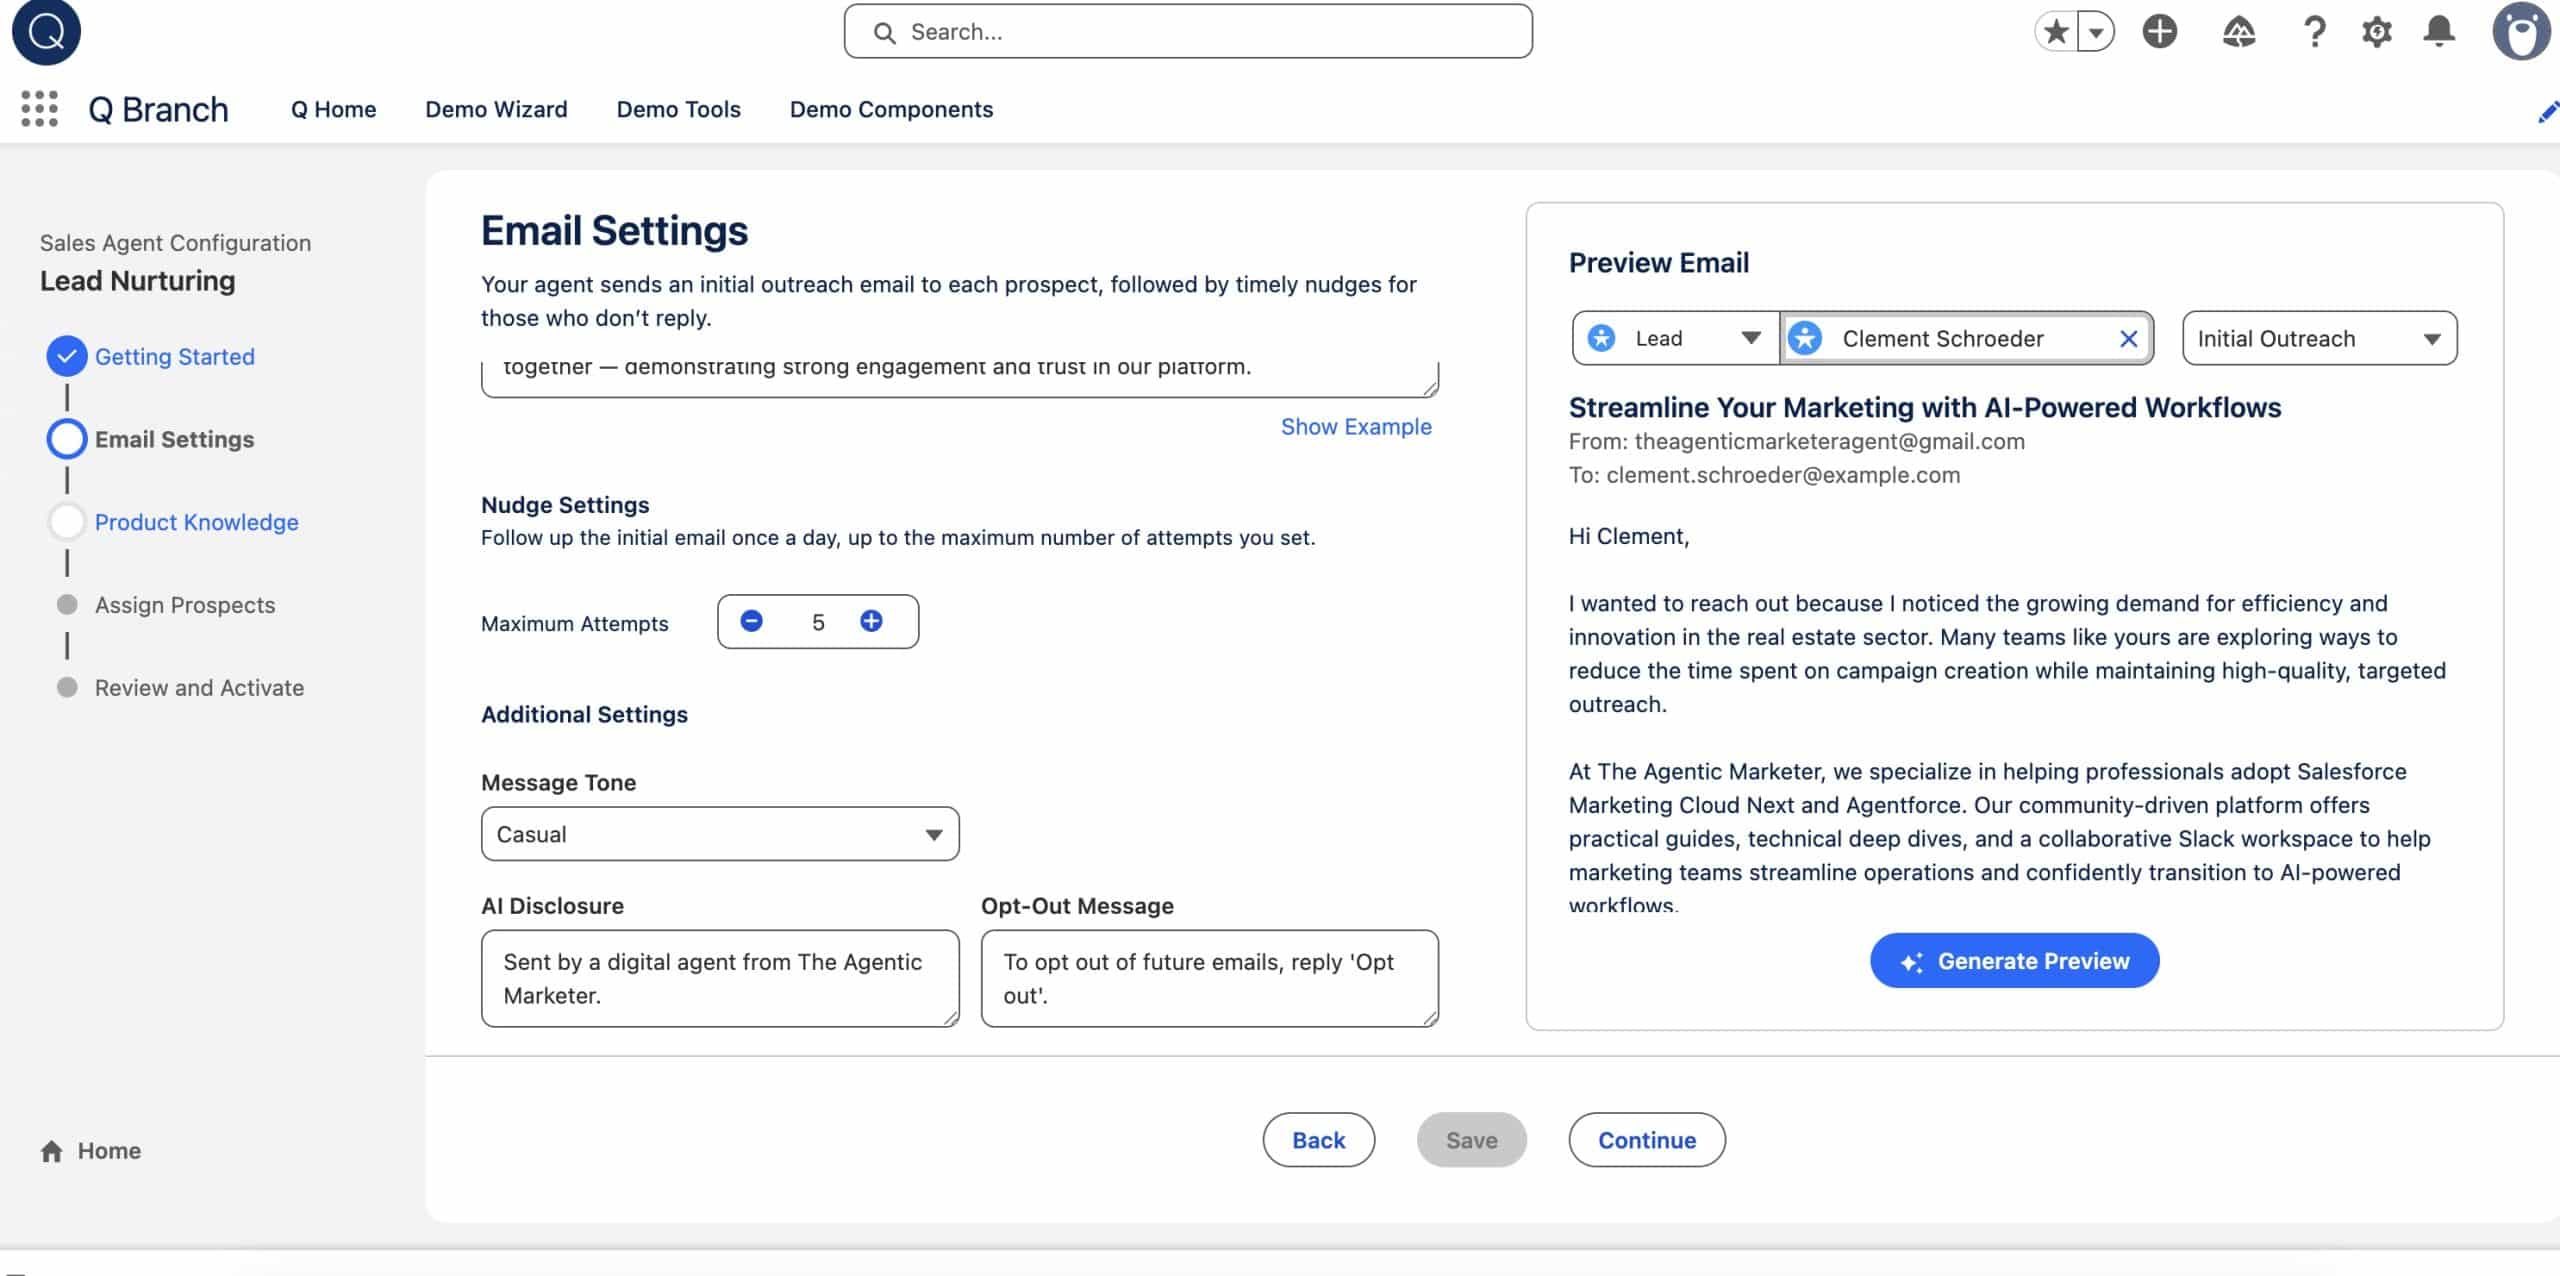
6.2- Email Settings
We’re now in the Email Settings step. This is where you give your Agent the Core Messaging they should use in their outreach, your main Value Proposition and a few Key Achievements. These inputs help the Agent stay on-brand without you having to write anything manually. You can also set how often the Agent should follow up with nudges, its Tone of Voice and the Opt Out Messaging. On the right, you’ll see a preview panel where you can check how your choices shape the actual emails before moving on. Once you are done with this, click on ‘Continue‘.

6.3- Product Knowledge
In this step, we can connect the Library we created in Step 5 to this Lead Nurturing Agent by choosing it in the dropdown. On the right hand side you can once again test this on your database. Once you are done, click on ‘Continue‘.

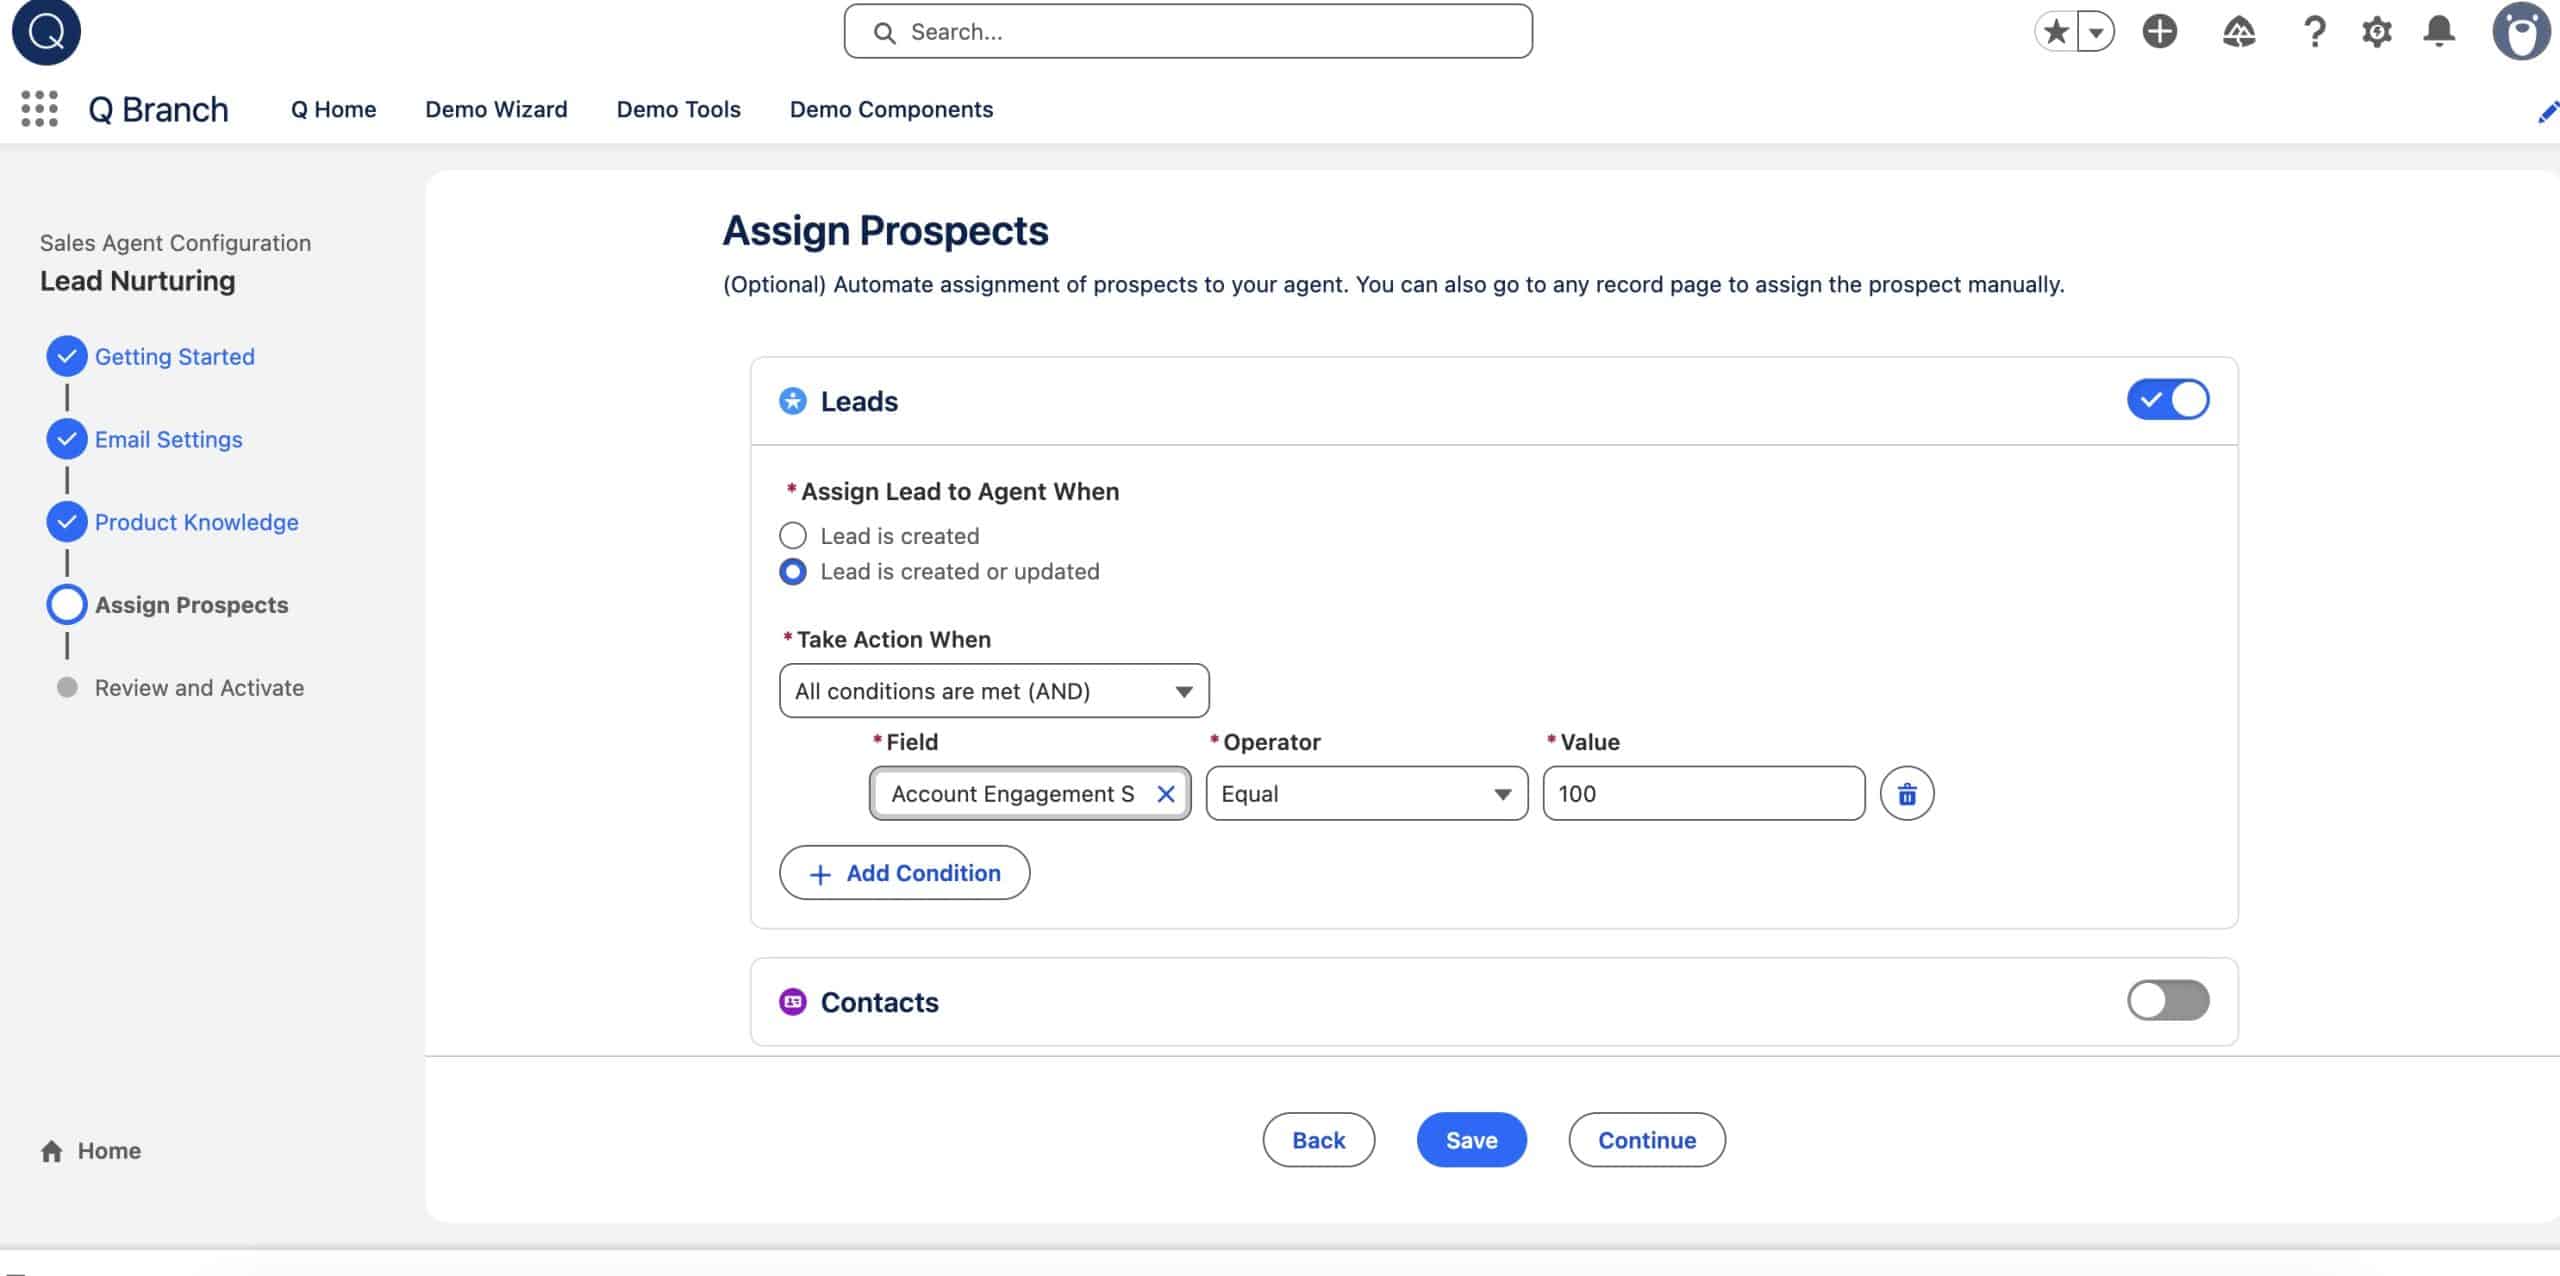
6.4- Assign Prospects
The next step is Assign Prospects, where we decide which Leads, Contacs or Person Accounts should automatically flow to our Agent. This part is optional, but it can save a lot of manual work. In my setup, I’m assigning a Lead to the Agent whenever the record is created or updated and meets a specific condition – in this case, an Account Engagement Score of 100. If you are using Marketing Cloud Growth/Advanced, you can also copy your Calculated Insight score into a field and use that as a condition. You can add more rules if you need to narrow it down further. Once this is in place, any matching Lead will be picked up by the Agent instantly, so you don’t have to route them yourself. Once you are done, don’t forget to ‘Save‘ and click ‘Continue‘.
6.5- Review and Activate
The last step is ‘Review and Activate’, where we take a quick look at everything we’ve configured before switching the Agent on. You’ll see a summary of your Email Tone, Core Messaging, Disclosures, and Prospect Assignment Rules on the left. On the right, you can preview exactly how the Agent will write to your Leads based on the inputs you’ve provided. If everything looks good, all that’s left to do is click ‘Activate Agent’. From here, your Lead Nurturing Agent goes live and you can track its performance in the Control Center. Let’s test!

7- Using the Lead Nurturing Agent
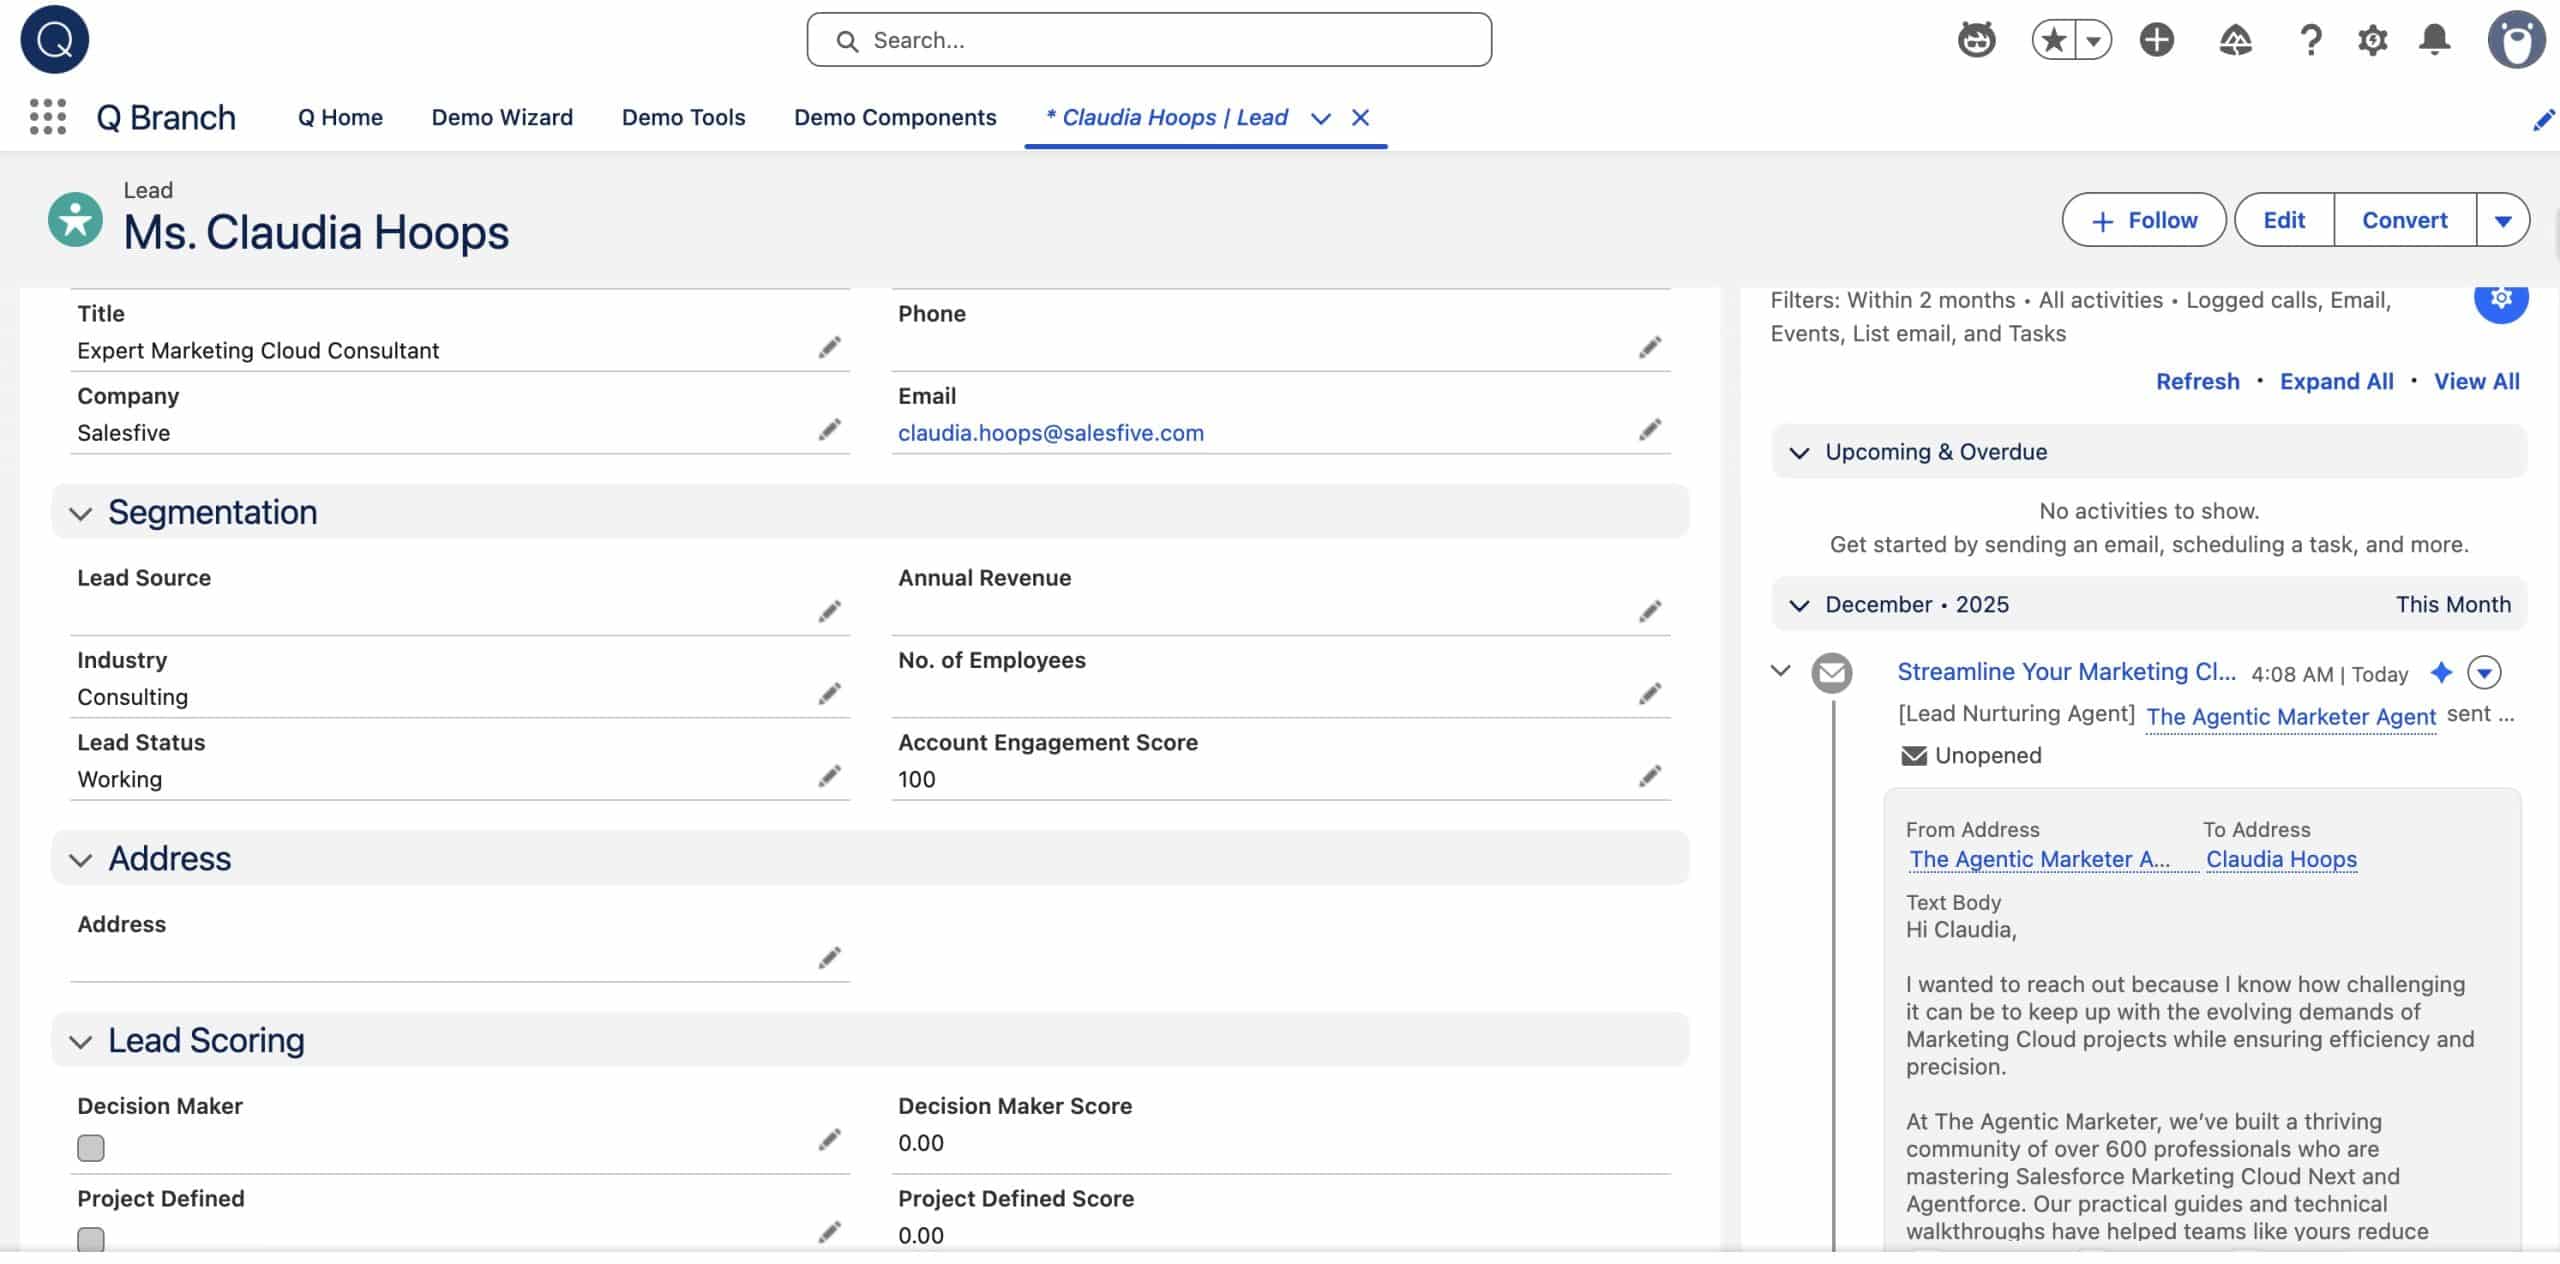
7.1- Testing our new Lead Nurturing Agent
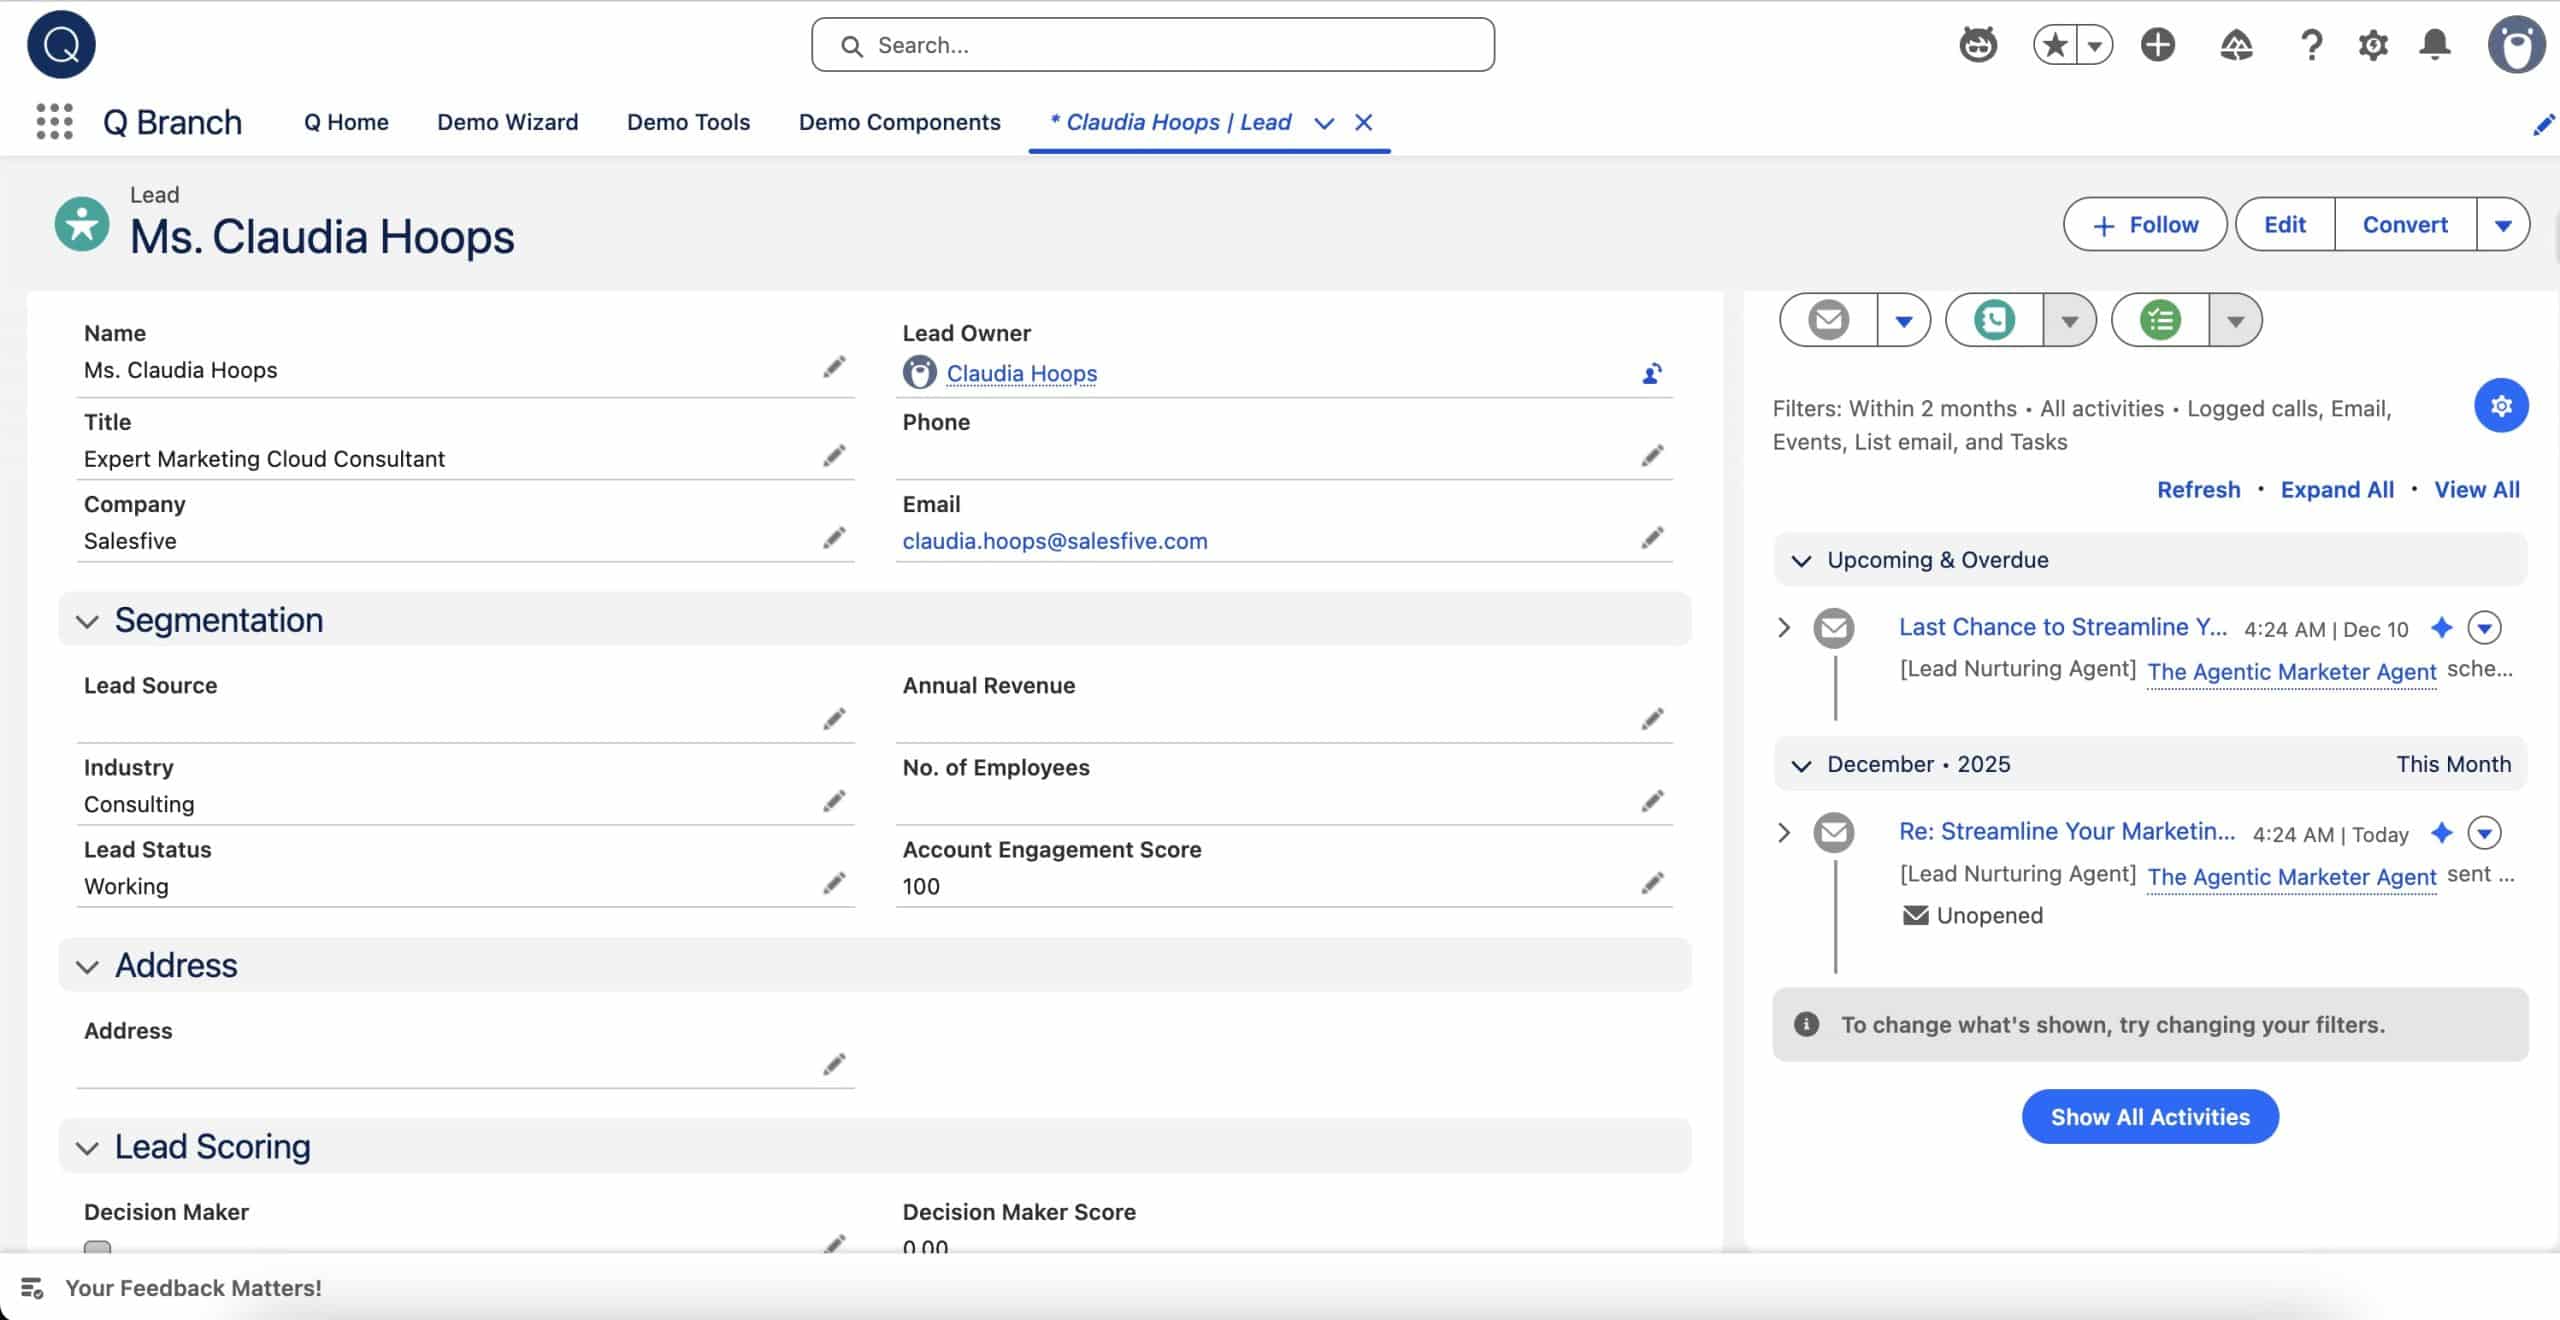
I have created a new Lead for myself and gave it a score of 100 points to trigger the Lead Nurturing Agent. You can see on the left hand side of my record that an outreach Email has been sent to me.
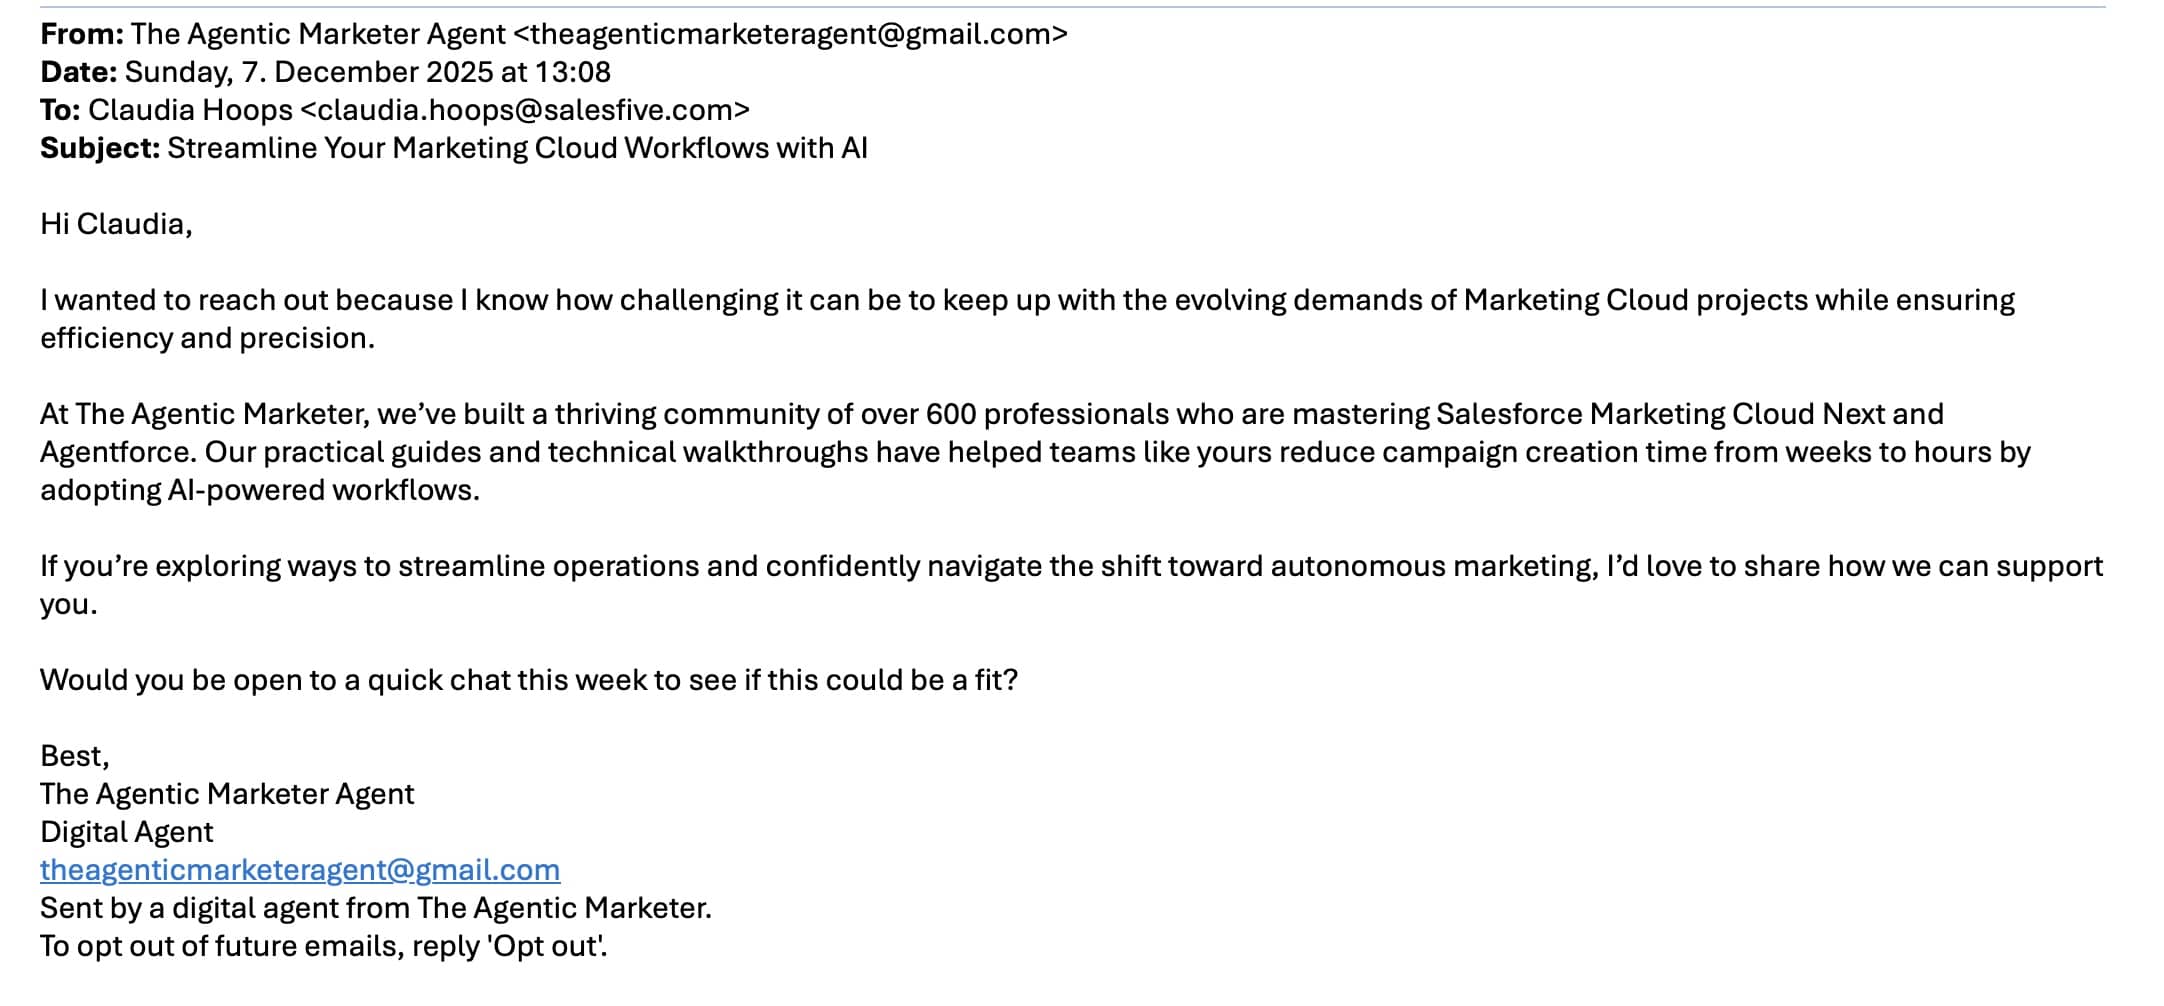
7.2- Interacting with the Lead Nurturing Agent
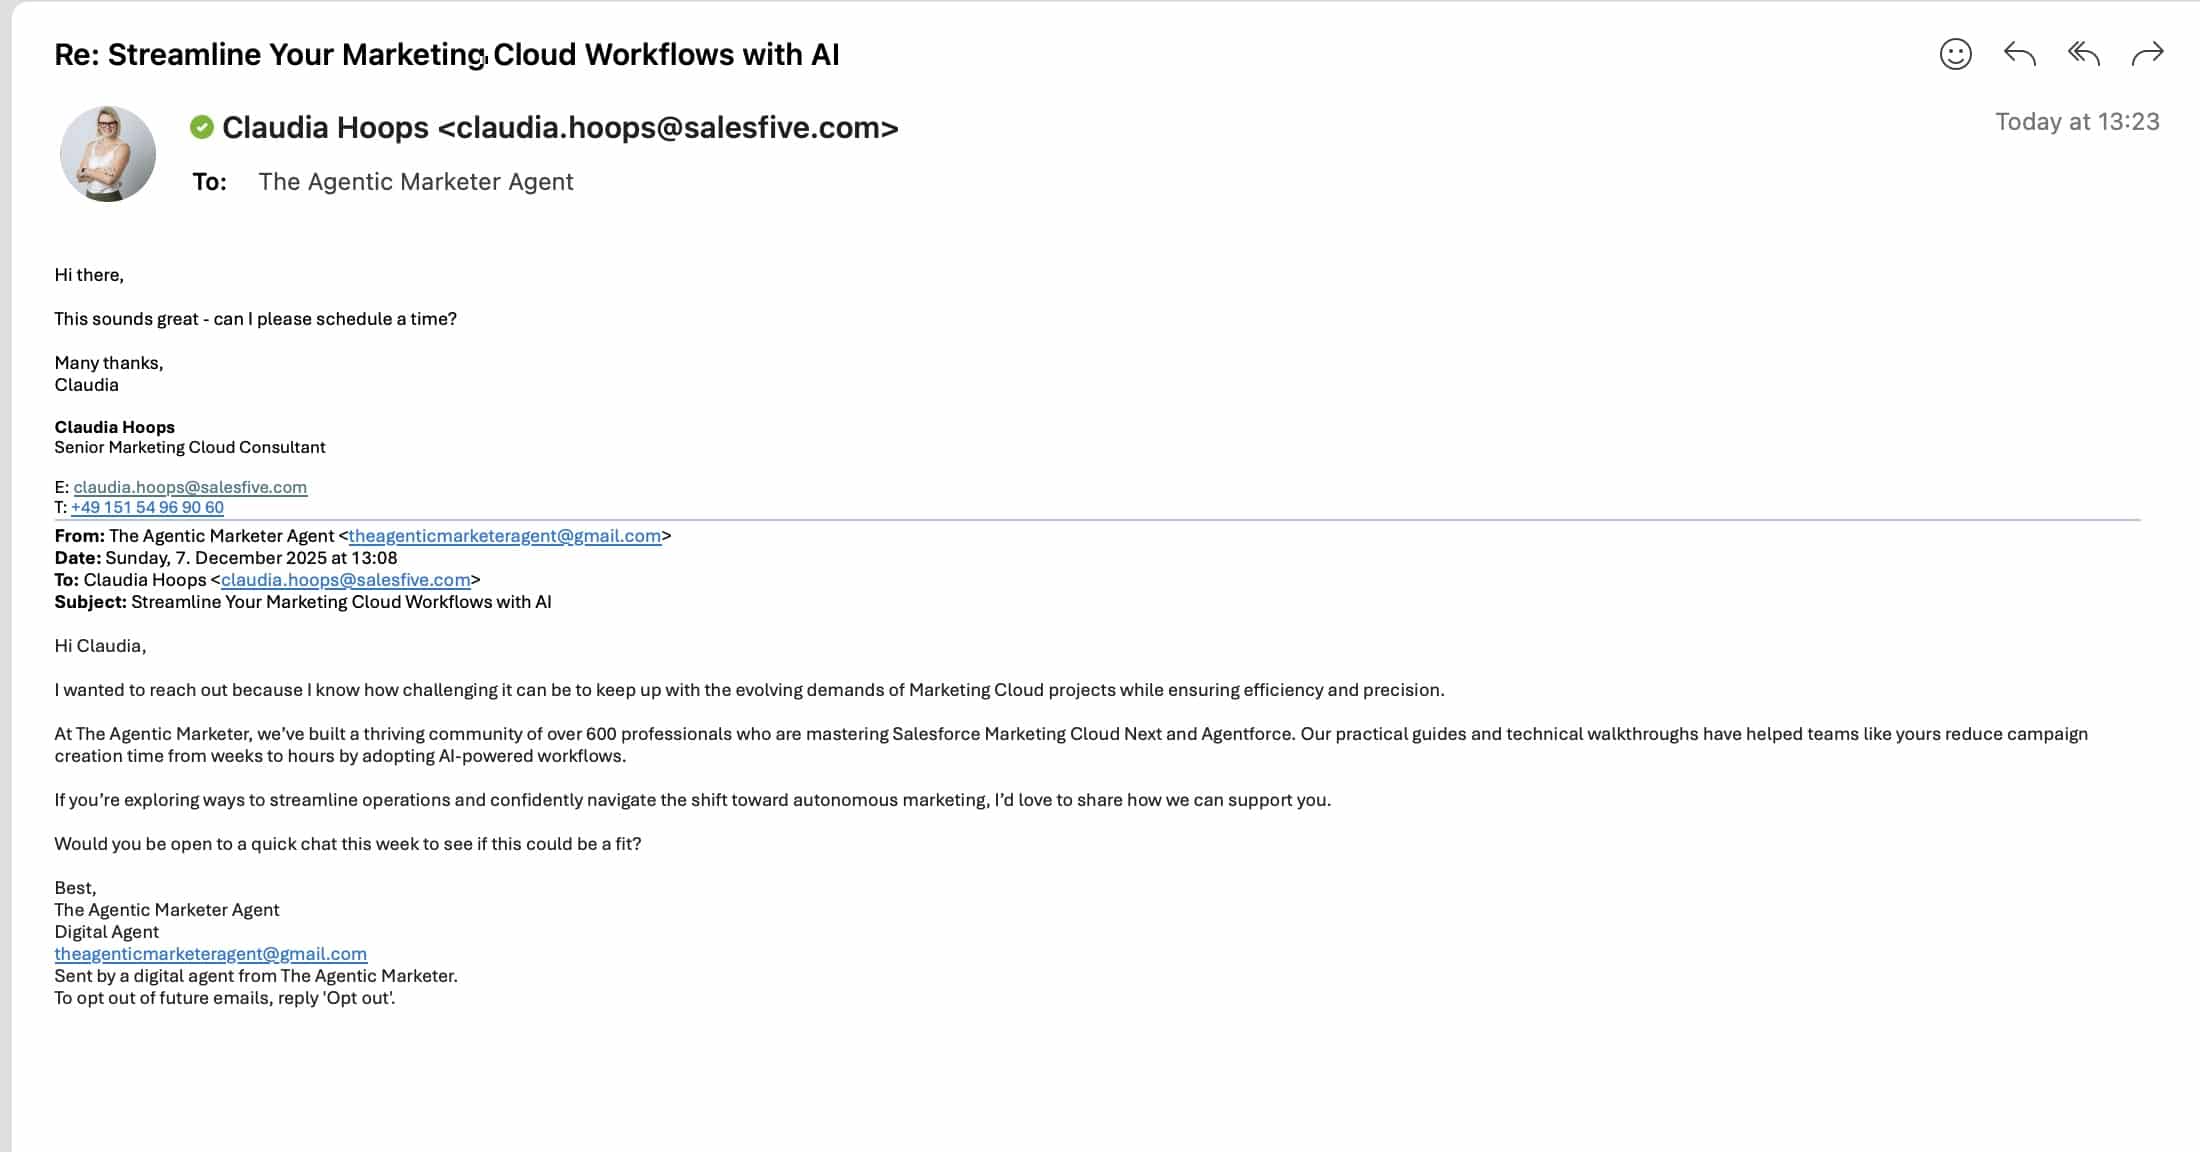
While the Agent already scheduled a nudge Email for tomorrow, I opened the Email in my inbox and replied to it, asking for an appointment.
7.3- Scheduling an appointment via the Lead Nurturing Agent
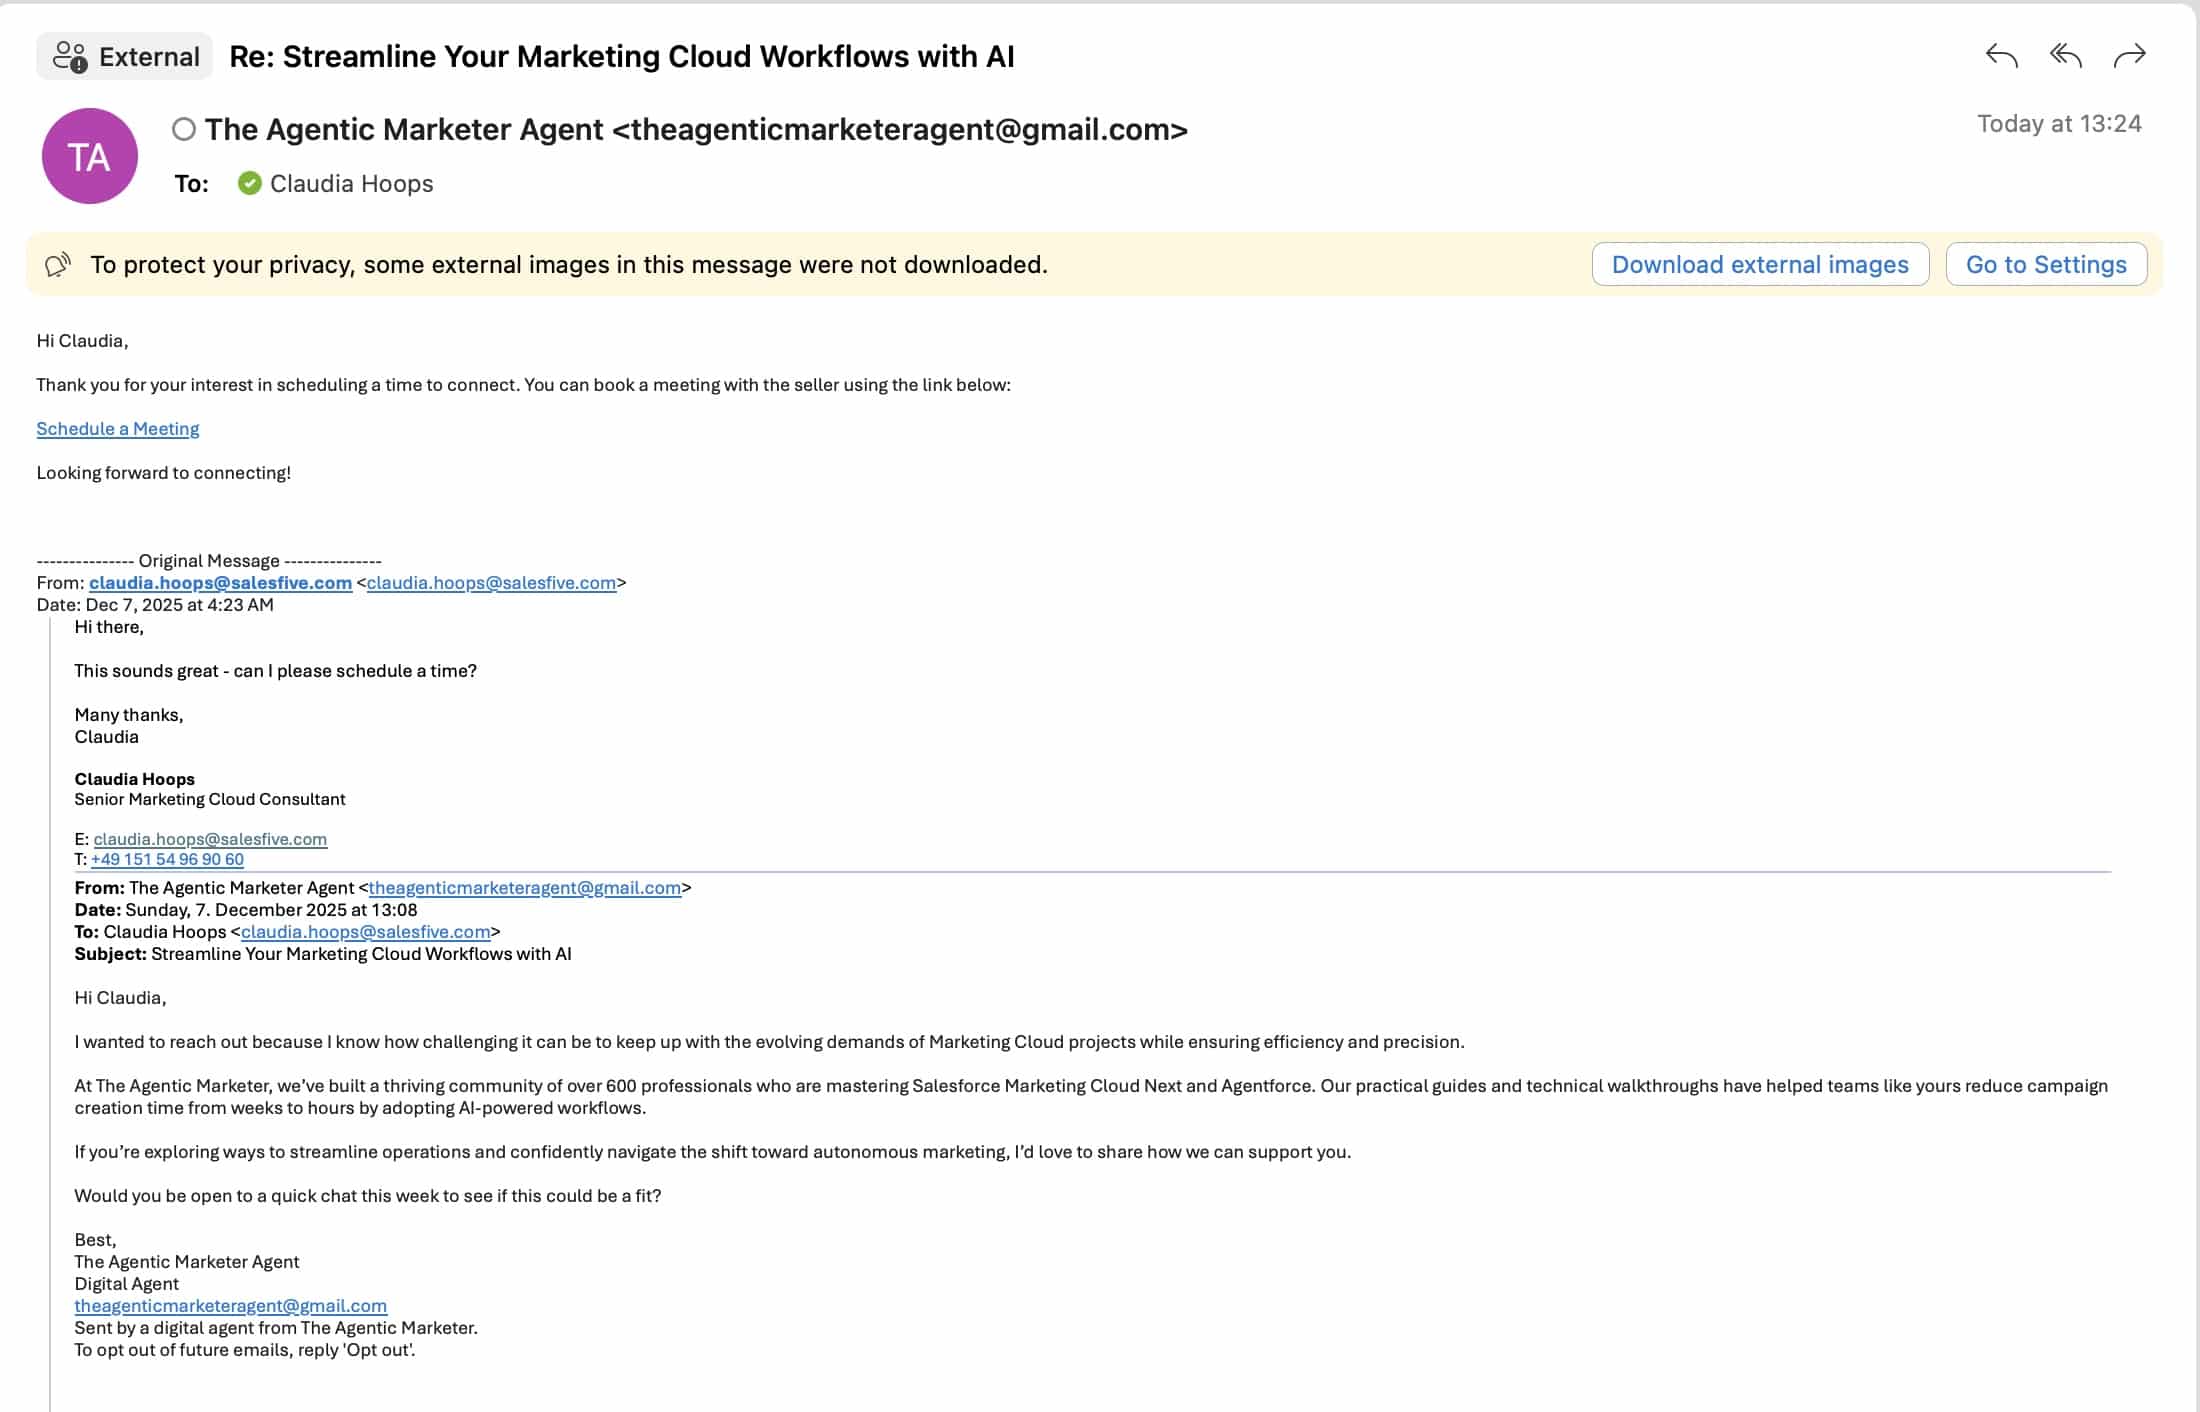
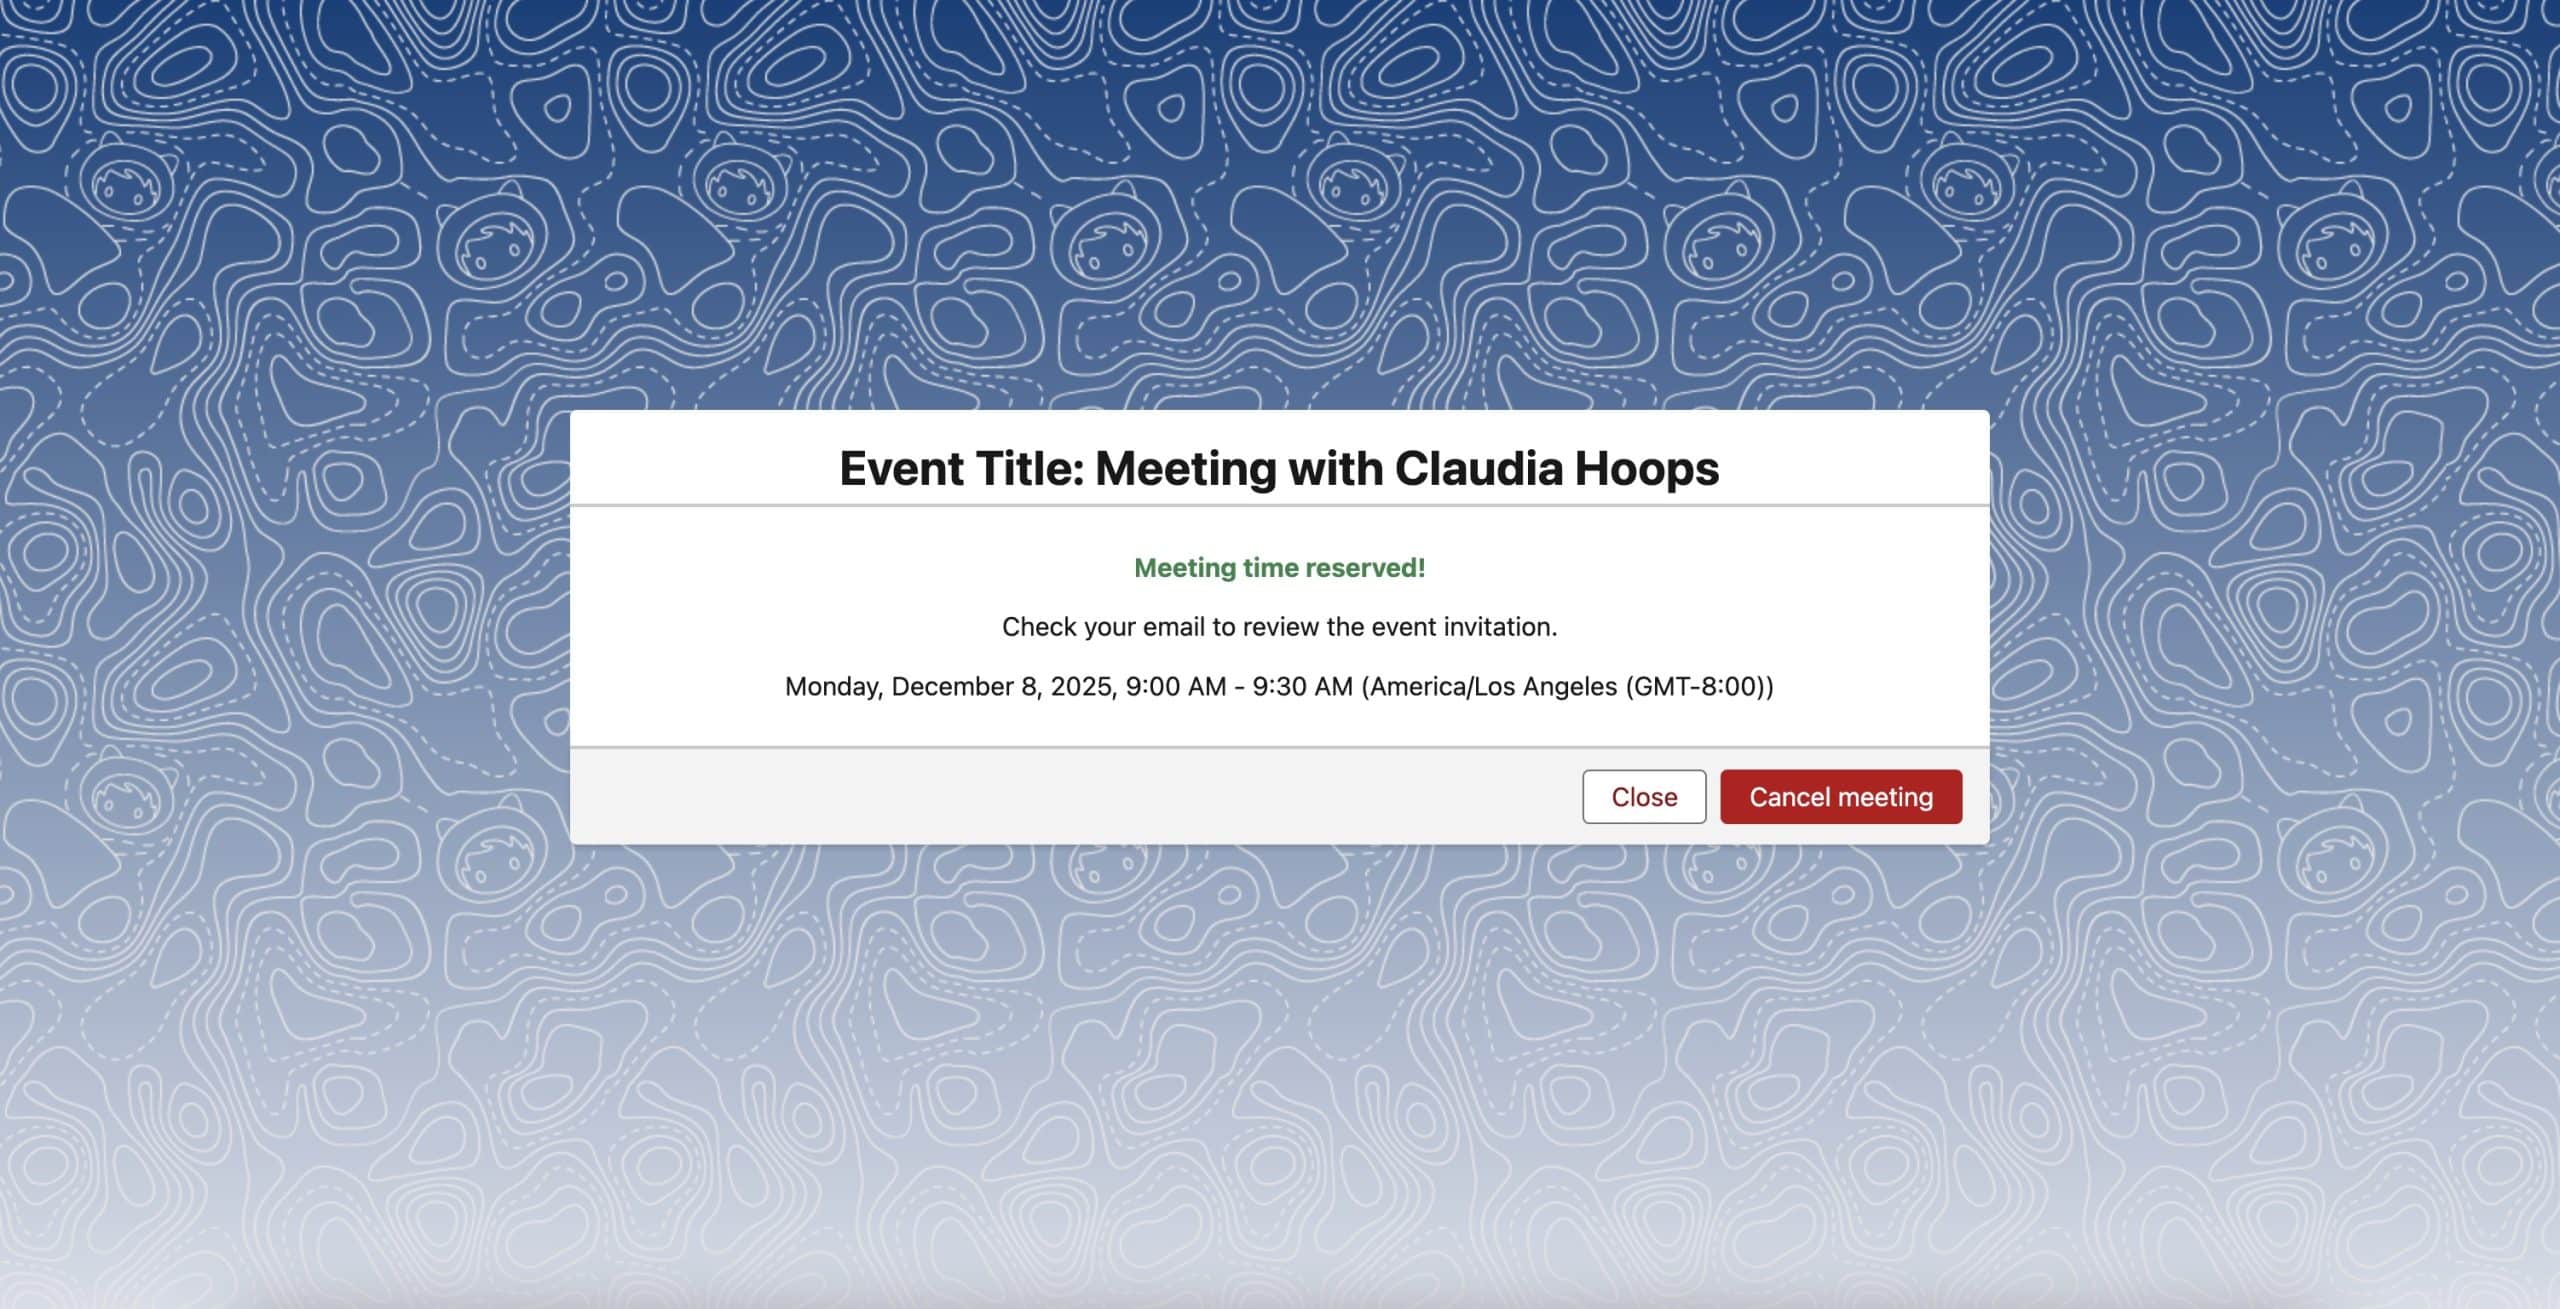
Once the agent received my Email asking for an appointment, I received an Email answer back with a link to Schedule a Meeting. I clicked on it, chose a date & time and the Agent confirmed the meeting back to me that is now attached to the Inbox calendar.
If the Agent’s response doesn’t include the Schedule a Meeting link, it’s usually because Salesforce Inbox isn’t connected to your Account. See step 4 for this.


Here I, (the Lead) already replied after the first outreach Email and asked for an appointment. If I had not done that, the Agent would have followed up with as many nudges as we had told him to do during the configuration process.
The Agent Control Center
You can follow all your Lead Nurturing Agent’s and other Agent’s activity in the Control Center.

How does the Lead Nurturing Agent work?
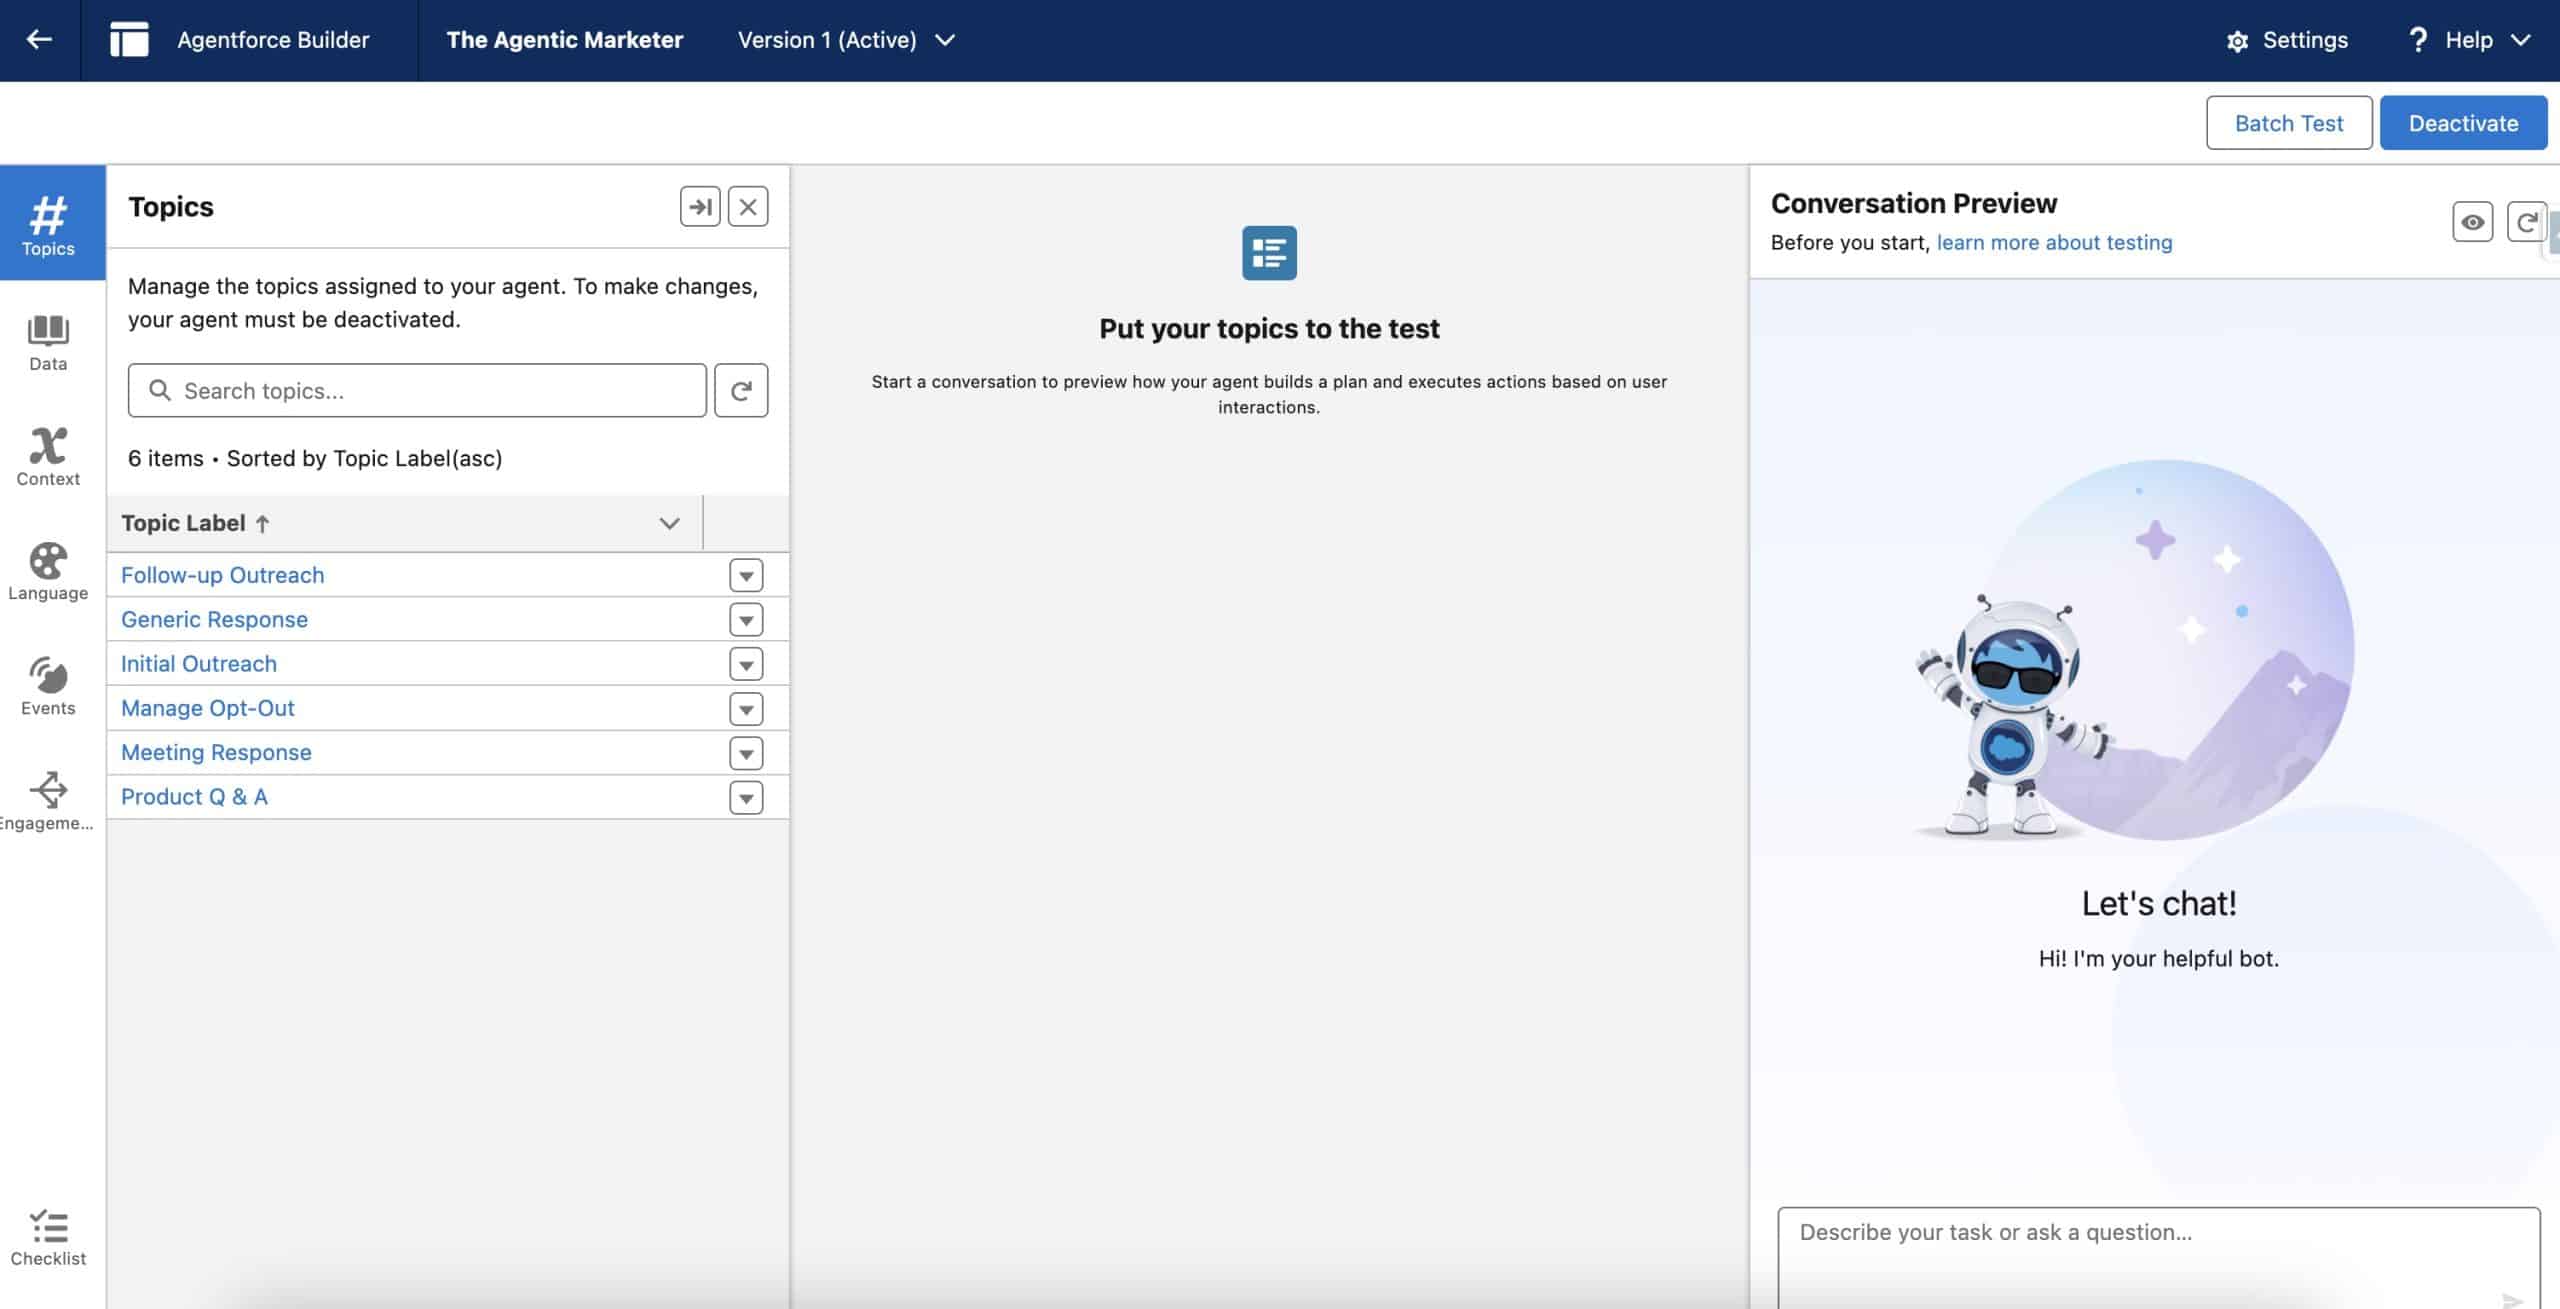
And that’s it. We have just setup and tested the Lead Nurturing Agent. You might wonder, how does it even work like that? Similar to François’ article on the Inbound Lead Generation Agent, the Lead Nurturing Agent is acting according to topics and actions. You can take a closer look when navigating into Setup – Agentforce Studio – Agentforce Agents – scroll to the bottom where you will find your agent and click on the Lead Nurturing Agent to open it. Each of these topics has its own configured actions.
Final thoughts
If you ask me, I’m quite impressed how far we have come and enjoyed setting up this Agent and testing it. But to wrap things up, it’s worth remembering that a Lead Nurturing Agent only performs well when it’s set up responsibly.
Salesforce’s guidelines make it clear that the Agent shouldn’t impersonate a human, over-promise, or handle anything outside your approved guardrails.
At the same time, don’t forget that every email, follow-up, or reply uses conversation units, so you’ll want to keep an eye on usage to avoid surprises.
In short, treat the Agent as a helpful assistant rather than a salesperson by giving it clear rules, good data, and light oversight, and it will scale your outreach without compromising trust or compliance.